

文章目录
- 1.pytorch的安装
* - 1.1环境配置
- 1.2创建pytorch文件夹(环境)
- 1.3查看pytorch历史版本
- 1.4接下来有一个小技巧
– - 1.5开始下载pytorch环境
- 1.6验证pytorch安装成功
- 1.7卸载pytorch环境
- 1.8将pycharm的环境换成Anaconda下的pytorch环境
1.pytorch的安装
1.1环境配置
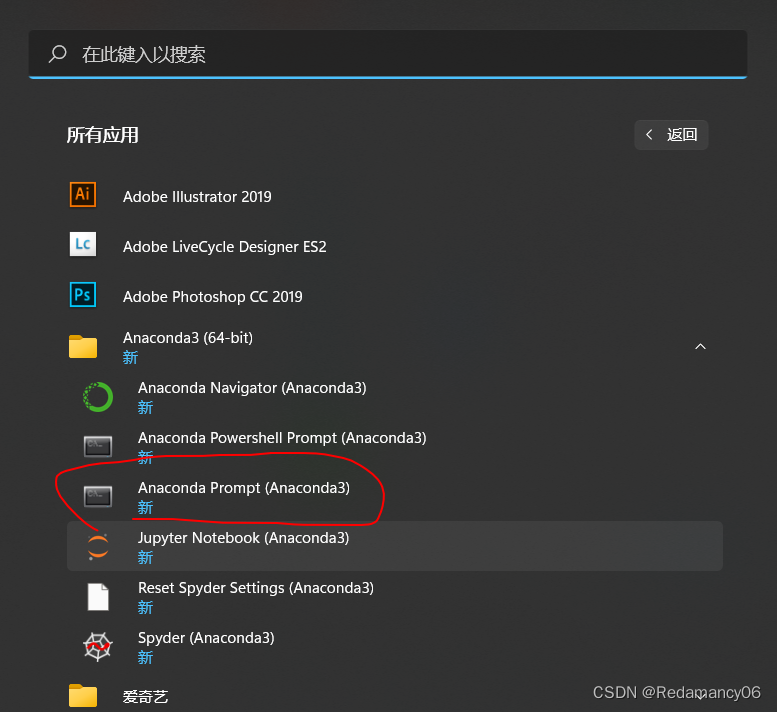

运行这个
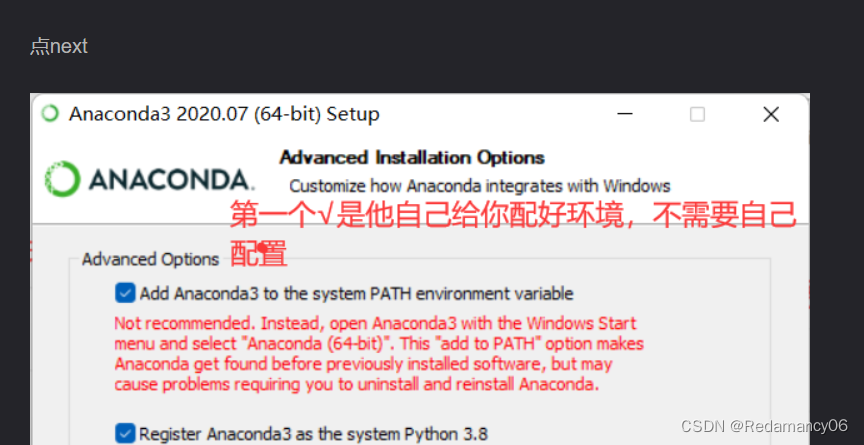
Anaconda安装详细步骤请看我之前写的http://t.csdn.cn/CZtm3
; 1.2创建pytorch文件夹(环境)
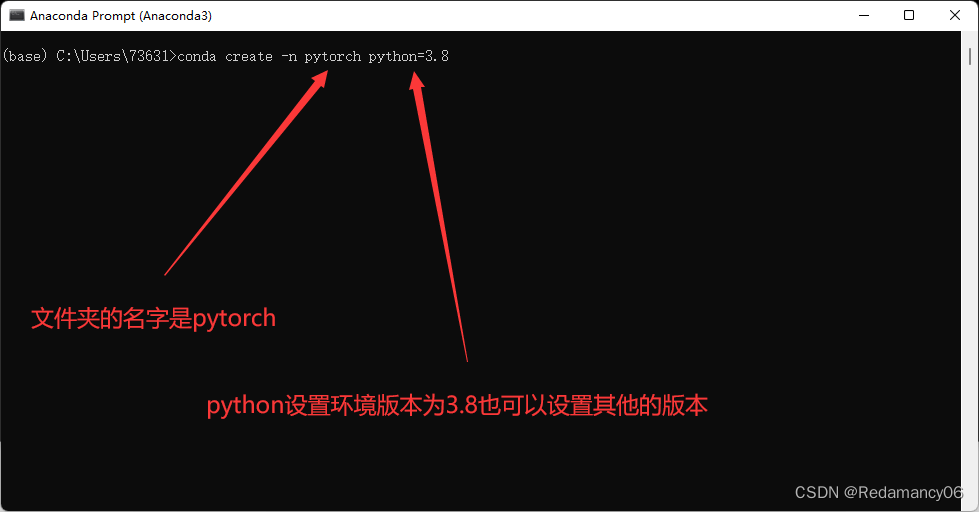
然后回车等待着安装
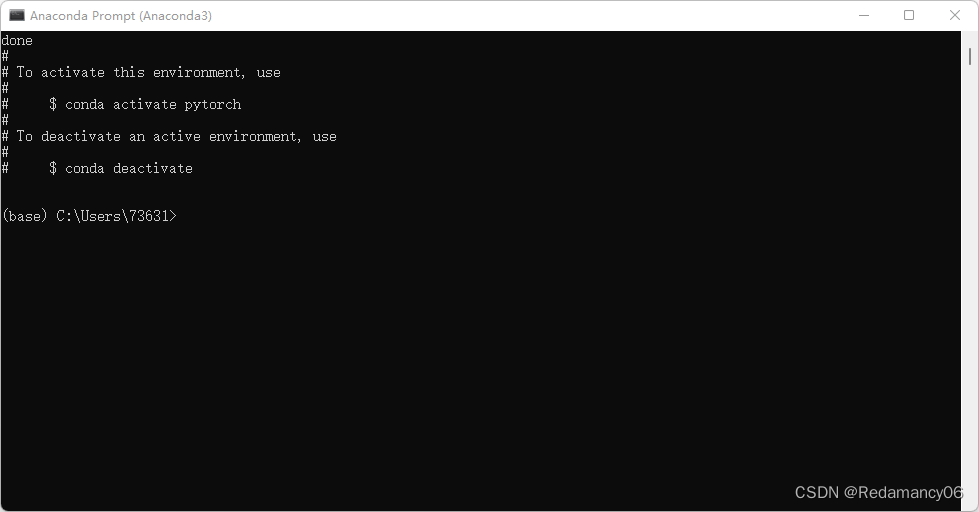
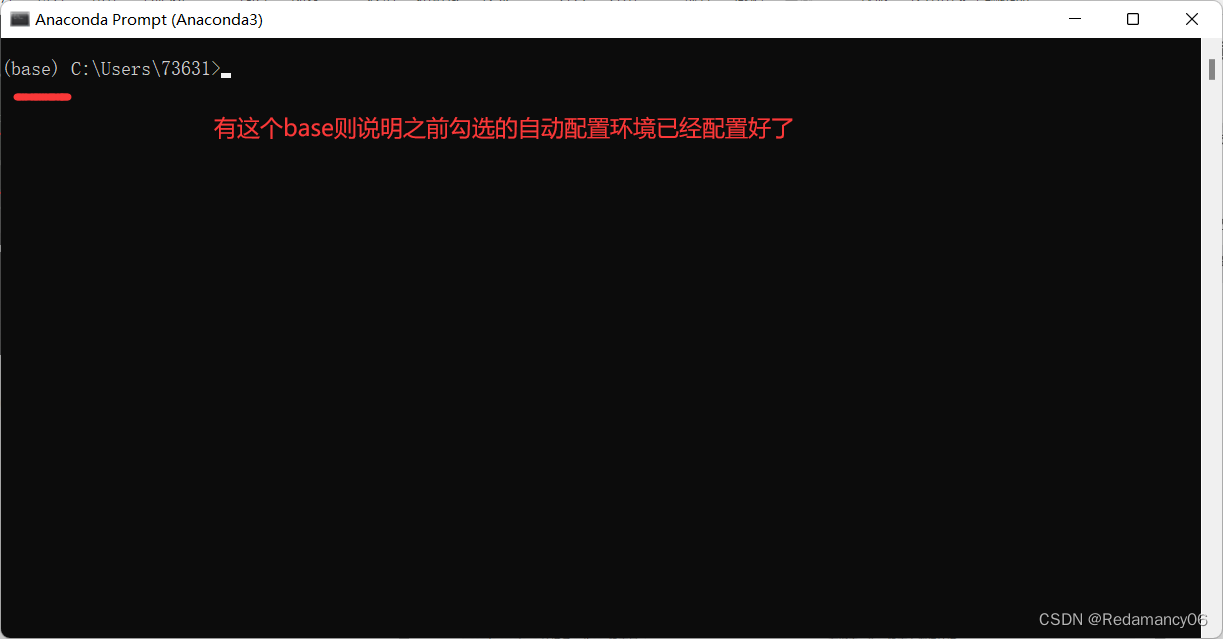
出现这个就按照成功了
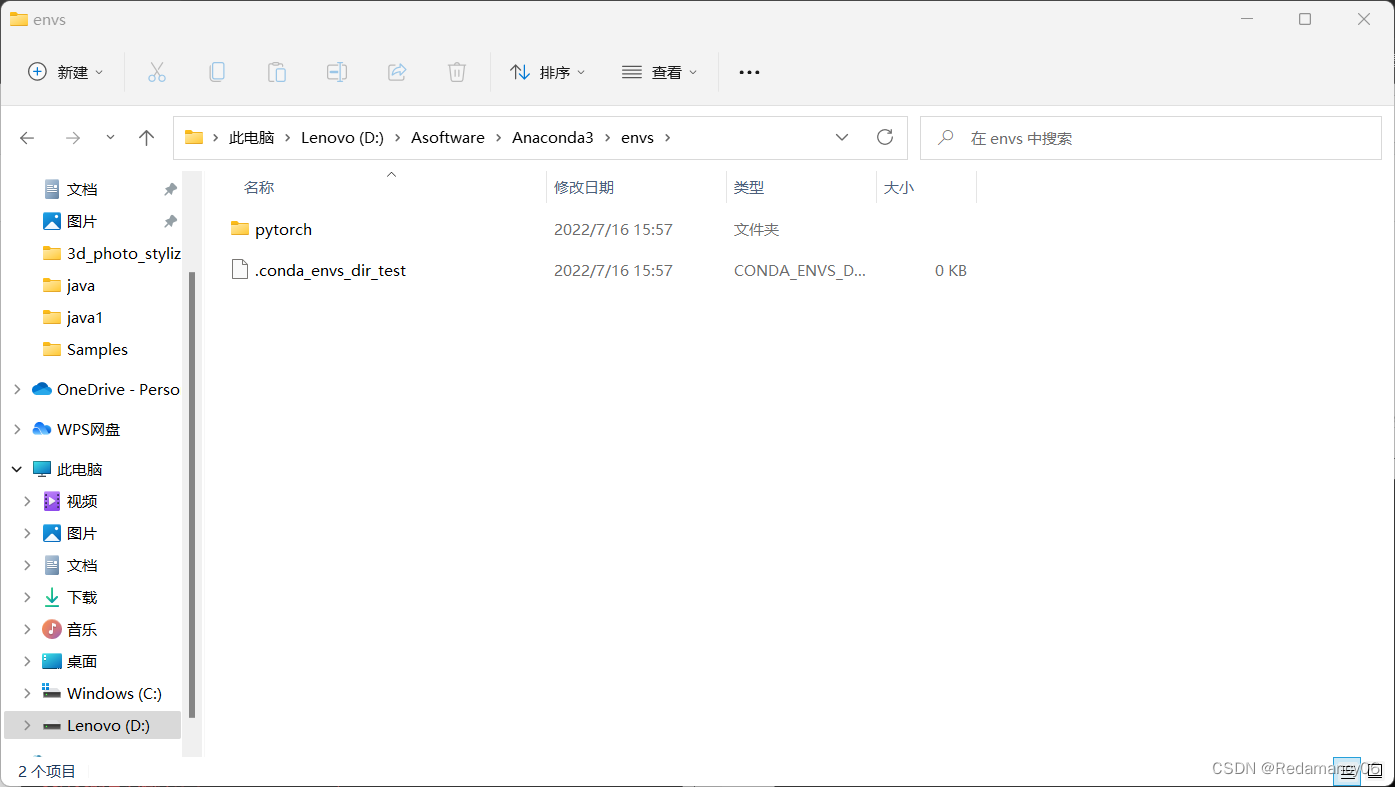
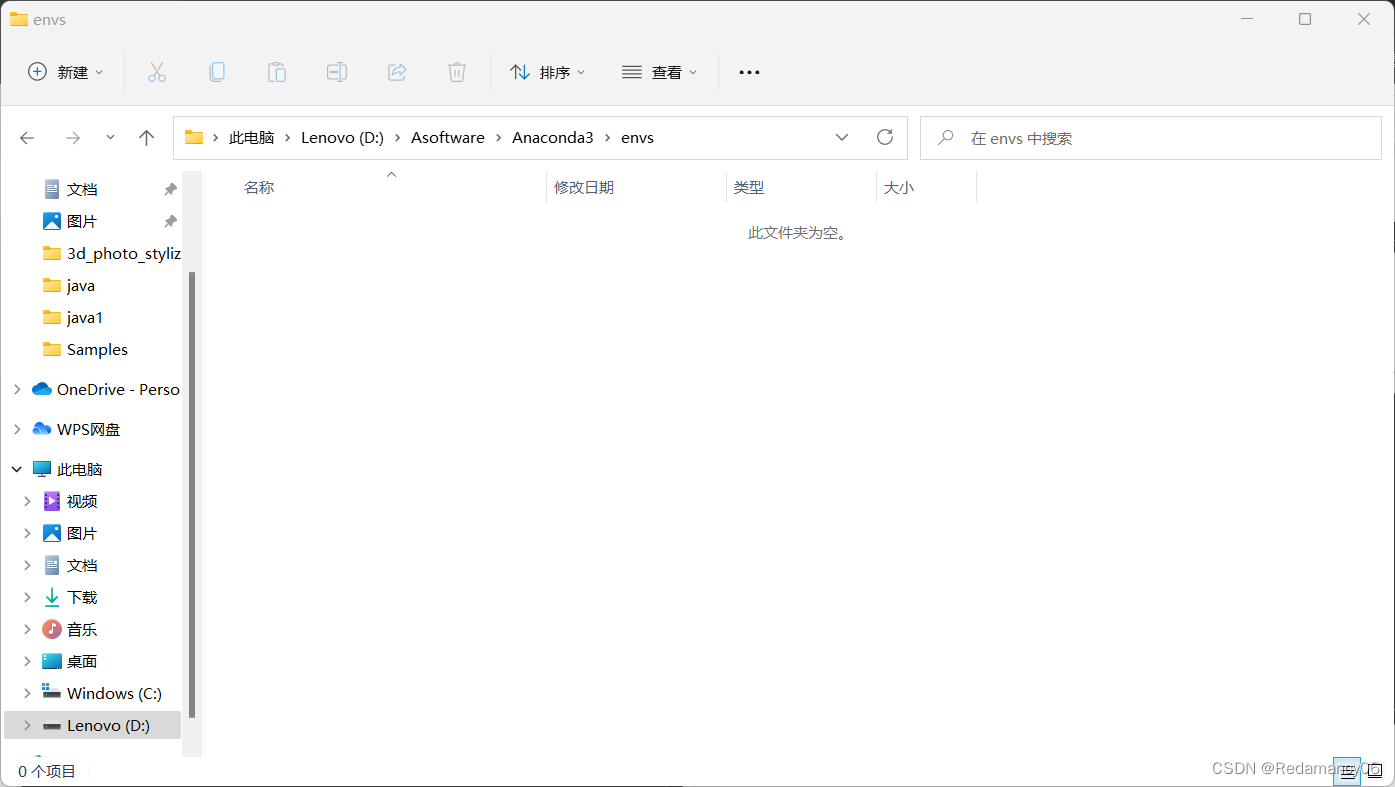
再看文件夹就多了一个文件pytorch
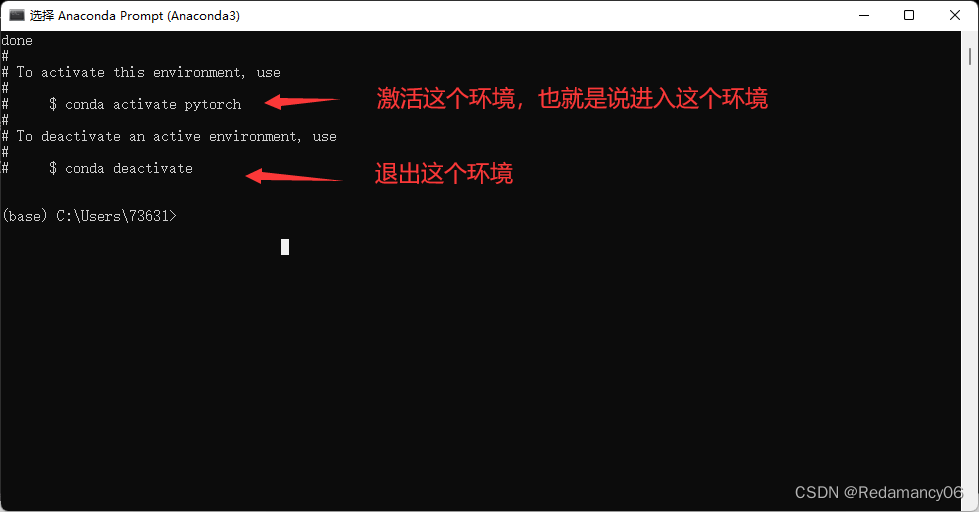
然后我们输入命令进入pytorch环境conda activate pytorch
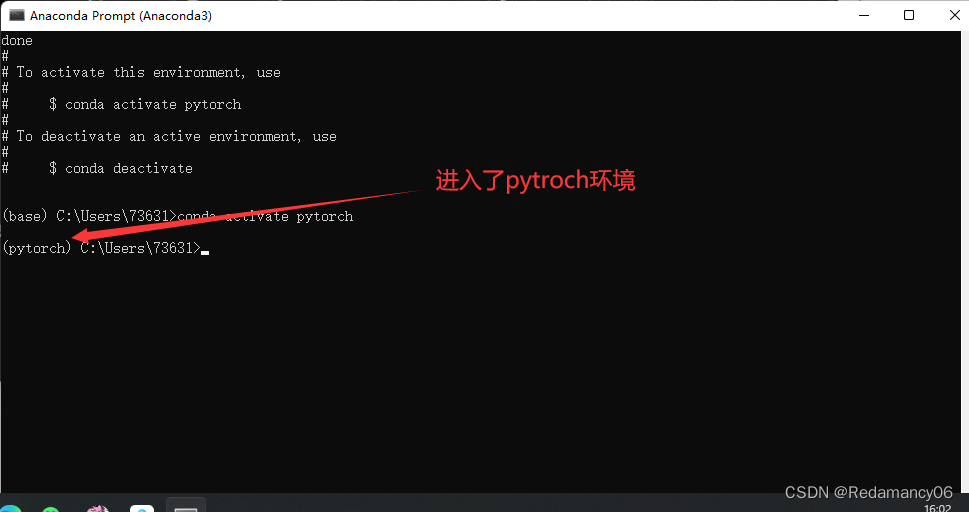
可以看到我们已经进入了pytorch环境
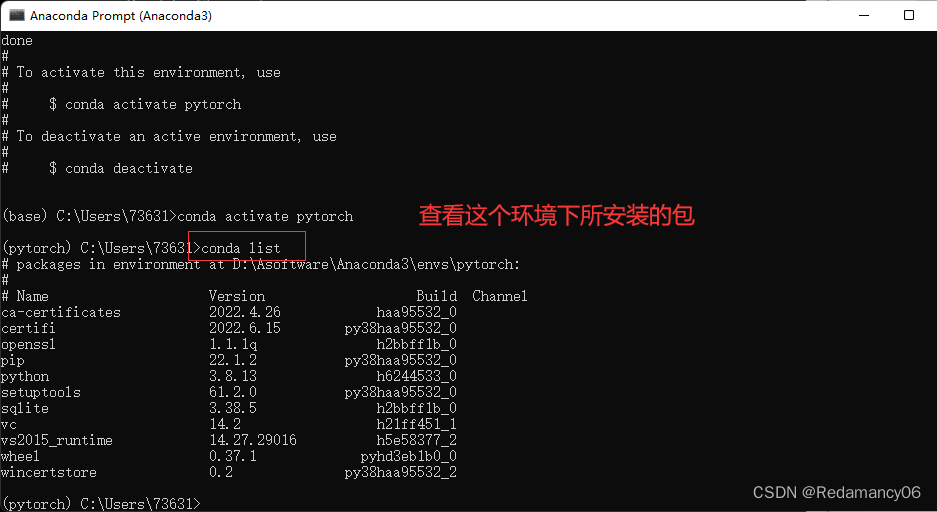
这个命令是查看该环境下所安装的包conda list
1.3查看pytorch历史版本
之前版本的链接https://pytorch.org/get-started/previous-versions/
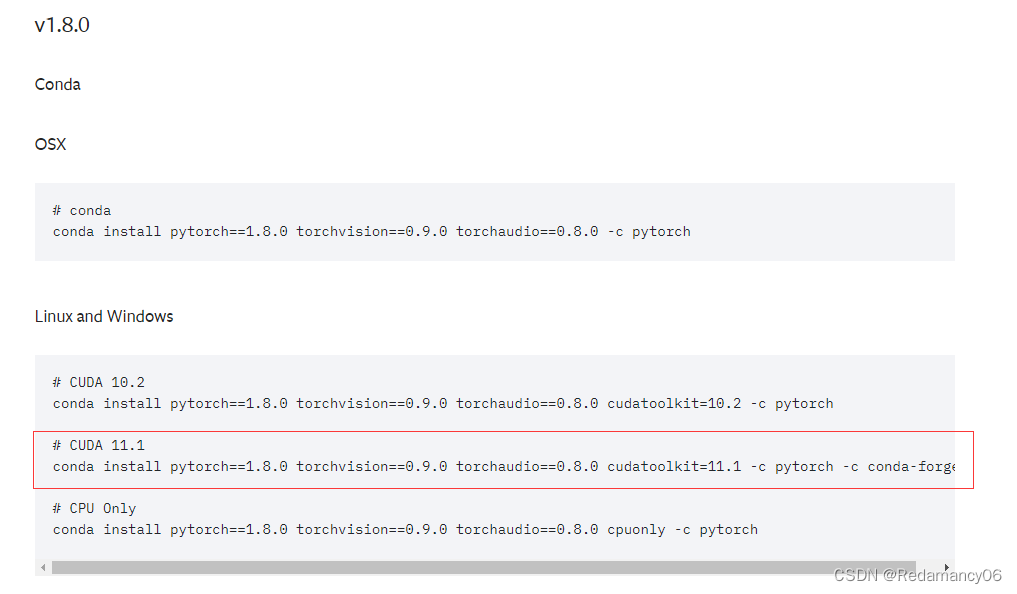
我选择了这个,因为我的cuda下载的是11.1
; 1.4接下来有一个小技巧
我们在使用anaconda环境管理软件时,通过指令下载的各种包,其默认的源,也就是提供安装包或压缩包的服务器,是他们公司自己设立的。这个服务器的位置是在国外,因此链接速度慢,不稳定,下载速度也慢。我们可以通过指令将下载源置为国内源。
这里推荐清华源、中科大源。
1.4.1清华源:
conda config --add channels https://mirrors.tuna.tsinghua.edu.cn/anaconda/pkgs/free/
conda config --add channels https://mirrors.tuna.tsinghua.edu.cn/anaconda/pkgs/main/
conda config --add channels https://mirrors.tuna.tsinghua.edu.cn/anaconda/cloud/pytorch/
conda config --set show_channel_urls yes
1.4.2中科大源:
conda config --add channels https://mirrors.ustc.edu.cn/anaconda/pkgs/main/
conda config --add channels https://mirrors.ustc.edu.cn/anaconda/pkgs/free/
conda config --add channels https://mirrors.ustc.edu.cn/anaconda/cloud/conda-forge/
conda config --add channels https://mirrors.ustc.edu.cn/anaconda/cloud/msys2/
conda config --add channels https://mirrors.ustc.edu.cn/anaconda/cloud/bioconda/
conda config --add channels https://mirrors.ustc.edu.cn/anaconda/cloud/menpo/
conda config --set show_channel_urls yes
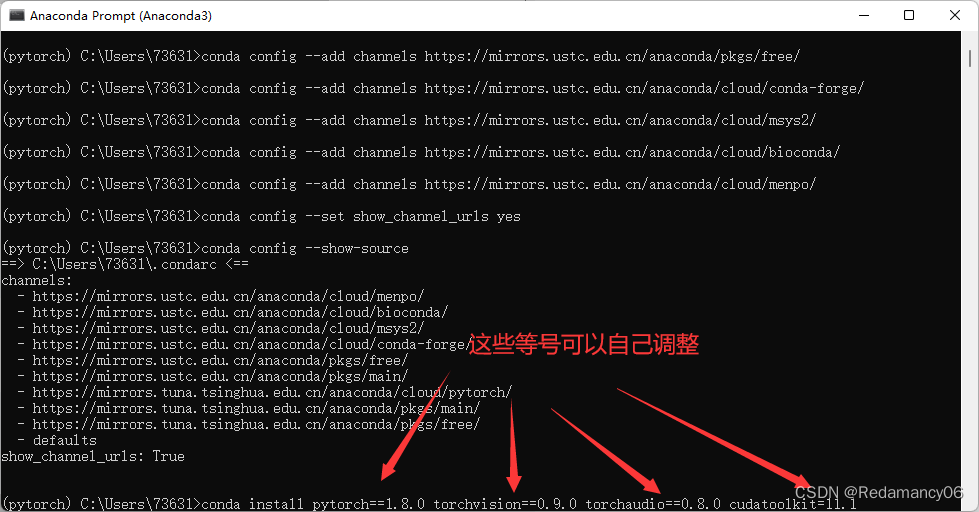
将全部指令复制粘贴进命令行即可。换源之后下载速度起飞。
将这些指令复制到Anaconda里面
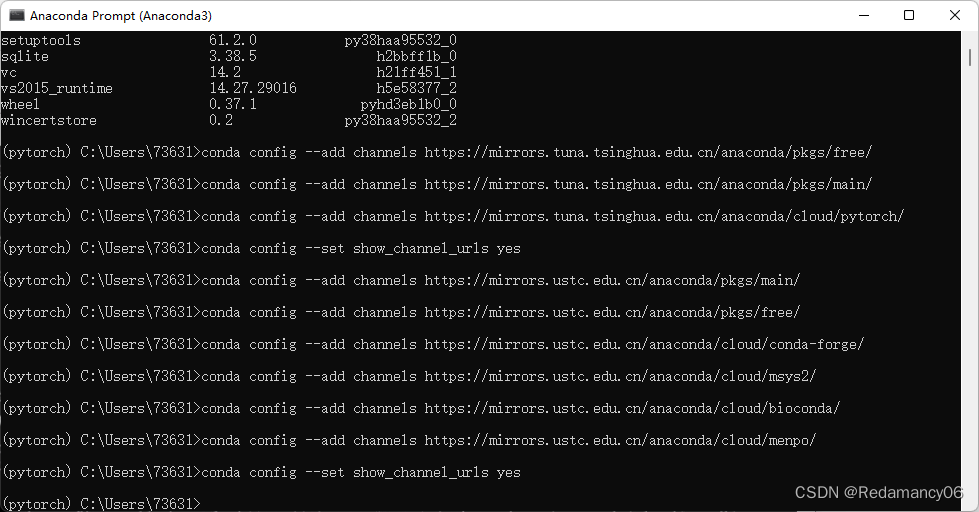
完成改下载源。
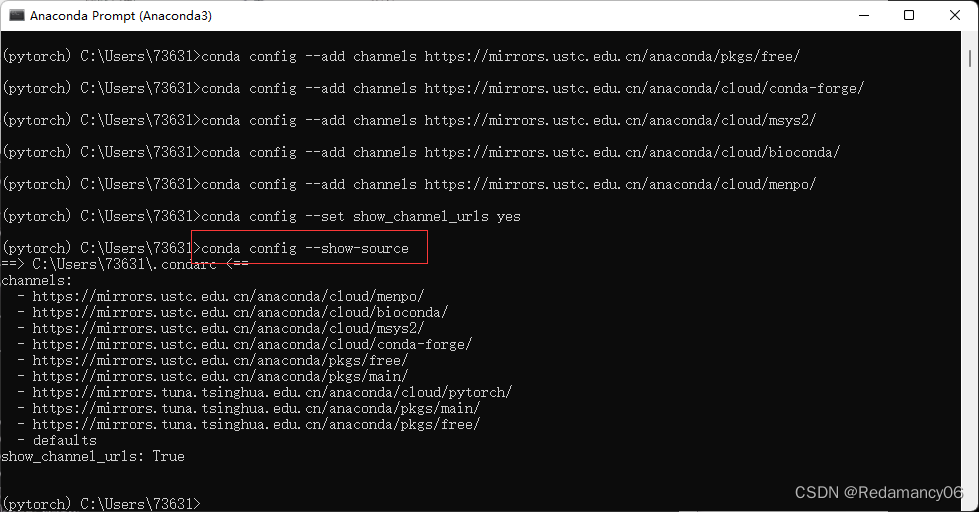
查看源有没有添加进去指令是
conda config --show-source
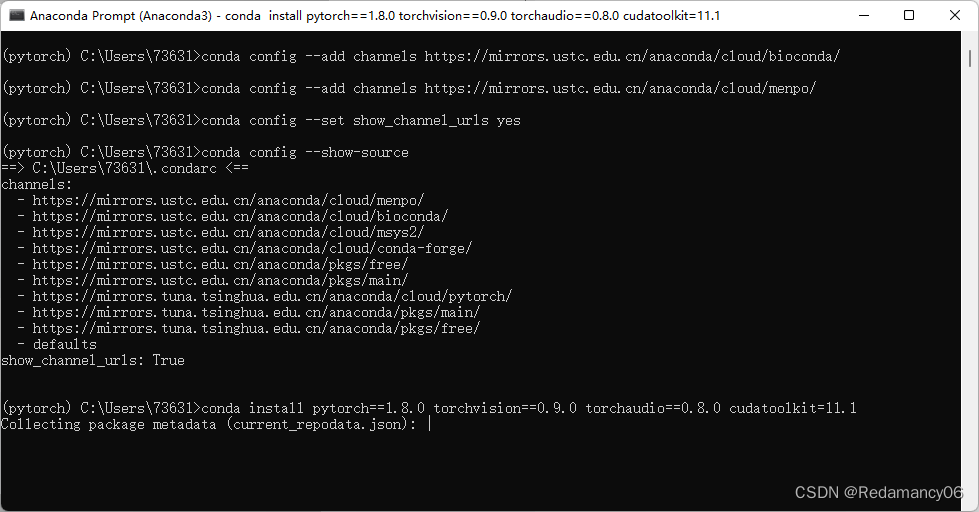
1.5开始下载pytorch环境
然后回车等待安装
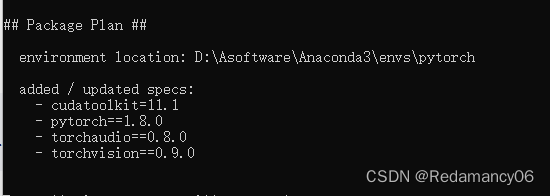
这里是下载包的版本
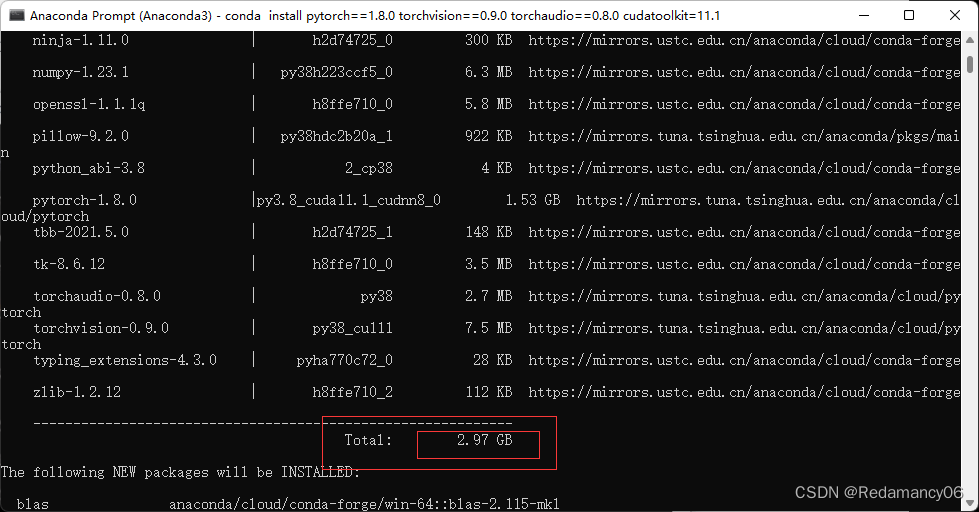
这里显示的是所需要安装的 大小
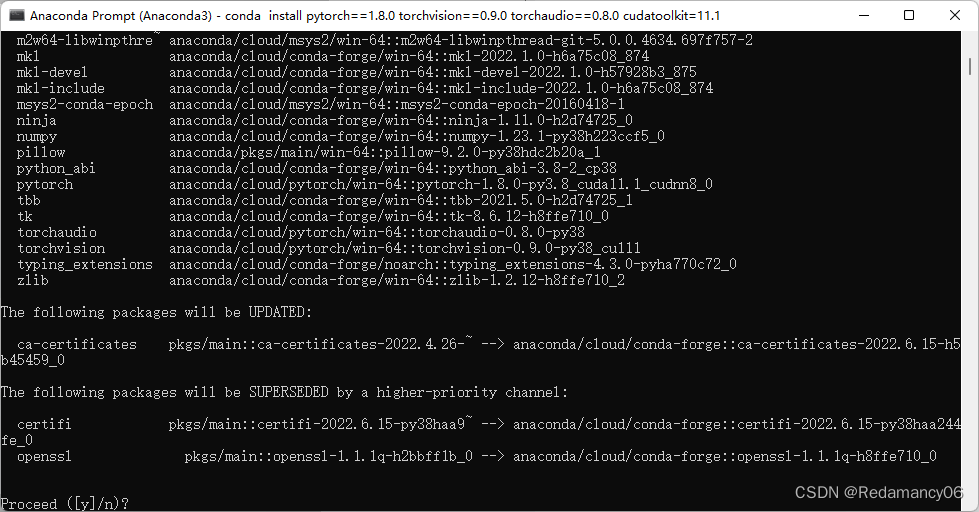
填y回车
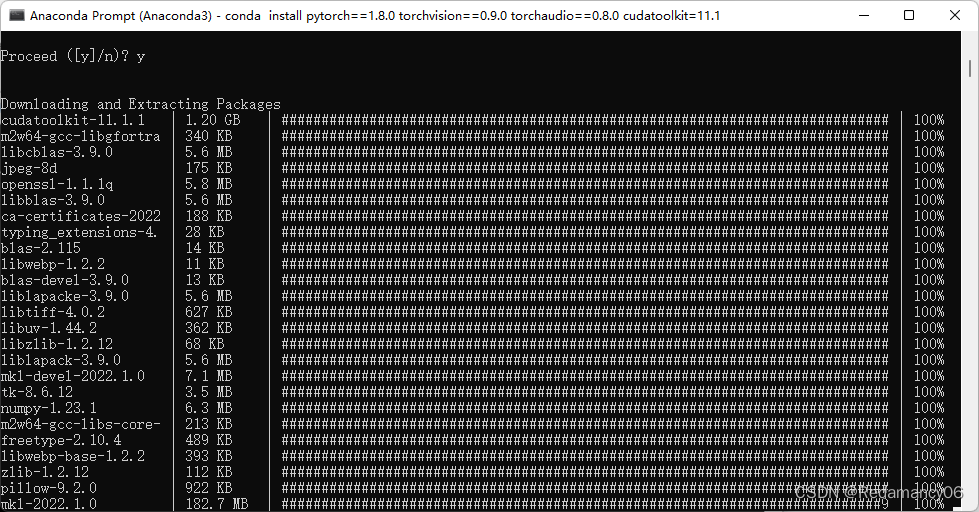
等待安装
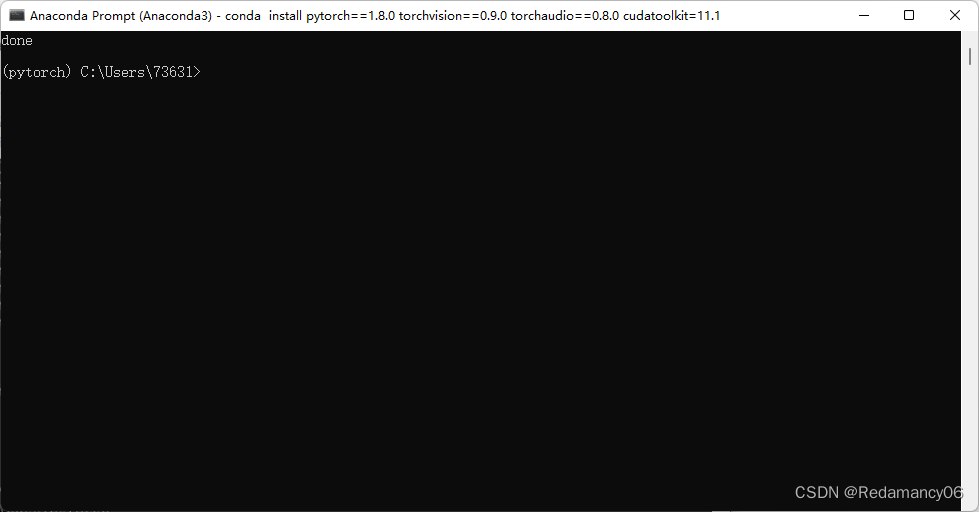
安装成功
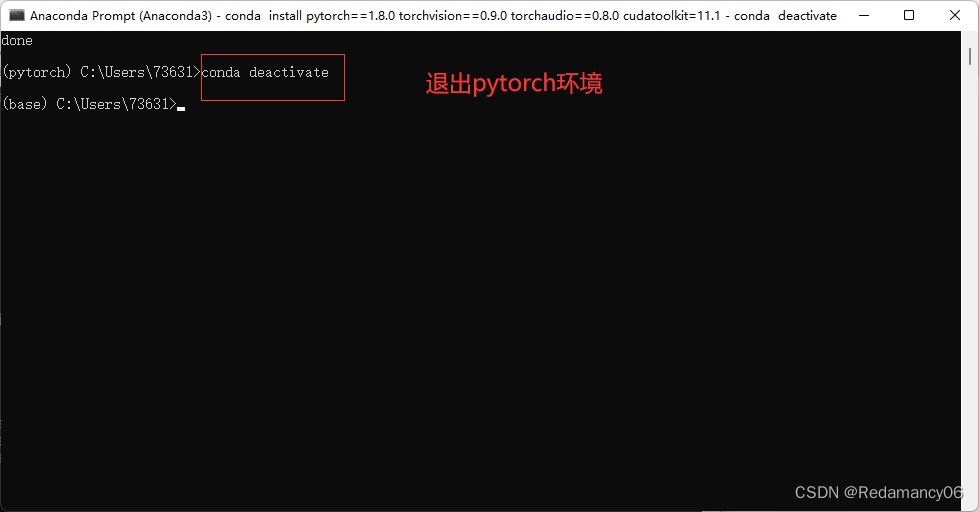
退出pytorch环境
conda deactivate
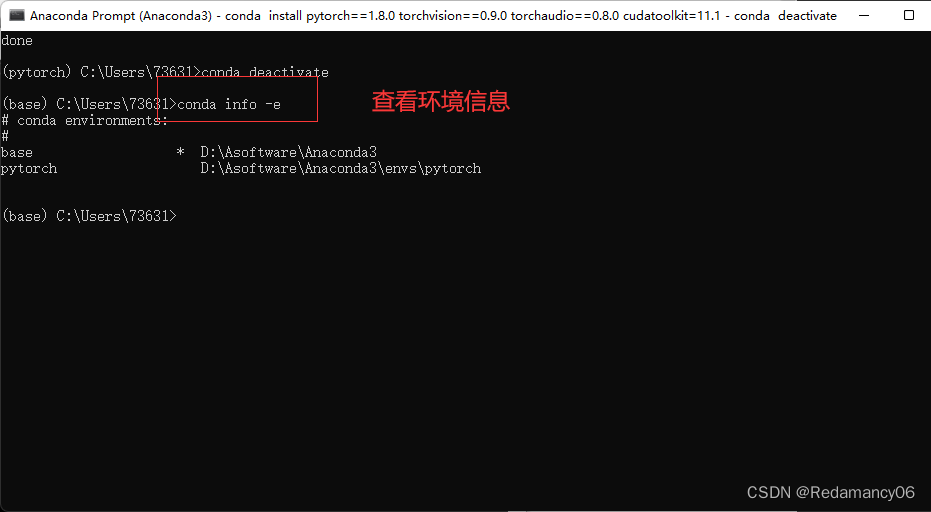
查看环境信息
conda info -e
完成
1.6验证pytorch安装成功
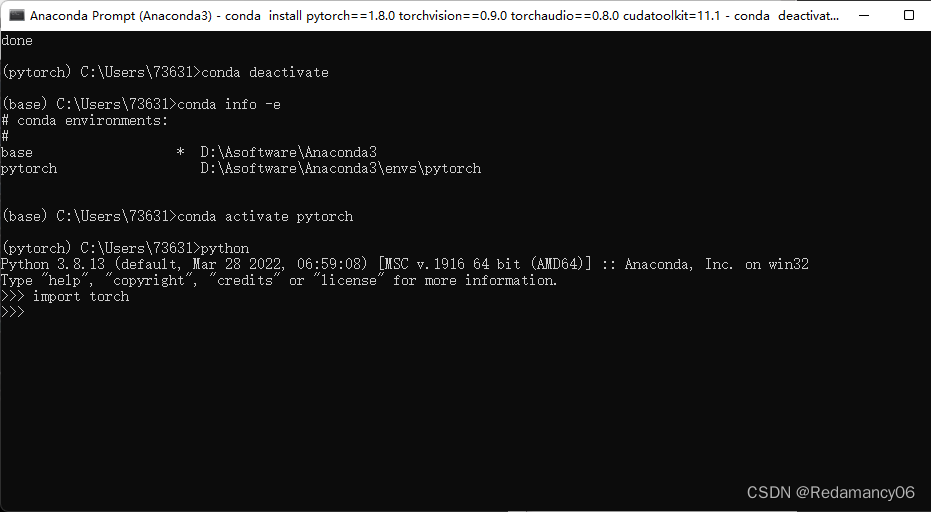
在pytorch环境中输入python,然后import torch,出现我这种情况就说明安装成功了
import torch

这个是验证cuda是不是可以正常运行
torch.cuda.is_available()
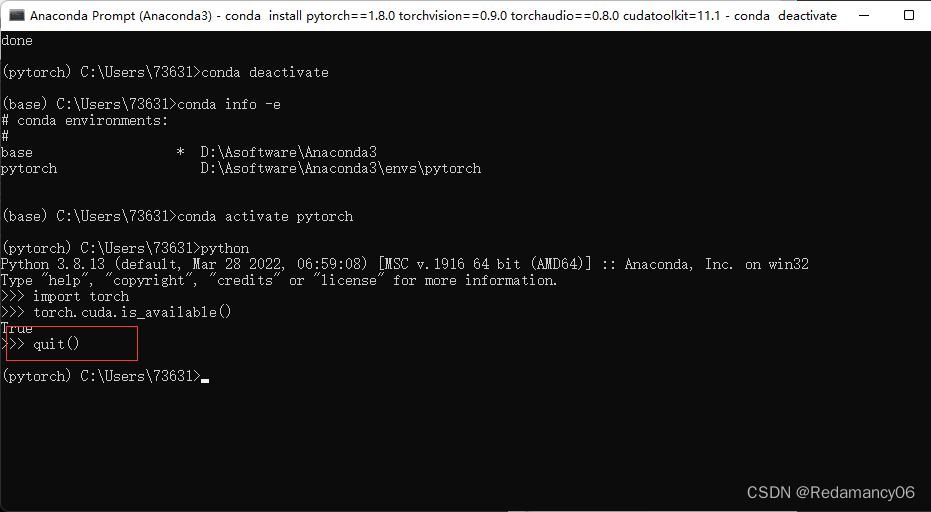
退出python环境
quit()
1.7卸载pytorch环境
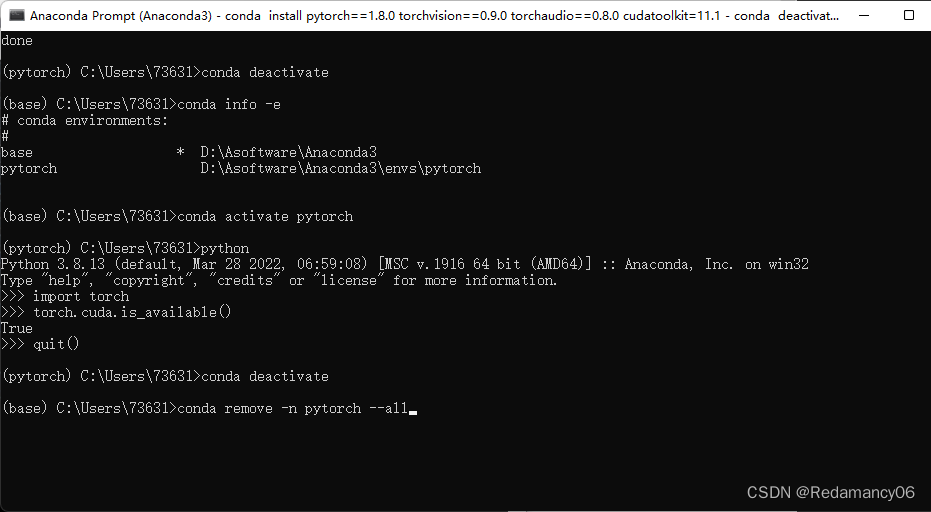
这条语句是将pytorch环境删除,根据提示走,我就不演示了,好不容易下载好的环境,就不删了
conda remove -n pytorch --all
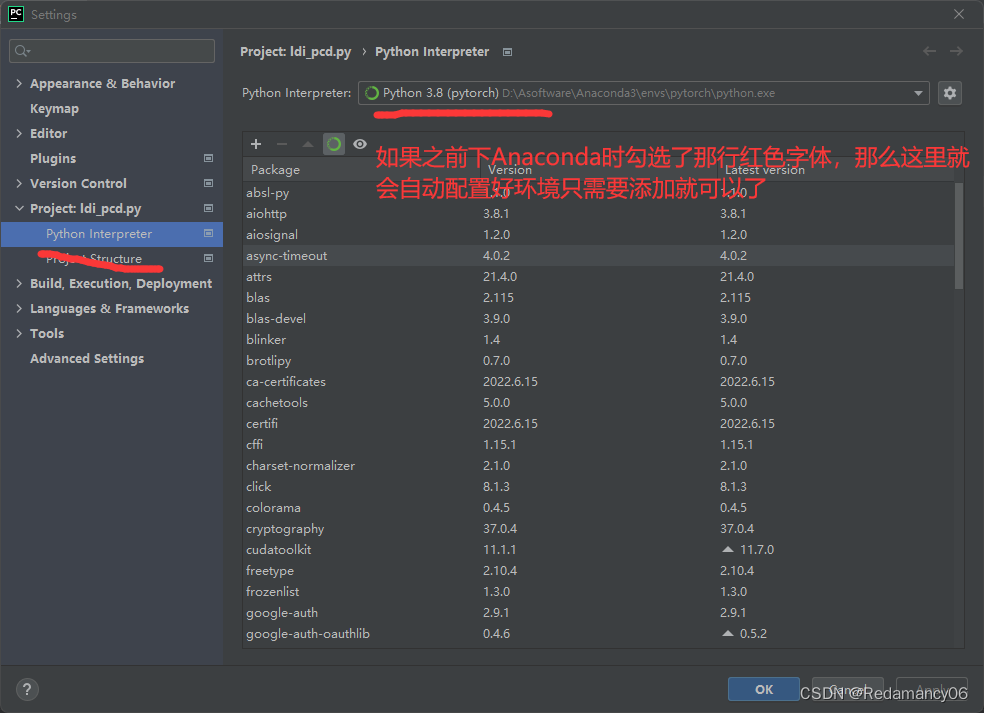
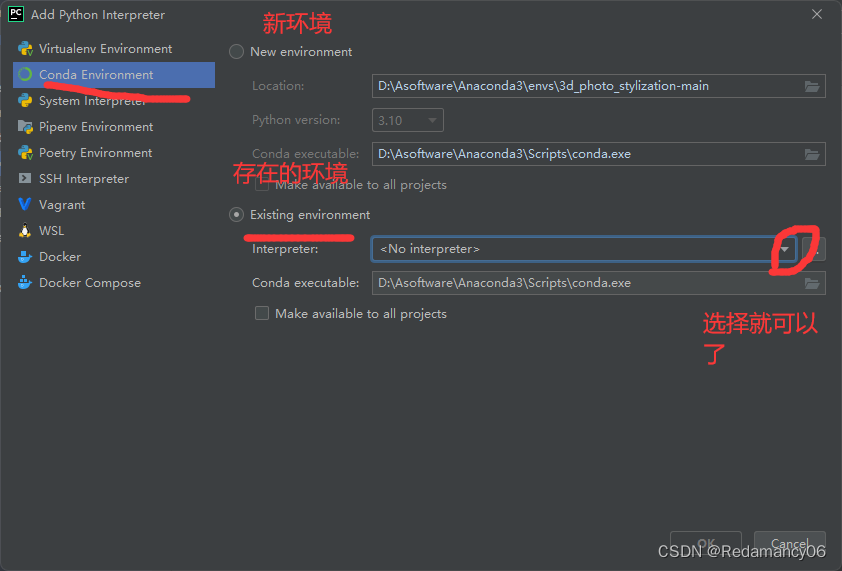
1.8将pycharm的环境换成Anaconda下的pytorch环境
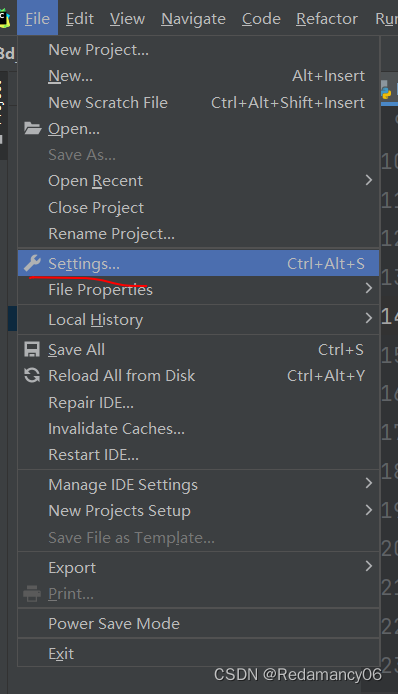
点击settings
详细的看我的博客http://t.csdn.cn/emDn2
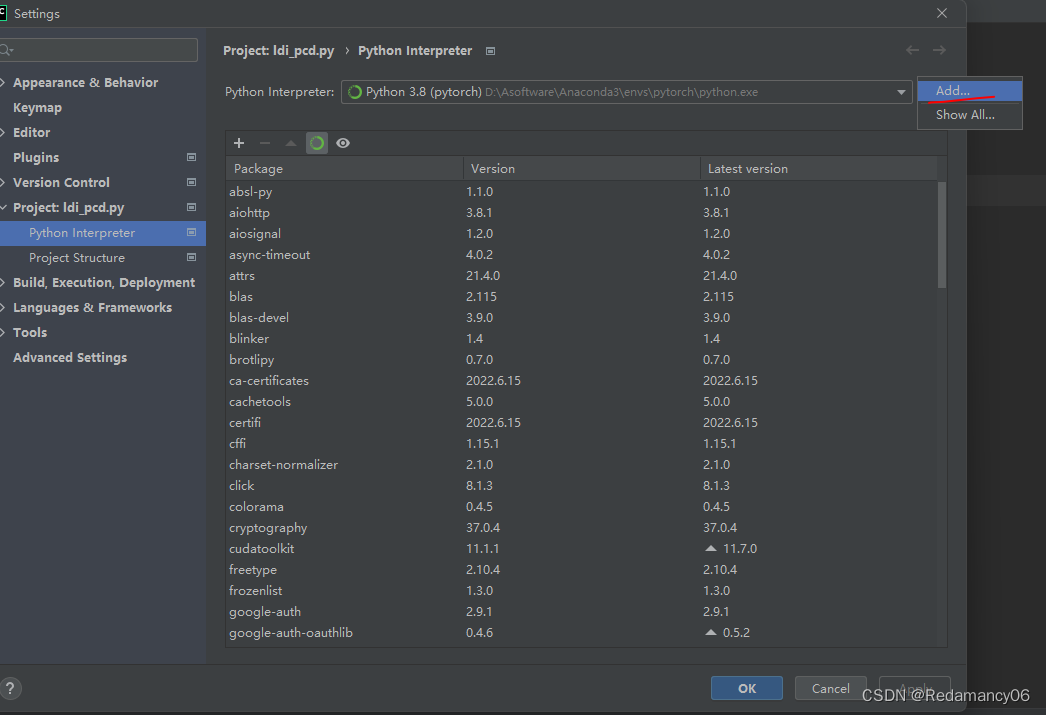
然后点add
完结
Original: https://blog.csdn.net/Redamancy06/article/details/125820669
Author: Redamancy_06
Title: pytorch的安装(非常详细)
原创文章受到原创版权保护。转载请注明出处:https://www.johngo689.com/705305/
转载文章受原作者版权保护。转载请注明原作者出处!