

我们在深度学习训练之前准备数据集的时候,特别是打标注的数据集,需要耗费大量的人力物力打标签,在打完的基础我们还可以直接对数据集进行二次增强,即 数据集增强。
目录
一、常用的数据集增强方法
常用的 数据增强方法有:
-
平移(Shift)变换:对原始图片在图像平面内以某种方式(预先定义或者随机方式确定平移的步长、范围及其方向)进行平移。
-
翻转(Flip)变换:沿竖直或者水平方向对原始图片进行翻转。
-
随机裁剪(Random Crop):随机定义感兴趣区域以裁剪图像,相当于增加随机扰动。
-
噪声扰动(Noise):对图像随机添加高斯噪声或者椒盐噪声等。
-
对比度变换(Contrast):改变图像对比度,相当于在HSV空间中,保持色调分量H不变,而改变亮度分量V和饱和度S,用于模拟现实环境的光照变化。
-
缩放变换(Zoom):以设定的比例缩小或者放大图像。
-
尺度变换(Scale):与缩放变换有点类似,不过尺度变换的对象是图像内容而非图像本身(可以参考SIFT特征提取方法),构建图像金字塔以得到不同大小、模糊程度的图像。
二、使用代码的五个修改点
以上这些方法可以用一段代码快速的实现增强,在代码中只需要改变五个地方就可直接使用,都在main函数里面:
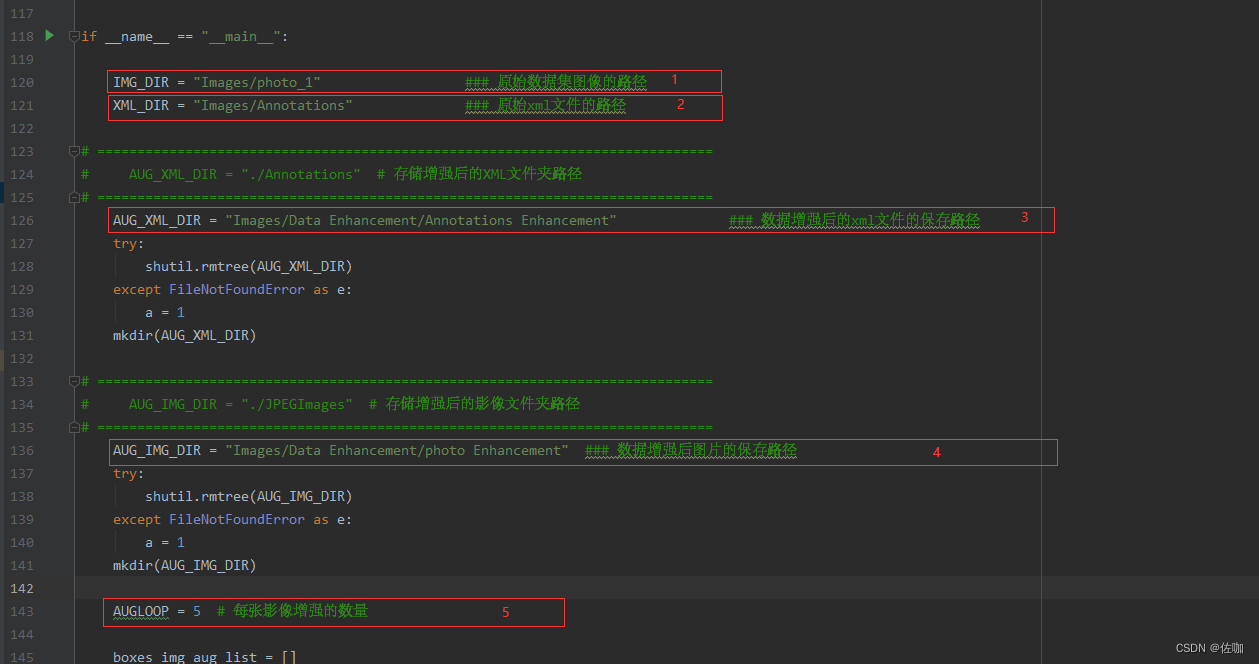
(1)IMG_DIR :原始数据集图片的文件夹路径
(2)XML_DIR: 原始xml文件的文件夹路径
(3)AUG_XML_DIR :数据增强后的图片保存路径
(4)AUG_IMG_DIR:数据增强后的xml文件的保存路径
(5)AUGLOOP :每张图片增强多少次(我自己设的是5)
代码中的具体修改位置见下:

注:使用前需要先确认原始的图片和xml文件夹内的文件是不是一 一对应的,比如图片文件夹有一张abc.jpg,则xml文件夹一定有一个abc.xml文件。我这里提供的教程主要是用来增强VOC格式的数据集。
; 三、代码
具体代码见下:
import xml.etree.ElementTree as ET
import pickle
import os
from os import getcwd
import numpy as np
from PIL import Image
import shutil
import matplotlib.pyplot as plt

import imgaug as ia
from imgaug import augmenters as iaa

ia.seed(1)

def read_xml_annotation(root, image_id):
    in_file = open(os.path.join(root, image_id))
    tree = ET.parse(in_file)
    root = tree.getroot()
    bndboxlist = []

    for object in root.findall('object'):
        bndbox = object.find('bndbox')

        xmin = int(bndbox.find('xmin').text)
        xmax = int(bndbox.find('xmax').text)
        ymin = int(bndbox.find('ymin').text)
        ymax = int(bndbox.find('ymax').text)

        bndboxlist.append([xmin, ymin, xmax, ymax])

    bndbox = root.find('object').find('bndbox')
    return bndboxlist

def change_xml_annotation(root, image_id, new_target):
    new_xmin = new_target[0]
    new_ymin = new_target[1]
    new_xmax = new_target[2]
    new_ymax = new_target[3]

    in_file = open(os.path.join(root, str(image_id) + '.xml'))
    tree = ET.parse(in_file)
    xmlroot = tree.getroot()
    object = xmlroot.find('object')
    bndbox = object.find('bndbox')
    xmin = bndbox.find('xmin')
    xmin.text = str(new_xmin)
    ymin = bndbox.find('ymin')
    ymin.text = str(new_ymin)
    xmax = bndbox.find('xmax')
    xmax.text = str(new_xmax)
    ymax = bndbox.find('ymax')
    ymax.text = str(new_ymax)
    tree.write(os.path.join(root, str("%06d" % (str(id) + '.xml'))))

def change_xml_list_annotation(root, image_id, new_target, saveroot, id,img_name):
    in_file = open(os.path.join(root, str(image_id) + '.xml'))
    tree = ET.parse(in_file)
    elem = tree.find('filename')
    elem.text = (img_name + str("_%06d" % int(id)) + '.jpg')
    xmlroot = tree.getroot()
    index = 0

    for object in xmlroot.findall('object'):
        bndbox = object.find('bndbox')

        new_xmin = new_target[index][0]
        new_ymin = new_target[index][1]
        new_xmax = new_target[index][2]
        new_ymax = new_target[index][3]

        xmin = bndbox.find('xmin')
        xmin.text = str(new_xmin)
        ymin = bndbox.find('ymin')
        ymin.text = str(new_ymin)
        xmax = bndbox.find('xmax')
        xmax.text = str(new_xmax)
        ymax = bndbox.find('ymax')
        ymax.text = str(new_ymax)

        index = index + 1

    tree.write(os.path.join(saveroot, img_name + str("_%06d" % int(id)) + '.xml'))

def mkdir(path):

    path = path.strip()

    path = path.rstrip("\\")

    isExists = os.path.exists(path)

    if not isExists:

        os.makedirs(path)
        print(path + ' 创建成功')
        return True
    else:

        print(path + ' 目录已存在')
        return False

if __name__ == "__main__":

    IMG_DIR = "Images/photo_1"
    XML_DIR = "Images/Annotations"

    AUG_XML_DIR = "Images/Data Enhancement/Annotations Enhancement"
    try:
        shutil.rmtree(AUG_XML_DIR)
    except FileNotFoundError as e:
        a = 1
    mkdir(AUG_XML_DIR)

    AUG_IMG_DIR = "Images/Data Enhancement/photo Enhancement"
    try:
        shutil.rmtree(AUG_IMG_DIR)
    except FileNotFoundError as e:
        a = 1
    mkdir(AUG_IMG_DIR)

    AUGLOOP = 5

    boxes_img_aug_list = []
    new_bndbox = []
    new_bndbox_list = []

    seq = iaa.Sequential([
        iaa.Flipud(0.5),
        iaa.Fliplr(0.5),
        iaa.Multiply((1.2, 1.5)),
        iaa.GaussianBlur(sigma=(0, 3.0)),
        iaa.Affine(
            translate_px={"x": 15, "y": 15},
            scale=(0.8, 0.95),
            rotate=(-30, 30)
        )
    ])

    for root, sub_folders, files in os.walk(XML_DIR):

        for name in files:
            print(name)
            bndbox = read_xml_annotation(XML_DIR, name)
            shutil.copy(os.path.join(XML_DIR, name), AUG_XML_DIR)
            shutil.copy(os.path.join(IMG_DIR, name[:-4] + '.jpg'), AUG_IMG_DIR)

            for epoch in range(AUGLOOP):
                seq_det = seq.to_deterministic()

                img = Image.open(os.path.join(IMG_DIR, name[:-4] + '.jpg'))

                img = np.asarray(img)

                for i in range(len(bndbox)):
                    bbs = ia.BoundingBoxesOnImage([
                        ia.BoundingBox(x1=bndbox[i][0], y1=bndbox[i][1], x2=bndbox[i][2], y2=bndbox[i][3]),
                    ], shape=img.shape)

                    bbs_aug = seq_det.augment_bounding_boxes([bbs])[0]
                    boxes_img_aug_list.append(bbs_aug)

                    n_x1 = int(max(1, min(img.shape[1], bbs_aug.bounding_boxes[0].x1)))
                    n_y1 = int(max(1, min(img.shape[0], bbs_aug.bounding_boxes[0].y1)))
                    n_x2 = int(max(1, min(img.shape[1], bbs_aug.bounding_boxes[0].x2)))
                    n_y2 = int(max(1, min(img.shape[0], bbs_aug.bounding_boxes[0].y2)))
                    if n_x1 == 1 and n_x1 == n_x2:
                        n_x2 += 1
                    if n_y1 == 1 and n_y2 == n_y1:
                        n_y2 += 1
                    if n_x1 >= n_x2 or n_y1 >= n_y2:
                        print('error', name)
                    new_bndbox_list.append([n_x1, n_y1, n_x2, n_y2])

                image_aug = seq_det.augment_images([img])[0]
                path = os.path.join(AUG_IMG_DIR,
                                    name[:-4] + str( "_%06d" % (epoch + 1)) + '.jpg')
                image_auged = bbs.draw_on_image(image_aug, thickness=0)
                Image.fromarray(image_auged).save(path)

                change_xml_list_annotation(XML_DIR, name[:-4], new_bndbox_list, AUG_XML_DIR,
                                           epoch + 1,name[:-4])
                print( name[:-4] + str( "_%06d" % (epoch + 1)) + '.jpg')
                new_bndbox_list = []
四、增强后与原始数据集对比
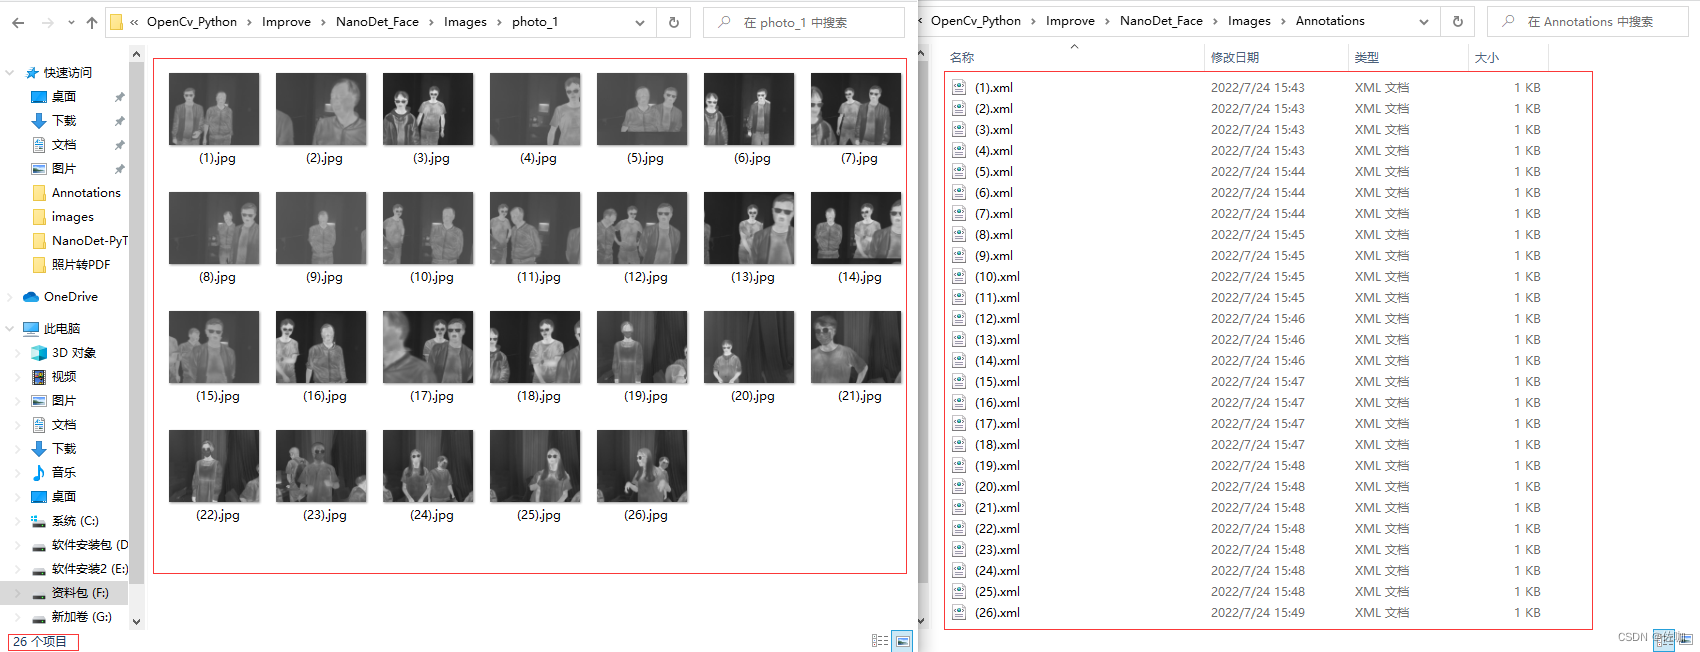
1、原始数据集
原始的数据集和原始对应的xml文件,原始的数据集中有26张图像:
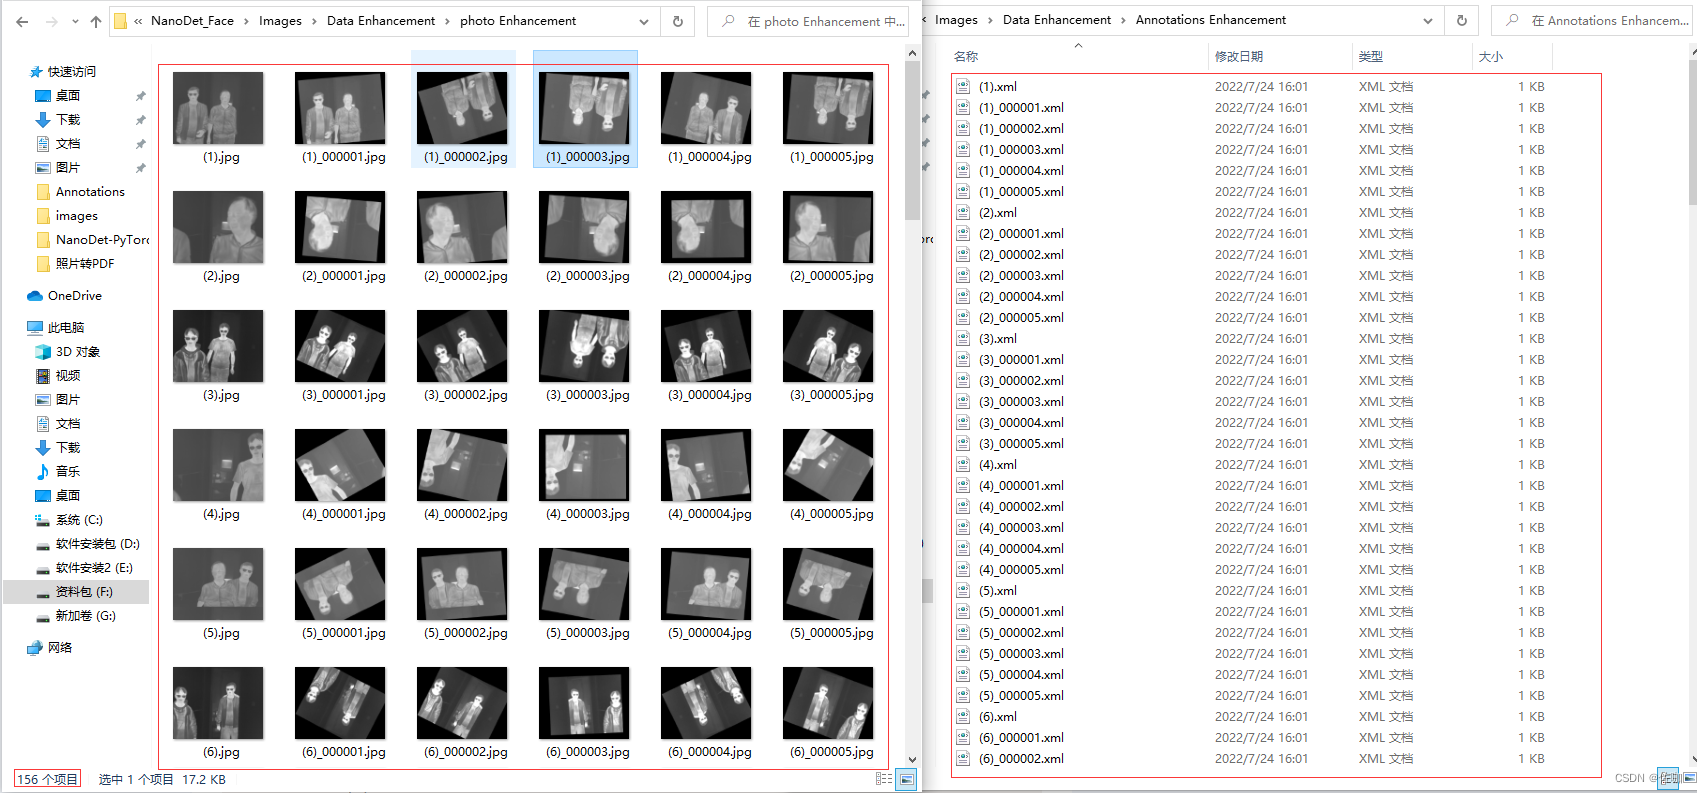
; 2、增强后数据集
数据增强后的数据集和数据集增强后的xml文件,增强后的图片有156张,对应的xml文件有156个:
以上就是深度学习之VOC格式数据集实现数据集增强的方法,希望此方法能帮助到你,多多支持,谢谢。
Original: https://blog.csdn.net/qq_40280673/article/details/125960440
Author: 佐咖
Title: 深度学习之快速实现数据集增强的方法
原创文章受到原创版权保护。转载请注明出处:https://www.johngo689.com/647463/
转载文章受原作者版权保护。转载请注明原作者出处!