

kaggle是一个可以下载数据集的网站,除了可以下载数据集以外,我们还可以使用kaggle的免费GPU资源,我们可以在kaggle上训练模型
这个是kaggle的网址Kaggle: Your Machine Learning and Data Science Community
如果一个没有注册的朋友可以注册一个账号,就会出现验证码过不过墙,看不到注册账号中的验证码的问题。我们可以在Google浏览器中安装一个插件来解决这个问题。
[En]
If a friend who has not registered can sign up for an account, there will be a problem that the verification code can not pass the wall and cannot see the verification code in the registered account. We can install a plug-in in Google browser to solve this problem.
目录
1 安装插件
参考文章链接 Google 人机验证(reCaptcha)无法显示解决方案(可解决大多数 CSP 问题) – Azure Zeng’s Blog
- 此插件只能在Google浏览器中使用
[En]
this plug-in can only be used in Google browser*
谷歌浏览器也有其他好用的插件,我们可以在这里进行下载 https://chrome.pictureknow.com
我们先下载一个Header Editor.crx这个文件,这个文件网上可以搜到
以下是指向该文件的百度云链接
[En]
The following is the Baidu Cloud link to this file
链接:百度网盘 请输入提取码 提取码:mpj1


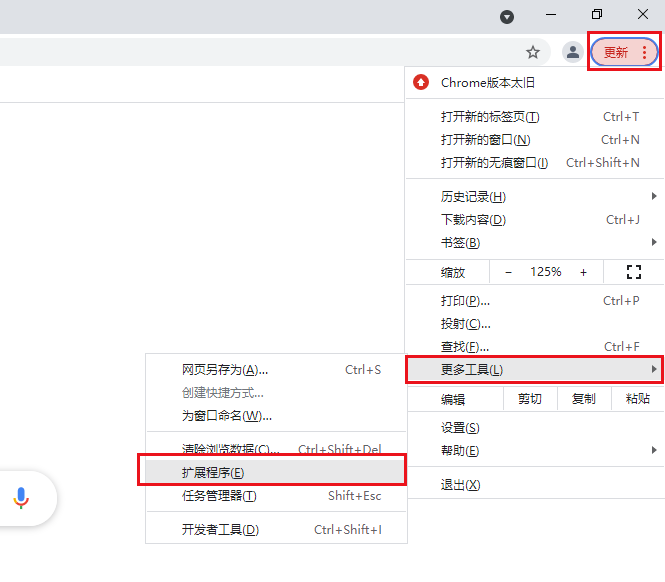
单击浏览器右上角的三个点,然后选择更多工具,然后单击扩展模块
[En]
Click the three points in the upper right corner of the browser, then select more tools, and then click the extension
进入页面后,打开右上角的开发者模式,下图的状态是打开的状态,打开之后把Header Editor.crx文件拖到画红框的区域
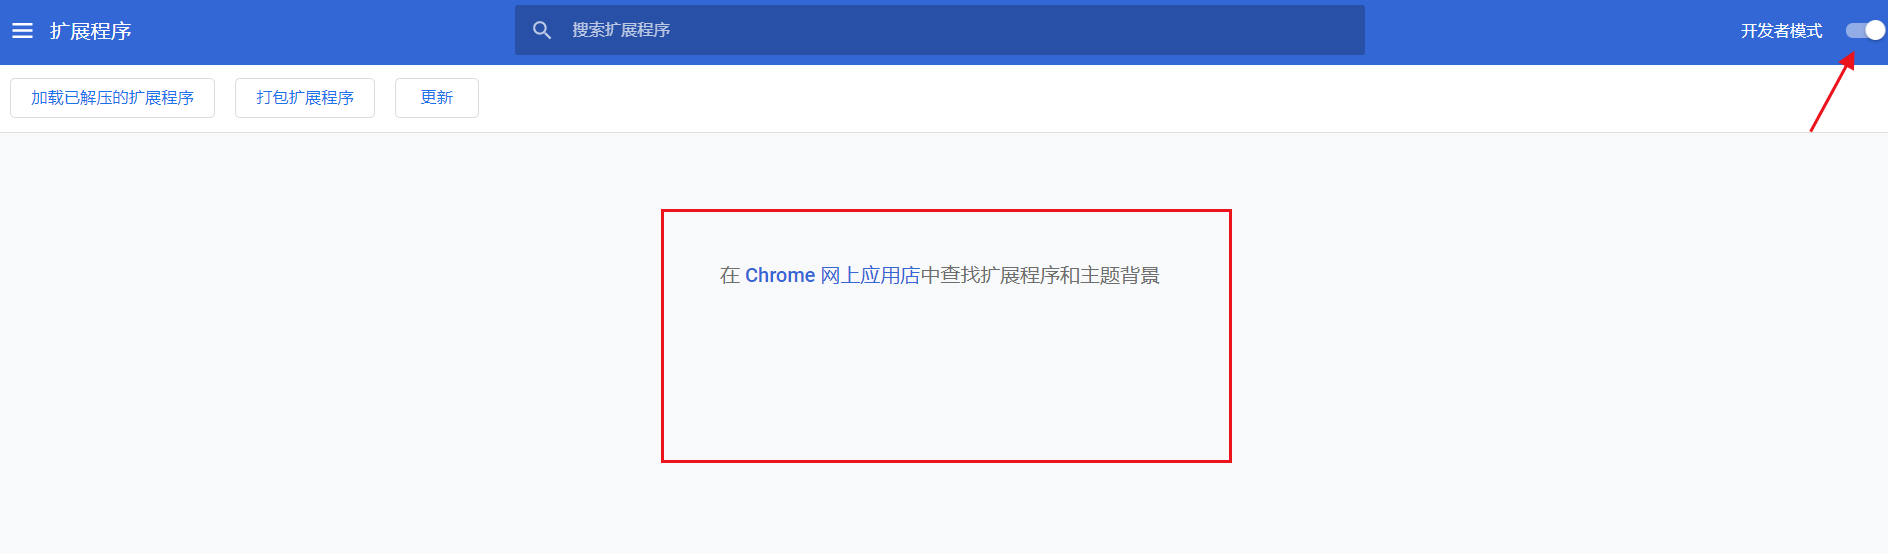
点击添加扩展程序
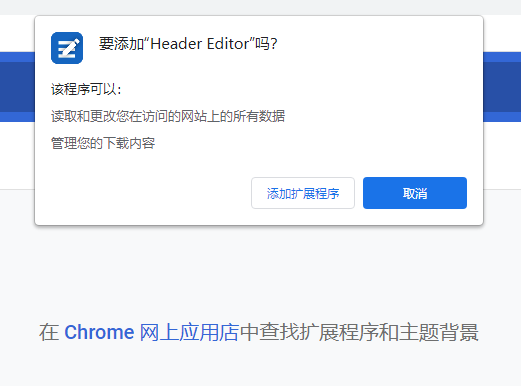
- 图标必须与我上方的图标相同,否则不正确。
[En]
the icon must be the same as the one above me, or it’s not right.*
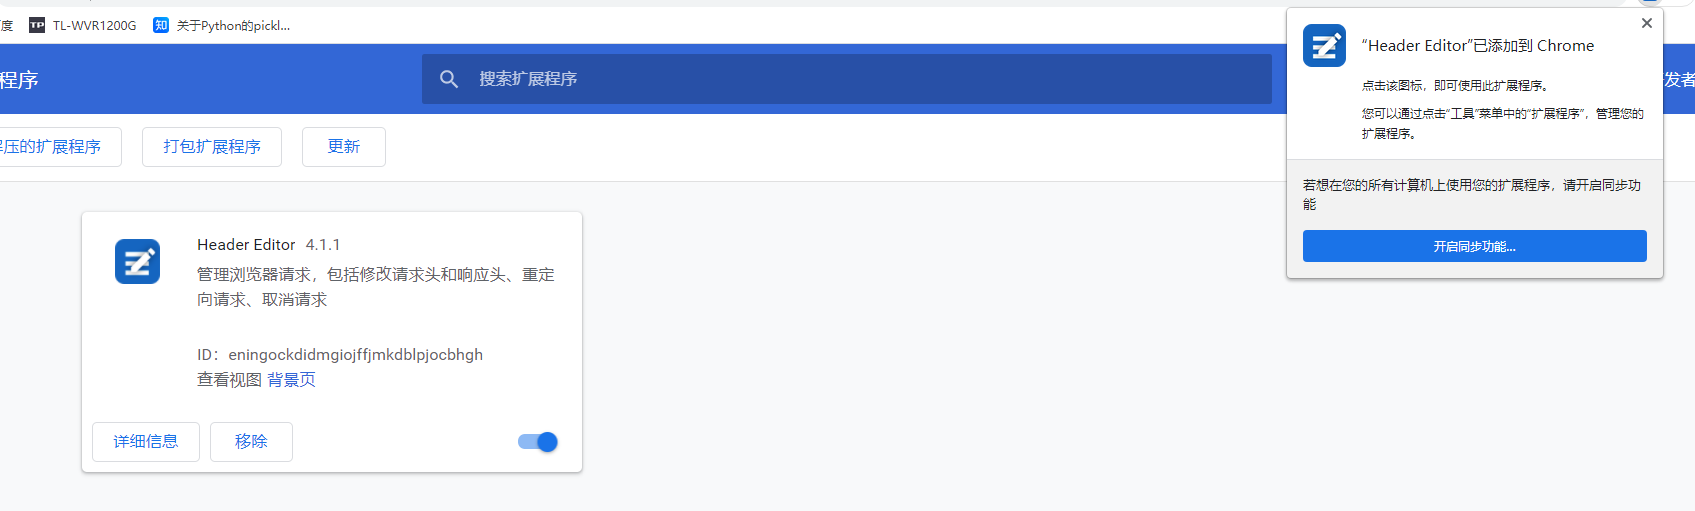
这样就添加完毕了
2 下载规则文件
我们需要下载规则文件,在github中GitHub – AzureZeng/azurezeng.github.io: My main page on github
我们需要这里的json文件

我们整体把它下载下来,然后解压,得到这个json文件
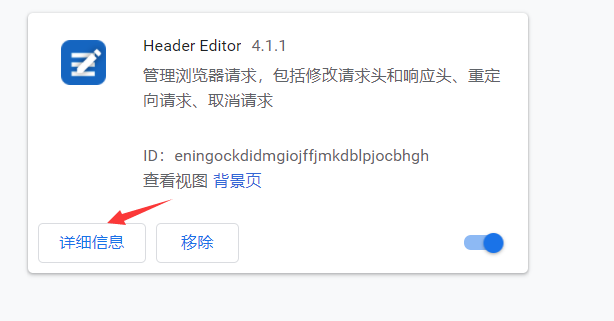
之后我们点击详细信息
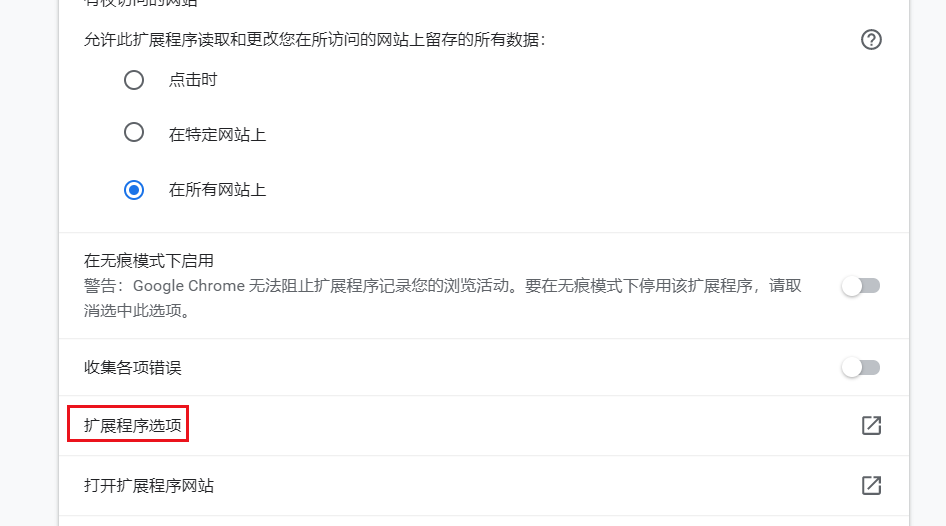
然后找到下面的扩展程序选项,然后单击它
[En]
Then find the extender option below, and then click it
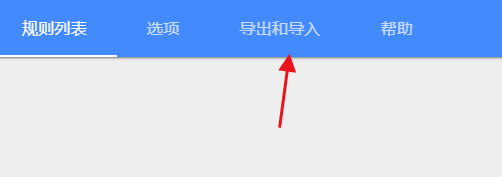
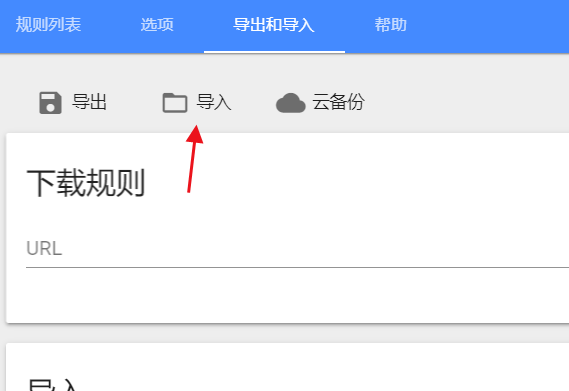
点击导入与导出
之后我们点击导入
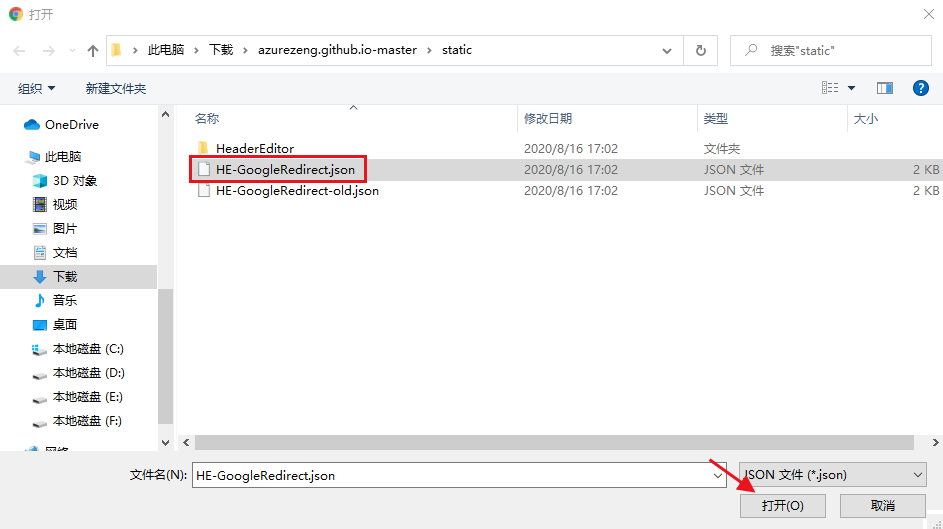
找到json文件,然后点击打开
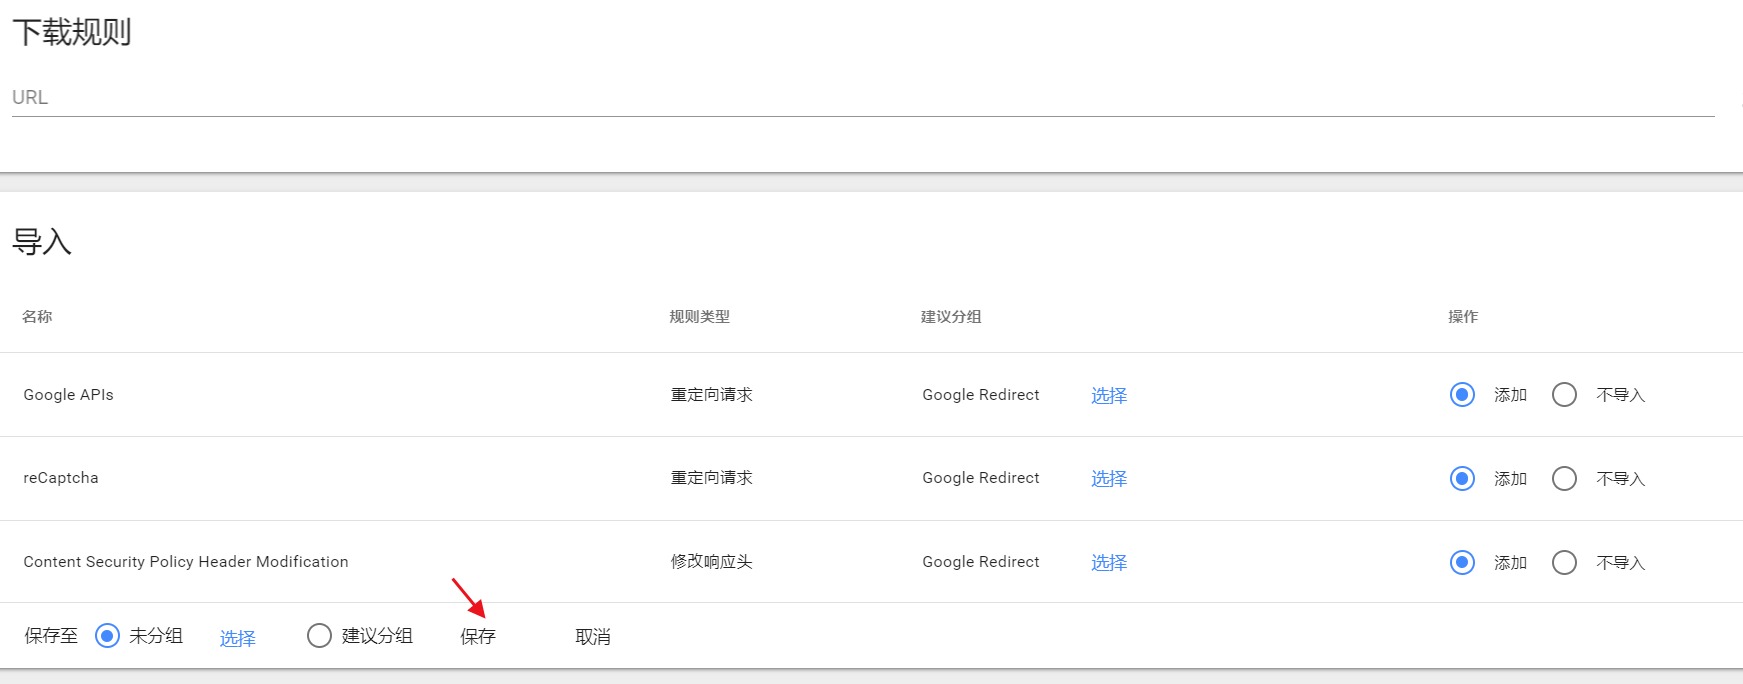
这些将显示在底部,然后我们单击保存。
[En]
These will appear at the bottom, and we click Save.
保存后,浏览器下方会显示导入成功,此时我们就已成功使用插件,kaggle上的人机验证我们就都可以看到了
4 登陆kaggle
kaggle登陆之后的页面是这样的
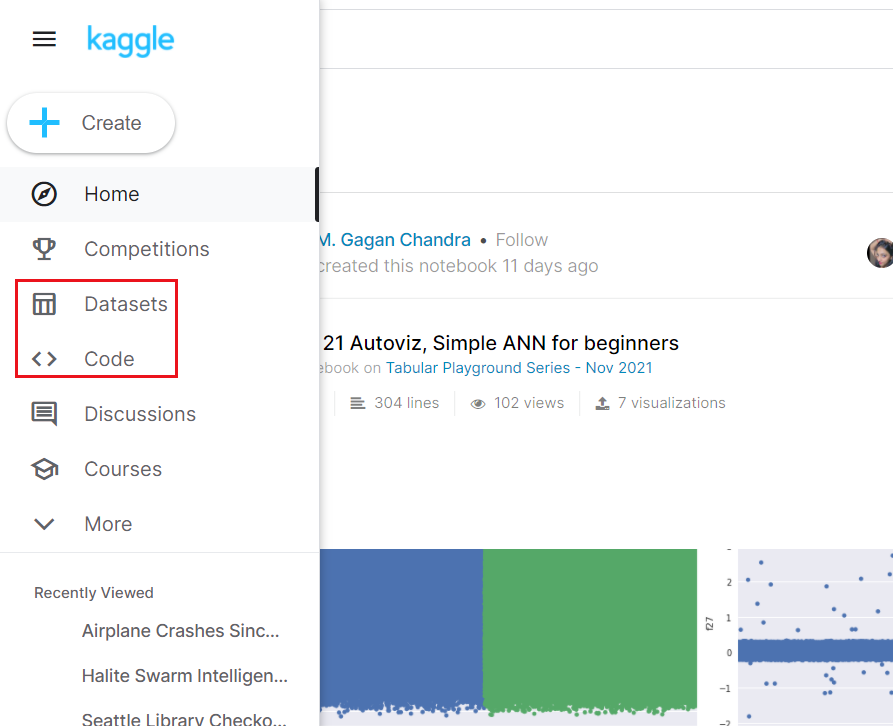
我们最常用的功能是左侧的datasets与code,datasets是找数据集的,code是写代码的,我们在这里就要详细介绍code
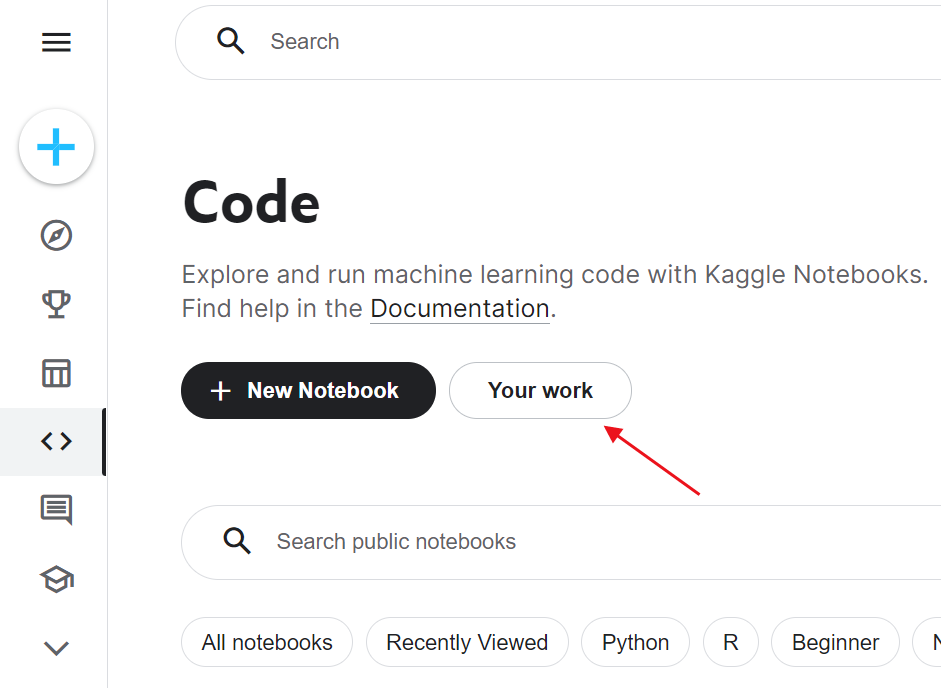
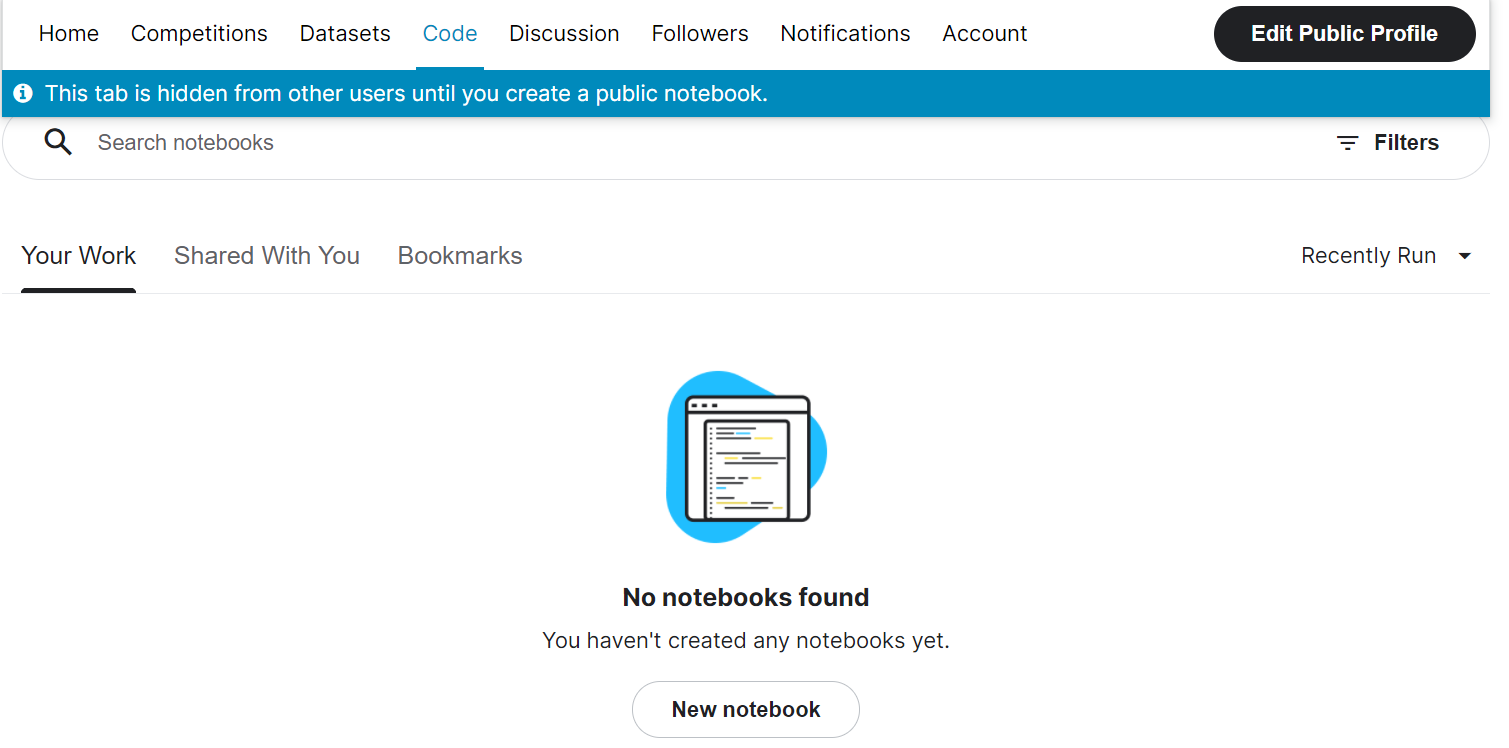
点进code之后,我们可以点击Your work 来查看过往的代码
我的活期账户以前没有创建过项目,所以我们不在这里显示它。
[En]
My current account has not created a project before, so we do not show it here.
我们点击 New Notebook创建新的notebook文件

点开之后是这样的,这个和我们的jupyter notebook的界面就很相似了,jupyter notebook的基本用法可以看一下这个 Jupyter notebook 基本用法_potato123232的博客-CSDN博客_notebook的markdown

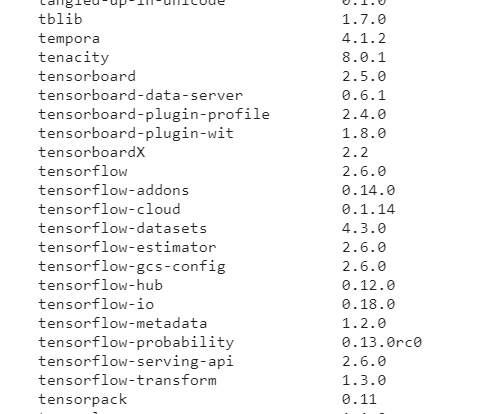
我们看一下在这个notebook中都安装了什么库
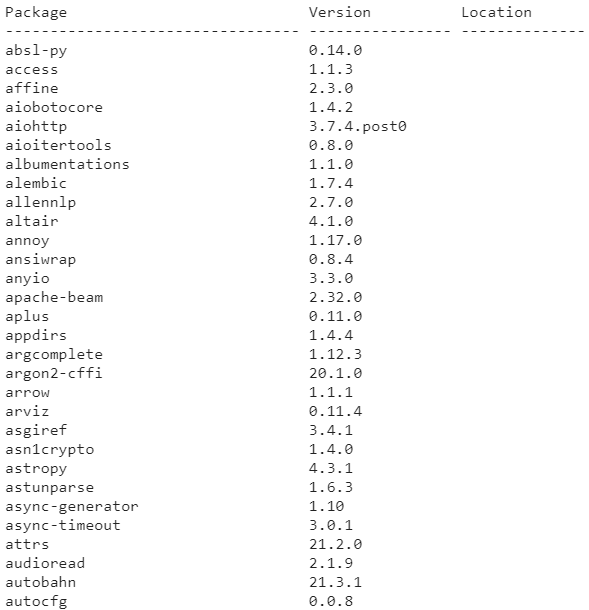
我们发现安装了很多的库,往下面看可以看到tensorflow也已经在这个notebook中安装好了
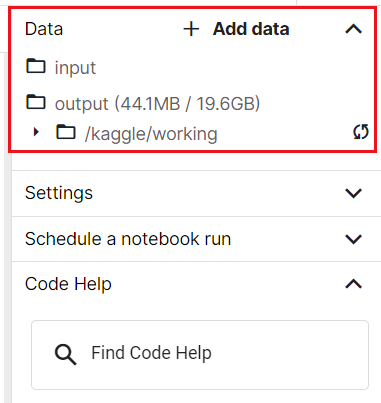
5 添加数据集
在界面的右侧又Data这一栏,我们可以添加kaggle网站中的数据集,或者我们可以自己上传数据集
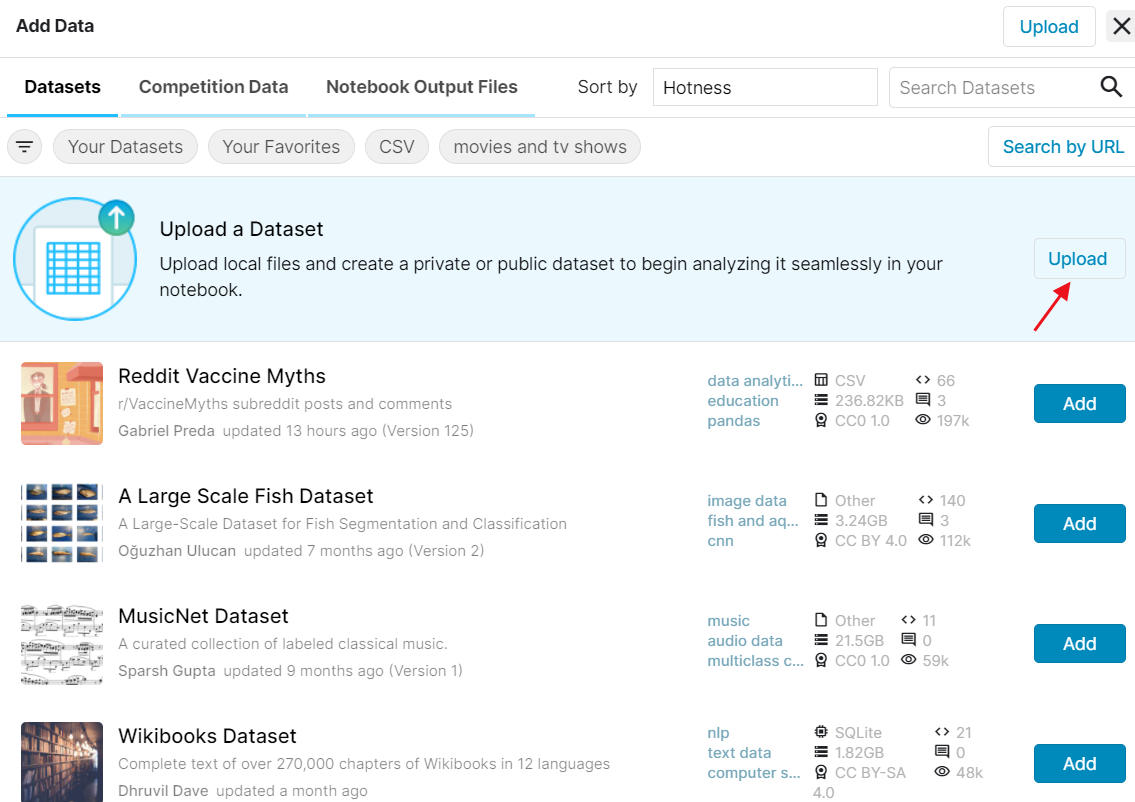
5.1 添加kaggle中的数据集
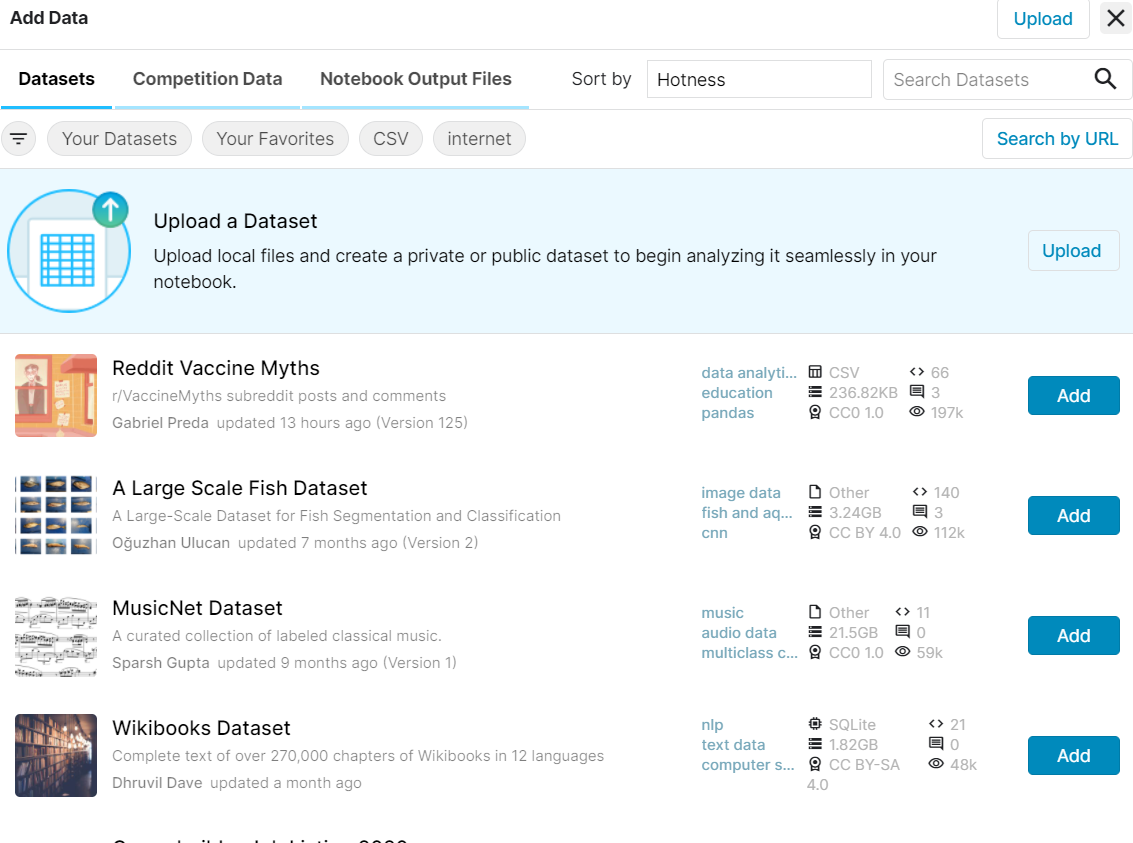
我们现在点击 Add data,点开后我们可以在右上角搜索数据集,之后选择添加
添加之后我们就在input中看到了该数据集
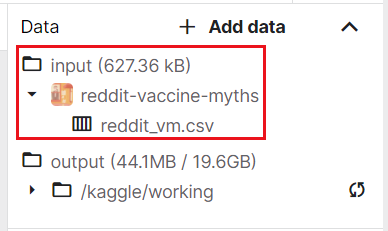
现在,让我们使用左侧的代码块来读取该数据集。首先,让我们导入库。
[En]
Let’s now use the code block on the left to read this dataset. First, let’s import the library.
然后我们找到数据集的位置。
[En]
And then we find the location of the dataset.

之后我们使用pandas进行读取

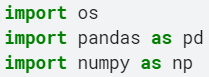
然后让我们来看看数据集的头部。
[En]
And then let’s take a look at the head of the data set.
这证明我们的数据集已经被读入了,我们会根据每个人的不同需求来使用它。
[En]
This proves that our dataset has been read in, and we will use it according to everyone’s different needs.
; 5.2 上传数据集
- 在kaggle中上传数据集需要翻墙才能上传
如果要添加kaggle中没有的数据集,我们选择upload
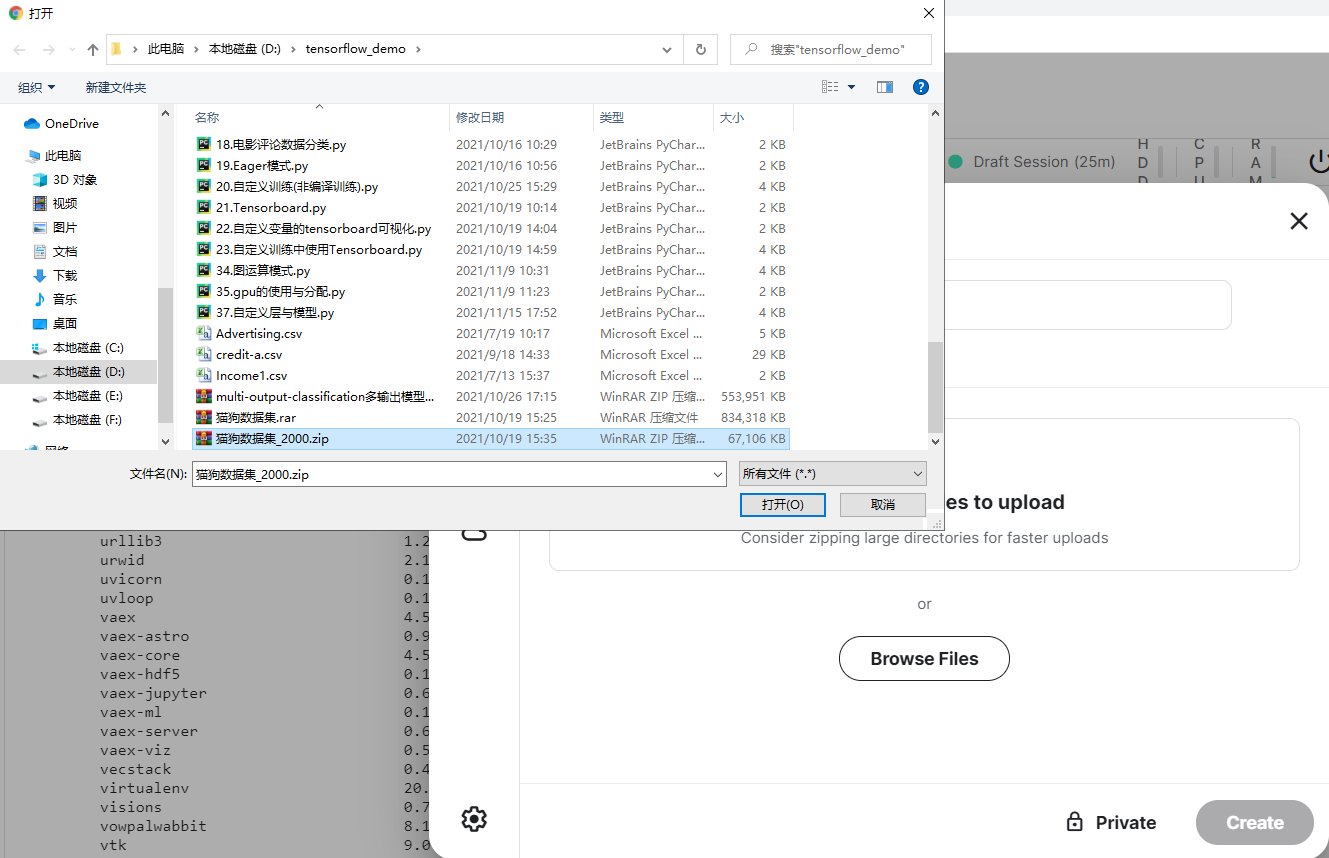
输出数据集名称,然后点击Brose Files
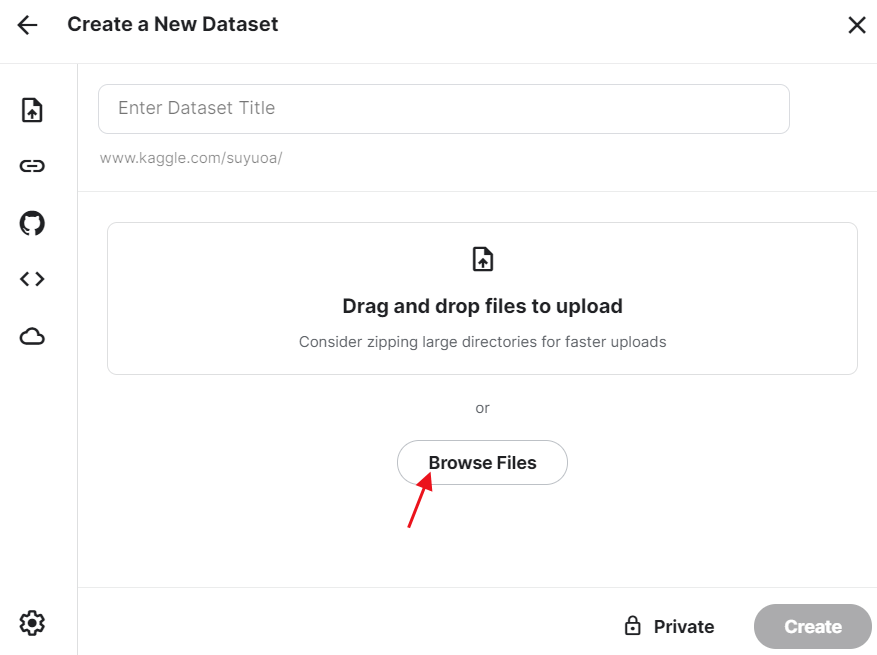
我们可以选择猫狗数据集_2000.zip然后选择打开
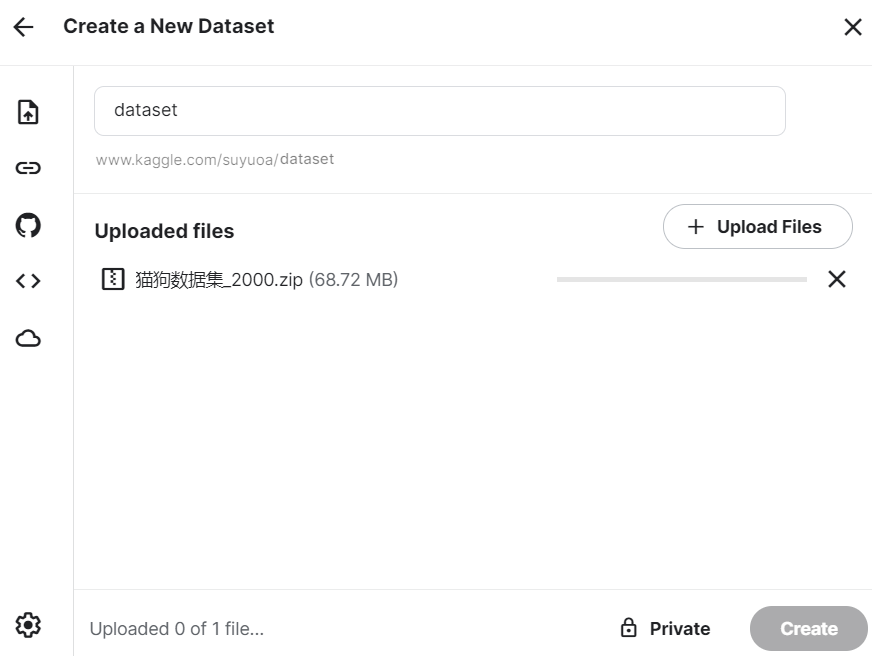
之后我们等待传输就可以了,上传完毕之后点击create就可以了
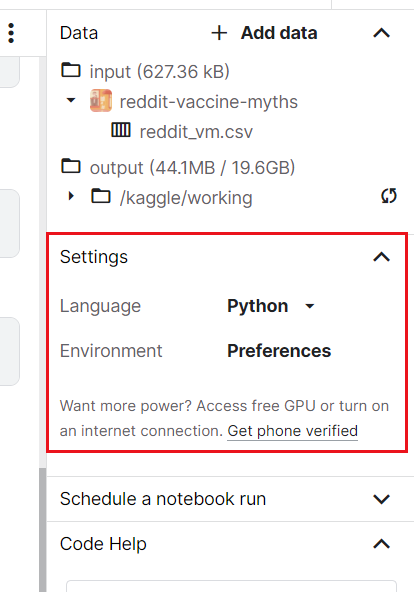
6 使用GPU或连接网络(使用requests库等)
这个时候我们需要使用这里的Settings,然后点击Get phone verified
点击后,进入该界面,选择+86,输出手机号码。
[En]
After clicking, we go to this interface, then select + 86, and then output the mobile phone number.
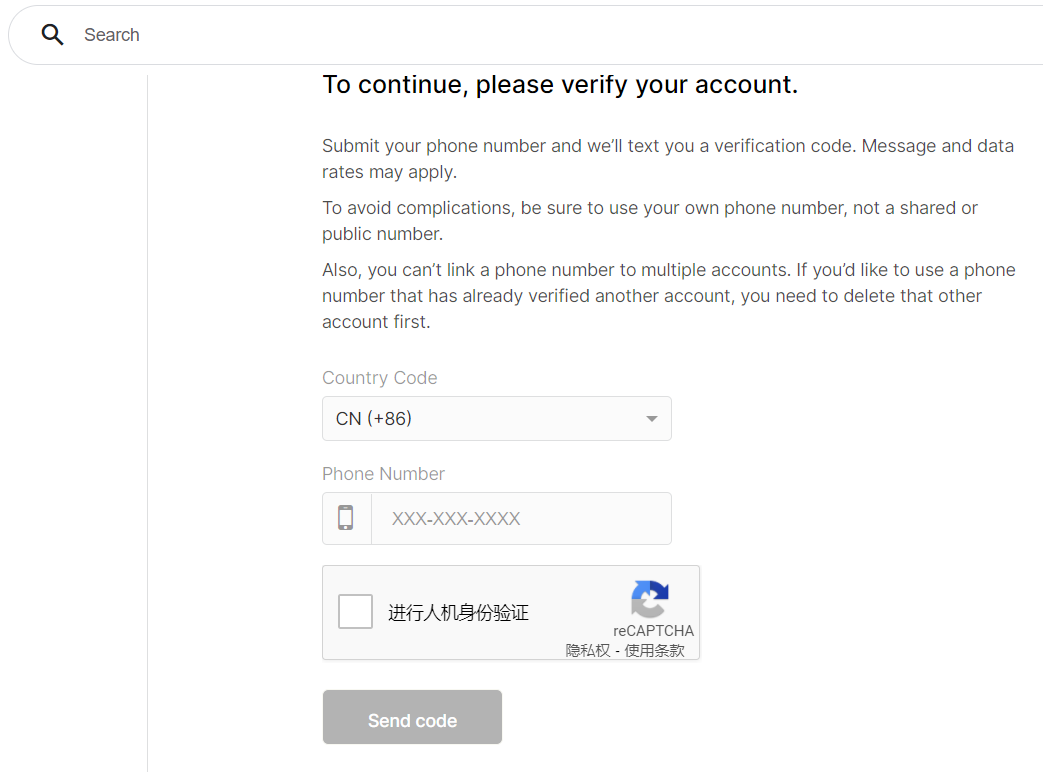
进行人机验证后点击send code,进入下面这个界面
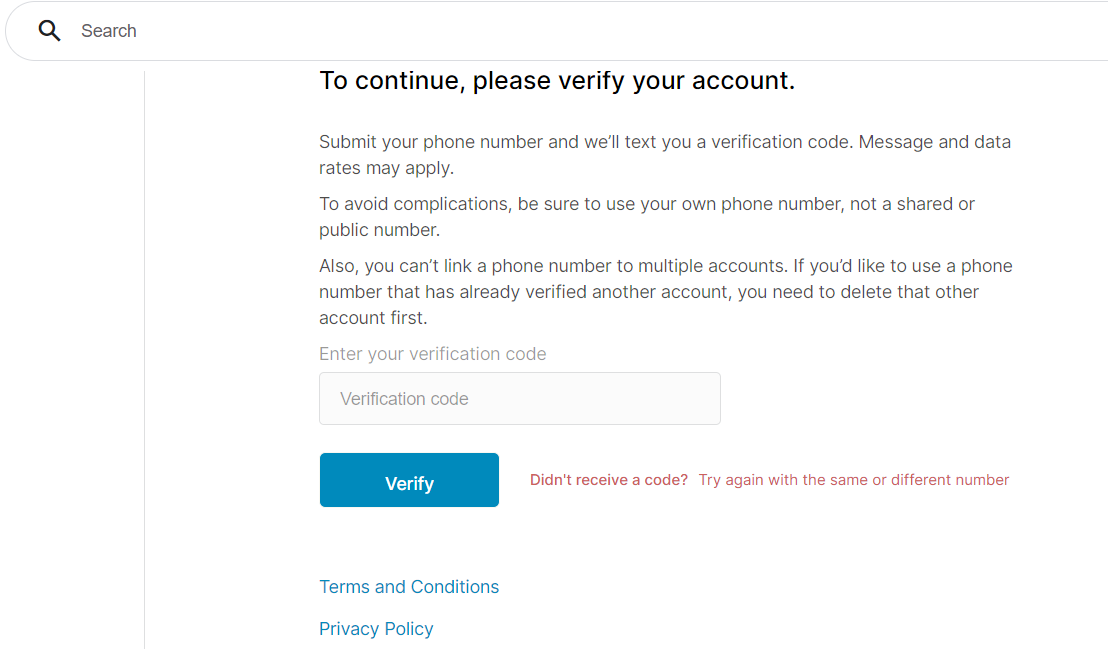
输入验证码后点击verify,之后我们的settings会变成这样
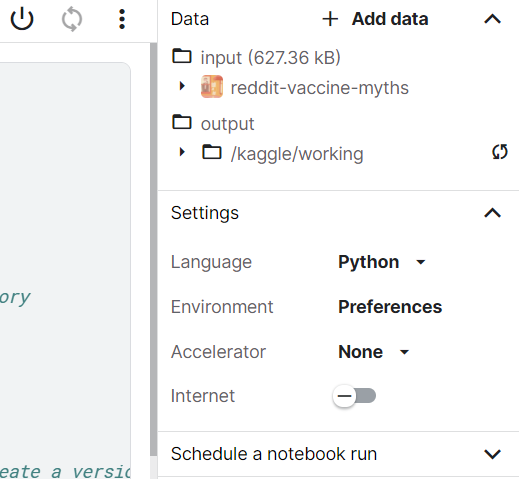
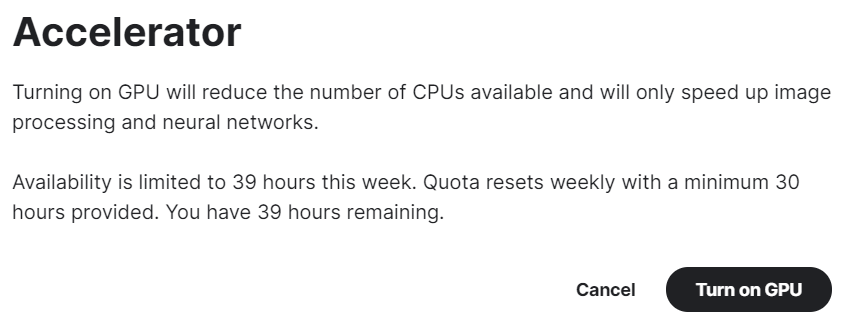
我们可以把Internet开启,然后在Accelerator中选择GPU
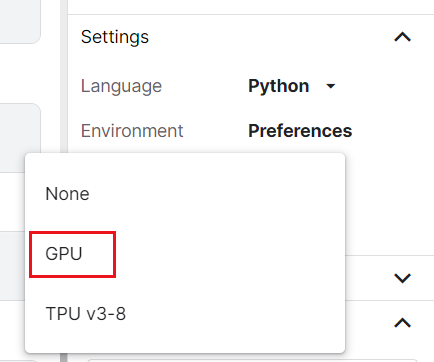
点击后弹出提示,每一周都有固定的免费GPU使用时长,我们在这里点击Turn on GPU
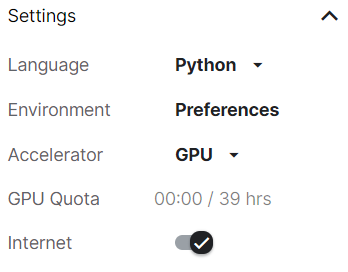
在settings中我们可以看到GPU的时长
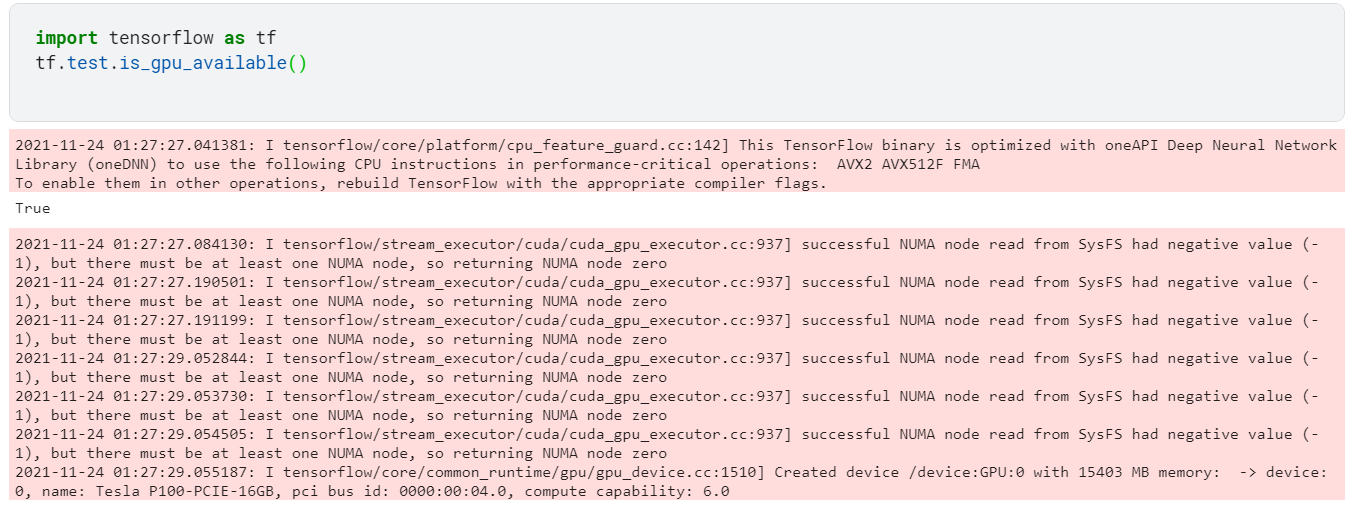
我们使用code验证一下是否使用了gpu
Internet这个选项在我们下载预训练模型,或者内置数据集中需要用到,这个没有时长限制,我们开着就行
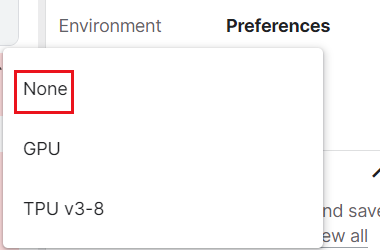
GPU的使用时间是无论你代码是否使用GPU,它都会计算时长,所以我们这个GPU如果长时间不用我们需要给它关上,关闭的时候在Accelerator中选择None就可以了
Original: https://blog.csdn.net/potato123232/article/details/121508743
Author: Suyuoa
Title: 附录-kaggle的使用
原创文章受到原创版权保护。转载请注明出处:https://www.johngo689.com/509342/
转载文章受原作者版权保护。转载请注明原作者出处!