

参考:《Mysql高可用实践》——清华大学出版社2020年6月
环境:CentOS Linux release 7.7.1908 (Core)
Mysql:8.0.27
MHA:0.58
说明:本MHA集群搭建从部署mysql开始,不适合于已有mysql集群进行改造的项目,改造项目可参考《Mysql高可用实践》
部署前准备:
mysql-8.0.27下载地址:https://cdn.mysql.com//Downloads/MySQL-8.0/mysql-8.0.27-1.el7.x86_64.rpm-bundle.tar
mha-manager下载地址:https://github.com/yoshinorim/mha4mysql-manager/releases/download/v0.58/mha4mysql-manager-0.58-0.el7.centos.noarch.rpm
mha-node下载地址:https://github.com/yoshinorim/mha4mysql-node/releases/download/v0.58/mha4mysql-node-0.58-0.el7.centos.noarch.rpm
部署架构:


基本配置
4个节点逐台配置hostname和/etc/hosts文件

安装mysql8
4个节点均创建/data目录,将mysql-8.0.27-1.el7.x86_64.rpm-bundle.tar上传到/data目录下,进行解压安装
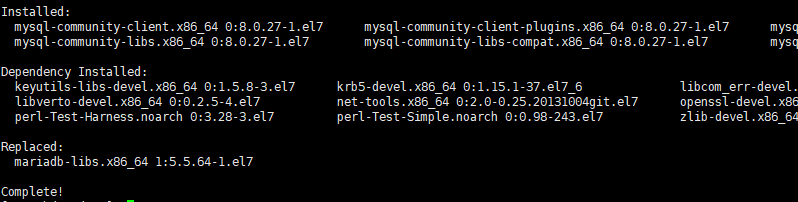
我这里使用操作系统镜像制作了本地yum源,用来解决依赖问题,命令见下图

当您看到以下内容时,说明安装已完成
[En]
When you see the following, the installation is complete
配置Mysql异步复制集群
启动hdp2、hdp3、hdp4上的mysql服务,并配置开机自启
bash;gutter:true;
systemctl enable mysqld --now</p>
<pre><code>
连接3个节点的mysql数据库,数据库默认root密码通过查看日志获取
;gutter:true;
cat /var/log/mysqld.log |grep password
…… [Server] A temporary password is generated for root@localhost: euBcRQk+3tpa
3个节点数据库修改root用户密码,命令及sql如下
bash;gutter:true;
[root@hdp2 data]# mysql -uroot -p
Enter password:
Welcome to the MySQL monitor.  Commands end with ; or \g.</p>
<p>Your MySQL connection id is 20
Server version: 8.0.27</p>
<p>Copyright (c) 2000, 2021, Oracle and/or its affiliates.</p>
<p>Oracle is a registered trademark of Oracle Corporation and/or its
affiliates. Other names may be trademarks of their respective
owners.</p>
<p>Type 'help;' or '\h' for help. Type '\c' to clear the current input statement.</p>
<p>mysql> alter user 'root'@'localhost' identified by '1qaz@WSX123';
Query OK, 0 rows affected (0.01 sec)</p>
<p>mysql> flush privileges;
Query OK, 0 rows affected (0.01 sec)</p>
<p>mysql> exit;
Bye</p>
<pre><code>
3个节点配置数据库server_id,以root用户登录mysql进行临时配置,然后将server_id配置在/etc/my.cnf中,防止重启后失效
;gutter:true;
hdp2
mysql> set global server_id=1;
hdp3
mysql> set global server_id=2;
hdp4
mysql> set global server_id=3;
hdp2
]# echo "server_id=1" >> /etc/my.cnf
hdp3
]# echo "server_id=2" >> /etc/my.cnf
hdp4
]# echo "server_id=3" >> /etc/my.cnf
查看主库hdp2的二进制日志信息
bash;gutter:true;
[root@hdp2 data]# mysql -uroot -p
Enter password:
Welcome to the MySQL monitor.  Commands end with ; or \g.</p>
<p>Your MySQL connection id is 23
Server version: 8.0.27 MySQL Community Server - GPL</p>
<p>Copyright (c) 2000, 2021, Oracle and/or its affiliates.</p>
<p>Oracle is a registered trademark of Oracle Corporation and/or its
affiliates. Other names may be trademarks of their respective
owners.</p>
<p>Type 'help;' or '\h' for help. Type '\c' to clear the current input statement.</p>
<p>mysql> show master status;
+---------------+----------+--------------+------------------+-------------------+
| File          | Position | Binlog_Do_DB | Binlog_Ignore_DB | Executed_Gtid_Set |
+---------------+----------+--------------+------------------+-------------------+
| binlog.000003 |      642 |              |                  |                   |
+---------------+----------+--------------+------------------+-------------------+
1 row in set (0.00 sec)</p>
<p>mysql></p>
<pre><code>
在主库hdp2上建立复制专用用户,并授权
;gutter:true;
mysql> create user ‘repl’@’%’ identified with mysql_native_password by ‘1qaz@WSX123’;
Query OK, 0 rows affected (0.01 sec)
mysql> grant replication client,replication slave on *.* to ‘repl’@’%’;
Query OK, 0 rows affected (0.01 sec)
mysql>
在从库hdp3和hdp4上创建主库信息
bash;gutter:true;
mysql> change master to
    -> master_host='192.168.244.151',
    ->  master_port=3306,
    -> master_user='repl',
    -> master_password='1qaz@WSX123',
    -> master_log_file='binlog.000003',               #主库状态显示的File
    -> master_log_pos=642;                            #主库状态显示的Position
Query OK, 0 rows affected, 9 warnings (0.02 sec)</p>
<p>mysql></p>
<pre><code>
从库中启动复制并查看从属库的状态<details><summary>*<font color='gray'>[En]</font>*</summary>*<font color='gray'>Start replication from the library and view the status of the slave library</font>*</details>
;gutter:true;
mysql> start slave;
Query OK, 0 rows affected, 1 warning (0.01 sec)
mysql> show slave status\G
*************************** 1. row ***************************
Slave_IO_State: Waiting for source to send event
Master_Host: 192.168.244.151
Master_User: repl
Master_Port: 3306
Connect_Retry: 60
Master_Log_File: binlog.000003
Read_Master_Log_Pos: 1165
Relay_Log_File: hdp3-relay-bin.000002
Relay_Log_Pos: 844
Relay_Master_Log_File: binlog.000003
Slave_IO_Running: Yes
Slave_SQL_Running: Yes
Replicate_Do_DB:
Replicate_Ignore_DB:
Replicate_Do_Table:
Replicate_Ignore_Table:
Replicate_Wild_Do_Table:
Replicate_Wild_Ignore_Table:
Last_Errno: 0
Last_Error:
Skip_Counter: 0
Exec_Master_Log_Pos: 1165
Relay_Log_Space: 1052
Until_Condition: None
Until_Log_File:
Until_Log_Pos: 0
Master_SSL_Allowed: No
Master_SSL_CA_File:
Master_SSL_CA_Path:
Master_SSL_Cert:
Master_SSL_Cipher:
Master_SSL_Key:
Seconds_Behind_Master: 0
Master_SSL_Verify_Server_Cert: No
Last_IO_Errno: 0
Last_IO_Error:
Last_SQL_Errno: 0
Last_SQL_Error:
Replicate_Ignore_Server_Ids:
Master_Server_Id: 1
Master_UUID: 7096d4eb-7378-11ec-8ec4-000c29f7d066
Master_Info_File: mysql.slave_master_info
SQL_Delay: 0
SQL_Remaining_Delay: NULL
Slave_SQL_Running_State: Replica has read all relay log; waiting for more updates
Master_Retry_Count: 86400
Master_Bind:
Last_IO_Error_Timestamp:
Last_SQL_Error_Timestamp:
Master_SSL_Crl:
Master_SSL_Crlpath:
Retrieved_Gtid_Set:
Executed_Gtid_Set:
Auto_Position: 0
Replicate_Rewrite_DB:
Channel_Name:
Master_TLS_Version:
Master_public_key_path:
Get_master_public_key: 0
Network_Namespace:
1 row in set, 1 warning (0.00 sec)
mysql>
配置Mysql半同步复制
在主库加载插件semisync_master.so,从库加载插件semisync_slave.so
bash;gutter:true;
hda2
mysql> install plugin rpl_semi_sync_master soname 'semisync_master.so';
Query OK, 0 rows affected, 1 warning (0.01 sec)
hda3
mysql> install plugin rpl_semi_sync_slave soname 'semisync_slave.so';
Query OK, 0 rows affected, 1 warning (0.01 sec)
hda4
mysql> install plugin rpl_semi_sync_slave soname 'semisync_slave.so';
Query OK, 0 rows affected, 1 warning (0.01 sec)</p>
<pre><code>
启用半同步复制
;gutter:true;
hdp2
mysql> set global rpl_semi_sync_master_enabled=1;
Query OK, 0 rows affected (0.00 sec)
hdp3
mysql> set global rpl_semi_sync_slave_enabled=1;
Query OK, 0 rows affected (0.00 sec)
hdp4
mysql> set global rpl_semi_sync_slave_enabled=1;
Query OK, 0 rows affected (0.00 sec)
将半同步插件配置持久化到配置文件
[En]
Persist the semi-synchronous plug-in configuration to the configuration file
bash;gutter:true;
hda2
]# echo -e "plugin-load=\"rpl_semi_sync_master=semisync_master.so;rpl_semi_sync_slave=semisync_slave.so\"\nrpl-semi-sync-master-enabled=1\nrpl-semi-sync-slave-enabled=1" >> /etc/my.cnf
hda3
]# echo -e "plugin-load=\"rpl_semi_sync_master=semisync_master.so;rpl_semi_sync_slave=semisync_slave.so\"\nrpl-semi-sync-master-enabled=1\nrpl-semi-sync-slave-enabled=1" >> /etc/my.cnf
hda4
]# echo -e "plugin-load=\"rpl_semi_sync_master=semisync_master.so;rpl_semi_sync_slave=semisync_slave.so\"\nrpl-semi-sync-master-enabled=1\nrpl-semi-sync-slave-enabled=1" >> /etc/my.cnf</p>
<pre><code>
重启从库上的IO线程,否则仍然为异步复制模式,查询状态及重启命令如下
;gutter:true;
hdp3
mysql> show status like ‘Rpl_semi_sync_slave_status’;
+—————————-+——-+
| Variable_name | Value |
+—————————-+——-+
| Rpl_semi_sync_slave_status | OFF |
+—————————-+——-+
1 row in set (0.01 sec)
mysql> stop slave io_thread;
Query OK, 0 rows affected, 1 warning (0.00 sec)
mysql> start slave io_thread;
Query OK, 0 rows affected, 1 warning (0.00 sec)
mysql> show status like ‘Rpl_semi_sync_slave_status’;
+—————————-+——-+
| Variable_name | Value |
+—————————-+——-+
| Rpl_semi_sync_slave_status | ON |
+—————————-+——-+
1 row in set (0.00 sec)
mysql>
hdp4
mysql> show status like ‘Rpl_semi_sync_slave_status’;
+—————————-+——-+
| Variable_name | Value |
+—————————-+——-+
| Rpl_semi_sync_slave_status | OFF |
+—————————-+——-+
1 row in set (0.01 sec)
mysql> stop slave io_thread;
Query OK, 0 rows affected, 1 warning (0.00 sec)
mysql> start slave io_thread;
Query OK, 0 rows affected, 1 warning (0.00 sec)
mysql> show status like ‘Rpl_semi_sync_slave_status’;
+—————————-+——-+
| Variable_name | Value |
+—————————-+——-+
| Rpl_semi_sync_slave_status | ON |
+—————————-+——-+
1 row in set (0.00 sec)
mysql>
查询主库的半同步复制是否正在运行
[En]
Query whether the semi-synchronous replication of the main database is running
bash;gutter:true;
hdp2
mysql> show status like 'Rpl_semi_sync_master_status';
+-----------------------------+-------+
| Variable_name | Value |
+-----------------------------+-------+
| Rpl_semi_sync_master_status | ON |
+-----------------------------+-------+
1 row in set (0.00 sec)</p>
<p>mysql></p>
<pre><code>
**部署MHA相关组件**
环境说明

组件:
mha-manager:部署在hdp1
mha-node:部署在hdp2、hdp3、hdp4
4个节点安装perl相关依赖
下载epel源
;gutter:true;
wget -O /etc/yum.repos.d/epel-7.repo http://mirrors.aliyun.com/repo/epel-7.repo
安装perl-DBD-MySQL、perl-Log-DIspatch、perl-Parallel-ForkManager、perl-Time-HiRes
bash;gutter:true;
yum -y install perl-DBD-MySQL perl-Log-DIspatch perl-Parallel-ForkManager perl-Time-HiRes
安装perl-Config-Tiny,下载地址:http://mirror.centos.org/altarch/7/os/aarch64/Packages/perl-Config-Tiny-2.14-7.el7.noarch.rpm
`bash;gutter:true;
]# yum -y install http://mirror.centos.org/altarch/7/os/aarch64/Packages/perl-Config-Tiny-2.14-7.el7.noarch.rpm
Loaded plugins: fastestmirror
perl-Config-Tiny-2.14-7.el7.noarch.rpm | 25 kB 00:00:00
Examining /var/tmp/yum-root-Zu9UoE/perl-Config-Tiny-2.14-7.el7.noarch.rpm: perl-Config-Tiny-2.14-7.el7.noarch
Marking /var/tmp/yum-root-Zu9UoE/perl-Config-Tiny-2.14-7.el7.noarch.rpm to be installed
Resolving Dependencies
–> Running transaction check
Original: https://www.cnblogs.com/sunnytomorrow/p/15794946.html
Author: NorthFeng
Title: 记一次部署系列:Mysql高可用之MHA
原创文章受到原创版权保护。转载请注明出处:https://www.johngo689.com/507776/
转载文章受原作者版权保护。转载请注明原作者出处!