

使用Yolo v5进行目标检测并训练自己的VOC格式数据集
- 一、前提准备
- 二、下载代码及配置环境
- 三、下载预训练模型
- 四、预测
- 五、训练
* - 5.1、在data文件夹下新建make_txt.py
- 5.2、在data文件夹创建 voc_label.py 文件,代码如下:
- 5.3、修改配置文件mytrain.yaml
- 5.4、开始训练
- 使用tensorboard可视化结果
- 六、可能遇到的问题
* - 问题1:CUDA out of memory
一、前提准备
- 源码下载
https://github.com/ultralytics/yolov5 - YOLOv5 文档:
https://docs.ultralytics.com/ - yolo v5原理:
深入浅出Yolo系列之Yolov5核心基础知识完整讲解
官方操作指南:
https://github.com/ultralytics/yolov5/blob/master/tutorial.ipynb
二、下载代码及配置环境
linux可以使用下面命令进行环境配置,当然如果是windows下,直接下载压缩包,解压即可。
git clone https://github.com/ultralytics/yolov5
cd yolov5
pip install -qr requirements.txt
其中 requirements.txt 中包含了必要的配置环境:
基本如下:
python>=3.6
torch>=1.7.0
如果你有英伟达的显卡,可以安装GPU版本的Pytorch,参考:
pytorch安装及卸载
测试环境是否配置成功:
import torch
from IPython.display import Image, clear_output

print(torch.__version__)
print(torch.cuda.is_available())
clear_output()
print(f"Setup complete. Using torch {torch.__version__} ({torch.cuda.get_device_properties(0).name if torch.cuda.is_available() else 'CPU'})")
三、下载预训练模型
到yolo官方github下载四个版本的模型,模型下载,
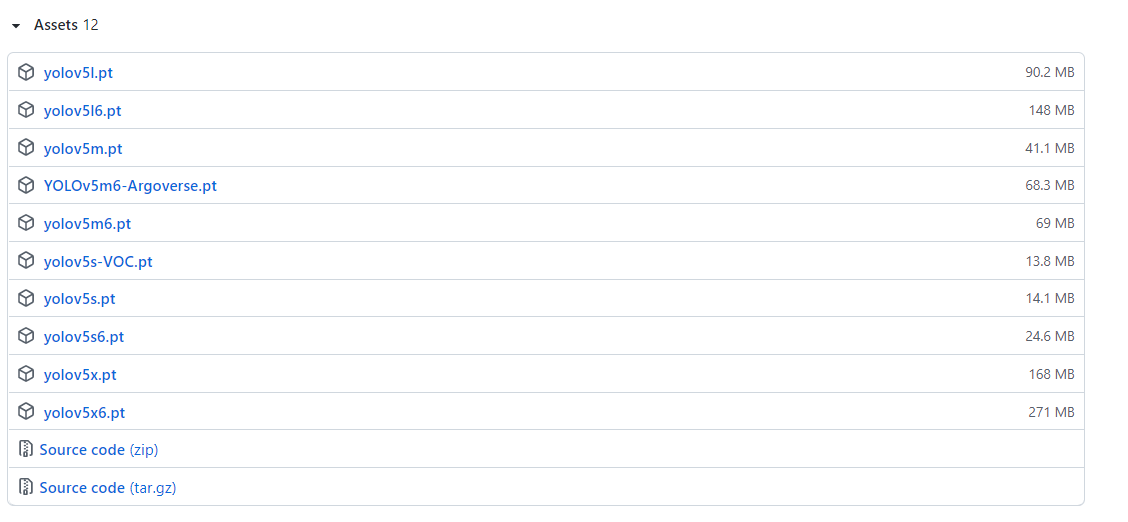

将模型下载到与detect.py同目录下。
; 四、预测
yolo v5官方检测类别
['person', 'bicycle', 'car', 'motorcycle', 'airplane', 'bus', 'train', 'truck',
'boat', 'traffic light', 'fire hydrant', 'stop sign', 'parking meter', 'bench',
'bird', 'cat', 'dog', 'horse', 'sheep', 'cow', 'elephant', 'bear', 'zebra','giraffe',
'backpack', 'umbrella', 'handbag', 'tie', 'suitcase', 'frisbee', 'skis', 'snowboard',
'sports ball', 'kite', 'baseball bat', 'baseball glove', 'skateboard', 'surfboard',
'tennis racket', 'bottle', 'wine glass', 'cup', 'fork', 'knife', 'spoon', 'bowl',
'banana', 'apple', 'sandwich', 'orange', 'broccoli','carrot', 'hot dog', 'pizza',
'donut', 'cake', 'chair', 'couch', 'potted plant', 'bed', 'dining table', 'toilet',
'tv', 'laptop', 'mouse', 'remote', 'keyboard', 'cell phone', 'microwave', 'oven',
'toaster', 'sink', 'refrigerator', 'book', 'clock', 'vase', 'scissors', 'teddy bear',
'hair drier', 'toothbrush']
摄像头实时检测
python detect.py --source 0 --weights weights/yolov5s.pt
检测单张图片
python detect.py --source file.jpg
检测本地视频
python detect.py --source file.mp4
其他检测
 python detect.py --source   path/
 python detect.py --source   path/*.jpg
 python detect.py --source   'https://youtu.be/NUsoVlDFqZg'
 python detect.py --source   'rtsp://example.com/media.mp4'
指定某个模型
python detect.py --weights yolov5s.pt
                           yolov5m.pt
                           yolov5l.pt
                           yolov5x.pt
五、训练
数据集准备
参考:https://blog.csdn.net/weixin_44145782/article/details/113983421
数据集可以放置到任意位置都行。但是要有一定的格式,即images下是图像,labels是yolo格式的标签
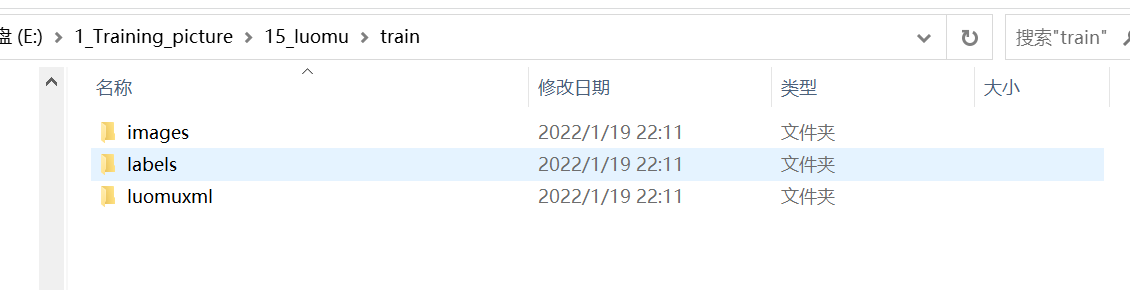
如果不按照上面要求,就会出现下面错误。
AssertionError: train: No labels in data\train.cache. Can not train without
; 5.1、在data文件夹下新建make_txt.py
注意修改xml文件存放地址
'''
*******************************************************************************
函数名称: ReadImage
描    述: yolov5训练,数据集的准备,从voc数据集xml文件,分为预测训练验证
作    者:狄云
编写时间:2022.01.19
*******************************************************************************/
'''

import os
import random
trainval_percent = 0.1
train_percent = 0.9

xmlfilepath = 'E:/1_Training_picture/15_luomu/train/luomuxml'

if not os.path.exists('ImageSets/'):
    os.makedirs('ImageSets/')

total_xml = os.listdir(xmlfilepath)
num = len(total_xml)
list = range(num)
tv = int(num * trainval_percent)
tr = int(tv * train_percent)
trainval = random.sample(list, tv)
train = random.sample(trainval, tr)
ftrainval = open('ImageSets/trainval.txt', 'w')
ftest = open('ImageSets/test.txt', 'w')
ftrain = open('ImageSets/train.txt', 'w')
fval = open('ImageSets/val.txt', 'w')

for i in list:
    name = total_xml[i][:-4] + '\n'
    if i in trainval:
        ftrainval.write(name)
        if i in train:
            ftest.write(name)
        else:
            fval.write(name)
    else:
        ftrain.write(name)
ftrainval.close()
ftrain.close()
fval.close()
ftest.close()
运行以上代码,可以得到的结果是,在ImageSets中有我们的数据集分类:

5.2、在data文件夹创建 voc_label.py 文件,代码如下:
需要注意的是,sets中改为你的sets的名字(make_txt生成的)
classes修改为你需要检测的类别
import xml.etree.ElementTree as ET
import pickle
import os
from os import listdir, getcwd
from os.path import join

sets = ['train', 'test','val']

Imgpath = 'E:/1_Training_picture/15_luomu/train/images'
xmlfilepath = 'E:/1_Training_picture/15_luomu/train/luomuxml/'
ImageSets_path='ImageSets/'
classes = ['w', 'wu', 'y', 's']

def convert(size, box):
    dw = 1. / size[0]
    dh = 1. / size[1]
    x = (box[0] + box[1]) / 2.0
    y = (box[2] + box[3]) / 2.0
    w = box[1] - box[0]
    h = box[3] - box[2]
    x = x * dw
    w = w * dw
    y = y * dh
    h = h * dh
    return (x, y, w, h)
def convert_annotation(image_id):
    in_file = open(xmlfilepath+'%s.xml' % (image_id))
    out_file = open('labels/%s.txt' % (image_id), 'w')
    tree = ET.parse(in_file)
    root = tree.getroot()
    size = root.find('size')
    w = int(size.find('width').text)
    h = int(size.find('height').text)
    for obj in root.iter('object'):
        difficult = obj.find('difficult').text
        cls = obj.find('name').text
        if cls not in classes or int(difficult) == 1:
            continue
        cls_id = classes.index(cls)
        xmlbox = obj.find('bndbox')
        b = (float(xmlbox.find('xmin').text), float(xmlbox.find('xmax').text), float(xmlbox.find('ymin').text),
             float(xmlbox.find('ymax').text))
        bb = convert((w, h), b)
        out_file.write(str(cls_id) + " " + " ".join([str(a) for a in bb]) + '\n')
wd = getcwd()
print(wd)
for image_set in sets:
    if not os.path.exists('labels/'):
        os.makedirs('labels/')
    image_ids = open(ImageSets_path+'%s.txt' % (image_set)).read().strip().split()
    list_file = open('%s.txt' % (image_set), 'w')
    for image_id in image_ids:
        list_file.write(Imgpath+'/%s.jpg\n' % (image_id))
        convert_annotation(image_id)
    list_file.close()
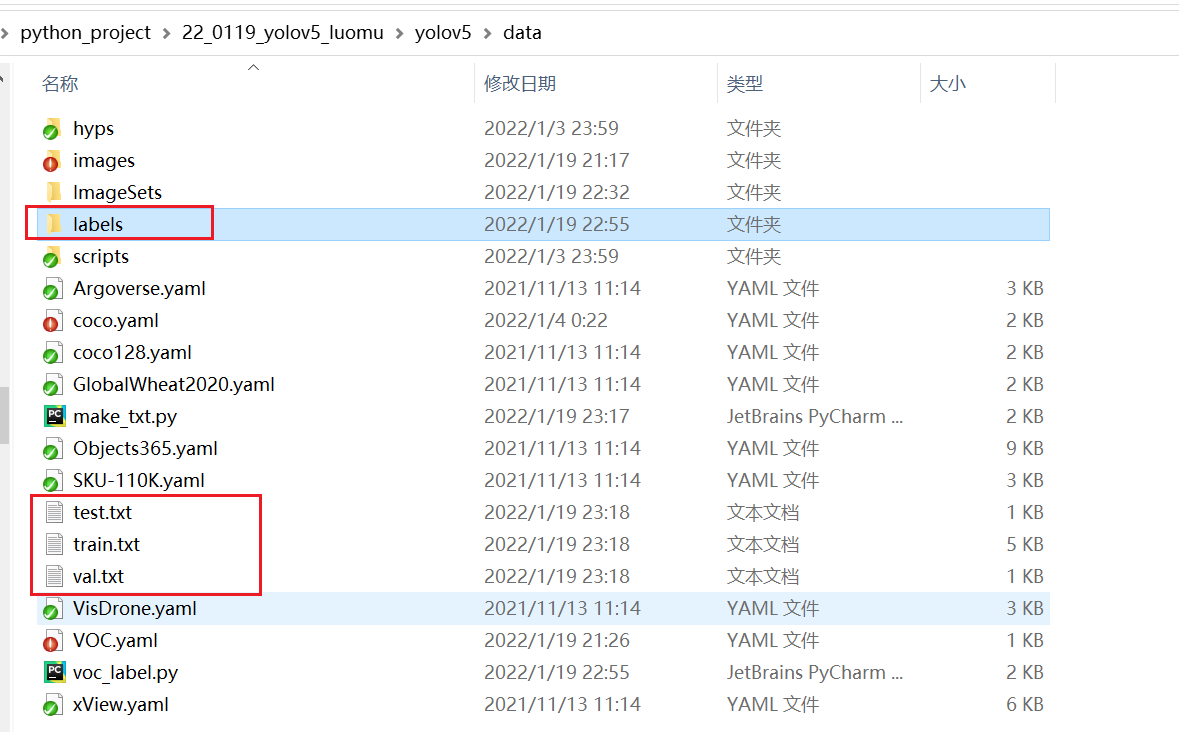
运行以上代码后,可以发现生成了voc格式的标签文件labels(显示数据集的具体标注数据),并且在data文件下出现了train、val、test的txt文件,保存了图片的路径。(带有图片的路径)
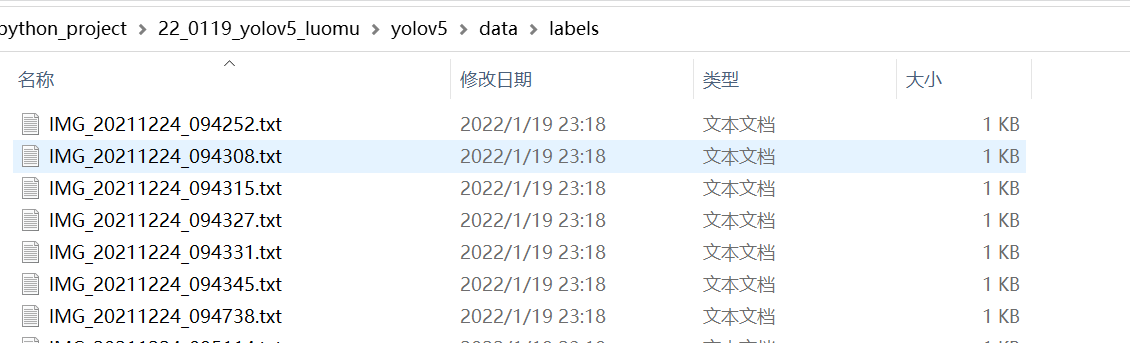

将label复制到图像位置同级目录下即可。
至此,我们的数据集就全部做完啦!!!~~
5.3、修改配置文件mytrain.yaml
修改coco.yaml文件
这里的yaml和以往的cfg文件是差不多的,但需要配置一份属于自己数据集的yaml文件。
复制data目录下的coco.yaml,我这里命名为mytrain.yaml
主要修改三个地方:
train: ./data/train.txt
val: ./data/val.txt
test: ./data/test.txt

nc: 4

names: ['w', 'wu', 'y', 's']
- 修改train,val,test的路径为自己刚刚生成的路径
- nc 里的数字代表数据集的类别,我这里有一类,所以修改为4
- names 里为自己数据集标注的类名称
5.4、开始训练
python train.py --data data/mytrain.yaml --cfg models/yolov5x.yaml --weights weights/yolov5x.pt
数据读取成功

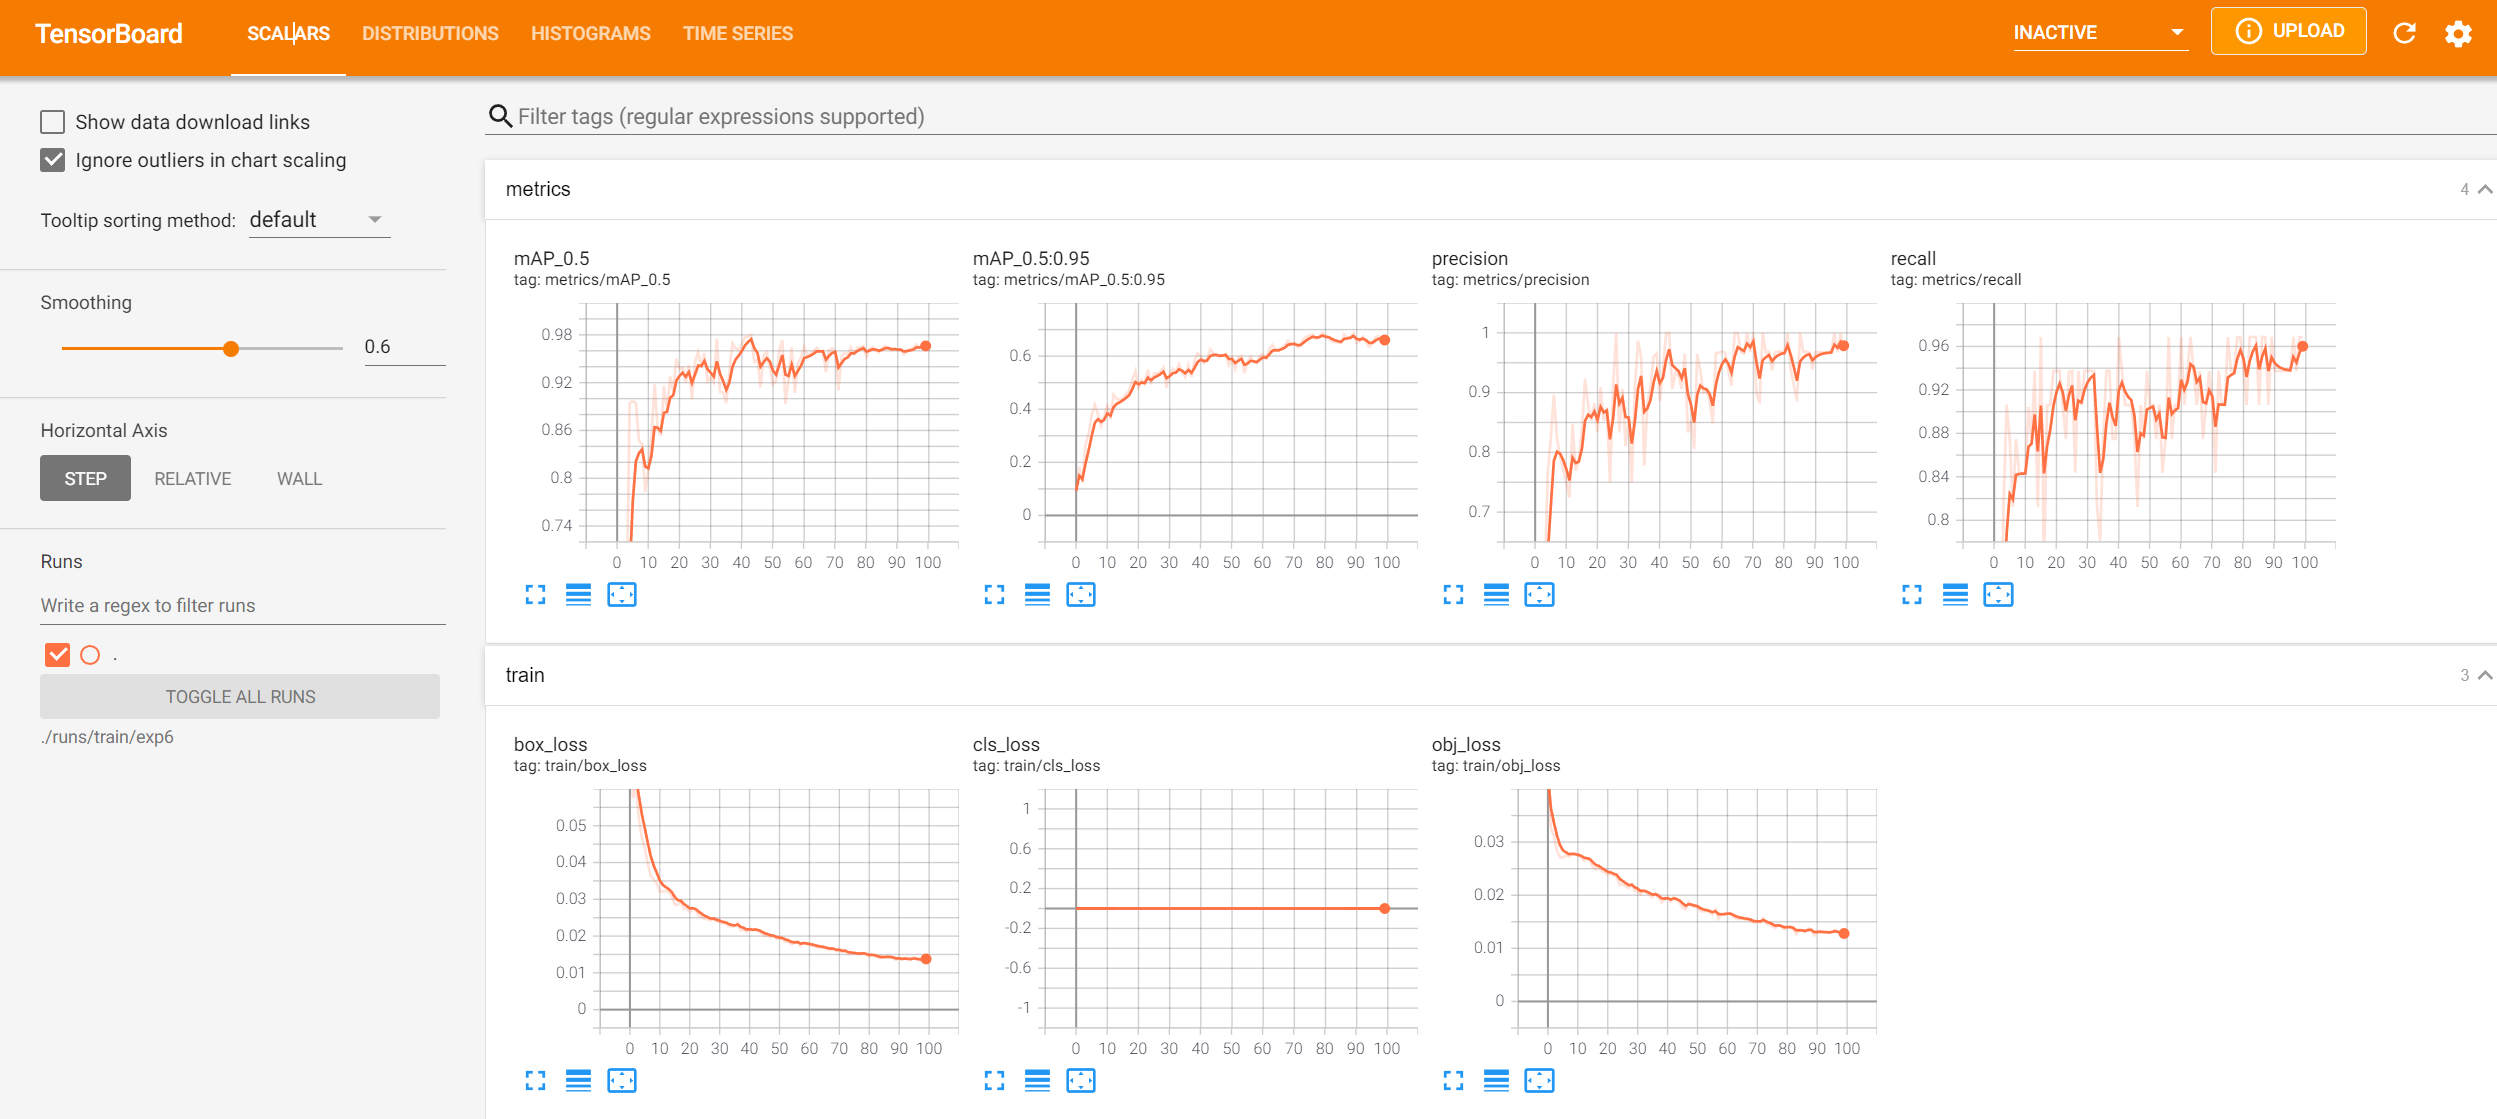
使用tensorboard可视化结果
在yolov5目录下(train.py同目录下),使用:
tensorboard --logdir=./runs/train/exp6
然后把返回的url地址粘贴到浏览器中即可!
一般都是:http://localhost:6006/
我测试显示结果如下:
; 六、可能遇到的问题
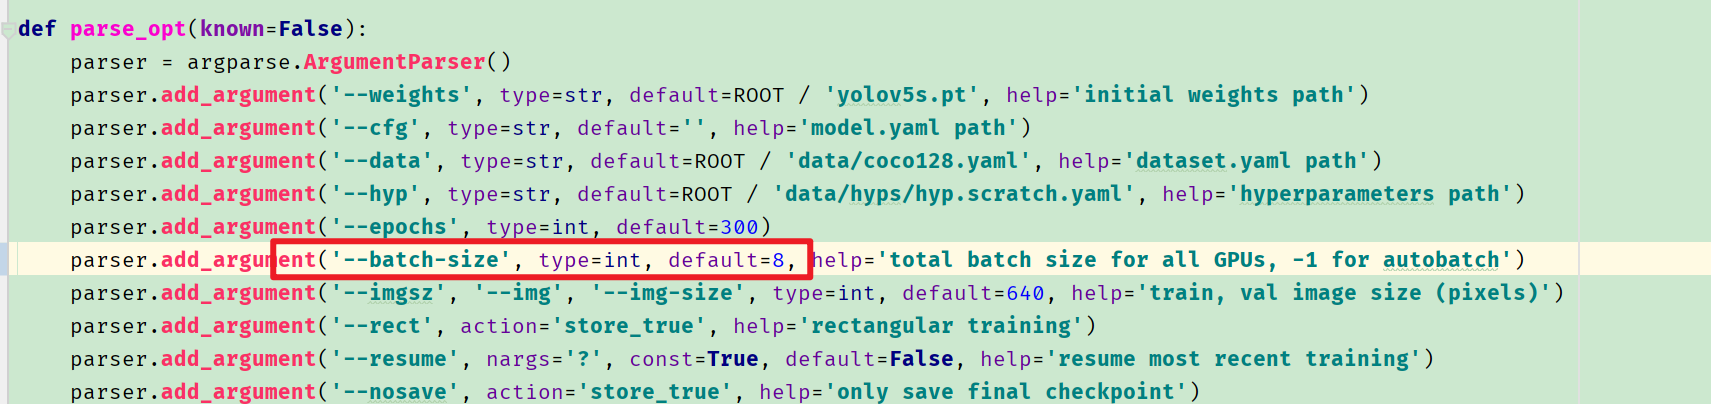
问题1:CUDA out of memory
RuntimeError: CUDA out of memory. Tried to allocate 126.00 MiB (GPU 0; 6.00 GiB total capacity; 3.71 GiB already allocated; 52.99 MiB free; 3.99 GiB reserved in total by PyTorch)
修改batch-size.我从默认16改成了8
Original: https://blog.csdn.net/mao_hui_fei/article/details/119331147
Author: 翟羽嚄
Title: 使用Yolov5进行目标检测并训练自己的VOC格式数据集
原创文章受到原创版权保护。转载请注明出处:https://www.johngo689.com/686528/
转载文章受原作者版权保护。转载请注明原作者出处!