

LNMP是Linux+Nginx+Mysql+PHP所构建的一个动态开发环镜
我这里使用的系统是华为的OpenEnler系统,使用了Nginx1.12版本、Mysql8和PHP7.4
如果有出错的地方可能是作者没做到位,见谅
安装依赖包并安装nginx:
mount /dev/cdrom /mnt/      #挂载镜像
dnf clean all     #清理之前创建的缓存
dnf makecache     #创建新缓存
dnf install nginx -y      #安装nginx
dnf list all | grep nginx     #查看安装的nginx
systemctl start nginx     #启动nginx
systemctl enable nginx      #设置开机自启动
netstat -anlpt | grep nginx     #查看nginx进程是否已启动


firewall-cmd --permanent --add-service=http #防火墙永久放行http
firewall-cmd --reload #刷新规则
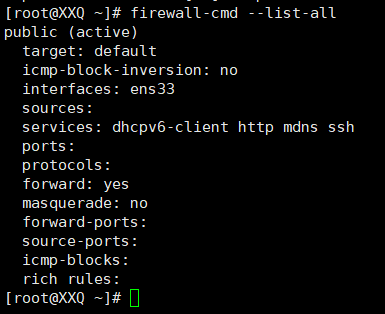
firewall-cmd --list-all #查看防火墙
安装mysql:
wget http://repo.mysql.com/mysql80-community-release-el8-4.noarch.rpm     #下载mysql软件包
rpm -ivh mysql80-community-release-el7-4.noarch.rpm     #安装软件包

dnf clean all
dnf makecache     #创建新缓存
dnf install mysql-community-server -y     #安装mysql-server

chown -R mysql:mysql /var/lib/mysql
systemctl start mysqld      #启动mysql服务
systemctl enable mysqld     #开机自启动

firewall-cmd --permanent --add-port=3306/tcp      #防火墙放行mysql的3306端口
firewall-cmd --reload
firewall-cmd --list-all

grep "password" /var/log/mysqld.log #查看root用户的默认密码
可以看见图片中root@localhost后面的字符就是密码了
使用root用户进入到mysql中
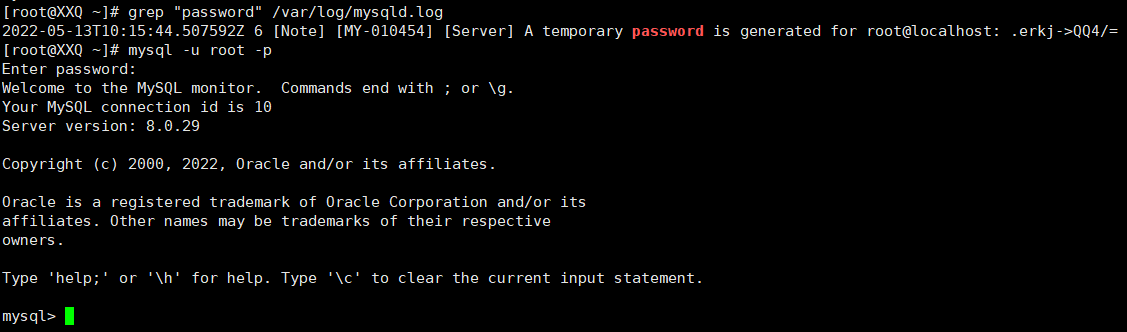
这里进入了之后需要重新设置root用户的密码(mysql是有密码复杂性要求的)

安装PHP:
dnf -y install cmake libxml2 libxml2-devel openssl openssl-devel curl-devel libjpeg-devel libpng-devel freetype-devel libzip libzip-devel libsodium sqlite sqlite-devel oniguruma oniguruma-devel libwebp-devel
cd /usr/local
wget https://www.php.net/distributions/php-7.4.9.tar.gz
tar -xvf php-7.4.9.tar.gz
cd php-7.4.9
./configure --prefix=/usr/local/php7 --with-config-file-path=/usr/local/php7/etc --with-config-file-scan-dir=/usr/local/php7/etc/php.d --enable-mysqlnd --with-mysqli --with-pdo-mysql --enable-fpm --with-fpm-user=nginx --with-fpm-group=nginx --enable-gd --with-iconv --with-zlib --enable-xml --enable-shmop --enable-sysvsem --enable-inline-optimization --enable-mbregex --enable-mbstring --enable-ftp --with-openssl --enable-pcntl --enable-sockets --with-xmlrpc --with-zip --with-jpeg --with-webp --enable-soap --without-pear --with-gettext --enable-session --with-curl --with-freetype --enable-opcache --disable-fileinfo
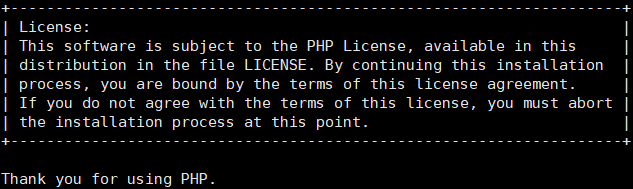
配置安装参数,成功后有下图提示
make && make install      #编译并安装
ln -s /usr/local/php7/bin/php /usr/bin/php      #创建链接

配置php-fpm开机启动
cp php.ini-production /usr/local/php7/etc/php.ini
cd /usr/local/php7/etc/
cp php-fpm.conf.default php-fpm.conf
cp php-fpm.d/www.conf.default php-fpm.d/www.conf
cp /usr/local/php-7.4.9/sapi/fpm/init.d.php-fpm /etc/init.d/php-fpm
chmod +x /etc/init.d/php-fpm
chkconfig --add php-fpm
chkconfig php-fpm on
systemctl start php-fpm
查看php-fpm的状态

为了使nginx能与PHP联动要对nginx的配置文件进行修改、添加内容
vi /etc/nginx/nginx.conf

### 配置文件的原内容

 server {
        listen       80;
        listen       [::]:80;
        server_name  _;
        root         /usr/share/nginx/html;

        # Load configuration files for the default server block.

        include /etc/nginx/default.d/*.conf;

        error_page 404 /404.html;
            location = /40x.html {
        }

        error_page 500 502 503 504 /50x.html;
            location = /50x.html {
        }
    }

### 修改并添加代码后的文件内容

    server {
        listen       80;
        listen       [::]:80;
        server_name  192.168.28.11;
        root         /usr/share/nginx/html;

        # Load configuration files for the default server block.

        include /etc/nginx/default.d/*.conf;

    location / {
        index index.php index.html index.htm;
    }

        error_page 404 /404.html;
            location = /40x.html {
        }

        error_page 500 502 503 504 /50x.html;
            location = /50x.html {
        }

    location ~ \.php$ {
        fastcgi_pass 127.0.0.1:9000;
        fastcgi_index index.php;
        fastcgi_param SCRIPT_FILENAME $document_root$fastcgi_script_name;
        include     fastcgi_params;
    }

:wq

nginx -t        #检查配置文件是否有误,无误重启nginx
systemctl restart nginx

为了试验能不能联动,在nginx的html目录中添加info.php文件
vi /usr/share/nginx/html/info.php

#文件添加以下内容

<?php

        phpinfo();

:wq
</code>
然后在你的浏览器上输入 http://ip地址/info.php
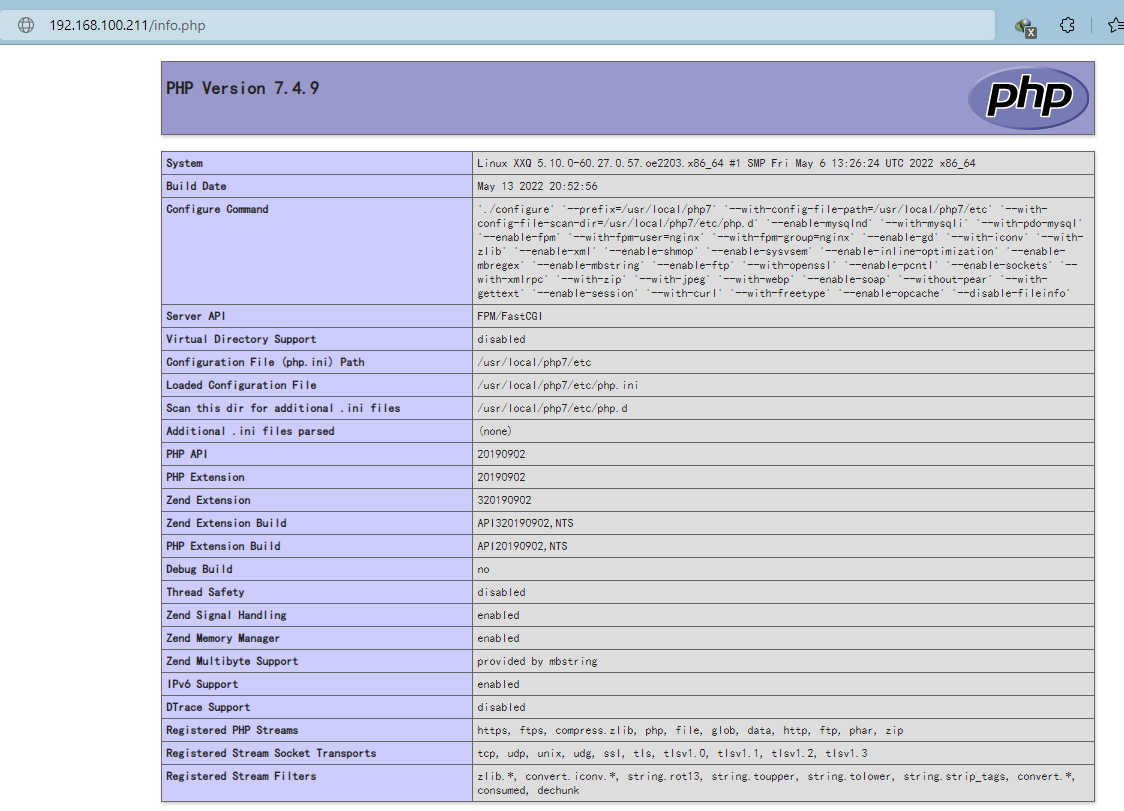
那么LNMP已经是成功部署了,可以开始搭建自己喜欢的网站
Original: https://www.cnblogs.com/Alexing/p/16359475.html
Author: 一头大笨向
Title: 华为OpenEnler Linux系统部署LNMP
原创文章受到原创版权保护。转载请注明出处:https://www.johngo689.com/644129/
转载文章受原作者版权保护。转载请注明原作者出处!