

镜像下载、域名解析、时间同步请点击阿里云开源镜像站
前言
这里说一下为什么要在Windows子系统下安装桌面版Ubuntu,可能有人会问虚拟机不香吗,双系统不香吗?折腾双系统一不留神就把原来的环境的搞崩了,安装虚拟机的话可能又会因为电脑硬件限制导致虚拟机非常卡顿无法正常使用,所以这里是只针对不想经历上面两种痛苦的另外一种方法。
一、在Windows上安装Linux子系统
前提条件
1.windows机器需要支持虚拟化,并且需要在BIOS中开启虚拟化技术,因为WSL2基于hyper-V。
查看是否开启虚拟化
按住Windows+R输入cmd打开命令行,输入
systeminfo
您可以看到以下文字,这意味着计算机已支持虚拟化,可以继续安装
[En]
You can see the following words, which means that the computer has supported virtualization and can continue to install
Hyper-V 要求:     虚拟机监视器模式扩展: 是
                  固件中已启用虚拟化: 是
                  二级地址转换: 是
                  数据执行保护可用: 是
2.无论是Windows10还是Windows11,所使用的Windows是最新版的,如果不是最新版,请在设置-Windows更新中将系统更新到最新版本。
安装步骤
- 开启开发者模式
在设置中搜索”开发者设置”并打开;


打开开发人员模式并单击是,这一次您将成功打开开发人员模式。
[En]
Open developer mode and click Yes, and this time you will successfully open developer mode.

- 开启”适用于Linux的Windows子系统”
找到控制面板-程序和功能-启用或关闭Windows功能,选中”适用于Linux的Windows子系统”,然后点击确定

您可以看到,计算机的反应如下所示,并且正在处理更改。
[En]
You can see that the computer reacts as follows and is working on the changes.


此时,单击以立即重新启动,并等待计算机重新启动。
[En]
At this point, click to restart immediately and wait for the computer to restart.
- 安装Linux分发版
3.1 升级WSL内核
下载Linux内核更新包,适用于 x64 计算机的 WSL2 Linux 内核更新包;
双击运行刚才下载的更新包,后缀为.msi,出现如下安装界面,点击next进行安装,直到出现安装成功界面。

3.2 启用虚拟机功能
安装 WSL 2 之前,必须启用”虚拟机平台”可选功能。 计算机需要虚拟化功能才能使用此功能。
以管理员身份打开PowerShell并运行:
dism.exe /online /enable-feature /featurename:VirtualMachinePlatform /all /norestart

此时,您需要重新启动计算机并等待计算机重新启动。
[En]
At this point, you need to restart the computer and wait for the computer to restart.
3.3 将 WSL 2 设置为默认版本
打开 PowerShell,然后在安装新的 Linux 发行版时运行以下命令,将 WSL 2 设置为默认版本:
wsl --set-default-version 2

3.4 安装Ubuntu20.04
打开微软商店(Microsoft Store)搜索”Ubuntu”,然后选择Ubuntu20.04 LTS点击安装,直到下载完成为止;

这时我们可以在开始菜单中看到Ubuntu20.04的图标:

双击打开即可看到注册的账号信息,根据个人习惯输入账号名称和密码。
[En]
Double-click to open to see the registered account information, according to personal habits to enter the account name and password.

密码输入完成后可以看到Ubuntu20.04的相关信息,到此为止在Windows子系统下安装Ubuntu20.04完成。

此时可以在此电脑中看到Linux,打开它可以看到Ubuntu的文件,后续与Ubuntu之间的文件操作可以从此处进行。

二、在子系统Ubuntu20.04上安装桌面环境
1. 更换软件源
由于Ubuntu默认的软件源在国外,有时候后可能会造成下载软件卡顿,这里我们更换为国内的阿里云源,其他国内源亦可。
双击打开Ubuntu20.04 LTS图标,在命令行中输入
备份原来的软件源
sudo cp /etc/apt/sources.list /etc/apt/sources.list.bak
编辑软件源
sudo nano /etc/apt/sources.list
将原来的内容替换为
deb http://mirrors.aliyun.com/ubuntu/ focal main restricted universe multiverse
deb-src http://mirrors.aliyun.com/ubuntu/ focal main restricted universe multiverse

deb http://mirrors.aliyun.com/ubuntu/ focal-security main restricted universe multiverse
deb-src http://mirrors.aliyun.com/ubuntu/ focal-security main restricted universe multiverse

deb http://mirrors.aliyun.com/ubuntu/ focal-updates main restricted universe multiverse
deb-src http://mirrors.aliyun.com/ubuntu/ focal-updates main restricted universe multiverse

deb http://mirrors.aliyun.com/ubuntu/ focal-proposed main restricted universe multiverse
deb-src http://mirrors.aliyun.com/ubuntu/ focal-proposed main restricted universe multiverse

deb http://mirrors.aliyun.com/ubuntu/ focal-backports main restricted universe multiverse
deb-src http://mirrors.aliyun.com/ubuntu/ focal-backports main restricted universe multiverse
如下所示,然后按Ctrl + O保存,并按Ctrl + X退出编辑模式。

2. 更新升级软件
在Ubuntu命令行中依次执行如下命令:
更新软件源
sudo apt-get update -y
升级所有软件
sudo apt-get upgrade -y
3. 安装gnome桌面环境
Windows子系统下安装的分发版Ubuntu是默认不带有桌面环境的,为了能够使用桌面环境,我们需要手动安装。桌面环境有xfce4、gnome等,在这里选择最经典的gnome桌面环境,即和Ubuntu官方版本的桌面环境相似。
在Ubuntu命令行中依次执行如下命令:
安装gnome桌面环境
sudo apt-get install ubuntu-desktop
安装相关工具
sudo apt-get install gnome-tweak-tool
4. 安装systemctl
Windows子系统下安装的分发版Ubuntu默认不支持systemctl命令,然而systemctl在原生版Ubuntu中是非常重要的,在这里手动安装。
在Ubuntu命令行中依次执行如下命令:
git clone https://github.com/DamionGans/ubuntu-wsl2-systemd-script.git
cd ubuntu-wsl2-systemd-script/
bash ubuntu-wsl2-systemd-script.sh
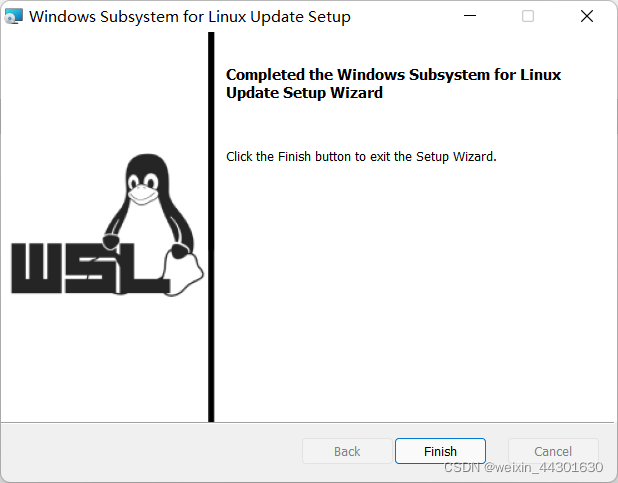
注意:杀毒软件可能会出现警告,需要允许程序的所有操作或先关闭杀毒软件。当您看到下面的图片时,说明安装成功。
[En]
Note: there may be a warning for the antivirus software, which needs to allow all operations of the program or shut down the antivirus software first. The installation is successful when you see the picture below.

这时需要重启WSL服务,以管理员模式打开PowerShell,执行
停止服务
net stop LxssManager
启动服务
net start LxssManager
5. 安装远程控制软件xrdp
我们每次双击打开的Ubuntu20.04 LTS图标都是命令行终端,无法看到桌面环境,所以需要在Ubuntu中安装远程控制软件,然后使用Windows自带的mstsc工具来达到可视化操作Ubuntu的目的。
在Ubuntu命令行中执行安装安装命令:
安装xrdp远程控制服务
sudo apt-get install xrdp
将端口从3389改为3390,因为此前默认的3389端口已保留用于ubuntu shell
sudo sed -i 's/3389/3390/g' /etc/xrdp/xrdp.ini
配置启动session,否则远程桌面登录输入密码之后会直接闪退
echo "gnome-session" > ~/.xsession
重新启动xrdp服务
sudo systemctl restart xrdp
这时可以查看xrdp服务状态
sudo systemctl status xrdp
如图所示,有绿色的running代表服务成功运行。

三、从Windows启动桌面版Ubuntu
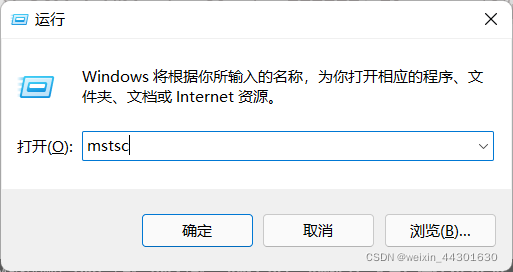
按住Windows+ R,在运行框中输入mstsc后按回车
计算机输入localhost:3390后按回车

注:这里:为英文状态下输入;在这里可以在显示选项里将这个连接另存到桌面,方便以后打开。
选择是

在这里输入你的账户和密码并点击OK

上一步之后可能会出现短黑屏,不要怕!这并不是配置不成功,稍等片刻即可看到下图,显示桌面环境已配置成功,可以正常进入!
[En]
There may be a short black screen after the previous step, don’t be afraid! This is not that the configuration is not successful, you can see the following picture after a short wait, which shows that the desktop environment has been successfully configured and can be entered normally!

本文转自:https://blog.csdn.net/weixin_44301630/article/details/122390018
Original: https://www.cnblogs.com/helong-123/p/16382059.html
Author: 萌褚
Title: 超详细Windows10/Windows11 子系统(WSL2)安装Ubuntu20.04(带桌面环境)
原创文章受到原创版权保护。转载请注明出处:https://www.johngo689.com/523365/
转载文章受原作者版权保护。转载请注明原作者出处!