

目录
- hudi学习相关文档
- hudi源码编译
- Hudi基本使用操作步骤
* - 集成Flink-SQL-Client方式
– - 集成Flink-代码编写方式
– - 集成Hive
– - Hudi实战
* - CDC数据同步
- 离线批量导入
- 全量接增量
- 离线Compaction
- 常见问题汇总
* - mor模式存储一直看不到数据
- 数据有重复
- Merge On Read 写只有 log 文件
- 核心参数设置
* - 临时参数生效
- 去重参数
- 并发参数
- 压缩参数
- 文件大小
- 内存优化
– - 读取模式
– - 限流
hudi学习相关文档
hudi源码编译
第一步:下载Maven并安装且配置Maven镜像
第二步:下载Hudi源码包(要求对应Hadoop版本、Spark版本、Flink版本、Hive版本)
第三步:执行编译命令,完成之后运行hudi-cli脚本,如果可以运行,则说明编译成功
Hadoop3.1.3Hive3.1.2Flink1.13.6,scala-2.12
maven的阿里云加速mirror
<mirror>
  <id>alimavenid>
  <name>aliyun mavenname>
  <url>https://maven.aliyun.com/repository/public/url>
  <mirrorOf>centralmirrorOf>
mirror>
编译Hudi指定Flink和Hadoop和Hive版本信息
可加 –e –X 参数查看编译ERROR异常和DEBUG信息
说明:默认scala2.11、默认不包含hive依赖
mvn clean install -DskipTests-Drat.skip=true -Dflink1.13 -Dscala-2.11 -Dhadoop.version=3.1.3 -Pflink-bundle-shade-hive3
Hudi基本使用操作步骤
集成Flink-SQL-Client方式
环境准备
引入Hudi依赖
hudi-flink-bundle.jar是flink用来写入和读取数据
hudi-mr-bundle.jar 是hive需要用来读hudi数据
将hudi相关jar包添加入Flink的lib目录下即可


根据官网的说明,修改conf下的配置为文件 flink-conf.yaml。给TaskManager分配Slots>=4

配置之后启动FLINK集群,有yarn-session模式和local模式
yarn-session模式
export HADOOP_CONF_DIR='/opt/module/hadoop-3.1.3/etc/hadoop'
export HADOOP_CLASSPATH=hadoop classpath

bin/yarn-session.sh -s 2 -jm 2048 -tm 2048 -nm ys_hudi -d
local模式
bin/start-cluster.sh
启动sql-client
bin/sql-client.sh --embedded
数据写入
set execution.checkpointing.interval = 30s;
set sql-client.execution.result-mode=tableau;

CREATE TABLE source (
uuid varchar(20),
name varchar(10),
age int,
ts timestamp(3),
partition varchar(20)
) WITH (
'connector' = 'datagen',
'rows-per-second' = '1'
);

create table sink(
uuid varchar(20),
name varchar(10),
age int,
ts timestamp(3),
partition varchar(20)
)
with (
'connector' = 'hudi',
'path' = '/tmp/hudi_flink/t2',
'table.type' = 'MERGE_ON_READ'
);

insert into sink select * from source;

select * from sink limit 10;
集成Flink-代码编写方式
代码地址
环境准备
由于中央仓库没有hudi相关依赖,因此需要手动install自己编译好的hudi到本地maven中
mvn install:install-file -DgroupId=org.apache.hudi -DartifactId=hudi-flink_2.12 -Dversion=0.12.0 -Dpackaging=jar -Dfile=./hudi-flink1.13-bundle-0.12.0.jar
编写代码
建立maven工程,pom引入相关依赖,没有下载到的依赖就手动编译然后install引入,实质上还是写flinksql提交运行,具体查看代码地址
提交运行
将代码打成jar包,上传到服务器上,执行jar包
bin/flink run -yd -m yarn-cluster -c czs.study.connector.hudi  -ytm 2048  -yjm 2048 bigdata-hudi-1.0-SNAPSHOT.jar

bin/flink run -m bigdata:8081 -c czs.study.connector.hudi bigdata-hudi-1.0-SNAPSHOT.jar
集成Hive
环境准备
将 hudi-hadoop-mr-bundle-0.12.0.jar , hudi-hive-sync-bundle-0.12.0.jar 放到hive节点的lib目录下

配置完后重启 hive
nohup hive --service metastore &
nohup hive --service hiveserver2 &
同步Hive
Flink hive sync 现在支持两种 hive sync mode, 分别是 hms 和 jdbc 模式。 其中 hms 只需要配置 metastore uris;而 jdbc 模式需要同时配置 jdbc 属性 和 metastore uris,具体配置模版如下
hms mode配置
CREATE TABLE t1(
  uuid VARCHAR(20),
  name VARCHAR(10),
  age INT,
  ts TIMESTAMP(3),
  partition VARCHAR(20)
)
PARTITIONED BY (partition)
with(
  'connector'='hudi',
  'path' = 'hdfs://xxx:8020/t1',
  'table.type'='COPY_ON_WRITE',
  'hive_sync.enable'='true',
  'hive_sync.table'='${hive_table}',
  'hive_sync.db'='${hive_db}',
  'hive_sync.mode' = 'hms',
  'hive_sync.metastore.uris' = 'thrift://ip:9083'
);

CREATE TABLE t10(
  id int,
  num int,
  ts int,
  primary key (id) not enforced
)
PARTITIONED BY (num)
with(
  'connector'='hudi',
  'path' = 'hdfs://bigdata:8020/tmp/hudi_flink/t10',
  'table.type'='COPY_ON_WRITE',
  'hive_sync.enable'='true',
  'hive_sync.table'='h10',
  'hive_sync.db'='default',
  'hive_sync.mode' = 'hms',
  'hive_sync.metastore.uris' = 'thrift://bigdata:9083'
);
insert into t10 values(1,1,1);
手动创建Hive表
如果不需要hudi帮助我们自动创建好对应的ro、rt表可以不配置 hive_sync.开头的hudi配置,然后在hive中手动创建hudi表
CREATE EXTERNAL TABLE flink_hudi_sink(
   uuid string,
   name string,
   age int,
   ts string,
   partition string
)
PARTITIONED BY (part string)
ROW FORMAT SERDE
   'org.apache.hadoop.hive.ql.io.parquet.serde.ParquetHiveSerDe'
 STORED AS INPUTFORMAT
   'org.apache.hudi.hadoop.HoodieParquetInputFormat'
 OUTPUTFORMAT
   'org.apache.hadoop.hive.ql.io.parquet.MapredParquetOutputFormat'
 LOCATION
   '/hudi-warehouse/flink_hudi_sink';

alter table tbl_hudi_trips add if not exists partition(part='pat1') location '/hudi-warehouse/flink_hudi_sink/par1';
使用Hive Catalog
上传Flink的Hive依赖到Flink的lib目录下

创建catalog
CREATE CATALOG hive_catalog
WITH (
'type' = 'hive',
'default-database' = 'default',
'hive-conf-dir' = '/opt/module/hive/conf',
'hadoop-conf-dir'='/opt/module/hadoop-3.1.3/etc/hadoop'
);

use catalog hive_catalog;

load module hive with ('hive-version'='3.1.2');
show modules;
show functions;

select split('a,b', ',');
查询Hive外部表
使用 Hive 查询 Hudi 表前,需要通过set命令设置hive.input.format,否则会出现数据重复,查询异常等错误,如下面这个报错就是典型的没有设置 hive.input.format 导致的:
java.lang.IllegalArgumentException: HoodieRealtimeReader can oly work on RealTimeSplit and not with xxxxxxxxxx
参数名描述hoodie.mytableName.consume.modeHudi表的查询模式。增量查询 :INCREMENTAL。非增量查询:不设置或者设为SNAPSHOThoodie.mytableName.consume.start.timestampHudi表增量查询起始时间。hoodie. mytableName.consume.max.commitsHudi表基于 hoodie.mytableName.consume.start.timestamp之后要查询的增量commit次数。例如:设置为3时,增量查询从指定的起始时间之后commit 3次的数据设为-1时,增量查询从指定的起始时间之后提交的所有数据
实时视图查询
设置hive的hive.input.format为如下两个之一,然后像普通的hive表查询一样即可
set hive.input.format=org.apache.hadoop.hive.ql.io.HiveInputFormat;

set hive.input.format=org.apache.hudi.hadoop.hive.HoodieCombineHiveInputFormat
增量视图查询
除了要设置 hive.input.format,还需要设置如下的3个增量查询参数,且增量查询语句中的必须添加 where 关键字并将 _hoodie_commit_time > 'startCommitTime'作为过滤条件(这地方主要是hudi的小文件合并会把新旧commit的数据合并成新数据,hive是没法直接从parquet文件知道哪些是新数据哪些是老数据)
set hive.input.format= org.apache.hadoop.hive.ql.io.HiveInputFormat;
set hoodie.mytableName.consume.mode=INCREMENTAL;
set hoodie.mytableName.consume.max.commits=3;
set hoodie.mytableName.consume.start.timestamp=commitTime;
MOR表查询
hudi的mor表会被hive自动映射成两张外部表ro和rt
实时视图
设置了 hive.input.format 之后,即可查询到Hudi源表的最新数据
set hive.input.format= org.apache.hadoop.hive.ql.io.HiveInputFormat;

select * from hudicow_rt;
读优化视图
ro 表全称 read oprimized table,对于 MOR 表同步的 xxx_ro 表,只暴露压缩后的 parquet。其查询方式和COW表类似。设置完 hiveInputFormat 之后 和普通的 Hive 表一样查询即可。
增量视图
这个增量查询针对的rt表,不是ro表。同 COW 表的增量查询类似
HoodieCombineHiveInputFormat:最好只用于 rt 表的增量查询 当然其他种类的查询也可以设置为这个,这个参数会影响到普通的hive表查询,因此在rt表增量查询完成后设回HiveInputFormat用于其他表的查询
set hive.input.format=org.apache.hudi.hadoop.hive.HoodieCombineHiveInputFormat;

set hoodie.hudimor.consume.mode=INCREMENTAL;

set hoodie.hudimor.consume.max.commits=-1;
set hoodie.hudimor.consume.start.timestamp=xxxx;

select * from hudimor_rt where _hoodie_commit_time>'xxxx';
Hudi实战
CDC数据同步
方式一:通过cdc-connector直接对接DB的 binlog 将数据导入 hudi,优点是不依赖消息队列,缺点是对 db server 造成压力,且存在binlog重复拉取的问题
方式二:对接cdc format消费kafka数据导入hudi,优点是可扩展性强,缺点是依赖kafka
如果上游数据无法保证顺序,需要指定 write.precombine.field字段
sql案例
create table stu_binlog(
  id bigint not null,
  name string,
  school string,
  nickname string,
  age int not null,
  class_num int not null,
  phone bigint not null,
  email string,
  ip string,
  primary key (id) not enforced
) with (
  'connector' = 'mysql-cdc',
  'hostname' = 'bigdata',
  'port' = '3306',
  'username' = 'root',
  'password' = 'root',
  'database-name' = 'realtime',
  'table-name' = 'stu'
);

create table stu_binlog_sink_kafka(
  id bigint not null,
  name string,
  school string,
  nickname string,
  age int not null,
  class_num int not null,
  phone bigint not null,
  email string,
  ip string,
  primary key (id) not enforced
) with (
  'connector' = 'upsert-kafka'
  ,'topic' = 'stu'
  ,'properties.zookeeper.connect' = 'bigdata:2181'
  ,'properties.bootstrap.servers' = 'bigdata:9092'
  ,'key.format' = 'json'
  ,'value.format' = 'json'
);

insert into stu_binlog_sink_kafka select * from stu_binlog;

create table stu_binlog_hudi_view(
  id bigint not null,
  name string,
  school string,
  nickname string,
  age int not null,
  class_num int not null,
  phone bigint not null,
  email string,
  ip string,
  primary key (id) not enforced
)
 partitioned by (school)
 with (
  'connector' = 'hudi',
  'path' = 'hdfs://bigdata:8020/hudi/stu_binlog_hudi_view',
  'table.type' = 'MERGE_ON_READ',
  'write.precombine.field' = 'school'
);

insert into stu_binlog_hudi_view select * from stu_binlog_sink_kafka;

select count(*) from stu_binlog_hudi_view;
离线批量导入
名称Required默认值说明write.operationtrueupsert配置bulk_insert开启该功能write.tasksfalse4bulk_insert 写 task 的并发,最后的文件数 >=write.taskswrite.bulk_insert.shuffle_by_partitionwrite.bulk_insert.shuffle_input(从 0.11 开始)falsetrue是否将数据按照 partition 字段 shuffle 再通过 write task 写入,开启该参数将减少小文件的数量但是可能有数据倾斜风险write.bulk_insert.sort_by_partitionwrite.bulk_insert.sort_input(从 0.11 开始)falsetrue是否将数据线按照 partition 字段排序再写入,当一个 write task 写多个 partition,开启可以减少小文件数量write.sort.memory128sort 算子的可用 managed memory(单位 MB)
如果存量数据来源于其他数据源,可以使用批量导入功能,快速将存量数据导成 Hoodie 表格式
批量导入省去了 avro 的序列化以及数据的merge过程,后续不会再有去重操作,数据的唯一性需要自己来保证
bulk_insert 需要在 Batch Execuiton Mode下执行更高效,Batch模式默认会按照partition path排序输入消息再写入Hoodie,避免file handle频繁切换导致性能下降,batch模式下,需要设置如下参数:
SET execution.runtime-mode = batch;
SET execution.checkpointing.interval = 0;
bulk_insert write task 的并发通过参数 write.tasks 指定,并发的数量会影响到小文件的数量,理论上,bulk_insert write task 的并发数就是划分的 bucket 数,当然每个 bucket 在写到文件大小上限(parquet 120 MB)的时候会 roll over 到新的文件句柄,所以最后:写文件数量 >= bulk_insert write task 数
sql脚本
create table stu(
  id bigint not null,
  name string,
  school string,
  nickname string,
  age int not null,
  score decimal(4,2) not null,
  class_num int not null,
  phone bigint not null,
  email string,
  ip string,
  PRIMARY KEY (id) NOT ENFORCED
) with (
  'connector' = 'jdbc',
  'url' = 'jdbc:mysql://bigdata:3306/realtime?serverTimezone=GMT%2B8',
  'username' = 'root',
  'password' = 'root',
  'table-name' = 'stu'
);

create table stu_sink_hudi(
  id bigint not null,
  name string,
  school string,
  nickname string,
  age int not null,
  score decimal(4,2) not null,
  class_num int not null,
  phone bigint not null,
  email string,
  ip string,
  primary key (id) not enforced
)
 partitioned by (school)
 with (
  'connector' = 'hudi',
  'path' = 'hdfs://bigdata:8020/hudi/stu_sink_hudi',
  'table.type' = 'MERGE_ON_READ',
  'write.option' = 'bulk_insert',
  'write.precombine.field' = 'school'
);

insert into stu_sink_hudi select * from stu;
全量接增量
如果已经有全量的离线Hoodie表,需要接上实时写入,并且保证数据不重复,可以开启index bootstrap功能
如果觉得流程冗长,可以在写入全量数据的时候资源调大直接走流模式写,全量走完接新数据再将资源调小(或者开启限流功能)。
名称Required默认值说明index.bootstrap.enabledtruefalse开启索引加载,会将已存表的最新数据一次性加载到state中index.partition.regexfalse*设置正则表达式进行分区筛选,默认为加载全部分区
使用流程:
- CREATE TABLE 创建和 Hoodie 表对应的语句,注意 table type 要正确
- 设置
index.bootstrap.enabled = true开启索引加载功能 - 等待第一次 checkpoint 成功,表示索引加载完成。(索引加载是阻塞式,所以在索引加载过程中 checkpoint 无法完成,索引加载由数据流触发,需要确保每个 partition 都至少有1条数据,即上游 source 有数据进来)
- 索引加载完成后可以退出并保存 savepoint (也可以直接用 externalized checkpoint)
- 重启任务将
index.bootstrap.enabled关闭,参数配置到合适的大小
说明:
- 索引加载为并发加载,根据数据量大小加载时间不同,可以在log中搜索
finish loading the index under partition和Load records from file日志来观察索引加载的进度 - 第一次checkpoint成功就表示索引已经加载完成,后续从checkpoint恢复时无需再次加载索引
离线Compaction
参数名required默认值备注–pathtrue–目标表的路径–compaction-tasksfalse-1压缩 task 的并发,默认是待压缩 file group 的数量–compaction-max-memoryfalse100 (单位 MB)压缩时 log 数据的索引 map,默认 100MB,内存足够可以开大些–schedulefalsefalse是否要执行 schedule compaction 的操作,当写流程还在持续写入表数据的时候,开启这个参数有丢失查询数据的风险,所以开启该参数一定要保证当前没有任务往表里写数据, 写任务的 compaction plan 默认是一直 schedule 的,除非手动关闭(默认 5 个 commits 一次压缩)–seqfalseLIFO执行压缩任务的顺序,默认是从最新的压缩 plan 开始执行,可选值:LIFO: 从最新的 plan 开始执行;FIFO: 从最老的 plan 开始执行–servicefalsefalse是否开启 service 模式,service 模式会打开常驻进程,一直监听压缩任务并提交到集群执行(从 0.11 开始执行)–min-compaction-interval-secondsfalse600 (单位 秒)service 模式下的执行间隔,默认 10 分钟
MOR 表的 compaction 默认是自动打开的,策略是 5 个 commits 执行一次压缩。 因为压缩操作比较耗费内存,和写流程放在同一个 pipeline,在数据量比较大的时候(10w+/s qps),容易干扰写流程,此时采用离线定时任务的方式执行 compaction 任务更稳定
具体参数查找核心参数设置的压缩参数
原理
一个compaction的任务的执行包括两部分
第一部分:schedule 压缩 plan该过程推荐由写任务定时触发,写参数 compaction.schedule.enabled默认开启
第二部分:执行对应的压缩plan
设置参数
compaction.async.enabled为 false,关闭在线compactioncompaction.schedule.enabled仍然保持开启,由写任务阶段性触发压缩plan
使用方式
create table stu(
  id int,
  ts int,
  primary key (id) not enforced
)
with (
  'connector' = 'hudi',
  'path' = 'hdfs://bigdata:8020/hudi/stu',
  'compaction.async.enabled' = 'false',
  'compaction.schedule.enabled' = 'true',
  'table.type' = 'MERGE_ON_READ'
);

bin/flink run -c org.apache.hudi.sink.compact.HoodieFlinkCompactor lib/hudi-flink1.13-bundle-0.12.0.jar --path hdfs://bigdata:8020/table
常见问题汇总
mor模式存储一直看不到数据
flink的writer有三种刷数据到磁盘的策略:
- 当某个bucket在内存积攒到一定大小(可配,默认64MB)
- 当总的buffer大小积攒到一定大小(可配,默认1GB)
- 当checkpoint触发,将内存里的数据全部flush出去
如果看不到数据可以通过调整这三个参数,一般方便来说可以将ck时间间隔设小
数据有重复
如果是 COW 写,需要开启参数 write.insert.drop.duplicates(write.precombine),COW 写每个 bucket 的第一个文件默认是不去重的,只有增量的数据会去重,全局去重需要开启该参数;MOR 写不需要开启任何参数,定义好 primary key 后默认全局去重。
如果需要多 partition 去重,需要开启参数: index.global.enabled 为 true。
索引index是判断数据重复的核心数据结构,index.state.ttl 设置了索引保存的时间,默认为 1.5 天,对于长时间周期的更新,比如更新一个月前的数据,需要将 index.state.ttl 调大(单位天),设置小于 0 代表永久保存。
Merge On Read 写只有 log 文件
Merge On Read 默认开启了异步的 compaction,策略是 5 个 commits 压缩一次,当条件满足参会触发压缩任务,另外,压缩本身因为耗费资源,所以不一定能跟上写入效率,可能会有滞后
可以先观察 log,搜索 compaction 关键词,看是否有 compact 任务调度
After filtering, Nothing to compact for 关键词说明本次 compaction strategy 是不做压缩
核心参数设置
具体的可以看hudi学习相关文档的hudi-flink答疑解惑,是玉兆大佬准备的很全面的hudi使用手册
临时参数生效
可以flink建表时在with中指定,或Hints临时指定参数的方式:在需要调整的表名后面加上 /*+ OPTIONS() */
insert into sink
select * from source;
去重参数
可以指定单个主键去重,也可以指定多个主键去重
create table hoodie_table (
  f0 int primary key not enforced,
  f1 varchar(20),
  ...

) with (
  'connector' = 'hudi',
  ...

)

create table hoodie_table (
  f0 int,
  f1 varchar(20),
  ...

  primary key(f0, f1) not enforced
) with (
  'connector' = 'hudi',
  ...

)
名称说明备注hoodie.datasource.write.recordkey.field主键字段支持主键语法 PRIMARY KEY 设置,支持逗号分隔的多个字段precombine.field(0.13.0 之前版本为 write.precombine.field)去重时间字段record 合并的时候会按照该字段排序,选值较大的 record 为合并结果;不指定则为处理序:选择后到的 record
并发参数
名称说明默认值备注write.taskswriter 的并发,每个 writer 顺序写 1~N 个 buckets4增加并发对小文件个数没影响write.bucket_assign.tasksbucket assigner 的并发Flink的并行度增加并发同时增加了并发写的 bucekt 数,也就变相增加了小文件(小 bucket) 数write.index_bootstrap.tasksIndex bootstrap 算子的并发,增加并发可以加快 bootstrap 阶段的效率,bootstrap 阶段会阻塞 checkpoint,因此需要设置多一些的 checkpoint 失败容忍次数Flink的并行度只在 index.bootstrap.enabled 为 true 时生效read.tasks读算子的并发(batch 和 stream)4compaction.tasksonline compaction 算子的并发writer 的并发online compaction 比较耗费资源,建议走 offline compaction
压缩参数
名称说明默认值备注compaction.schedule.enabled是否阶段性生成压缩 plantrue建议开启,即使compaction.async.enabled 关闭的情况下compaction.async.enabled是否开启异步压缩true通过关闭此参数关闭在线压缩compaction.tasks压缩 task 并发4compaction.trigger.strategy压缩策略num_commits支持四种策略:num_commits、time_elapsed、num_and_time、num_or_timecompaction.delta_commits默认策略,5 个 commits 压缩一次5compaction.delta_seconds3600compaction.max_memory压缩去重的 hash map 可用内存100(MB)资源够用的话建议调整到 1GBcompaction.target_io每个压缩 plan 的 IO 上限,默认 5GB500(GB)
开启离线压缩
通过设置compaction.async.enabled =false关闭在线压缩执行,但是调度compaction.schedule.enabled 仍然建议开启,之后通过离线压缩直接执行 在线压缩任务 阶段性调度的压缩 plan
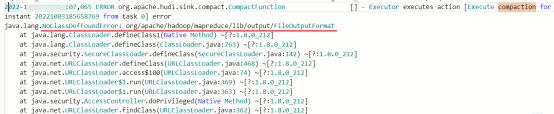
compaction阶段的报错可以查看taskmanager日志信息
全局搜索compaction即可查看
sql脚本
CREATE TABLE sink(
  uuid VARCHAR(20) PRIMARY KEY NOT ENFORCED,
  name VARCHAR(10),
  age INT,
  ts TIMESTAMP(3),
  partition VARCHAR(20)
)
WITH (
  'connector' = 'hudi',
  'path' = 'hdfs://bigdata:8020/hudi/sink',
  'compaction.async.enabled' = 'true',
  'compaction.tasks' = '1',
  'compaction.schedule.enabled' = 'true',
  'compaction.trigger.strategy' = 'num_commits',
  'compaction.delta_commits' = '2',
  'table.type' = 'MERGE_ON_READ'
);

set table.dynamic-table-options.enabled=true;

insert into sink select * from source;
文件大小
Hudi会自管理文件大小,避免向查询引擎暴露小文件,其中自动处理文件大小起很大作用。在进行insert/upsert操作时,Hudi可以将文件大小维护在一个指定文件大小。
目前只有 log 文件的写入大小可以做到精确控制,parquet 文件大小按照估算值。
名称说明默认值备注hoodie.parquet.max.file.size最大可写入的 parquet 文件大小120 * 1024 * 1024默认 120MB(单位 byte)超过该大小切新的 file grouphoodie.logfile.to.parquet.compression.ratiolog文件大小转 parquet 的比率0.35hoodie 统一依据 parquet 大小来评估小文件策略hoodie.parquet.small.file.limit在写入时,hudi 会尝试先追加写已存小文件,该参数设置了小文件的大小阈值,小于该参数的文件被认为是小文件104857600默认 100MB(单位 byte)大于 100MB,小于 120MB 的文件会被忽略,避免写过度放大hoodie.copyonwrite.record.size.estimate预估的 record 大小,hoodie 会依据历史的 commits 动态估算 record 的大小,但是前提是之前有单次写入超过 hoodie.parquet.small.file.limit 大小,在未达到这个大小时会使用这个参数1024默认 1KB(单位 byte)如果作业流量比较小,可以设置下这个参数hoodie.logfile.max.sizeLogFile最大大小。这是在将Log滚转到下一个版本之前允许的最大大小。1073741824默认1GB(单位 byte)
sql脚本
CREATE TABLE sink(
  uuid VARCHAR(20) PRIMARY KEY NOT ENFORCED,
  name VARCHAR(10),
  age INT,
  ts TIMESTAMP(3),
  partition VARCHAR(20)
)
WITH (
  'connector' = 'hudi',
  'path' = 'hdfs://bigdata:8020/hudi/sink',
  'compaction.tasks' = '1',
  'hoodie.parquet.max.file.size'= '10000',
  'hoodie.parquet.small.file.limit'='5000',
  'table.type' = 'MERGE_ON_READ'
);

set table.dynamic-table-options.enabled=true;

insert into sink select * from source ;
内存优化
内存参数
名称说明默认值备注write.task.max.size一个 write task 的最大可用内存1024当前预留给 write buffer 的内存为write.task.max.size -compaction.max_memory当 write task 的内存 buffer达到阈值后会将内存里最大的 buffer flush 出去write.batch.sizeFlink 的写 task 为了提高写数据效率,会按照写 bucket 提前 buffer 数据,每个 bucket 的数据在内存达到阈值之前会一直 cache 在内存中,当阈值达到会把数据 buffer 传递给 hoodie 的 writer 执行写操作256一般不用设置,保持默认值就好write.log_block.sizehoodie 的 log writer 在收到 write task 的数据后不会马上 flush 数据,writer 是以 LogBlock 为单位往磁盘刷数据的,在 LogBlock 攒够之前 records 会以序列化字节的形式 buffer 在 writer 内部128一般不用设置,保持默认值就好write.merge.max_memoryhoodie 在 COW 写操作的时候,会有增量数据和 base file 数据 merge 的过程,增量的数据会缓存在内存的 map 结构里,这个 map 是可 spill 的,这个参数控制了 map 可以使用的堆内存大小100一般不用设置,保持默认值就好compaction.max_memory同 write.merge.max_memory: 100MB 类似,只是发生在压缩时。100如果是 online compaction,资源充足时可以开大些,比如 1GB
MOR模式
- 状态后端state backend 换成 rocksdb (默认的 in-memory state-backend 非常吃内存)
- 内存够的话,compaction.max_memory 调大些 (默认是 100MB 可以调到 1GB)
- 关注 TM 分配给每个 write task 的内存,保证每个 write task 能够分配到 write.task.max.size 所配置的大小,比如 TM 的内存是 4GB 跑了 2 个 StreamWriteFunction 那每个 write function 能分到 2GB,尽量预留一些 buffer,因为网络 buffer,TM 上其他类型 task (比如 BucketAssignFunction 也会吃些内存)
- 需要关注 compaction 的内存变化,compaction.max_memory 控制了每个 compaction task 读 log 时可以利用的内存大小,compaction.tasks 控制了 compaction task 的并发
- *write.task.max.size – compaction.max_memory 是预留给每个 write task 的内存 buffer
COW模式
- write.task.max.size 和 write.merge.max_memory 同时调大(默认是 1GB 和 100MB 可以调到 2GB 和 1GB)
- write.task.max.size – write.merge.max_memory 是预留给每个 write task 的内存 buffer
- 同MOR模式一样,更换状态后端、关注TM分配给write task的内存
读取模式
名称Required默认值说明read.streaming.enabledfalsefalse设置 true 开启流读模式read.start-commitfalse最新 commit指定 ‘yyyyMMddHHmmss’ 格式的起始 commit(闭区间)read.streaming.skip_compactionfalsefalse流读时是否跳过 compaction 的 commits,跳过 compaction 有两个用途:1)避免 upsert 语义下重复消费 (compaction 的 instant 为重复数据,如果不跳过,有小概率会重复消费)2) changelog 模式下保证语义正确性*0.11 开始,以上两个问题已经通过保留 compaction 的 instant time 修复*clean.retain_commitsfalse10cleaner 最多保留的历史 commits 数,大于此数量的历史 commits 会被清理掉,changelog 模式下,这个参数可以控制 changelog 的保留时间,例如 checkpoint 周期为 5 分钟一次,默认最少保留 50 分钟的时间。
流读
当前表 默认是快照读取,即读取最新的全量快照数据并一次性返回。通过参数 read.streaming.enabled 参数开启流读模式,通过 read.start-commit 参数指定起始消费位置,支持指定 earliest 从最早消费。
sql脚本
CREATE TABLE sink(
  uuid VARCHAR(20) PRIMARY KEY NOT ENFORCED,
  name VARCHAR(10),
  age INT,
  ts TIMESTAMP(3),
  partition VARCHAR(20)
) WITH (
  'connector' = 'hudi',
  'path' = 'hdfs://bigdata:8020/hudi/sink',
  'table.type' = 'MERGE_ON_READ',
  'read.streaming.enabled' = 'true',
  'read.streaming.check-interval' = '4'
);

insert into sink select * from source;

select * from sink;
增量读取
名称Required默认值说明read.start-commitfalse默认从最新 commit支持 earliest 从最早消费read.end-commitfalse默认到最新 commit
增量读取包含三种场景:
- Stream 增量消费,通过参数 read.start-commit 指定起始消费位置;
- Batch 增量消费,通过参数 read.start-commit 指定起始消费位置,通过参数 read.end-commit 指定结束消费位置,区间为闭区间,即包含起始、结束的 commit
- TimeTravel:Batch 消费某个时间点的数据:通过参数 read.end-commit 指定结束消费位置即可(由于起始位置默认从最新,所以无需重复声明)
限流
如果将全量数据(百亿数量级) 和增量先同步到 kafka,再通过flink流式消费的方式将库表数据直接导成 hoodie 表,因为直接消费全量部分数据:量大(吞吐高)、乱序严重(写入的 partition 随机),会导致写入性能退化,出现吞吐毛刺,这时候可以开启限速参数,保证流量平稳写入
名称Required默认值说明write.rate.limitfalse0默认关闭限速
Original: https://blog.csdn.net/xiaoyixiao_/article/details/127659474
Author: 是圣宝呀
Title: 大数据技术-Hudi学习笔记
原创文章受到原创版权保护。转载请注明出处:https://www.johngo689.com/817542/
转载文章受原作者版权保护。转载请注明原作者出处!