

对于一个深度学习从事者来说,Windows训练模型有着诸多不便,还好现在Windows的Ubuntu子系统逐渐完善,近期由于工作需求,配置了Windows的工作站,为了方便起见,搭建了Ubuntu子系统,网上教程比较多,但是都或多或少存在一些小问题(也许是他们没有遇到), 于是我自己在尝试中,将自己踩到的坑记录如下。
总结: win11 直接去Microsoft store 下载即可,然后注册账号即可使用,无需任何骚操作(它自带cuda,而且源也是OK的)
建议2:如果要做深度学习环境,即conda环境训练模型的话,强烈建议20.04,因为22.04坑太多了。
1,ubuntu子系统安装预备工作
首先,win11的子系统开启前,需要进行一系列操作,并重启计算机,过程如下:
1.1 设置开发者模式
打开win10开发人员模式,在设置–>更新和安全–>针对开发人员,中勾选开发人员模式。


1.2 打开子系统选项和虚拟机选项
然后在控制面板中勾选添加Linux子系统。依次进入控制面板–>程序–>启用或关闭windows功能,勾选适用于windows的linux的子系统,点击确定。之后重启电脑。

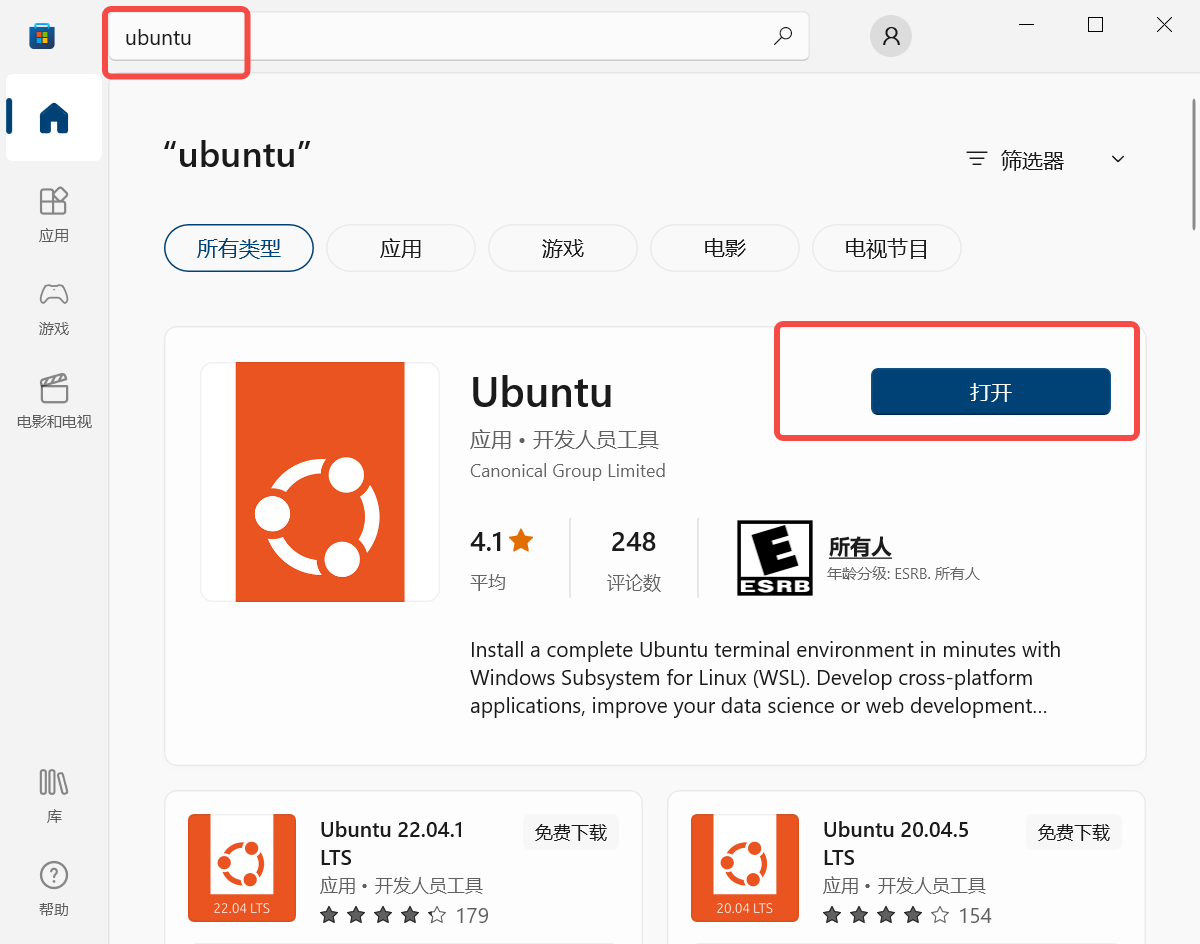
1.3 下载Ubuntu
最后去Microsoft Store下载Ubuntu,进行安装:
注意: 这里我测试了 20.04 和 22.04 的 Ubuntu 版本,发现其差异不大,所以随便一个都可以。
2,ubuntu子系统注册和配置
2.1 配置个人资料
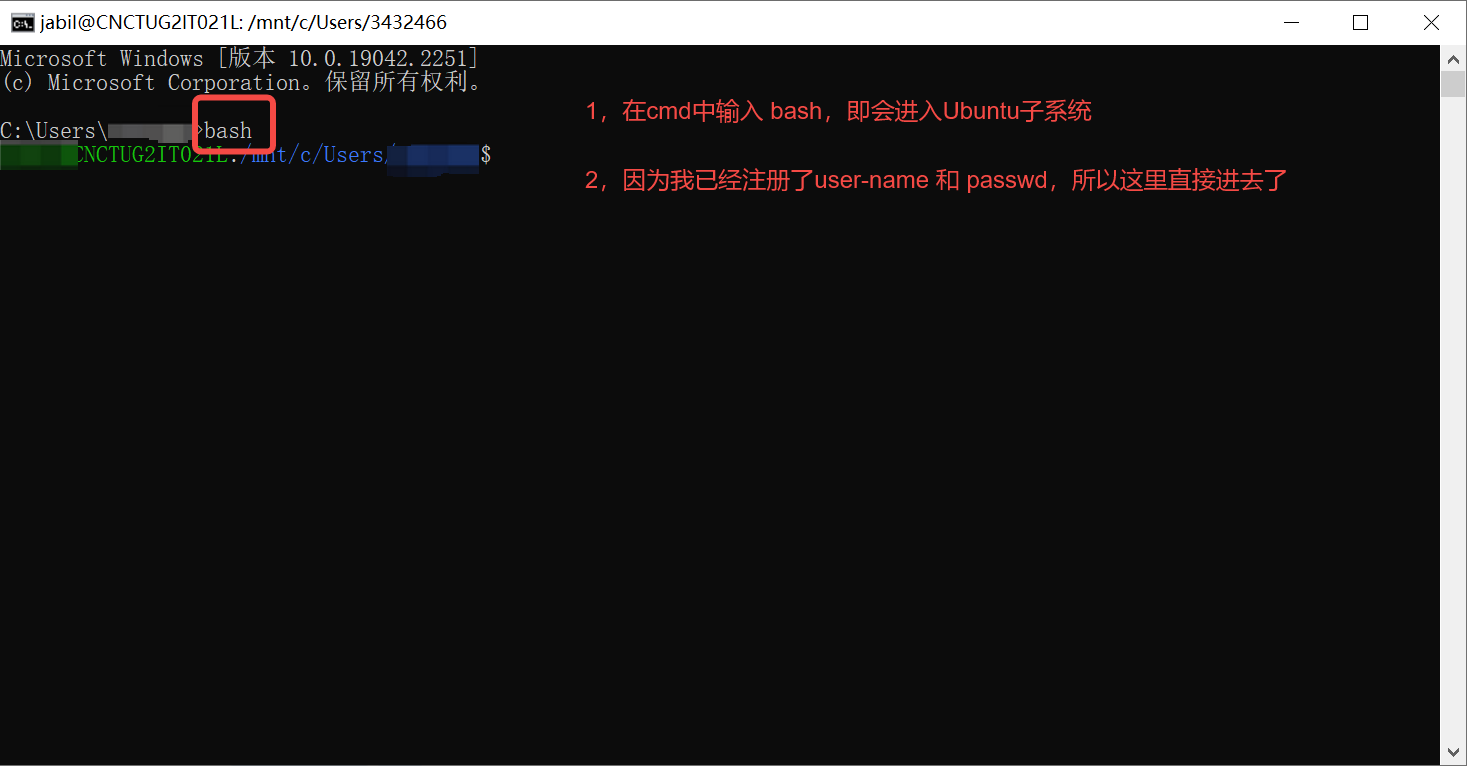
进入cmd中,配置个人账号和密码。
然后进行换源,我们需要更换Linux子系统ubuntu的apt镜像源,因为Linux的apt源使用的是官方源,需要连接到国外的服务器。所以安装一些包或一些软件时下载会很慢,我们可以改用国内的镜像apt源。
国内的源主要就是中科大,清华,阿里的,我这里在网上抄几个复制如下:
(大家想看全的,可以参考这个博客:https://blog.csdn.net/shangyuanlang/article/details/80737434)
2.2,Ubuntu子系统换源(不换源直接忽略,不要看)
注意: 这里我测试了 换源后 和不换源,我发现对于Ubuntu子系统,根本不需要换源,而且没有任何问题。
反而是换源后,问题一大堆,存在了各种依赖不存在,报错。
总结:建议不要换源(对于Ubuntu子系统而言)。
不换源,直接 sudo apt-get update,结果无任何warning。
2.2.1 清华源
清华源地址:https://mirrors.tuna.tsinghua.edu.cn/ubuntu/
源数据如下:
csharp;gutter:true;
默认注释了源码镜像以提高 apt update 速度,如有需要可自行取消注释
deb https://mirrors.tuna.tsinghua.edu.cn/ubuntu/ bionic main restricted universe multiverse
deb-src https://mirrors.tuna.tsinghua.edu.cn/ubuntu/ bionic main restricted universe multiverse
deb https://mirrors.tuna.tsinghua.edu.cn/ubuntu/ bionic-updates main restricted universe multiverse
deb-src https://mirrors.tuna.tsinghua.edu.cn/ubuntu/ bionic-updates main restricted universe multiverse
deb https://mirrors.tuna.tsinghua.edu.cn/ubuntu/ bionic-backports main restricted universe multiverse
deb-src https://mirrors.tuna.tsinghua.edu.cn/ubuntu/ bionic-backports main restricted universe multiverse
deb https://mirrors.tuna.tsinghua.edu.cn/ubuntu/ bionic-security main restricted universe multiverse
deb-src https://mirrors.tuna.tsinghua.edu.cn/ubuntu/ bionic-security main restricted universe multiverse</p>
<p>预发布软件源,不建议启用
deb https://mirrors.tuna.tsinghua.edu.cn/ubuntu/ bionic-proposed main restricted universe multiverse
deb-src https://mirrors.tuna.tsinghua.edu.cn/ubuntu/ bionic-proposed main restricted universe multiverse</p>
<pre><code>
#### 2.2.2,阿里源

阿里源地址如下:http://mirrors.aliyun.com/ubuntu/

源数据如下:
;gutter:true;
默认注释了源码仓库,如有需要可自行取消注释
deb http://mirrors.aliyun.com/ubuntu/ bionic main restricted universe multiverse
deb-src https://mirrors.aliyun.com/ubuntu/ bionic main restricted universe multiverse
deb http://mirrors.aliyun.com/ubuntu/ bionic-updates main restricted universe multiverse
deb-src http://mirrors.aliyun.com/ubuntu/ bionic-updates main restricted universe multiverse
deb http://mirrors.aliyun.com/ubuntu/ bionic-backports main restricted universe multiverse
deb-src http://mirrors.aliyun.com/ubuntu/ bionic-backports main restricted universe multiverse
deb http://mirrors.aliyun.com/ubuntu/ bionic-security main restricted universe multiverse
deb-src http://mirrors.aliyun.com/ubuntu/ bionic-security main restricted universe multiverse
预发布软件源,不建议启用
deb http://mirrors.aliyun.com/ubuntu/ bionic-proposed main restricted universe multiverse
deb-src http://mirrors.aliyun.com/ubuntu/ bionic-proposed main restricted universe multiverse
2.2.3,中科大源
中科大源地址:https://mirrors.ustc.edu.cn/ubuntu/
源数据如下:
csharp;gutter:true;
默认注释了源码仓库,如有需要可自行取消注释
deb https://mirrors.ustc.edu.cn/ubuntu/ bionic main restricted universe multiverse
deb-src https://mirrors.ustc.edu.cn/ubuntu/ bionic main restricted universe multiverse
deb https://mirrors.ustc.edu.cn/ubuntu/ bionic-updates main restricted universe multiverse
deb-src https://mirrors.ustc.edu.cn/ubuntu/ bionic-updates main restricted universe multiverse
deb https://mirrors.ustc.edu.cn/ubuntu/ bionic-backports main restricted universe multiverse
deb-src https://mirrors.ustc.edu.cn/ubuntu/ bionic-backports main restricted universe multiverse
deb https://mirrors.ustc.edu.cn/ubuntu/ bionic-security main restricted universe multiverse
deb-src https://mirrors.ustc.edu.cn/ubuntu/ bionic-security main restricted universe multiverse</p>
<p>预发布软件源,不建议启用
deb https://mirrors.ustc.edu.cn/ubuntu/ bionic-proposed main restricted universe multiverse
deb-src https://mirrors.ustc.edu.cn/ubuntu/ bionic-proposed main restricted universe multiverse</p>
<pre><code>
随便选一个源,进入Ubuntu子系统,进行修改。

首先,备份原来的数据源配置文件,就是对系统给的镜像源进行备份,以防出问题。
;gutter:true;
sudo cp /etc/apt/sources.list /etc/apt/sources.list.bak
然后,修改数据源配置文件。
csharp;gutter:true;
sudo vim /etc/apt/sources.list</p>
<pre><code>
进去后,注释所有的,当然也可以清空内容,选择一个源添加到文件最前面或直接将官方的源注释掉替换掉原文件。

保存后运行下面代码更新配置即完成换源操作。
;gutter:true;
sudo apt-get update
2.3 报错1:由于没有公钥,无法验证下列签名
报错如下:

原因分析:GPG是一个加密与解密的工具,在apt更新下载包时会进行加密解密,提供相关支持。如果没有密钥的话是无法进行验证的。我们需要添加密钥。
解决方法:添加密钥(keys后面添加的就是上面报错NO_PUBKEY 后面的密钥代码):
csharp;gutter:true;
sudo apt-key adv --keyserver keyserver.ubuntu.com --recv-keys 3B4FE6ACC0B21F32(密钥代码)</p>
<pre><code>
执行成功,显示如下;

然后再sudo apt-get update即可。
### 2.4 警告1:Key is stored in legacy trusted.gpg keyring
强迫症的我,看到warning就想给他干掉。查找了一些资料,大概是Ubuntu版本是22.04,更新源会出现这个问题。

首先查看key list,找到警告相关源的key,我们使用 -key 命令添加仓库密钥。首先,让我们使用命令列出添加的密钥:(此命令将列出所有添加的仓库密钥)

正如你在上面的输出中所看到的,那串长的(40 个字符)十六进制值是仓库密钥。如果你希望 APT 包管理器停止信任该密钥,只需使用以下命令将其删除:
;gutter:true;
sudo apt-key del "3820 03C2 C8B7 B4AB 813E 915B 14E4 9429 73C6 2A1B"
或者只指定最后八个字符
csharp;gutter:true;
sudo apt-key del 557BEFF9</p>
<pre><code>
另外如果发现列表中某些key的状态是 [expired] 也可以用以下命令删除
;gutter:true;
$ sudo apt-key del 557BEFF9
我找了一个网友的key-list,里面存在过期的,大概如下:
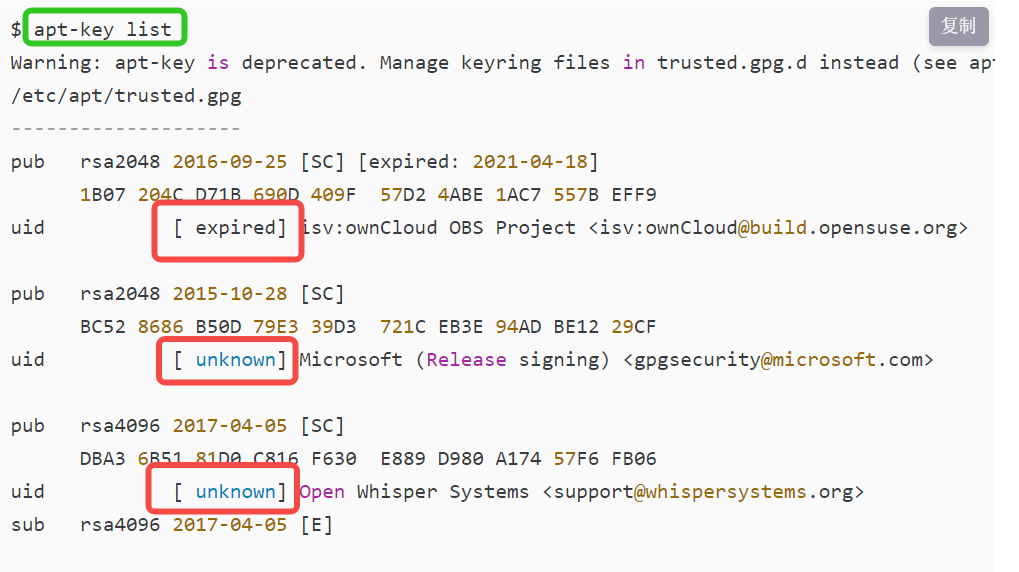
所以,发现自己的key也存在过期的,可以删除。
完成!仓库密钥已被删除。运行以下命令更新仓库列表:

3,安装深度学习环境
注意: 这里我测试了Windows11 和 Windows10,其中window11自带cuda环境,不需要安装,而Windows10 则需要进行cuda安装。
3.1 安装CUDA
首先更新:
csharp;gutter:true;
sudo apt-get upgrade</p>
<p>sudo apt-get update</p>
<pre><code>
然后去 nvidia 下载cuda
Download linking: [https://developer.nvidia.com/cuda-toolkit](https://developer.nvidia.com/cuda-toolkit)
选择适合自己的版本

bash installer instructions as fellowing:
;gutter:true;
wget https://developer.download.nvidia.com/compute/cuda/repos/ubuntu2204/x86_64/cuda-ubuntu2204.pin
sudo mv cuda-ubuntu2204.pin /etc/apt/preferences.d/cuda-repository-pin-600
wget https://developer.download.nvidia.com/compute/cuda/11.8.0/local_installers/cuda-repo-ubuntu2204-11-8-local_11.8.0-520.61.05-1_amd64.deb
sudo dpkg -i cuda-repo-ubuntu2204-11-8-local_11.8.0-520.61.05-1_amd64.deb
sudo cp /var/cuda-repo-ubuntu2204-11-8-local/cuda-*-keyring.gpg /usr/share/keyrings/
sudo apt-get update
sudo apt-get -y install cuda
然后运行:
csharp;gutter:true;
sudo sh cuda_11.7.1_515.65.01_linux.run</p>
<p>sudo sh cuda_11.7.1_515.65.01_linux.run -tmpdir /tmp</p>
<pre><code>
### 3.2 安装Anaconda
其实也可以按照miniconda,我这里以miniconda为例。
miniconda linux download linking: [https://docs.conda.io/en/latest/miniconda.html#linux-installers](https://docs.conda.io/en/latest/miniconda.html#linux-installers)
进去复制适合自己系统的链接:

如果不知道自己系统的版本,可以使用下面命令查看:

然后使用命令下载:
;gutter:true;
下载
curl https://repo.anaconda.com/miniconda/Miniconda3-py39_4.12.0-Linux-x86_64.sh
安装
sudo sh Miniconda3-py39_4.12.0-Linux-x86_64.sh
安装完成后,直接使用conda命令的话,如果显示如下:
csharp;gutter:true;
conda: command not found</p>
<pre><code>
则可以使用下面命令直接启动(需要每次都要启动):
;gutter:true;
source ~/miniconda3/bin/activate
也可以添加环境变量 进入 ~/.bashrc ,在最后一行添加:
csharp;gutter:true;
export PATH=~/miniconda3/bin:$PATH</p>
<pre><code>
推出重启即可生效。

conda换源:
;gutter:true;
conda config –add channels https://mirrors.tuna.tsinghua.edu.cn/anaconda/pkgs/free/
conda config –add channels https://mirrors.tuna.tsinghua.edu.cn/anaconda/pkgs/main/
conda config –set show_channel_urls yes
pip config set global.index-url https://pypi.tuna.tsinghua.edu.cn/simple
3.3 安装python环境(install pytorch)
创建环境
csharp;gutter:true;
conda create -n env_name python==3.9.13(版本号)</p>
<pre><code>
进入环境
;gutter:true;
conda activate env_name
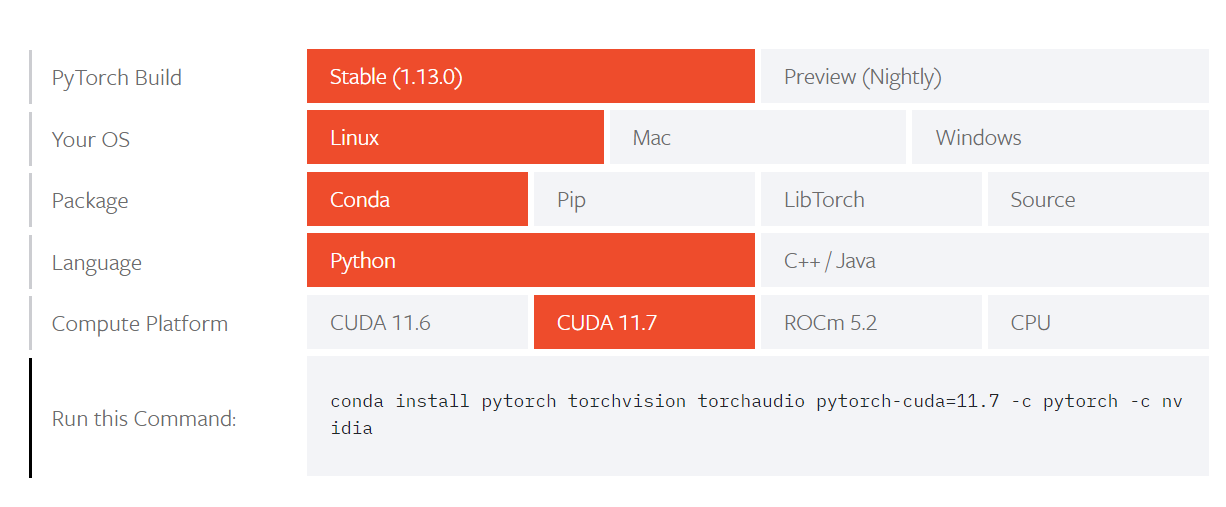
进入pytorch 官网: https://pytorch.org/get-started/locally/
可以使用命令安装,也可以离线安装。
4,怪异的bug(WSL无法启动 \wsl$\Ubuntu无法访问。你可能没有权限使用网络资源)
报错如下:
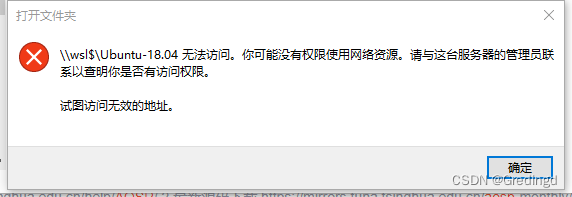
为啥说是怪异呢,这里凑巧,使用了 \wsl.localhost\ ( \wsl$ )点击发现可以进去,然后点击Linux按钮,竟然进去了。

更新于2022.12.9 找到原因了。
(github地址:https://github.com/microsoft/WSL/issues/7499#issuecomment-937523918)
原因如下:
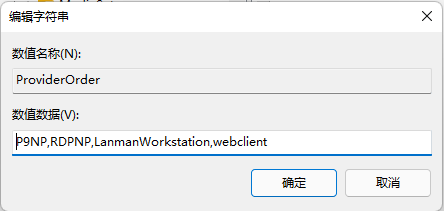
由Window10升级到Windows11的系统,在注册表 HKEY_LOCAL_MACHINE\SYSTEM\CurrentControlSet\Control\NetworkProvider\Order和 \HKEY_LOCAL_MACHINE\SYSTEM\CurrentControlSet\Control\NetworkProvider\HwOrder两个键值中 ProviderOrder的值为 cbfs6,P9NP,RDPNP,LanmanWorkstation,webclient. 而在Windows11中,WSL的文件访问方式已经全面启用了 P9NP,并且若是全新安装的系统,默认就没有 cbfs6这个参数.所以只要删除这个参数,并保持 P9NP处于开头的位置即可.随后重启系统就可以正常访问了.
Original: https://www.cnblogs.com/wj-1314/p/16921218.html
Author: 战争热诚
Title: 在 win11 下搭建并使用 ubuntu 子系统(同时测试 win10)——(附带深度学习环境搭建)
原创文章受到原创版权保护。转载请注明出处:https://www.johngo689.com/797569/
转载文章受原作者版权保护。转载请注明原作者出处!