

1.安装包依赖
与上篇通过摄像头动态识别人脸一样,先下载好opencv-python、face-recognition,这里因为使用的是照片对比的方式,特意使用tkinter画了一个简单的GUI方便操作。
在python 3以上版本tkinter是环境自带的,所以这里不需要安装
2.代码示例
import os
import cv2
import numpy as np
import face_recognition
import tkinter as tk
import tkinter.filedialog
from PIL import Image,ImageTk
classNames=[]
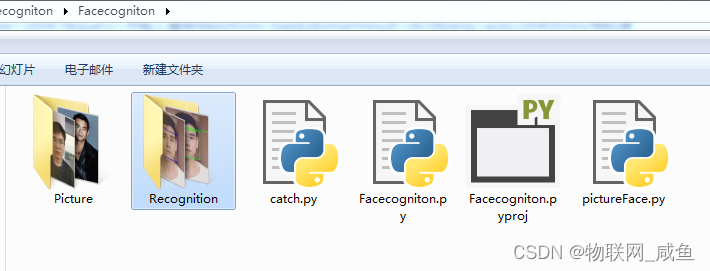
img_path='Picture'
img_recognition_path='Recognition'
existsEncodeingList=[]
#对人脸集合进行编码进行处理
def findEncodeings(images):
for img in images:
#灰度处理
img=cv2.cvtColor(src=img,code=cv2.COLOR_BGR2RGB)
#face_encodings对图片对象a_images进行编码并返回数组0位置编码结果
encode=face_recognition.face_encodings(img)[0]
existsEncodeingList.append(encode)
#获取当前存储的人脸编码集合
def findExistsEncodeingList(img_path):
images=[]
#列出已经上传的所有图片
imgList=os.listdir(img_path)
#处理存储的图片得到其人脸编码
for pic in imgList:
img=cv2.imread('{}/{}'.format(img_path,pic))
images.append(img)
classNames.append(os.path.splitext(pic)[0])
findEncodeings(images)
#选择并对比图片
def choosepic():
choosepath = tkinter.filedialog.askopenfilename()
path.set(choosepath)
img_open = Image.open(entry.get()).resize((530,750))
img = ImageTk.PhotoImage(img_open)
lableShowImage.config(image=img)
lableShowImage.image = img
lableShowImage.place(x=30, y=70, width=530, height=750)
faceRecognition(choosepath)
def faceRecognition(choosepath):
frame=cv2.imread(choosepath)
frameRGB=cv2.cvtColor(src=frame,code=cv2.COLOR_BGR2RGB)
#对摄像头读取的检测人脸
facesLocate=face_recognition.face_locations(frameRGB)
#进行特征编码
faceEncoded=face_recognition.face_encodings(frameRGB,facesLocate)
#遍历检测的人脸和库中读取的图片进行对比,计算其相似度
name='unknow'
for (top,right, bottom,left),face_encoding in zip(facesLocate,faceEncoded):
#进行匹配
matchs=face_recognition.compare_faces(existsEncodeingList,face_encoding)
#计算相似度
distance=face_recognition.face_distance(existsEncodeingList,face_encoding)
lab='unknow'
for index, item in enumerate(distance):
if item
3.说明
首先我将需要被识别的人脸的照片预设到项目目录的Picture文件夹下,然后创建一个Recognition目录存放识别过的图片,这样方便在一个界面上展示对比结果照片。

其实对比结果也可以不用存,直接将处理后的图片缓存直接展示在界面上,这里需要改一下此处的代码,将上述代码注释掉,然后换成下面的那行,通过数组直接转成图片
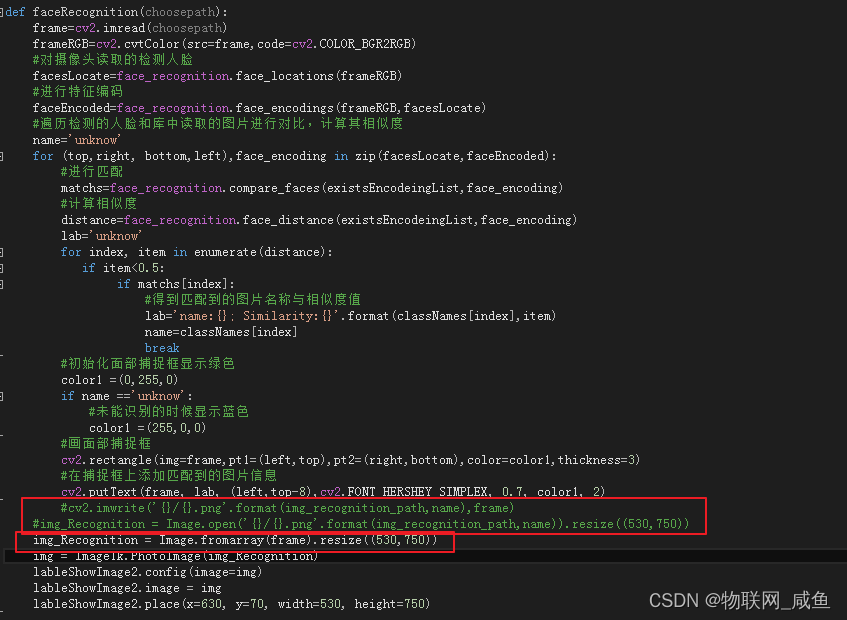
但是效果会存在色彩的失真,效果如下:
也尝试了PIL的九种不同图片模式: 1,L,P,RGB,RGBA,CMYK,YCbCr,I,F,最终效果也没达到,大概与我resize((530,750))这个有关,也没继续纠结,有兴趣的同学可以尝试一下。
这里简单提下PIL的九种不同图片模式:
modes描述11位像素,黑和白,存成8位的像素L8位像素,黑白P8位像素,使用调色板映射到任何其他模式RGB3× 8位像素,真彩RGBA4×8位像素,真彩+透明通道CMYK4×8位像素,颜色隔离YCbCr3×8位像素,彩色视频格式I32位整型像素F32位浮点型像素
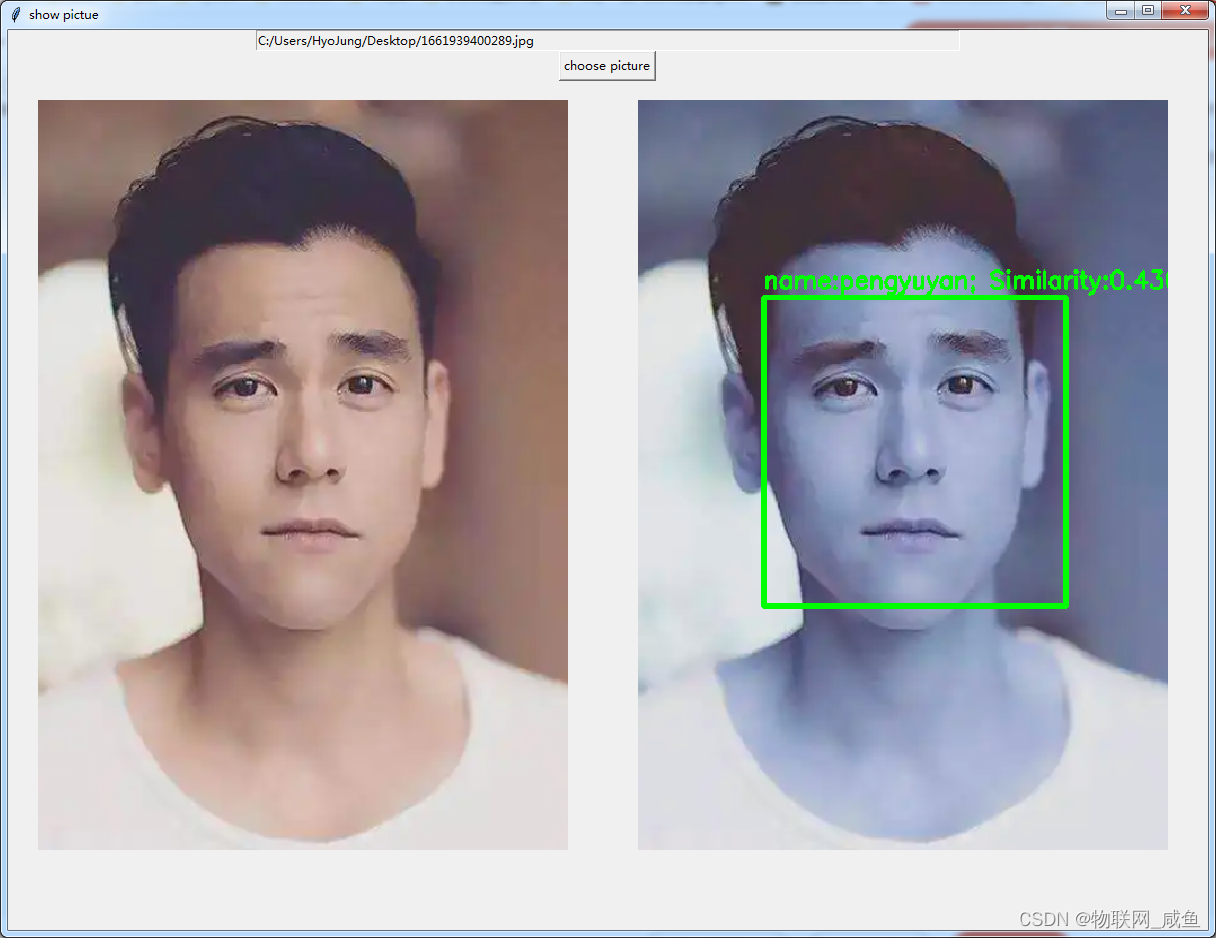
4.实现效果
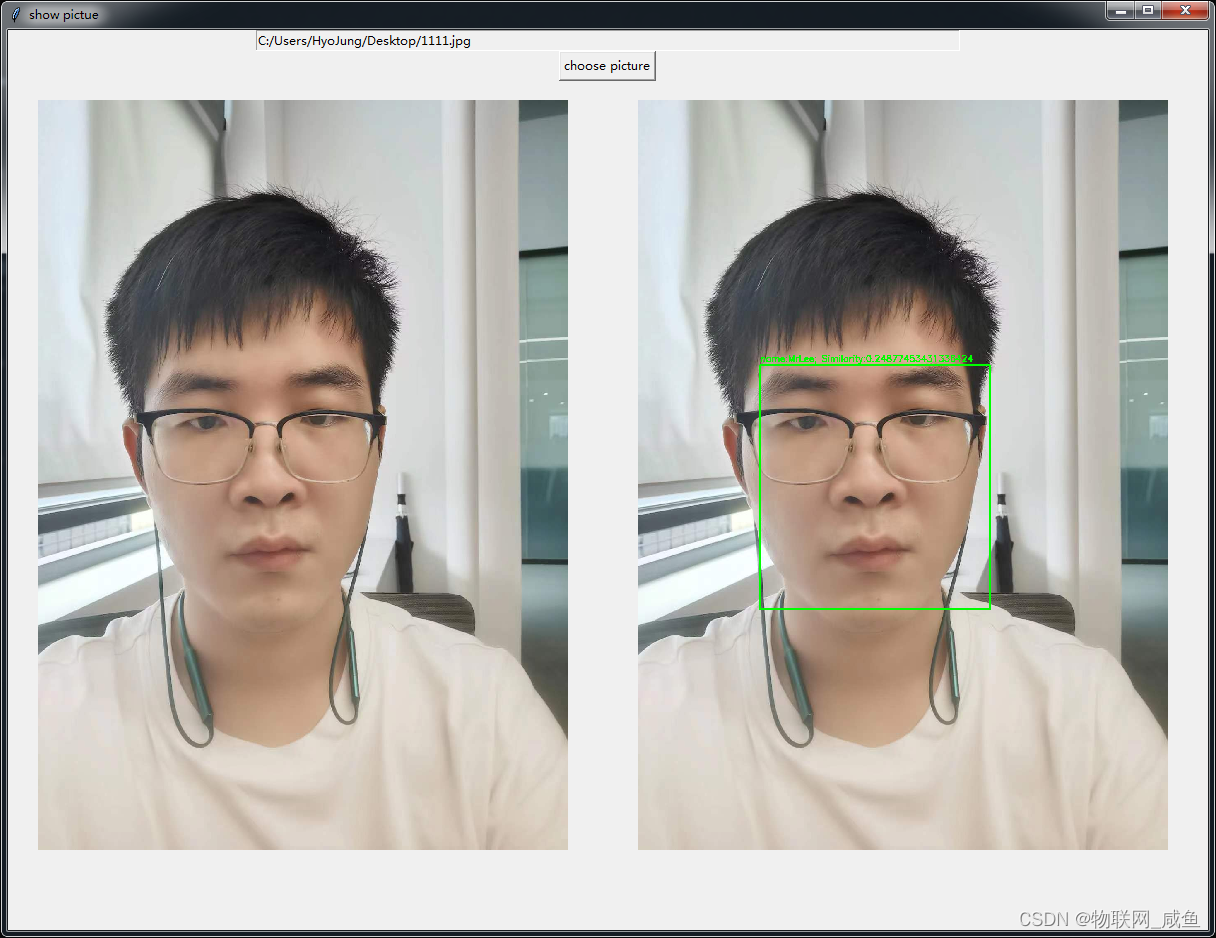
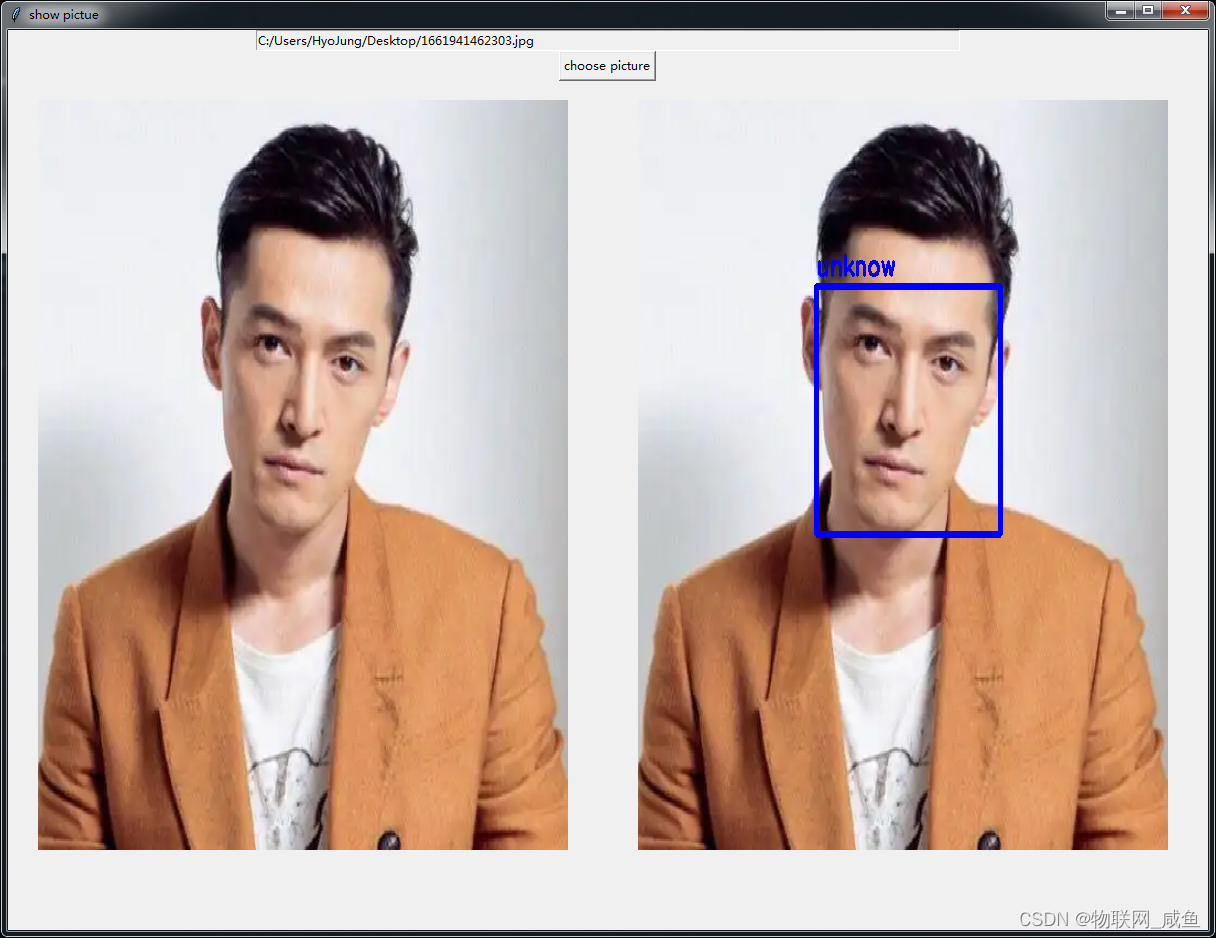
可以实现简单的人脸对比,Similarity代表相似度值,值越小代表人脸与预设的图片越相似。
Original: https://blog.csdn.net/qq_17486399/article/details/126629288
Author: 物联网_咸鱼
Title: Python 基于OpenCV+face_recognition实现人脸捕捉与人脸识别(照片对比)
原创文章受到原创版权保护。转载请注明出处:https://www.johngo689.com/786520/
转载文章受原作者版权保护。转载请注明原作者出处!