

一. Pytest-基本使用
应用场景:
pytest 框架可以解决我们多个测试脚本一起执行的问题
1.1 安装和介绍
概念:
pytest 是 python 的一种单元测试框架,同自带的 Unittest 测试框架类似,相比于 Unittest 框架使用起来更简洁,效率更高。
安装:
pip3 install pytest
安装校验
- 进入命令行
- 输入命令 pytest –version会展示当前已安装版本
1.2 运行方式
代码准备
test_login.py
import pytest
class TestLogin:
    def test_o(self):
        print("test_a")
        assert 1
    def test_b(self):
        print("test_b")
        assert 1
运行方式分为两种
- 命令行模式【建议】
- 主函数模式
命令行模式【建议】
在pycharm中打开termital,输入
pytest -s test_login.py
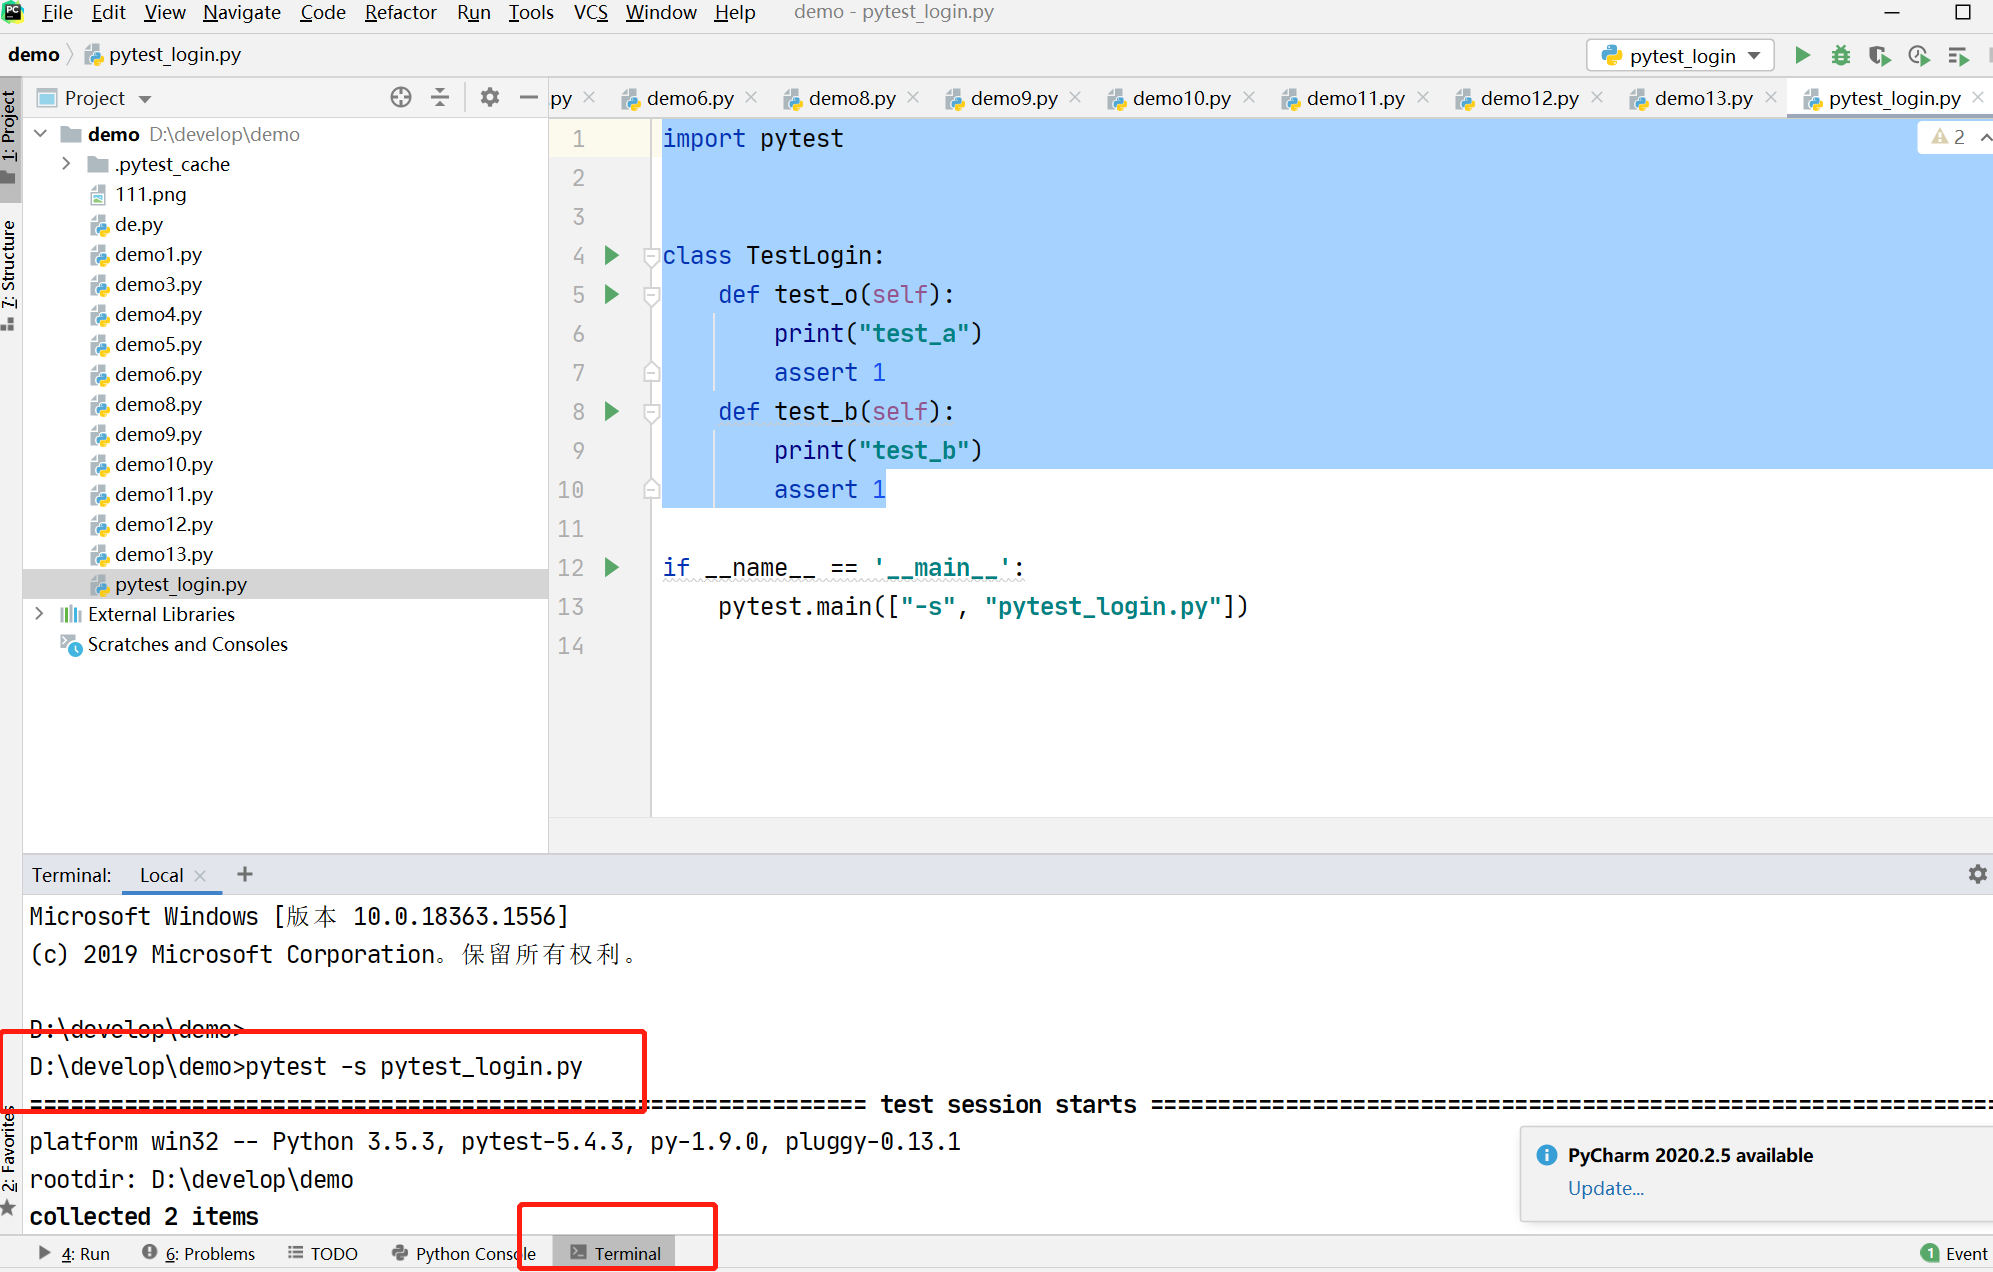

主函数模式
在 test_login.py 文件中增加主函数,右键run即可
if __name__ == '__main__':
    pytest.main(["-s", "pytest_login.py"])
-s 表示支持控制台打印,如果不加,print 不会出现任何内容
小结
建议使用命令行的形式运行,对比主函数模式更加方便
1.3 setup 和 teardown
1.3.1 函数级别方法
运行于测试方法的始末,运行一次测试函数会运行一次 setup 和 teardown。
示例:
import pytest
class TestLogin:
    def setup(self):
        print('------setup-----')

    def teardown(self):
        print('-----teardown---')

    def test_a(self):
        print('----test_a----')
    def test_b(self):
        print('----test_b----')
结果:
pytest_new.py ------setup-----
1.4 配置文件
使用方式:
- 项目下新建 scripts 模块
- 将测试脚本文件放到 scripts 中
- pytest 的配置文件放在自动化项目目录下
- 名称为 pytest.ini
- 命令行运行时会使用该配置文件中的配置
- 第一行内容为 [pytest]
示例:
[pytest]

addopts = -s

testpaths = ./scripts

python_files = test_*.py

python_classes = Test*

python_functions = test_*
addopts = -s
表示命令行参数
testpaths,python_files,python_classes,python_functions
表示 哪一个文件夹 下的 哪一个文件 下的 哪一个类 下的 哪一个函数
表示执行 scripts 文件夹下的 test_ 开头 .py 结尾的文件下的 Test 开头的类下的 test_开头的函数
注意:
windows环境运行配置文件会报错,这时候把中文去掉
Pytest-常用插件
插件列表网址:https://plugincompat.herokuapp.com 包含很多插件包,大家可依据工作的需求选择使用。
二. Pytest-常用插件
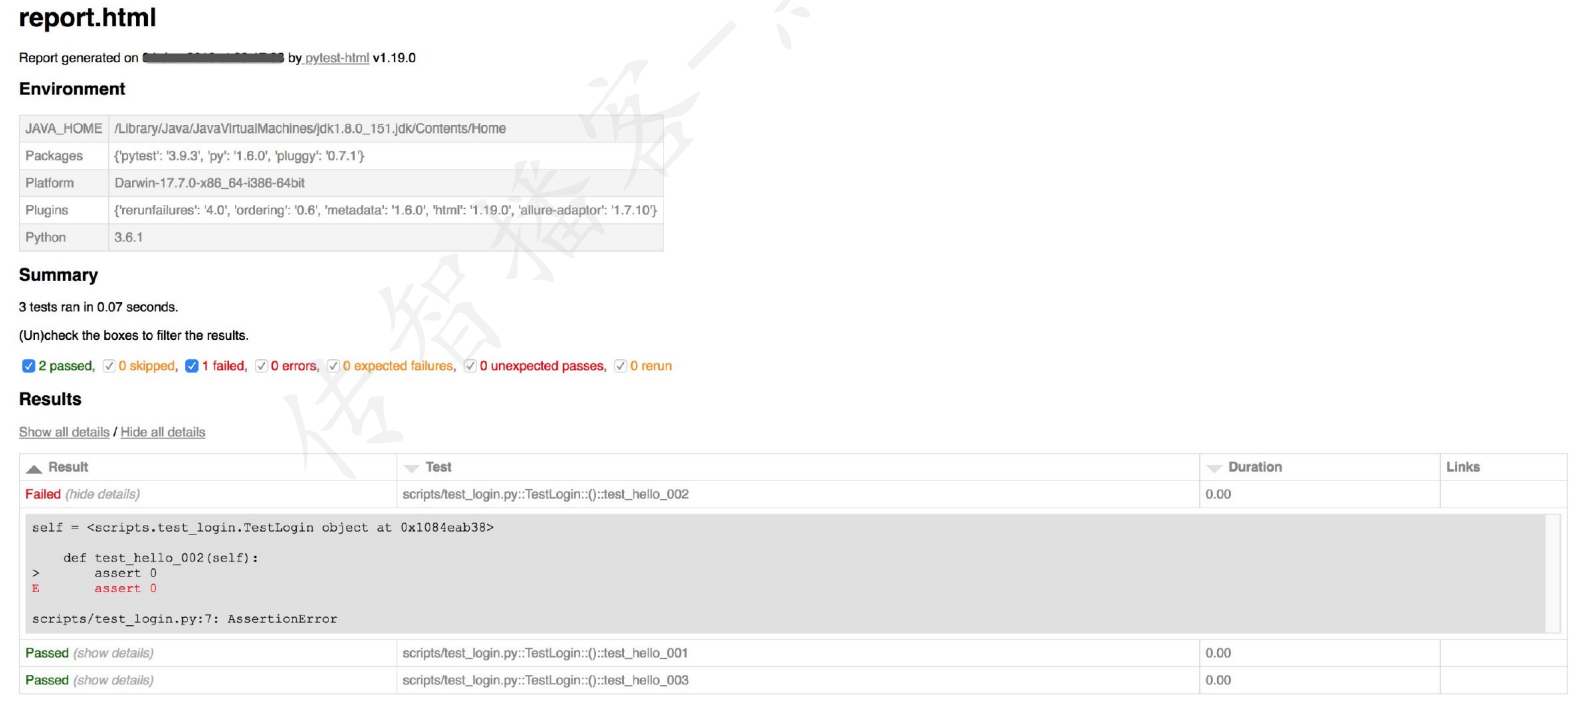
2.1 测试报告
安装
使用命令 pip3 install pytest-html 进行安装
使用
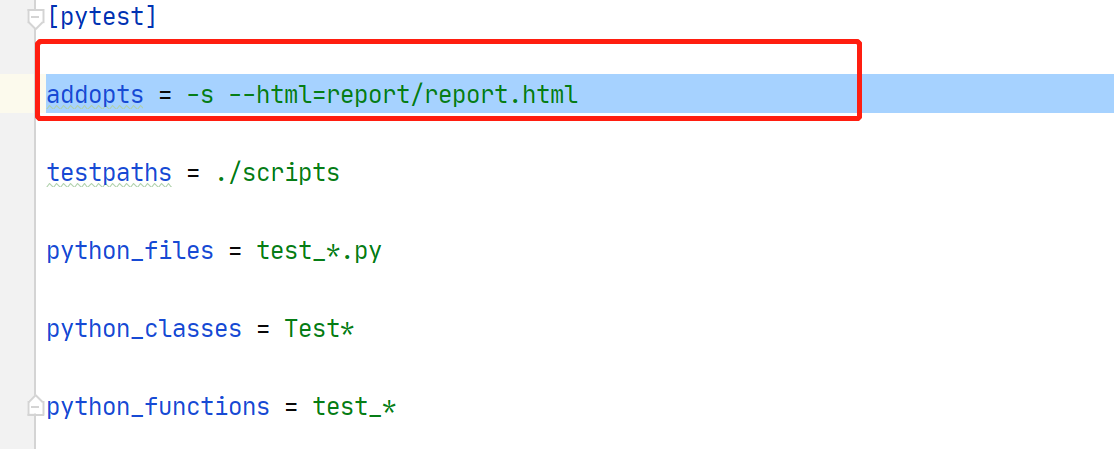
在配置文件中的命令行参数中增加 –html=用户路径/report.html
示例:
addopts = -s --html=report/report.html
结果:
2.2 控制函数执行顺序
安装:
使用命令 pip3 install pytest-ordering 进行安装
使用:
- 标记于被测试函数,@pytest.mark.run(order=x)
- 根据order传入的参数来解决运行顺序
- order值全为正数或全为负数时,运行顺序:值越小,优先级越高
- 正数和负数同时存在:正数优先级高
示例
import pytest

class TestLogin:
    @pytest.mark.run(order = 1)
    def test_login1(self):
        print('1')
    @pytest.mark.run(order = 2)
    def test_login2(self):
        print('2')
    @pytest.mark.run(order = -1)
    def test_login3(self):
        print('3')
    @pytest.mark.run(order = -2)
    def test_login4(self):
        print('4')
    @pytest.mark.run(order = 0)
    def test_login5(self):
        print('5')

    def test_login6(self):
        print('没有写')
结果:
scripts\test_login.py 0
.1
.2
.没有写
.4
.3
.
2.3 失败重试
应用场景:
自动化测试脚本可能会使用到网络,如果网络不好可能最终会使脚本不通过。像这种情况可能并不是脚本本身的问题,仅仅是因为网络忽快忽慢,那么我们可以使用失败重试的插件,当失败后尝试再次运行。一般情况最终成功可以视为成功,但最好进行进行排查时候是脚本问题。
安装:
使用命令 pip3 install pytest-rerunfailures 进行安装
使用:
在配置文件中的命令行参数中增加 –reruns n
示例

注意点
重试时,如果脚本通过,那么后续不再重试
三. Pytest-高级用法
3.1 跳过测试函数
应用场景:
同一个软件在不同的设备上可能会有不同的效果,比如,iOS 的 3d touch 操作是需要 6s 以上设备支持的,6 和 6s都可以安装同一款应用,如果设备不支持,那么根本没有必要去测试这个功能。此时,我们可以让这种函数进行跳过。
方法名:
@pytest.mark.skipif(condition, reason=None)
使用方式:
在需要跳过的测试脚本之上加上装饰器 @pytest.mark.skipif(condition, reason=”xxx”)
示例:
import pytest

class TestLogin:

    def test_login1(self):
        print('11111')
        assert 1
    @pytest.mark.skipif(True,reason=None)
    def test_login2(self):
        print('22222')
        assert 1
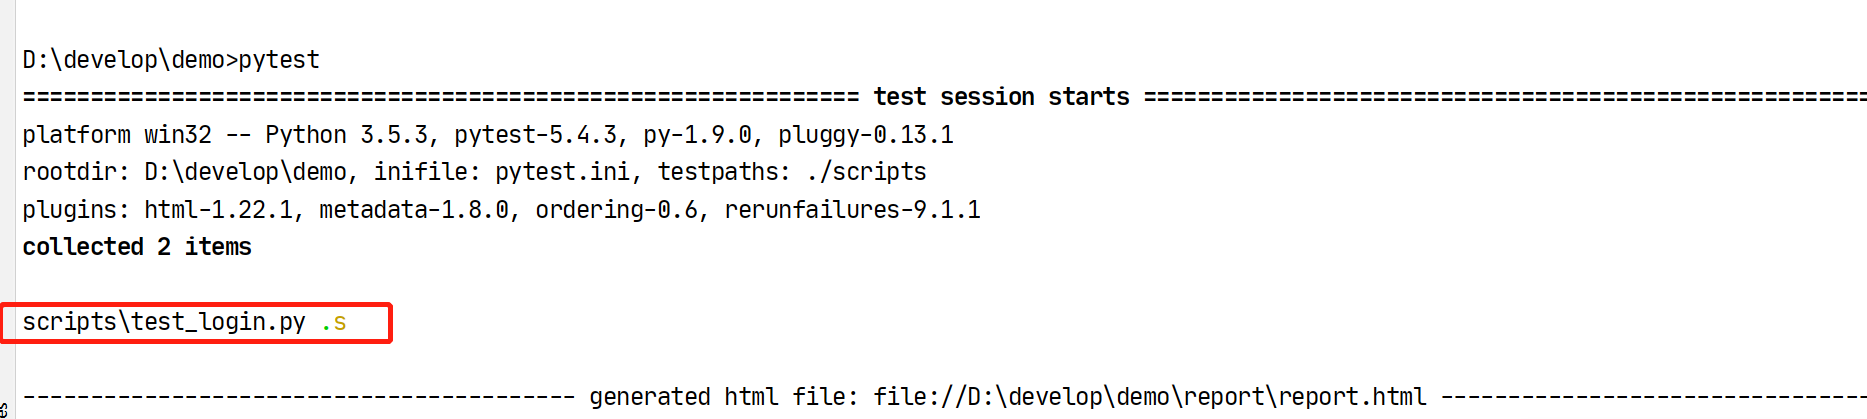
执行结果:
s代表跳过
3.2 预期失败
应用场景:
比如,注册时要求用户名为 6 – 10 位,如果我们传入一个 12 位的用户名,此时可以使用预期失败
方法名:
@pytest.mark.xfail(condition=None, reason=None, raises=None, run=True, strict=False)
使用方式:
在需要标记预期失败的测试脚本之上加上装饰器 @pytest.mark.xfail(condition, reason=”xx”)
示例
import pytest

class TestLogin:

    @pytest.mark.xfail(condition=False,reason=None)
    def test_login2(self):
        assert 1
    @pytest.mark.xfail(condition=False,reason=None)
    def test_login3(self):
        assert 0
    @pytest.mark.xfail(condition=True,reason=None)
    def test_login4(self):
        assert 1
    @pytest.mark.xfail(condition=True,reason=None)
    def test_login5(self):
        assert 0
结果:
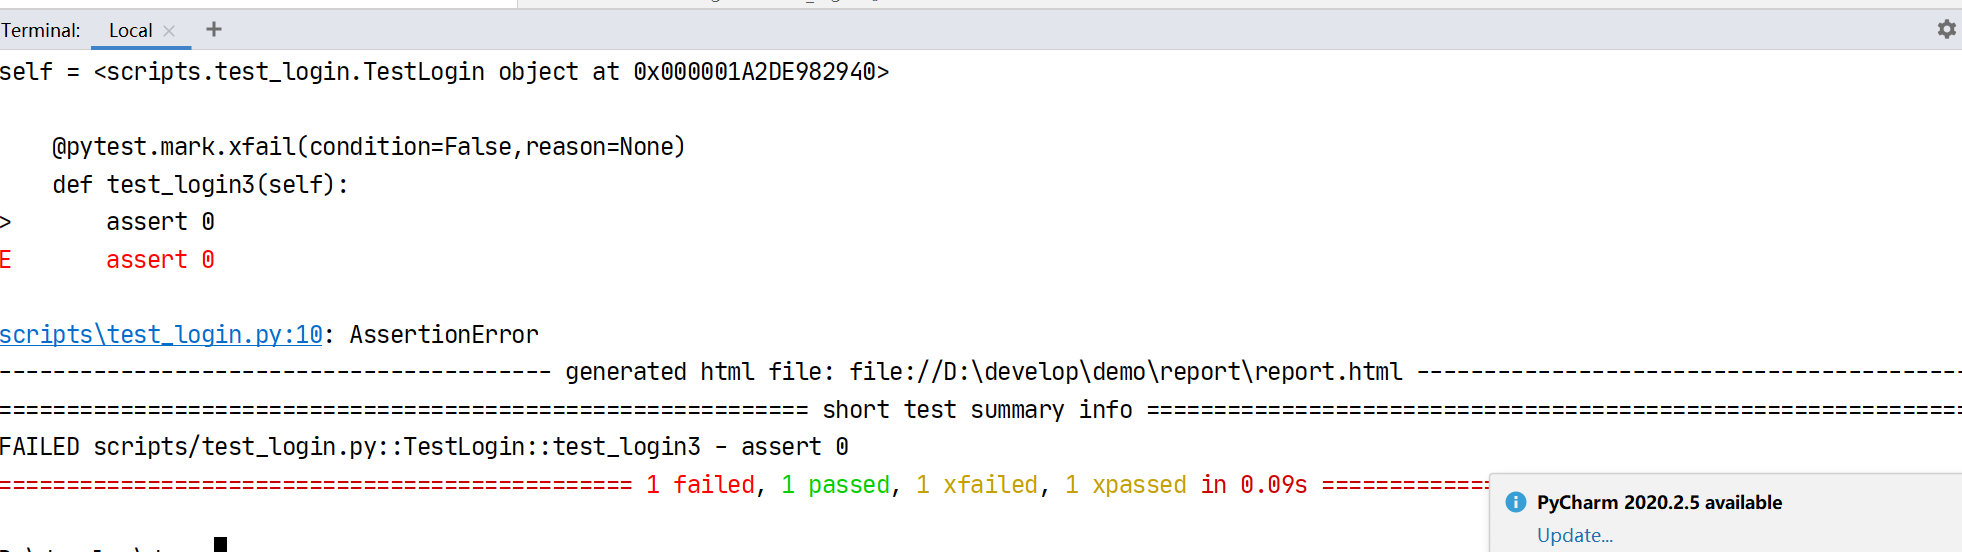
注意:
x 表示预期失败结果失败 不算是bug
X 表示预期失败结果成功 算是bug
3.3 数据参数化
应用场景
登录功能都是输入用户名,输入密码,点击登录。但登录的用户名和密码如果想测试多个值是没有办法用普通的操作实现的。数据参数化可以帮我实现这样的效果。
方法名:
@pytest.mark.parametrize(argnames, argvalues, indirect=False, ids=None, scope=None)
一个参数使用方式:
- argnames 为字符串类型,根据需求决定何时的参数名
- argvalues 为列表类型,根据需求决定列表元素中的内容
- 在测试脚本中,参数,名字与 argnames 保持一致
- 在测试脚本中正常使用
argvalues 列表有多少个内容,这个脚本就会运行几次
示例:
import time
import pytest

from appium import webdriver

class TestContact:

    def setup(self):

        desired_caps = {}

        desired_caps['platformName'] = 'Android'

        desired_caps['platformVersion'] = '5.1'

        desired_caps['deviceName'] = '192.168.56.101:5555'

        desired_caps['appPackage'] = 'com.android.contacts'
        desired_caps['appActivity'] = '.activities.PeopleActivity'

        self.driver = webdriver.Remote('http://localhost:4723/wd/hub', desired_caps)

    def teardown(self):
        time.sleep(3)
        self.driver.quit()

    @pytest.mark.parametrize("name", ["zhangsan", "lisi", "wangwu"])
    def test_add_contact(self, name):

        self.driver.find_element_by_id("com.android.contacts:id/floating_action_button").click()

        self.driver.find_element_by_xpath("//*[@text='本地保存']").click()

        self.driver.find_element_by_xpath("//*[@text='姓名']").send_keys(name)
多个参数使用方式
示例:
import time
import pytest

from appium import webdriver

class TestContact:

    def setup(self):

        desired_caps = {}

        desired_caps['platformName'] = 'Android'

        desired_caps['platformVersion'] = '5.1'

        desired_caps['deviceName'] = '192.168.56.101:5555'

        desired_caps['appPackage'] = 'com.android.contacts'
        desired_caps['appActivity'] = '.activities.PeopleActivity'

        self.driver = webdriver.Remote('http://localhost:4723/wd/hub', desired_caps)

    def teardown(self):
        time.sleep(3)
        self.driver.quit()

    @pytest.mark.parametrize(("name", "phone"), [("zhangsan", "18888888888"), ("lisi", "13333333333")])
    def test_add_contact(self, name, phone):

        self.driver.find_element_by_id("com.android.contacts:id/floating_action_button").click()

        self.driver.find_element_by_xpath("//*[@text='本地保存']").click()

        self.driver.find_element_by_xpath("//*[@text='姓名']").send_keys(name)

        self.driver.find_element_by_xpath("//*[@text='电话']").send_keys(phone)
注意:
多个参数还可以将装饰器写成
@pytest.mark.parametrize("username,password", [("zhangsan",
"zhangsan123"), ("xiaoming", "xiaoming123")])
效果是一样的。
四. Pytest-fixture
应用场景
fixture 修饰器来标记固定的工厂函数,在其他函数,类调用它时会被激活并优先执行,通常会被用于完成预置处理和重复操作。
4.1 使用方式
通过参数引用
示例:
import pytest
class TestLogin:

    @pytest.fixture()
    def before(self):
        print('before')

    def test_login1(self,before):
        print('login1')

    def test_login2(self,before):
        print('login2')
通过函数引用
示例:
import pytest
class TestLogin:

    @pytest.fixture()
    def before(self):
        print('before')

    @pytest.mark.usefixtures("before")
    def test_login1(self):
        print('login1')

    def test_login2(self,before):
        print('login2')
4.2 参数
默认运行
参数
@pytest.fixture(autouse=False)
示例:
import pytest
class TestLogin:

    def setup(self):
        print('setup')

    @pytest.fixture(autouse=True)
    def before(self):
        print('before')

    def test_login1(self):
        print('login1')

    def test_login2(self):
        print('login2')
结果:
scripts\test_login.py before
setup
login1
.before
setup
login2
作用域
参数名
@pytest.fixture(scope=”function”)
默认作用域为 函数 级别,在设置自动运行的情况,所有的测试脚本都会运行 fixture,如果想某个类只运行一次,可
以将作用域改为 class。但前提一定是将 fixture 函数写在类的外面。
示例:
import pytest
@pytest.fixture(autouse=True,scope='class')
def before():
    print('before')
class TestLogin:

    def setup_class(self):
        print('setup_class')

    def test_login1(self):
        print('login1')

    def test_login2(self):
        print('login2')

class TestLogin2:

    def setup_class(self):
        print('setup_class')

    def test_login1(self):
        print('login1')

    def test_login2(self):
        print('login2')
参数化
参数名
@pytest.fixture(params=None)
params 是一个列表,列表中有多少元素,脚本就会运行多少次。
如果想获取 params 中的数据,需要在 fixture 里面加上 request 参数,这个参数名必须叫做 request ,通过这个参数的 .param 属性获取值
示例:
import pytest
class TestLogin:
    @pytest.fixture(params=[1, 2])
    def before(self, request):
        print("------->before")
        print(request.param)
    def test_a(self, before):
        print("------->test_a")
结果:
scripts\test_login.py ------->before
1
4.3返回值
fixture 函数是允许有返回值,使用参数的形式进行 fixture 的引用,可以直接使用 fixture 的返回值。
示例:
import pytest
class TestLogin:
    @pytest.fixture(params=[1, 2])
    def before(self, request):
        return request.param
    def test_a(self, before):
        print(before)
        print('login')
结果:
scripts\test_login.py 1
login
.2
login
扩展
如果使用 fixture 参数化的同时也使用了脚本的参数化,可以达到 “两两” 组合的效果。比如,fixture的parmas里面
有 3 个元素,脚本的参数化里面有 4 个元素,那么这个脚本会运行 12 次。
示例:
import pytest
class TestLogin:
@pytest.fixture(params=[1, 2])
def before(self, request):
print("------->before")
return request.param
@pytest.mark.parametrize("name", [3, 4])
def test_a(self, before, name):
print("------->test_a")
print("%d - %d" % (before, name))
assert 1
结果:
scripts/test_login.py ------->before
1 - 4
.------->before
2 - 4
.
Original: https://blog.csdn.net/weixin_44999591/article/details/119462203
Author: 大头博客
Title: 四、pytest框架
原创文章受到原创版权保护。转载请注明出处:https://www.johngo689.com/774436/
转载文章受原作者版权保护。转载请注明原作者出处!