

一、Pytest
1.前提:需要安装pytest
2.介绍:unittest是python自带单元测试模块,除生成测试报告有区别,其余步骤基本一致
Python单元测试-unittest2_彭俞伟的博客-CSDN博客
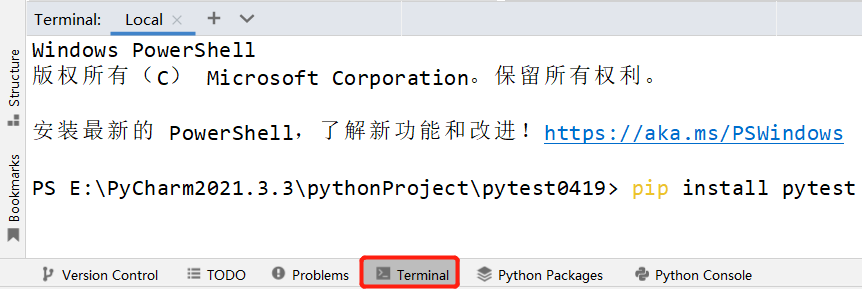
3.安装命令:
- pip install pytest
- pytest –version 检验是否安装成功
- pip list 查看当前项目下所有的包

二、命名规则
- Pytest单元测试中的类名和方法名必须是以test开头
- 执行中只能找到test开头的类和方法,比unittest更加严谨
- 在不指定读取某文件的情况下,模块名(py文件)必须以test_开头或以_test结尾,否则自动识别不到
- setup和teardown运行于测试方法的始末,每执行一次测试用例就会执行一次
- setup_class和teardown_class运行于测试方法的始末,不管有多少测试用例都只执行一次
- setup、teardown、setup_class和teardown_class在pytest里都没有快捷方式,需手动生成
三、Pytest调用语句
pytst.main(["-x","--html=生成测试报告的路径.html","模块名.py"])
- -x:出现一条测试用例失败就退出测试,不再执行后面的
- -s:显示print内容
四、跳过执行
- 使用@pytest.mark.skip()跳过执行测试用例(函数)
@pytest.mark.skip()
def test001(self):
       assert 2==2
五、Pytest运行结果展示
- 点号.,表示用例通过,通过n条显示n个点
- F 表示失败 Failure
- E 表示用例中存在异常 Error
- s 表示跳过 skip
- …
六、Pytest生成测试报告
1.前提:需要下载pytest-html模块(python自带的生成测试报告模块)
2.命令:pip install pytest-html
3.案例:
①方式一:运行指定模块下,所有以test开头的类和测试用例
if __name__ == '__main__':
    pytest.main(["--html=生成测试报告的路径.html","模块名.py"])
②方式二:运行指定模块的指定类的指定测试用例,用双冒号分割,并生成测试报告
if __name__ == '__main__':
    pytest.main(["--html=生成测试报告的路径.html","模块名.py::类名::方法名"])
③方式三:自动查找当前目录下,以test_开头或者以_test结尾的py文件
if __name__ == '__main__':
    pytest.main(["--html=./report.html"])
七、读取文件数据
1.读取xml文件
#导入读取xml文件的模块
from xml.dom import minidom

class ReadXmlClass():
    def read_xml(self,filename,firstname,secondname):
        #解析xml文件数据
        root =minidom.parse(filename)
        #根据标签名和索引获取元素
        firstnode =root.getElementsByTagName(firstname)[0]
        #根据父标签获取子标签,根据子标签的名称和索引获取元素
        secondnode=firstnode.getElementsByTagName(secondname)[0].firstChild.data
        return secondnode
2.读取csv文件
#导入csv模块
import csv

class ReadCsvClass():
    def read_csv(self):
        #定义一个空列表
        item =[]
        #得到csv文件对象
        c = csv.reader(open("../data/csvData.csv","r"))
        for csv_i in c:
            #将获取的数据添加到列表中
            item.append(csv_i)
        return item
八、Allure
1.定义:一款轻量级并且非常灵活的开源测试报告框架。它支持绝大多数测试框架,例如TestNG、Pytest、JUint等。它简单易用,易于集成
2.Allure常用特性:
2.1.allure.attach:在测试报告中生成指定内容、名称、类型的附件
①语法:allure.attach(body, name=None, attachment_type=None, extension=None)
②参数说明:
- body:需要显示的内容,也可以理解为写入附件的内容
- name:附件名称
- attachment_type:附件类型,如csv、jpg、html 等,由allure.attachment_type提供
- extension:附件扩展名,不常用
2.2.allure.attach.file():向测试用例中上传附件
①语法:allure.attach.file(source, name=None, attachment_type=None, extension=None)
②参数说明:source为文件路径,其他参数与allure.attach()参数一致
2.3.with allure.step():将普通的代码标记为测试步骤,执行到这段代码时则会在Allure报告中展示步骤说明。可以理解为python中的注释
①语法:with allure.step(“步骤说明”)
②案例:比如某段代码用于断言
def testAssert():
    with allure.step("断言")
    assert 1==1
2.4.fixture: Pytest之Fixture参数详解及使用_测试之道.的博客-CSDN博客_pytest.fixture
2.5.标记装饰器:
①@allure.epic:敏捷里面的概念,定义史诗,相当于module级的标签
②@allure.feature:功能点的描述,可以理解成模块,相当于class级的标签
③@allure.story:故事,可以理解为场景,相当于method级的标签
三者关系:epic是feature父级,feature是story父级
3.使用Pytest结合Allure生成测试报告:
①下载allure: Central Repository: io/qameta/allure/allure-commandline
②配置环境变量:系统变量的Path中,添加allure本地的bin路径
③验证:在cmd窗口中输入allure –version
④安装allure-pytest:命令 pip install allure-pytest
⑤安装完成后重启PyCharm
⑥生成测试报告:
if __name__ == '__main__':
    #allure生成json类型的测试报告
    pytest.main(['--alluredir', 'report/result', '模块名.py'])
    #将测试报告转为html格式
    split = 'allure ' + 'generate ' + './report/result ' + '-o ' + './report/html ' + '--clean'
    #system函数可以将字符串转化成命令在服务器上运行
    os.system(split)
- 注:allure-pytest是Pytest的一个插件,通过它我们可以生成Allure所需要的用于生成测试报告的数据
Original: https://blog.csdn.net/weixin_45583894/article/details/124282874
Author: 彭俞伟
Title: Python单元测试-pytest
原创文章受到原创版权保护。转载请注明出处:https://www.johngo689.com/773410/
转载文章受原作者版权保护。转载请注明原作者出处!