

前言:结合上文讲到了博客发布,本篇文章进行对于个人的信息进行一系列操作:
从零到一搭建一个属于自己的博客系统(弌):从零到一搭建一个属于自己的博客系统(弌)
从零到一搭建一个属于自己的博客系统(弍):从零到一搭建一个属于自己的博客系统(弍)
目录:
- 一.界面元素:
- 二.个人中心:
* - 1.页面部分以及HTML:
- 2.CSS:
- 3.效果图:
- 4.js:
- 三.Django接口:
* - 1.修改密码(update):
- 2.忘记密码(see):
- 3.日志查看(seemsg):
- 4.日志写入(usermsg):
- 四.补充:
- 五.换肤:
一.界面元素:
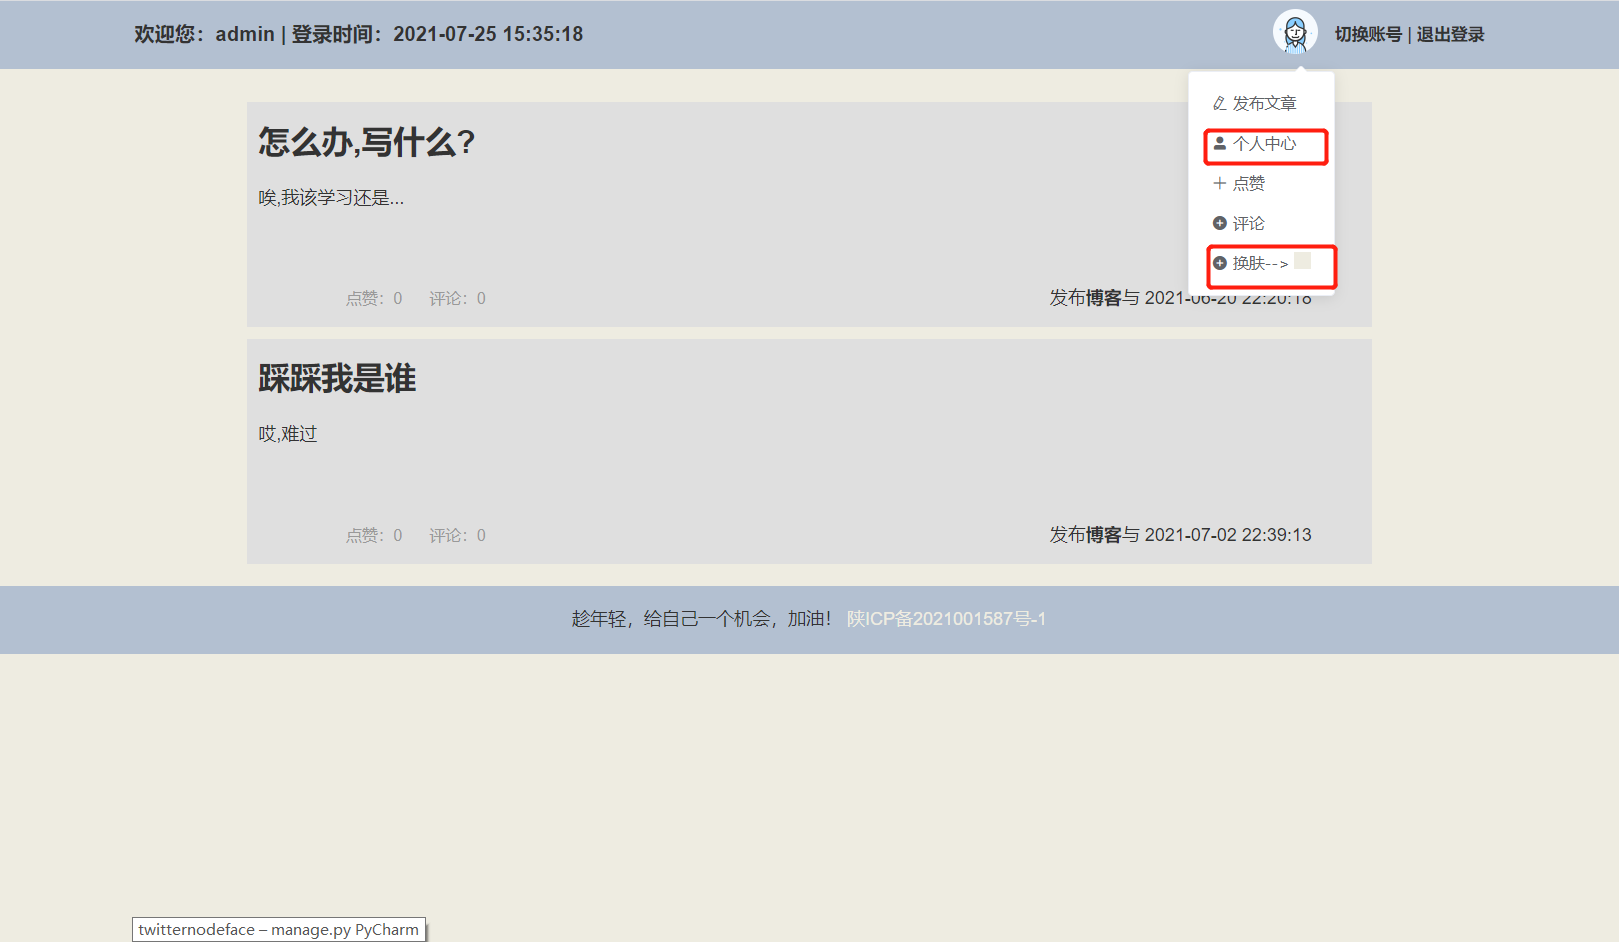

本次更新以上红框框的两个模块,我们先看个人中心模块
; 二.个人中心:
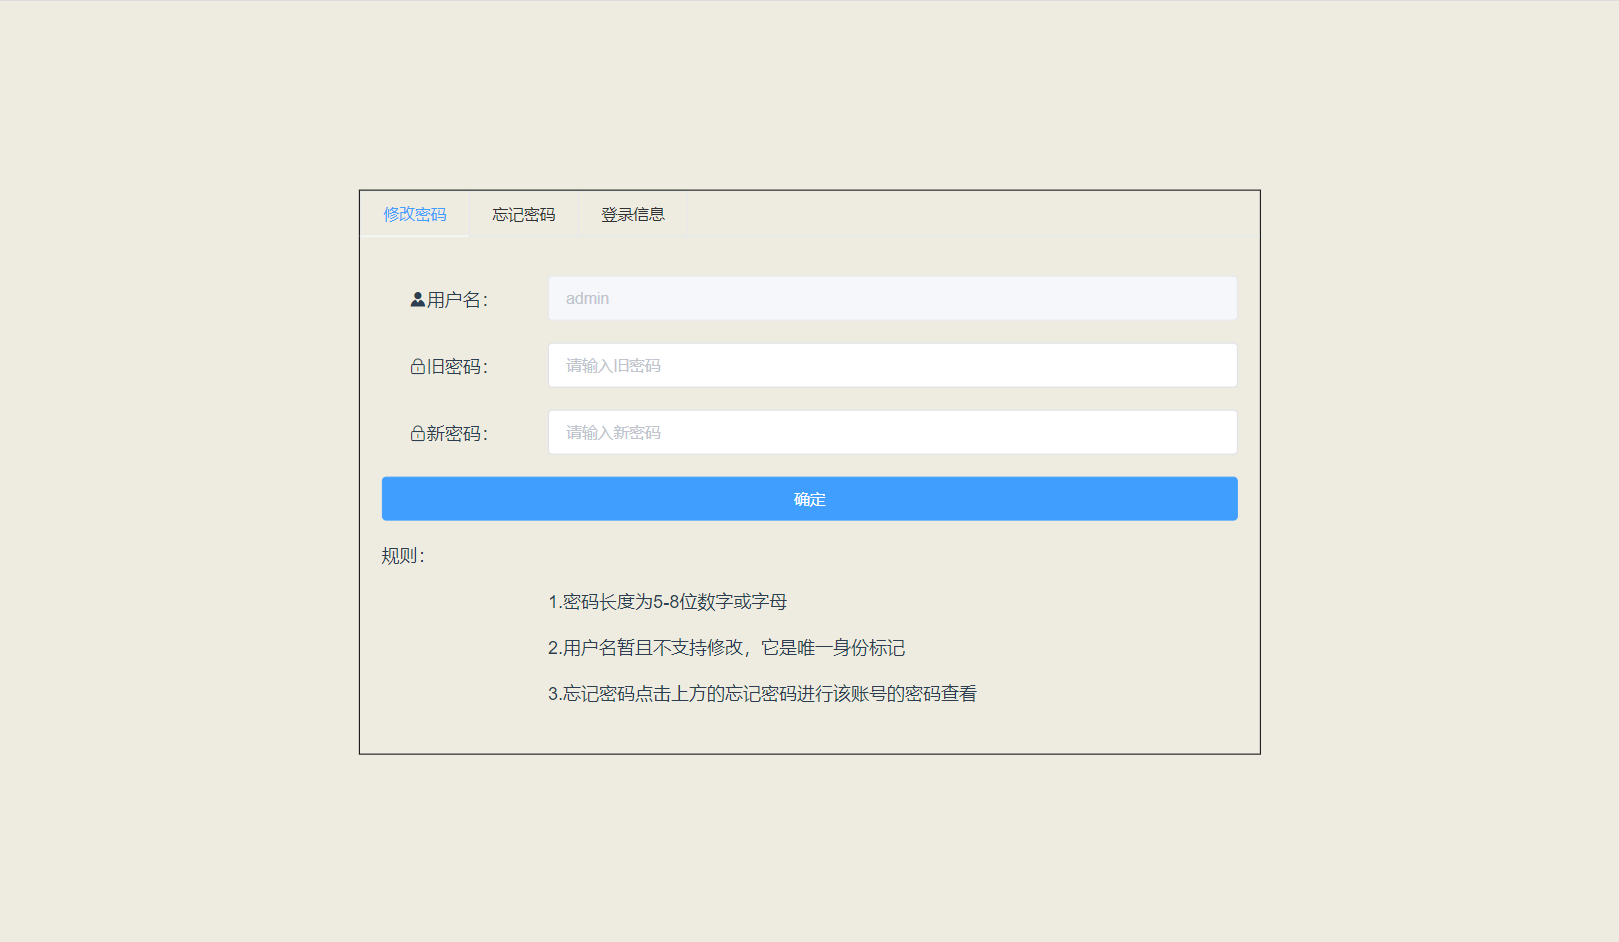
1.页面部分以及HTML:
一般我们对于自己账号管理,有修改密码和忘记密码的操作,另外加上日志我们可以详细的了解自己账号的登录情况(我们采用 elementUI 进行元素界面的设计):
Personalcenter.vue
<template>
  <div class="Personalcenter">
    <div class="content">
      <el-tabs v-model="activeName" type="card">
        <el-tab-pane label="修改密码" name="first">
          <table border="0" width="100%" cellspacing="20px;">
            <tr>
              <td><i class="el-icon-s-custom">i>用户名:td>
              <td>
                <el-input v-model="username" disabled>el-input>
              td>
            tr>
            <tr>
              <td><i class="el-icon-lock">i>旧密码:td>
              <td>
                <el-input v-model="pwd1" placeholder="请输入旧密码">el-input>
              td>
            tr>
            <tr>
              <td><i class="el-icon-lock">i>新密码:td>
              <td>
                <el-input v-model="pwd2" placeholder="请输入新密码">el-input>
              td>
            tr>
            <tr>
              <td colspan="2">
                <el-button type="primary" style="width:100%" @click="update">确定el-button>
              td>
            tr>
            <tr align="left">
              <td colspan="2">规则:td>
            tr>
            <tr>
              <td>td>
              <td align="left">
                1.密码长度为5-8位数字或字母
              td>
            tr>
            <tr>
              <td>td>
              <td align="left">
                2.用户名暂且不支持修改,它是唯一身份标记
              td>
            tr>
            <tr>
              <td>td>
              <td align="left">
                3.忘记密码点击上方的忘记密码进行该账号的密码查看
              td>
            tr>
          table>
        el-tab-pane>
        <el-tab-pane label="忘记密码" name="second">
          <table border="0" width="100%" cellspacing="20px;">
            <tr>
              <td><i class="el-icon-s-custom">i>用户名:td>
              <td>
                <el-input v-model="username" disabled>el-input>
              td>
            tr>
            <tr>
              <td><i class="el-icon-lock">i>密码:td>
              <td>
                <el-input v-model="pwd3" disabled>el-input>
              td>
            tr>
            <tr align="left">
              <td colspan="2">温馨提示:td>
            tr>
            <tr>
              <td>td>
              <td align="left">
                1.请勿将您的密码泄露给其他人;
              td>
            tr>
            <tr>
              <td>td>
              <td align="left">
                2.忘记密码可以进行在这里查看;
              td>
            tr>
            <tr>
              <td>td>
              <td align="left">
                3.有问题请联系管理员--叫做长大
              td>
            tr>
          table>
        el-tab-pane>
        <el-tab-pane label="登录信息" name="third">
           <el-table
              :data='userData'
              style="width: 100%"
              align="center"
              header-align="center"
              >
              <el-table-column
                label="序号"
                width="180"
                type="index"
                :index="indexMethod">
              el-table-column>
              <el-table-column
                label="用户"
                width="180">
                <template slot-scope="scope">
                 <span style="margin-left: 10px">{{scope.row[0]}}span>
              template>
              el-table-column>
              <el-table-column
                label="登录时间"> <template slot-scope="scope">
                 <span style="margin-left: 10px">{{scope.row[1]}}span>
              template>
              el-table-column>
    el-table>
        el-tab-pane>
      el-tabs>
    div>
  div>
template>
2.CSS:
.Personalcenter {
    width: 100%;
    height: 100%;
  }

  .content {
    width: 800px;
    height: 500px;
    position: absolute;
    top: 50%;
    left: 50%;
    transform: translate(-50%, -50%);
    border: 1px solid black;
  }
3.效果图:


; 4.js:
界面布局完成那么就要进行我们的逻辑操作部分,数据的请求以及返回结果的处理 (接口部分移步三.Django接口):
- data中存储我们需要的数据存储变量:
data () {
    return {
      activeName: 'first',
      username: '',
      pwd1: '',
      pwd2: '',
      pwd3: '',
      userData: []
    }
  },
- 修改密码部分:
    update () {

      var reg = /^[a-zA-Z0-9@#]{5,8}$/

      if (this.pwd1 === '' || this.pwd2 === '') {
        this.$message({
          message: '密码不能为空',
          type: 'error'
        })

      } else if (this.pwd1 === this.pwd2) {
        this.$message({
          message: '两次密码不能一样,请仔细核查',
          type: 'error'
        })

      } else if (!reg.test(this.pwd1) || !reg.test(this.pwd1)) {
        this.$message({
          message: '请输入5-8位密码',
          type: 'error'
        })

      } else if (this.pwd1 !== this.pwd3) {
        this.$message({
          message: '原始密码错误',
          type: 'error'
        })
      } else {

        var data = {
          user: sessionStorage.getItem('user'),
          pwd: this.pwd2
        }
        this.$post('/update/', data, {headers: {'Content-Type': 'application/x-www-form-urlencoded'}}).then(res => {
          if (res === 'ok') {
            this.$message({
              message: '密码修改成功',
              type: 'success'
            })

            this.pwd1 = ''
            this.pwd2 = ''

            this.see()

            this.$router.push({
              path: '/'
            })
          }

        }).catch((e) => {
          this.$message({
            message: '数据库或者网络异常' + e,
            type: 'error'
          })
        })
      }
    },
- 查看密码:
    see () {
    需要发送的数据
      var data = {
        user: sessionStorage.getItem('user')
      }
      this.$get('/see/', data, 'get').then(res => {
        for (var i = 0; i < res.length; i++) {
          this.pwd3 = res[i][1]
        }
      })
    },
- 日志查看:
 seemsg () {

      var data = {
        user: sessionStorage.getItem('user')
      }
      this.$get('/seemsg', data).then(res => {
        for (var i = 0; i < res.length; i++) {
          this.userData = res
        }
      })
    },
- 序号索引
  indexMethod (index) {
      return index + 1
    }
三.Django接口:
首先进行操作时候我们应该知道我们需要什么接口,应该进行哪些相关的操作
1.修改密码(update):

同样我们在views中进行接口的编写,其原理很简单就是对于数据库中的信息进行操作而已:
def update(request):
    data = json.loads(request.body, encoding='utf-8')

    db = MySQLdb.connect("localhost", "用户名", "密码", "数据库名", charset='utf8')

    cursor = db.cursor()

    sql = "UPDATE user_table SET password='%s' WHERE user='%s'"%(data['pwd'],data['user'])
    try:

        cursor.execute(sql)

        db.commit()

        results = cursor.fetchall()
        print(results)

    except:

        result = {
            'code': 400,
            'msg': '数据库错误'
        }
        print("Error: unable to fecth data")
        return JsonResponse(result, safe=False)

    db.close()
    return HttpResponse('ok')
2.忘记密码(see):
根据登录的用户名对于我们的数据库进行数据字段的查询最终返回对应字段下面的数据:
def see(request):

     db = MySQLdb.connect("localhost", "用户名", "密码", "数据库名", charset='utf8')

    cursor = db.cursor()
    data=request.GET

    sql = "SELECT * FROM user_table WHERE user='%s'"%(data['user'])
    try:

        cursor.execute(sql)

        results = cursor.fetchall()

    except:
        result = {
            'code': 400,
            'msg': '数据库错误'
        }
        print("Error: unable to fecth data")
        return JsonResponse(result, safe=False)

    db.close()
    return JsonResponse(results, safe=False)
3.日志查看(seemsg):
原理就是对于登录用户进行对应的用户名在数据库中进行查询,返回结果集:
def seemsg(request):

    db = MySQLdb.connect("localhost", "用户名", "密码", "数据库名", charset='utf8')

    cursor = db.cursor()
    data=request.GET

    sql = "SELECT * FROM usermsg_table WHERE user='%s'"%(data['user'])
    try:

        cursor.execute(sql)

        results = cursor.fetchall()

    except:
        result = {
            'code': 400,
            'msg': '数据库错误'
        }
        print("Error: unable to fecth data")
        return JsonResponse(result, safe=False)

    db.close()
    return JsonResponse(results, safe=False)
4.日志写入(usermsg):
在用户登录成功时候将登录信息通过此接口写入数据库中:
def usermsg(request):

    data = json.loads(request.body, encoding='utf-8')

    db = MySQLdb.connect("localhost", "用户名", "密码", "数据库名", charset='utf8')

    cursor = db.cursor()

    sql = "INSERT INTO usermsg_table(user,time) VALUES('%s','%s')"%(data['user'],data['time'])
    try:

        cursor.execute(sql)

        db.commit()

        results = cursor.fetchall()
        print(results)

    except:
        result = {
            'code': 400,
            'msg': '数据库错误'
        }
        print("Error: unable to fecth data")
        return JsonResponse(result, safe=False)

    db.close()
    return HttpResponse('ok')
四.补充:
日志查看是需要我们在登录时候将信息写入数据库中的,也就是在login页面进行数据的写入(接口欧请访问:三.Django接口):
在login界面,在用户点击登录按钮时:
   login () {

      var reg = /^[a-zA-Z0-9@#]{5,8}$/

      if (this.user === '') {
        this.$message({
          message: '用户名不能为空',
          type: 'error'
        })
      } else if (!reg.test(this.user)) {
        this.$message({
          message: '请输入5-8位账号',
          type: 'error'
        })
      } else if (this.pwd === '') {
        this.$message({
          message: '密码不能为空',
          type: 'error'
        })
      } else if (!reg.test(this.pwd)) {
        this.$message({
          message: '请输入5-8位密码',
          type: 'error'
        })
      } else {

        this.$get('/login').then(res => {
          var a = ''
          var b = ''
          console.log(res)
          for (var i = 0; i < res.length; i++) {
            if (this.user === res[i][0] && this.pwd === res[i][1]) {
              a = res[i][0]
              b = res[i][1]
              this.time = this.timestampToTime(Date.now() / 1000)
              sessionStorage.setItem('sid', '已登录')
              sessionStorage.setItem('user', this.user)
              sessionStorage.setItem('time', this.time)
              var data = {
                time: this.time,
                user: sessionStorage.getItem('user')
              }

              this.$post('/usermsg/', data, {headers: {'Content-Type': 'application/x-www-form-urlencoded'}}).then(res => {
                this.$message({
                  message: '恭喜你,登录成功!',
                  type: 'success'
                })
                this.$router.push({
                  name: 'homepage'
                })
              })
            }
          }
          if (this.user !== a) {
            this.$message({
              message: '用户不存在!',
              type: 'error'
            })
          } else if (this.pwd !== b) {
            this.$message({
              message: '密码有误,请核查!',
              type: 'error'
            })
          }
        })
      }
    }
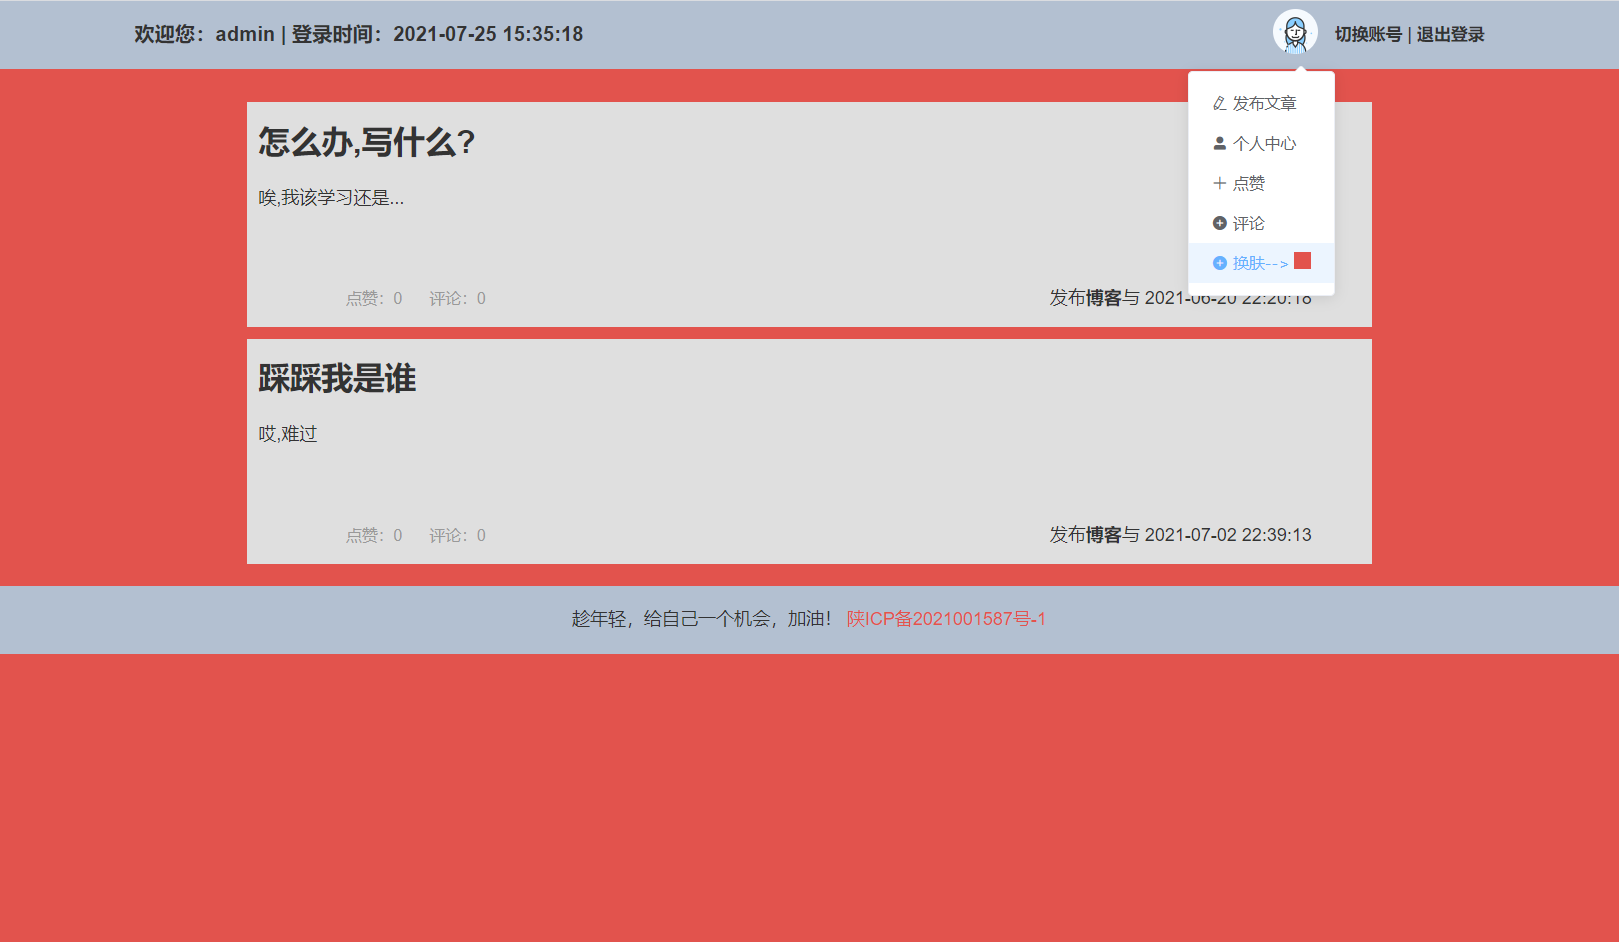
五.换肤:
所谓换肤,就是给页面换一种背景色,我们可以使用elementUI中的 ColorPicker 颜色选择器:
- 首先引用组件:
<div class="block">
  <el-color-picker v-model="color">el-color-picker>
div>
- 我们在data中设置默认值:
color: '#999'
- 添加点击事件:
<colorPicker v-model="color" @change="handleChangeColor">colorPicker>
- 点击事件执行:
 handleChangeColor (val) {
      console.log('输出颜色值', val)
      this.color = val

      document.body.style.backgroundColor = this.color
      document.querySelector('a').style.color = this.color
    },
- 效果图:
Original: https://blog.csdn.net/qq_45096273/article/details/119083206
Author: 木偶☜
Title: 从零到一搭建一个属于自己的博客系统(弎)
原创文章受到原创版权保护。转载请注明出处:https://www.johngo689.com/736537/
转载文章受原作者版权保护。转载请注明原作者出处!