

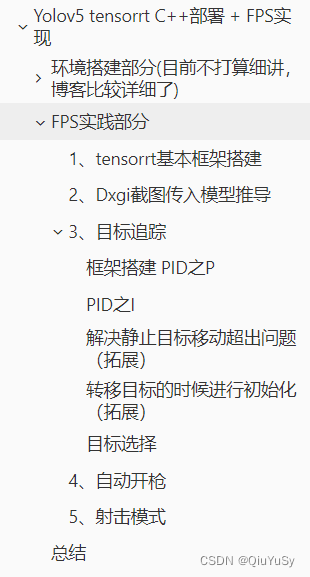
Yolov5 tensorrt C++部署 + FPS实现
作者:QiuYu Yolo交流QQ群:936625049
本文面向有一定python/C++基础的同学,本教程内容仅供学习使用。
目录
环境搭建部分(目前不打算细讲,博客比较详细了)
1、Python/Pytorch/Cuda环境搭建
具体参考这篇博客
https://blog.csdn.net/weixin_44791964/article/details/120668551?spm=1001.2014.3001.5502
tip:如果之后在权重训练时,缺少部分包,百度包名然后导入即可
2、权重训练
可以参考这位up主的视频,训练完毕后得到.pt权重文件
https://space.bilibili.com/14796576/?spm_id_from=333.999.0.0

; 3、C++环境搭建
具体参考下面这篇博客
https://blog.csdn.net/weixin_45747759/article/details/124076582?spm=1001.2014.3001.5501
tip: CMake编译的时候如果找不到Cuda,可能是Cuda安装的时候没选VS的那个包,重新单独勾选VS的包安装一遍也许可以解决。
注意这部分是必须的,后面部分需要这部分作为前置
; FPS实践部分
如果你完成了环境搭建那么恭喜你,已经完成了最难熬的部分
1、tensorrt基本框架搭建
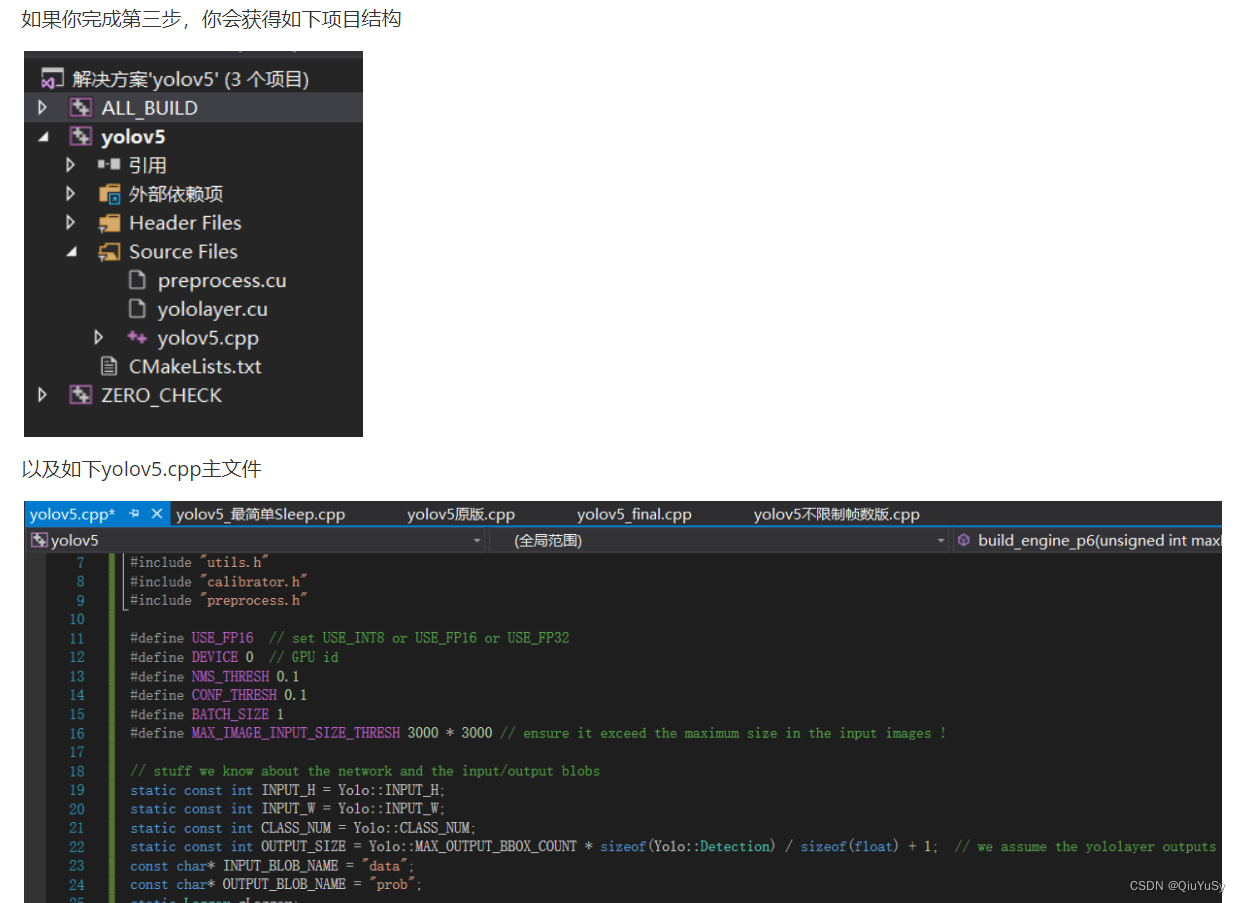
首先当然是导入头文件了
#include
#include
#include
#include "cuda_utils.h"
#include "logging.h"
#include "common.hpp"
#include "utils.h"
#include "calibrator.h"
#include "preprocess.h"
#include
#include "atlstr.h"
#include
#include "stdafx.h"
#include "kmbox.cpp"

#include
#include
#include
#include

#include

#define KEY_DOWN(VK_NONAME) ((GetAsyncKeyState(VK_NONAME) & 0x8000) ? 1:0)

#define USE_FP16
#define DEVICE 0
#define NMS_THRESH 0.1
#define CONF_THRESH 0.6
#define BATCH_SIZE 1
#define MAX_IMAGE_INPUT_SIZE_THRESH 1000 * 1000

#pragma comment(lib, "d3d11.lib")
#pragma comment(lib, "dxgi.lib")
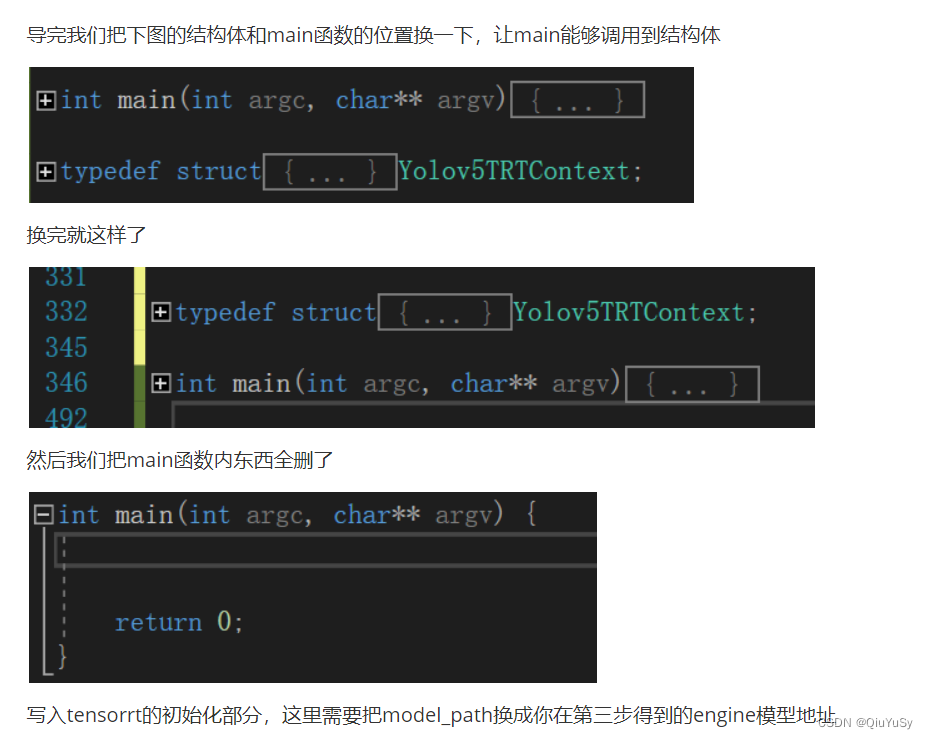
写入tensorrt的初始化部分,这里需要把model_path换成你在第三步得到的engine模型地址
char *model_path = "C:\\Users\\QiuYuSY\\Desktop\\yolov5-6.1_tensorrt_CFHD\\yolov5s.engine";

cudaSetDevice(DEVICE);

char *trtModelStream{ nullptr };
size_t size_e{ 0 };
std::string engine_name = model_path;
std::ifstream file(engine_name, std::ios::binary);
Yolov5TRTContext * trt = new Yolov5TRTContext();
if (file.good()) {
    file.seekg(0, file.end);
    size_e = file.tellg();
    file.seekg(0, file.beg);
    trtModelStream = new char[size_e];
    assert(trtModelStream);
    file.read(trtModelStream, size_e);
    file.close();
}

trt->runtime = createInferRuntime(gLogger);
assert(trt->runtime != nullptr);
trt->engine = trt->runtime->deserializeCudaEngine(trtModelStream, size_e);
assert(trt->engine != nullptr);
trt->context = trt->engine->createExecutionContext();
assert(trt->context != nullptr);

assert(trt->engine->getNbBindings() == 2);
trt->data = new float[BATCH_SIZE * 3 * INPUT_H * INPUT_W];
trt->prob = new float[BATCH_SIZE * OUTPUT_SIZE];
trt->inputIndex = trt->engine->getBindingIndex(INPUT_BLOB_NAME);
trt->outputIndex = trt->engine->getBindingIndex(OUTPUT_BLOB_NAME);
assert(trt->inputIndex == 0);
assert(trt->outputIndex == 1);

CUDA_CHECK(cudaMalloc(&trt->buffers[trt->inputIndex], BATCH_SIZE * 3 * INPUT_H * INPUT_W * sizeof(float)));
CUDA_CHECK(cudaMalloc(&trt->buffers[trt->outputIndex], BATCH_SIZE * OUTPUT_SIZE * sizeof(float)));

CUDA_CHECK(cudaStreamCreate(&trt->stream));
2、Dxgi截图传入模型推导
把以下几个方法放到main函数前面
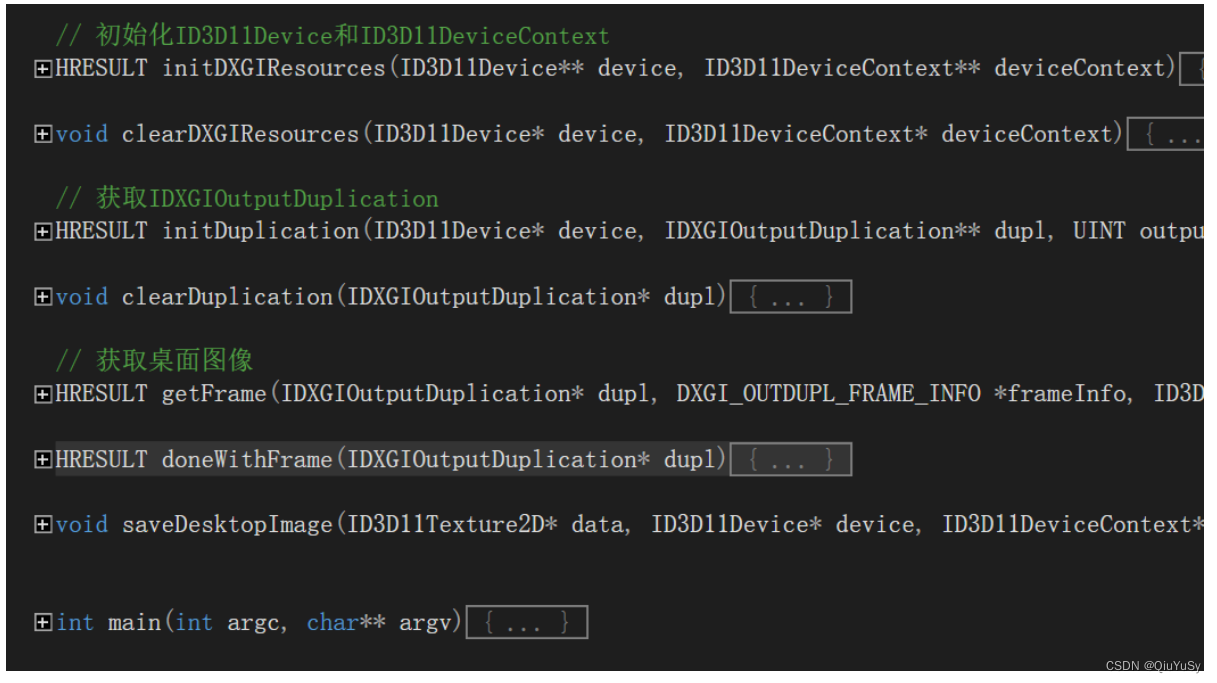
完整方法以及项目群文件取 936625049
然后在main函数之前填写的下面加入如下行,进行dxgi初始化 截图
ID3D11Device* device = nullptr;
ID3D11DeviceContext* deviceContext = nullptr;
initDXGIResources(&device, &deviceContext);
IDXGIOutputDuplication* desktopDupl = nullptr;
UINT output = 0;
initDuplication(device, &desktopDupl, output);
DXGI_OUTDUPL_FRAME_INFO frameInfo;
ID3D11Texture2D* acquiredDesktopImage = nullptr;
bool timeOut;
while (true) {
HRESULT ret = getFrame(desktopDupl, &frameInfo, &acquiredDesktopImage, &timeOut);
if (timeOut || ret < 0)
{
continue;
}
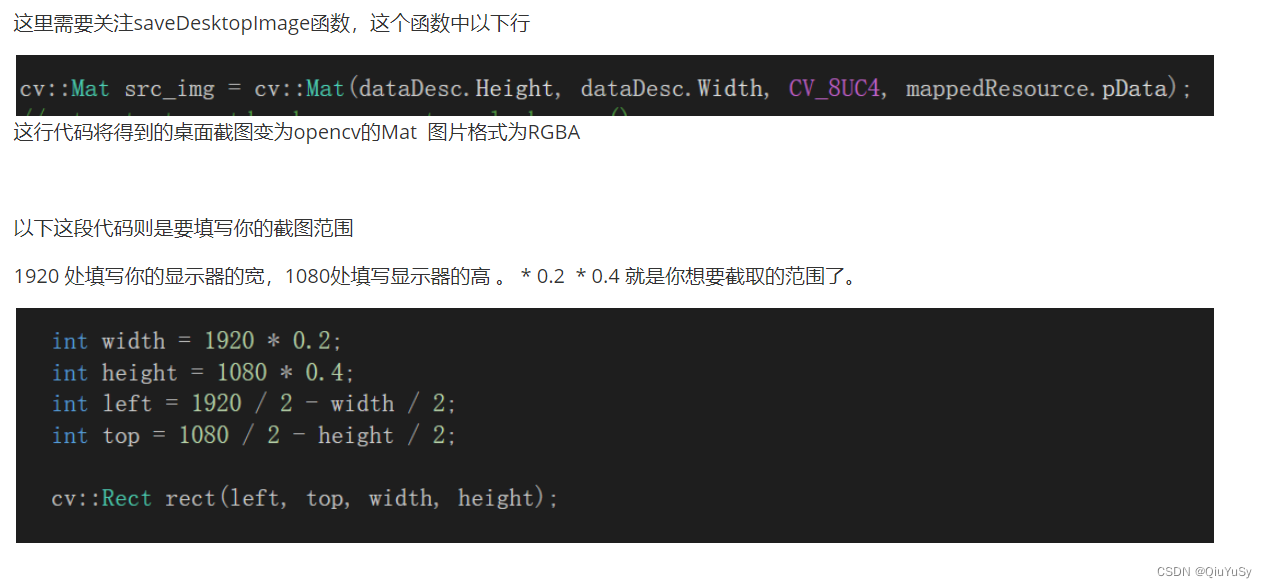
cv::Mat img = cv::Mat(640, 640, CV_8UC4);
saveDesktopImage(acquiredDesktopImage, device, deviceContext, &img);
doneWithFrame(desktopDupl);
if (acquiredDesktopImage)
{
acquiredDesktopImage->Release();
acquiredDesktopImage = nullptr;
}
cv::cvtColor(img, img, cv::COLOR_RGBA2RGB);
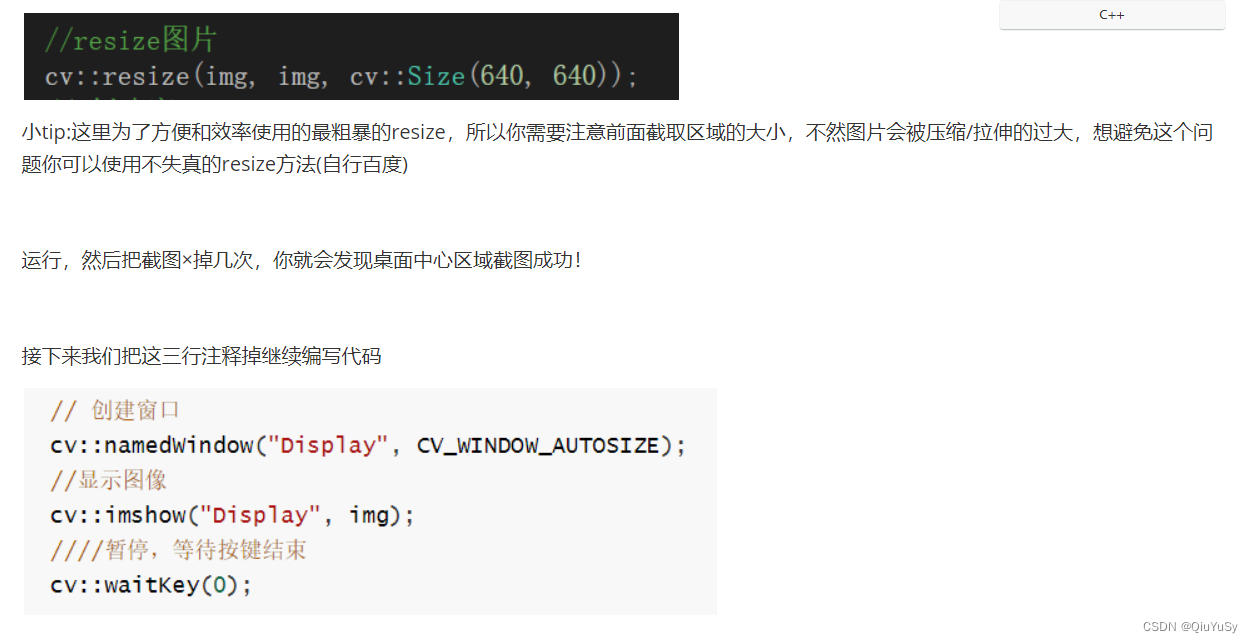
cv::resize(img, img, cv::Size(640, 640));
cv::namedWindow("Display", CV_WINDOW_AUTOSIZE);
cv::imshow("Display", img);
cv::waitKey(0);
}
clearDuplication(desktopDupl);
clearDXGIResources(device, deviceContext);
然后我们把图片放入模型进行推理,位置在resize后面
int i = 0;
for (int row = 0; row < INPUT_H; ++row) {
    for (int col = 0; col < INPUT_W; ++col) {
        trt->data[i] = img.at<cv::Vec3b>(row, col)[0] / 255.0;
        trt->data[i + INPUT_H * INPUT_W] = img.at<cv::Vec3b>(row, col)[1] / 255.0;
        trt->data[i + 2 * INPUT_H * INPUT_W] = img.at<cv::Vec3b>(row, col)[2] / 255.0;
        ++i;
    }
}

doInference(*trt->context, trt->stream, trt->buffers, trt->data, trt->prob, BATCH_SIZE);
std::vector<std::vector<Yolo::Detection>> batch_res(1);
auto& res = batch_res[0];
nms(res, &trt->prob[0 * OUTPUT_SIZE], CONF_THRESH, NMS_THRESH);
int len = res.size();

float(*res_array)[6] = new float[len][6];

for (size_t j = 0; j < res.size(); j++) {
    cv::Rect r = get_rect(img, res[j].bbox);
    res_array[j][0] = r.x;
    res_array[j][1] = r.y;
    res_array[j][2] = r.width;
    res_array[j][3] = r.height;

    res_array[j][5] = res[j].conf;
}
此时我们便得到了图片中每个对象的信息,并放入了res_array数组中
那么截图推理部分到此结束!
剩余部分文档在群文件中
Original: https://blog.csdn.net/QiuYuSy/article/details/125375273
Author: QiuYuSy
Title: Yolov5 tensorrt C++部署 + FPS实现
原创文章受到原创版权保护。转载请注明出处:https://www.johngo689.com/719053/
转载文章受原作者版权保护。转载请注明原作者出处!