

目录
1.LinkedHashMap的内部结构
2.LinkedHashMap构造函数
3.元素新增策略
4.元素删除
5.元素修改和查找
6.特殊操作
7.扩容
8.总结
1.LinkedHashMap的内部结构
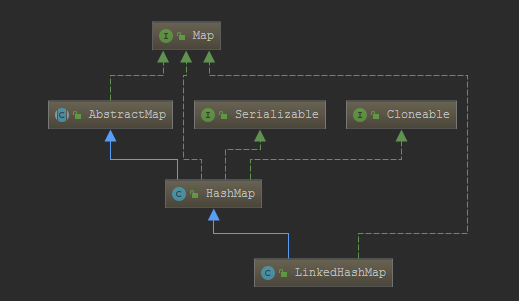

对象的内部结构其实就是hashmap的内部结构,但是比hashmap的内部结构node要多维护2个引用指针,用来做前置和后置链表
同事linkedhashmap本身还有头链表节点和尾部链表节点
static class Entry extends MyHashMap.Node {
    Entry before, after;
    Entry(int hash, K key, V value, Node next) {
        super(hash, key, value, next);
    }
}
因为linkedhashmap是继承自hashmap,所以hashmap有的它都有,比如上面2的n次幂,扩容策略等等
那么就有意思了,linkedhashmap有什么独到的地方么???
既然是继承自hashmap,那么我们看看hashmap没有的东西,或者被覆盖重写了的东西即可
2.LinkedHashMap构造函数
基本和hashmap一致,无法就是设置空间容量,负载因子等数据
这里空间容量和hashmap一样,也是取比当前容量大的最小2次幂
3.元素新增策略
就说put吧,就是完完全全调用的hashmap的 put方法。。。。晕
不过注意啊,再hashmap中有实打实大三个函数是为了linkedhashmap准备的,这个在源码中就说明了,并且put操作就用到了其中2个

这里可以吧之前hashmap中的这几个函数加上了解了
还有个地方需要注意,linkedhashmap还重写了newnode方法,这个是为了和链表串联起来
Node newNode(int hash, K key, V value, Node e) {
    //每当创建一个新的链表节点的时候,我们调用linknodelast,吧当前添加到链表末尾
    TestLinkedHashMap.Entry p =
            new TestLinkedHashMap.Entry(hash, key, value, e);
    linkNodeLast(p);
    return p;
}

//不论这个节点是处于什么位置,都进行添加节点
private void linkNodeLast(TestLinkedHashMap.Entry p) {
    TestLinkedHashMap.Entry last = tail;
    tail = p;
    if (last == null)
        head = p;
    else {
        p.before = last;
        last.after = p;
    }
}
接下来我们一一阐述hashmap专门为linkedhashmap预留的几个函数
3.1 afterNodeAccess
/**
 *
 * @program: y2019.collection.map.TestLinkedHashMap
 * @description: 只有当put进去,这个值存放到hash桶上的时候,并且这个值是之前存在的,(或者是树状结构),才会触发这个函数
 * @auther: xiaof
 * @date: 2019/8/29 17:03
 */
void afterNodeAccess(Node e) { // move node to last
    TestLinkedHashMap.Entry last;
    if (accessOrder && (last = tail) != e) {
        //获取这个节点的前置,和后置引用对象
        TestLinkedHashMap.Entry p = (TestLinkedHashMap.Entry)e, b = p.before, a = p.after;
        //把后置设置为空
        p.after = null;
        //如果替换的对象没有前置节点,那么就把当前节点当做head
        if (b == null)
            head = a;
        else
            b.after = a; //否则建立双向链表数据,前置改为a

        //吧a的前置改成b
        if (a != null)
            a.before = b;
        else
            last = b;

        //然后吧tail指向p,这样就把p从原来的链表中,断裂开,然后拼接到tail后
        if (last == null)
            head = p;
        else {
            p.before = last;
            last.after = p;
        }
        tail = p;
        //容器类修改次数++
        ++modCount;
    }
}
3.2 afterNodeInsertion
这个是linkedhashmap再实现lrucache的时候会调用到的方法,平时没有作用
根据evict 和 判断是否需要删除最老插入的节点,后面我们实现lrucache的时候再详细了解
4.元素删除
Linkedhashmap的删除操作和hashmap一致,但是还有一个函数被重写了,就是这里有点不一样
其实操作就是,linkedhashmap因为是一个双向链表,所以在删除的时候就是做一个对双向链表进行删除的操作
这个方法就是
AfterNodeRemoval 把从hashmap中删除的元素,断开双向链表的连接
//把从hashmap中删除的元素,断开双向链表的连接
void afterNodeRemoval(Node e) { // unlink
    TestLinkedHashMap.Entry p =
            (TestLinkedHashMap.Entry) e, b = p.before, a = p.after;
    p.before = p.after = null;
    if (b == null)
        head = a;
    else
        b.after = a;
    if (a == null)
        tail = b;
    else
        a.before = b;
}
5.元素修改和查找
对于查找get元素,这里linkedhashmap就直接重写了,但是里面调用getnode其实还是hashmap那一套,不过就是多了个判断accessOrder参数,如果为true就会调用afterNodeAccess
这个方法前面有讲到
6.特殊操作
6.1 containsValue
因为是链表的缘故,所以这里是直接循环遍历链表一次即可
public boolean containsValue(Object value) {
    for (TestLinkedHashMap.Entry e = head; e != null; e = e.after) {
        V v = e.value;
        if (v == value || (value != null && value.equals(v)))
            return true;
    }
    return false;
}
而hashmap呢?
public boolean containsValue(Object value) {
        Node[] tab; V v;
        if ((tab = table) != null && size > 0) {
            //先循环hash桶
            for (int i = 0; i < tab.length; ++i) {
                //然后遍历链表
                for (Node e = tab[i]; e != null; e = e.next) {
                    if ((v = e.value) == value ||
                            (value != null && value.equals(v)))
                        return true;
                }
            }
        }
        return false;
    }
6.2 实现LRUCACHE
要实现lru首先要明白这是个什么?
近期最少使用算法。 内存管理的一种页面置换算法,对于在内存中但又不用的数据块(内存块)叫做LRU,操作系统会根据哪些数据属于LRU而将其移出内存而腾出空间来加载另外的数据。
为什么用linkedhashmap呢?因为这个容器事实是一个双向链表,而且里面带上参数的构造函数的时候,前面用的get方法会调用到afterNodeAccess方法,这个方法会吧最近get的数据重新指引向链表末尾
基于这点我们只要吧accessOrder设置为true即可
package y2019.collection.map;

import java.util.Iterator;
import java.util.LinkedHashMap;
import java.util.Map;
import java.util.Set;

/**
 * @ProjectName: cutter-point
 * @Package: y2019.collection.map
 * @ClassName: TestLRUCache
 * @Author: xiaof
 * @Description: 实现lru (最近最不常使用)缓存
 * 获取数据(get)和写入数据(set)。
 * 获取数据get(key):如果缓存中存在key,则获取其数据值(通常是正数),否则返回-1。
 * 写入数据set(key, value):如果key还没有在缓存中,则写入其数据值。
 * 当缓存达到上限,它应该在写入新数据之前删除最近最少使用的数据用来腾出空闲位置。
 * @Date: 2019/9/3 16:42
 * @Version: 1.0
 */
public class TestLRUCache {

    LinkedHashMap cache = null;
    int cacheSize;

    public TestLRUCache(int cacheSize) {
        //默认负载因子取0.75
        this.cacheSize = (int) Math.ceil(cacheSize / 0.75f) + 1;//向上取整数
        cache = new LinkedHashMap(this.cacheSize, 0.75f, true) {
            @Override
            protected boolean removeEldestEntry(Map.Entry eldest) {
                //这里有个关键的负载操作,因为是lru,所以当长度超了的时候,不是扩容,而是吧链表头干掉
                System.out.println("size=" + this.size());
                return this.size() > cacheSize;
            }
        };
    }

    public V get(K key) {
        return cache.get(key);
    }

    public V set(K key, V value) {
        return cache.put(key, value);
    }

    public void setCacheSize(int cacheSize) {
        this.cacheSize = cacheSize;
    }

    public void printCache(){
        for(Iterator it = cache.entrySet().iterator(); it.hasNext();){
            Map.Entry entry = (Map.Entry)it.next();
            if(!"".equals(entry.getValue())){
                System.out.println(entry.getKey() + "\t" + entry.getValue());
            }
        }
        System.out.println("------");
    }

    public void PrintlnCache(){
        Set> set = cache.entrySet();
        for(Map.Entry entry : set){
            K key = entry.getKey();
            V value = entry.getValue();
            System.out.println("key:"+key+"value:"+value);
        }

    }

    public static void main(String[] args) {
        TestLRUCache lrucache = new TestLRUCache(3);
        lrucache.set("aaa", 1);
        lrucache.printCache();
        lrucache.set("bbb", 2);
        lrucache.printCache();
        lrucache.set("ccc", 3);
        lrucache.printCache();
        lrucache.set("ddd", 4);
        lrucache.printCache();
        lrucache.set("eee", 5);
        lrucache.printCache();
        System.out.println("这是访问了ddd后的结果");
        lrucache.get("ddd");
        lrucache.printCache();
        lrucache.set("fff", 6);
        lrucache.printCache();
        lrucache.set("aaa", 7);
        lrucache.printCache();
    }

}
7.扩容
参考hashmap
8.总结我们重点放在lrucache上吧
借助linkedhashmap实现lru,重点就是再大小范围超出的时候进行删除头结点,而不是扩容
参考:
https://blog.csdn.net/zxt0601/article/details/77429150
https://www.jianshu.com/p/d76a78086c3a
Original: https://www.cnblogs.com/cutter-point/p/11454164.html
Author: cutter_point
Title: 【数据结构】10.java源码关于LinkedHashMap
原创文章受到原创版权保护。转载请注明出处:https://www.johngo689.com/713250/
转载文章受原作者版权保护。转载请注明原作者出处!