

硬件平台:windows10、NVIDIA GeForce GTX 1060
软件平台:Pycharm、Anaconda3、CUDA&cuDNN、pytorch
本篇博客实现的功能:
一、应用Intel RealSense D455 深度相机,进行深度图像采集
二、在Windows下搭建yolov5的环境
三、应用GitHub克隆下来的大佬代码实现目标分类检测和测距
(ps:如果无法进入上述”大佬代码”网站,可以点击”百度网盘”笔者已上传至百度网盘-提取码:mmtt )
一、opencv-python 调用D455 rgb深度测试
① 安装opencv-python
pip install opencv-python -i https://pypi.mirrors.ustc.edu.cn/simple
② 安装pyrealsense2 软件包
pip install pyrealsense2 -i https://pypi.mirrors.ustc.edu.cn/simple
③测试代码 如果报错:没有numpy包 —— 解决方法:直接在终端pip安装即可
import pyrealsense2 as rs
import numpy as np
import cv2

if __name__ == "__main__":
    # Configure depth and color streams
    pipeline = rs.pipeline()
    config = rs.config()
    config.enable_stream(rs.stream.depth, 640, 480, rs.format.z16, 60)
    config.enable_stream(rs.stream.color, 640, 480, rs.format.bgr8, 60)
    # Start streaming
    pipeline.start(config)

    try:
        while True:
            # Wait for a coherent pair of frames: depth and color
            frames = pipeline.wait_for_frames()
            depth_frame = frames.get_depth_frame()
            color_frame = frames.get_color_frame()
            if not depth_frame or not color_frame:
                continue
            # Convert images to numpy arrays

            depth_image = np.asanyarray(depth_frame.get_data())
            color_image = np.asanyarray(color_frame.get_data())
            depth_colormap = cv2.applyColorMap(cv2.convertScaleAbs(depth_image, alpha=0.03), cv2.COLORMAP_JET)
            # Stack both images horizontally
            images = np.hstack((color_image, depth_colormap))
            # Show images
            cv2.namedWindow('RealSense', cv2.WINDOW_AUTOSIZE)
            cv2.imshow('RealSense', images)
            key = cv2.waitKey(1)
            # Press esc or 'q' to close the image window
            if key & 0xFF == ord('q') or key == 27:
                cv2.destroyAllWindows()
                break
    finally:
        # Stop streaming
        pipeline.stop()
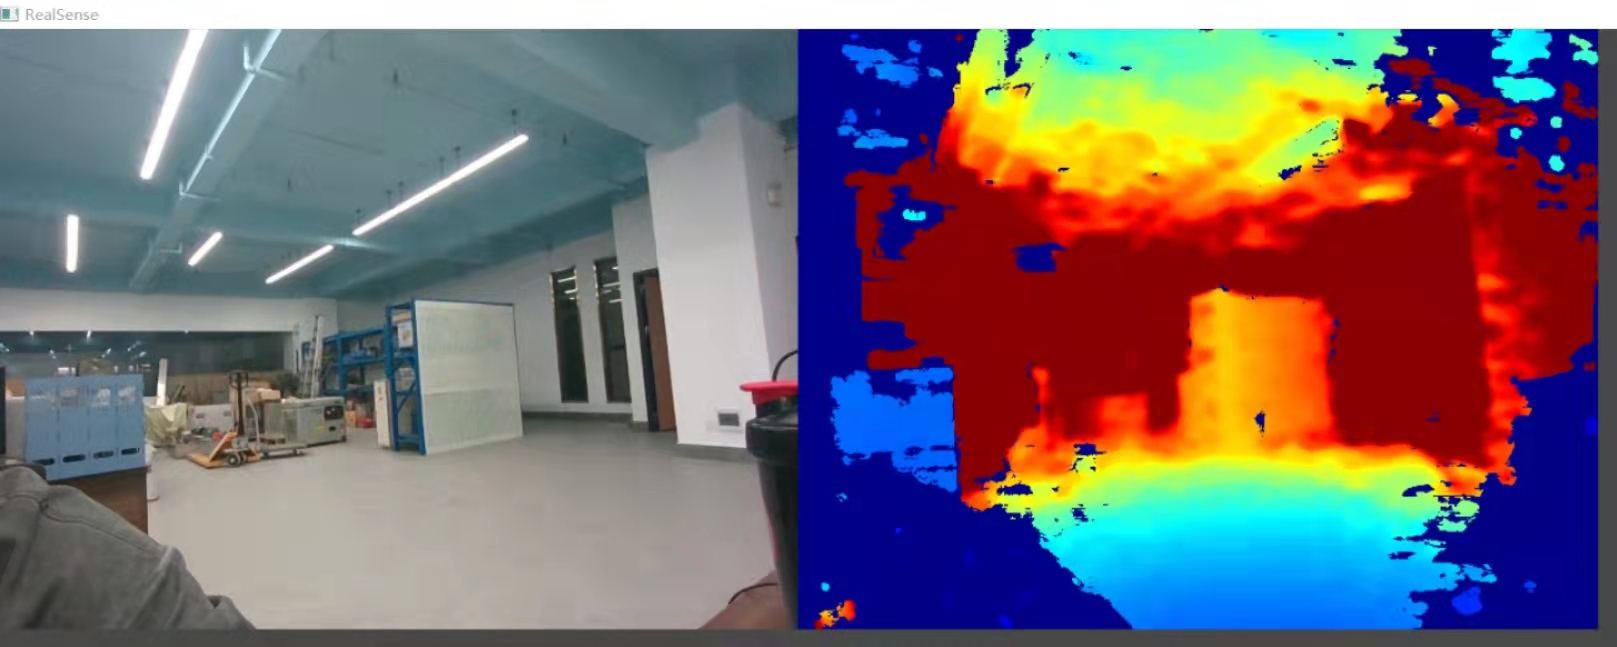
④ 测试效果

二、在Windows下搭建YOLO v5 6.0 环境
step 1 :安装Pycharm、Anaconda3、CUDA&cuDNN;新建虚拟环境,将下载的代码包放入工程文件夹中
安装方法见此篇博客:安装详细步骤,无需执行”安装tensorflow-gpu”(跳过此步)
step 2 :安装pytorch
笔者的CUDA的版本是11.2
使用一下命令进行安装
pip3 install torch-1.10.0+cu113 torchvision==0.11.1+cu113 torchaudio==0.10.0+cu113 -f https://download.pytorch.org/whl/cu113/torch_stable.html
读者需要根据自己的显卡驱动和CUDA版本选择合适的pytorch版本号,版本查询方式
【注】如果版本号无法匹配,在下面测试代码时将会出现以下错误:
AttributeError: 'Upsample' object has no attribute 'recompute_scale_factor'
解决方法:卸载掉当前版本(带有tourch的都需要删掉)后重新pip install 正确版本号
pip uninstall 软件包名称
step 3 :运行 realsensedetect.py
本工程转载自:https://blog.csdn.net/qq_45077256/article/details/120040059 代码解析见原博客
如果在第一步中保存的是”大佬的代码”,则在初次运行时会自动下载 yolov5m.pt 权重文件,下载速度较慢。如果尝试多次无法成功下载,可以在上述百度网盘中直接下载下来。
直接保存百度网盘中的工程可以不用再次下载这个权重文件
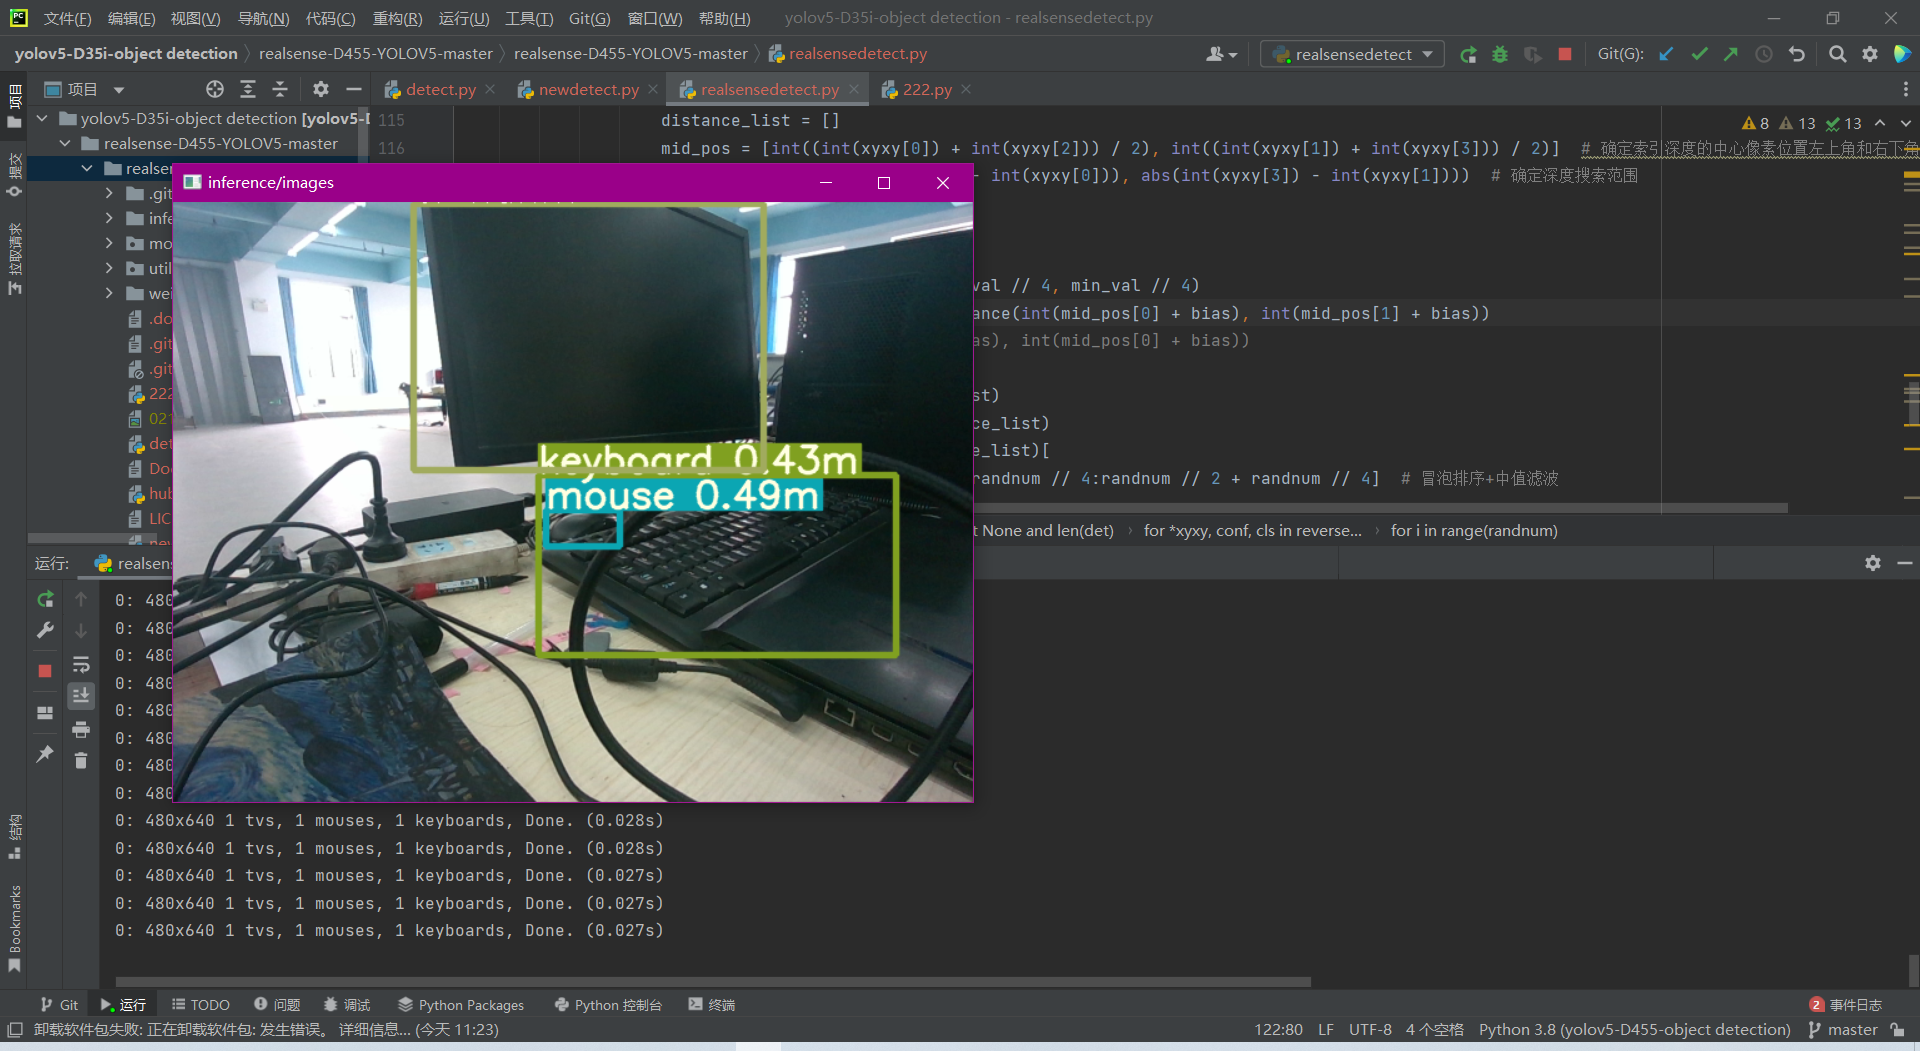
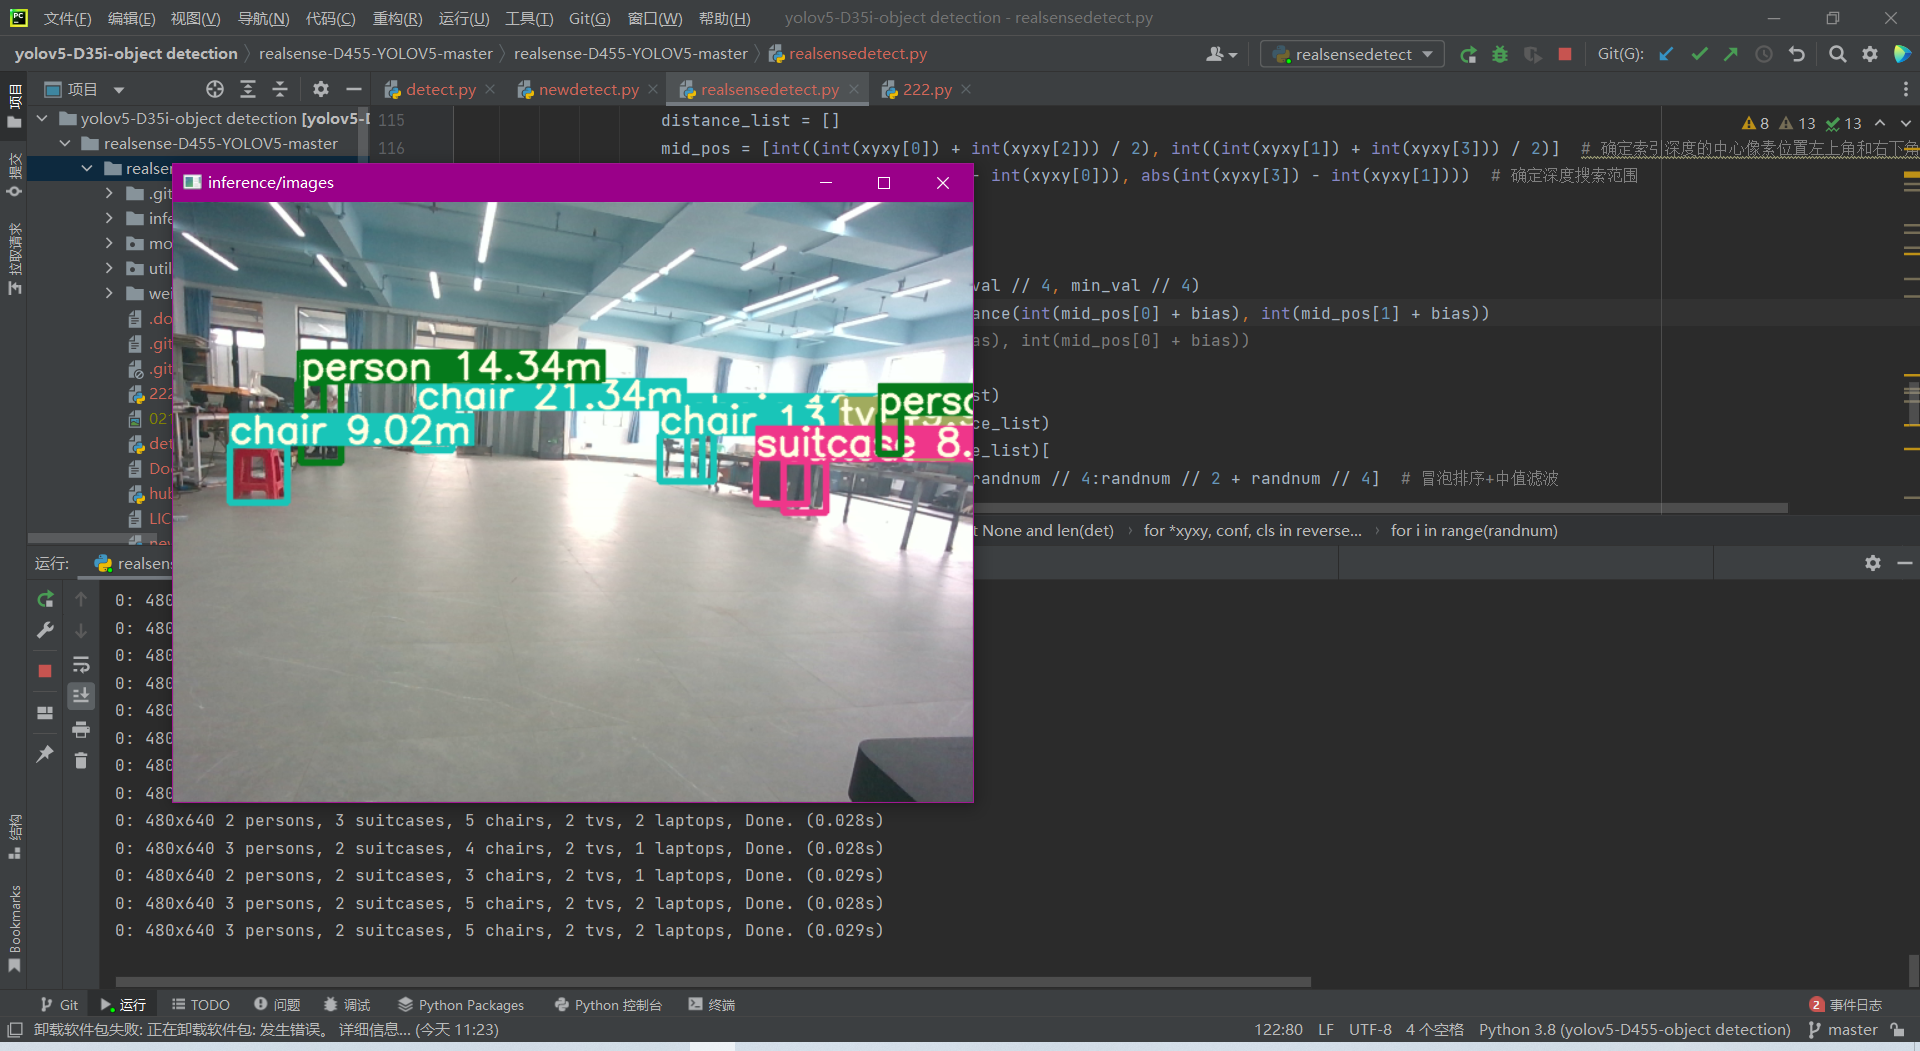
检测效果
Original: https://blog.csdn.net/MartinQi02/article/details/123531193
Author: Rainbow pony
Title: 【Intel RealSense D455】Windows + yolo v5 6.0 环境搭建 & 目标检测深度测距的实现
原创文章受到原创版权保护。转载请注明出处:https://www.johngo689.com/708981/
转载文章受原作者版权保护。转载请注明原作者出处!