

系列文章目录
目标跟踪——SORT算法原理浅析
目标跟踪——Deep Sort算法原理浅析
基于yolov5与Deep Sort的流量统计与轨迹跟踪
文章目录
前言
先来看下实现效果:


上图展示了用yolov5作为检测器,Deep Sort为追踪器实现了对车流量的统计并绘制了每辆车的运行轨迹。
; 一、整体目录结构
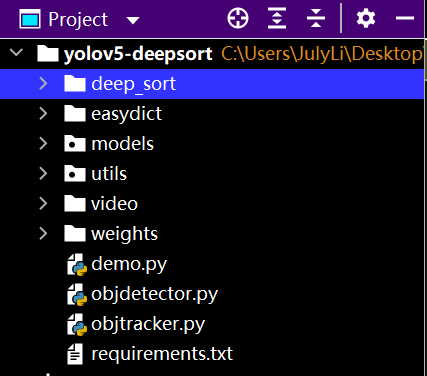
下图展示了项目的整体目录结构:
其中:
deep_sort文件下为目标跟踪相关代码;weights文件夹下存放yolov5检测模型;demo.py针对读取的视频进行目标追踪objdetector.py封装的一个目标检测器,对视频中的物体进行检测objtracker.py封装了一个目标追踪器,对检测的物体进行追踪
二、Deep Sort代码参数解释
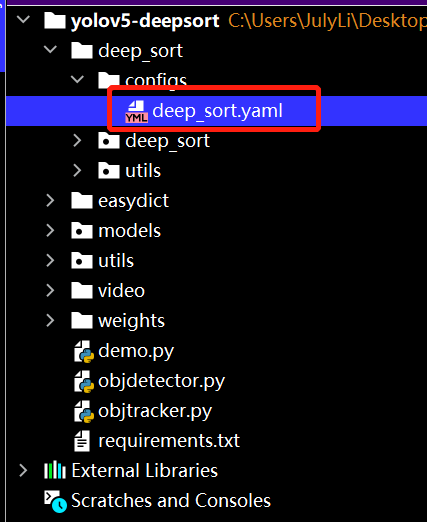
deep_sort/configs/deep_sort.yaml文件里保存了Deep Sort算法的配置参数:

这些参数依次的含义为:
REID_CKPT:特征提取权重的目录路径MAX_DIST:最大余弦距离,用于级联匹配,如果大于该阈值,则忽略MIN_CONFIDENCE:检测结果置信度阈值NMS_MAX_OVERLAP:非极大抑制阈值,设置为1代表不进行抑制MAX_IOU_DISTANCE:最大IOU阈值MAX_AGE:最大寿命,也就是经过MAX_AGE帧没有追踪到该物体,就将该轨迹变为删除态N_INIT:最高击中次数,如果击中该次数,就由不确定态转为确定态NN_BUDGET:最大保存特征帧数,如果超过该帧数,将进行滚动保存
; 三、代码展示
下面给出 demo.py的代码:
import numpy as np

import objtracker
from objdetector import Detector
import cv2

VIDEO_PATH = './video/test_traffic.mp4'

if __name__ == '__main__':

    width = 1920
    height = 1080
    mask_image_temp = np.zeros((height, width), dtype=np.uint8)

    pts = {}

    list_pts_blue = [[204, 305], [227, 431], [605, 522], [1101, 464], [1900, 601], [1902, 495], [1125, 379], [604, 437],
                     [299, 375], [267, 289]]
    ndarray_pts_blue = np.array(list_pts_blue, np.int32)
    polygon_blue_value_1 = cv2.fillPoly(mask_image_temp, [ndarray_pts_blue], color=1)
    polygon_blue_value_1 = polygon_blue_value_1[:, :, np.newaxis]

    mask_image_temp = np.zeros((height, width), dtype=np.uint8)
    list_pts_yellow = [[181, 305], [207, 442], [603, 544], [1107, 485], [1898, 625], [1893, 701], [1101, 568],
                       [594, 637], [118, 483], [109, 303]]
    ndarray_pts_yellow = np.array(list_pts_yellow, np.int32)
    polygon_yellow_value_2 = cv2.fillPoly(mask_image_temp, [ndarray_pts_yellow], color=2)
    polygon_yellow_value_2 = polygon_yellow_value_2[:, :, np.newaxis]

    polygon_mask_blue_and_yellow = polygon_blue_value_1 + polygon_yellow_value_2

    polygon_mask_blue_and_yellow = cv2.resize(polygon_mask_blue_and_yellow, (width // 2, height // 2))

    blue_color_plate = [255, 0, 0]

    blue_image = np.array(polygon_blue_value_1 * blue_color_plate, np.uint8)

    yellow_color_plate = [0, 255, 255]

    yellow_image = np.array(polygon_yellow_value_2 * yellow_color_plate, np.uint8)

    color_polygons_image = blue_image + yellow_image

    color_polygons_image = cv2.resize(color_polygons_image, (width // 2, height // 2))

    list_overlapping_blue_polygon = []

    list_overlapping_yellow_polygon = []

    down_count = 0

    up_count = 0

    font_draw_number = cv2.FONT_HERSHEY_SIMPLEX
    draw_text_postion = (int((width / 2) * 0.01), int((height / 2) * 0.05))

    detector = Detector()

    capture = cv2.VideoCapture(VIDEO_PATH)

    while True:

        _, im = capture.read()
        if im is None:
            break

        im = cv2.resize(im, (width // 2, height // 2))

        list_bboxs = []

        output_image_frame, list_bboxs = objtracker.update(detector, im)

        output_image_frame = cv2.add(output_image_frame, color_polygons_image)

        if len(list_bboxs) > 0:

            for item_bbox in list_bboxs:
                x1, y1, x2, y2, _, track_id = item_bbox

                y1_offset = int(y1 + ((y2 - y1) * 0.5))
                x1_offset = int(x1 + ((x2 - x1) * 0.5))

                y = y1_offset
                x = x1_offset

                center = (x, y)
                if track_id in pts:
                    pts[track_id].append(center)
                else:
                    pts[track_id] = []
                    pts[track_id].append(center)

                thickness = 2
                cv2.circle(output_image_frame, (center), 1, [255, 255, 255], thickness)

                for j in range(1, len(pts[track_id])):
                    if pts[track_id][j - 1] is None or pts[track_id][j] is None:
                        continue
                    cv2.line(output_image_frame, (pts[track_id][j - 1]), (pts[track_id][j]), [255, 255, 255], thickness)

                if polygon_mask_blue_and_yellow[y, x] == 1:

                    if track_id not in list_overlapping_blue_polygon:
                        list_overlapping_blue_polygon.append(track_id)

                    if track_id in list_overlapping_yellow_polygon:

                        up_count += 1
                        print('up count:', up_count, ', up id:', list_overlapping_yellow_polygon)

                        list_overlapping_yellow_polygon.remove(track_id)

                elif polygon_mask_blue_and_yellow[y, x] == 2:

                    if track_id not in list_overlapping_yellow_polygon:
                        list_overlapping_yellow_polygon.append(track_id)

                    if track_id in list_overlapping_blue_polygon:

                        down_count += 1
                        print('down count:', down_count, ', down id:', list_overlapping_blue_polygon)

                        list_overlapping_blue_polygon.remove(track_id)

            list_overlapping_all = list_overlapping_yellow_polygon + list_overlapping_blue_polygon
            for id1 in list_overlapping_all:
                is_found = False
                for _, _, _, _, _, bbox_id in list_bboxs:
                    if bbox_id == id1:
                        is_found = True
                if not is_found:

                    if id1 in list_overlapping_yellow_polygon:
                        list_overlapping_yellow_polygon.remove(id1)

                    if id1 in list_overlapping_blue_polygon:
                        list_overlapping_blue_polygon.remove(id1)
            list_overlapping_all.clear()

            list_bboxs.clear()
        else:

            list_overlapping_blue_polygon.clear()
            list_overlapping_yellow_polygon.clear()

        text_draw = 'DOWN: ' + str(down_count) + \
                    ' , UP: ' + str(up_count)
        output_image_frame = cv2.putText(img=output_image_frame, text=text_draw,
                                         org=draw_text_postion,
                                         fontFace=font_draw_number,
                                         fontScale=0.75, color=(0, 0, 255), thickness=2)
        cv2.imshow('Counting Demo', output_image_frame)
        cv2.waitKey(1)

    capture.release()
    cv2.destroyAllWindows()
若需要更改模型,只需要更改 objdetector.py下面的给出的部分:
OBJ_LIST = ['person', 'car', 'bus', 'truck']
DETECTOR_PATH = 'weights/yolov5m.pt'
总结
本篇文章给出了基于yolov5与Deep Sort的流量统计与轨迹跟踪的实例,在项目中有着实际的应用场景。
下面给出源码地址,欢迎 star:
https://github.com/JulyLi2019/yolov5-deepsort/releases/tag/V1.0,yolov5-deepsort.zip文件
如果阅读本文对你有用,欢迎一键三连呀!!!
2022年4月15日09:59:53

Original: https://blog.csdn.net/JulyLi2019/article/details/124047020
Author: JulyLi2019
Title: 基于yolov5与Deep Sort的流量统计与轨迹跟踪
原创文章受到原创版权保护。转载请注明出处:https://www.johngo689.com/629082/
转载文章受原作者版权保护。转载请注明原作者出处!