

文章目录
摘要
MMDetection是商汤和港中文大学针对目标检测任务推出的一个开源项目,它基于Pytorch实现了大量的目标检测算法,把数据集构建、模型搭建、训练策略等过程都封装成了一个个模块,通过模块调用的方式,我们能够以很少的代码量实现一个新算法,大大提高了 代码复用率。
GitHub链接:https://github.com/open-mmlab/mmdetection。
Gitee链接:https://gitee.com/open-mmlab/mmdetection。
主分支代码目前支持 PyTorch 1.5 以上的版本。主要特性:
- 模块化设计 MMDetection 将检测框架解耦成不同的模块组件,通过组合不同的模块组件,用户可以便捷地构建自定义的检测模型
- 丰富的即插即用的算法和模型 MMDetection 支持了众多主流的和最新的检测算法,例如 Faster R-CNN,Mask R-CNN,RetinaNet 等。
- 速度快 基本的框和 mask 操作都实现了 GPU 版本,训练速度比其他代码库更快或者相当,包括 Detectron2, maskrcnn-benchmark 和 SimpleDet。
- 性能高 MMDetection 这个算法库源自于 COCO 2018 目标检测竞赛的冠军团队 MMDet 团队开发的代码,之后持续进行了改进和提升。
配置文件参数详解
faster_rcnn_r50_fpn_1x_coco.py文件为例,这个文件包含四个文件,分别是:faster_rcnn_r50_fpn.py、coco_detection.py、schedule_1x.py、default_runtime.py。
configs/base/schedules/schedule_1x.py
optimizer = dict(type='SGD', lr=0.02, momentum=0.9, weight_decay=0.0001)
optimizer_config = dict(grad_clip=None)

lr_config = dict(
    policy='step',
    warmup='linear',
    warmup_iters=500,
    warmup_ratio=0.001,
    step=[8, 11])
runner = dict(type='EpochBasedRunner', max_epochs=12)
faster_rcnn_r50_fpn.py
model = dict(
    type='FasterRCNN',
    backbone=dict(
        type='ResNet',
        depth=50,
        num_stages=4,
        out_indices=(0, 1, 2, 3),
        frozen_stages=1,
        norm_cfg=dict(type='BN', requires_grad=True),
        norm_eval=True,
        style='pytorch',
        init_cfg=dict(type='Pretrained', checkpoint='torchvision://resnet50')),
    neck=dict(
        type='FPN',
        in_channels=[256, 512, 1024, 2048],
        out_channels=256,
        num_outs=5),
    rpn_head=dict(
        type='RPNHead',
        in_channels=256,
        feat_channels=256,
        anchor_generator=dict(
            type='AnchorGenerator',
            scales=[8],
            ratios=[0.5, 1.0, 2.0],
            strides=[4, 8, 16, 32, 64]),
        bbox_coder=dict(
            type='DeltaXYWHBBoxCoder',
            target_means=[.0, .0, .0, .0],
            target_stds=[1.0, 1.0, 1.0, 1.0]),
        loss_cls=dict(
            type='CrossEntropyLoss', use_sigmoid=True, loss_weight=1.0),
        loss_bbox=dict(type='L1Loss', loss_weight=1.0)),
    roi_head=dict(
        type='StandardRoIHead',
        bbox_roi_extractor=dict(
            type='SingleRoIExtractor',
            roi_layer=dict(type='RoIAlign', output_size=7, sampling_ratio=0),
            out_channels=256,
            featmap_strides=[4, 8, 16, 32]),
        bbox_head=dict(
            type='Shared2FCBBoxHead',
            in_channels=256,
            fc_out_channels=1024,
            roi_feat_size=7,
            num_classes=80,
            bbox_coder=dict(
                type='DeltaXYWHBBoxCoder',
                target_means=[0., 0., 0., 0.],
                target_stds=[0.1, 0.1, 0.2, 0.2]),
            reg_class_agnostic=False,
            loss_cls=dict(
                type='CrossEntropyLoss', use_sigmoid=False, loss_weight=1.0),
            loss_bbox=dict(type='L1Loss', loss_weight=1.0))),

    train_cfg=dict(
        rpn=dict(
            assigner=dict(
                type='MaxIoUAssigner',
                pos_iou_thr=0.7,
                neg_iou_thr=0.3,
                min_pos_iou=0.3,
                match_low_quality=True,
                ignore_iof_thr=-1),
            sampler=dict(
                type='RandomSampler',
                num=256,
                pos_fraction=0.5,
                neg_pos_ub=-1,
                add_gt_as_proposals=False),
            allowed_border=-1,
            pos_weight=-1,
            debug=False),
        rpn_proposal=dict(
            nms_pre=2000,
            max_per_img=1000,
            nms=dict(type='nms', iou_threshold=0.7),
            min_bbox_size=0),
        rcnn=dict(
            assigner=dict(
                type='MaxIoUAssigner',
                pos_iou_thr=0.5,
                neg_iou_thr=0.5,
                min_pos_iou=0.5,
                match_low_quality=False,
                ignore_iof_thr=-1),
            sampler=dict(
                type='RandomSampler',
                num=512,
                pos_fraction=0.25,
                neg_pos_ub=-1,
                add_gt_as_proposals=True),
            pos_weight=-1,
            debug=False)),
    test_cfg=dict(
        rpn=dict(
            nms_pre=1000,
            max_per_img=1000,
            nms=dict(type='nms', iou_threshold=0.7),
            min_bbox_size=0),
        rcnn=dict(
            score_thr=0.05,
            nms=dict(type='nms', iou_threshold=0.5),
            max_per_img=100)

    ))
环境准备
CUDA:11.3
新建虚拟环境openmm
conda create --name openmm python=3.7
然后,激活环境。
Win10执行命令:
activate openmm
UBuntu执行命令:
source activate openmm
进入虚拟环境后,安装pytorch,输入命令:
conda install pytorch torchvision torchaudio cudatoolkit=11.3


安装mmcv,执行命令:
pip install mmcv-full
安装mmcv-full,等待的时间较长。如果不报错误,耐心等待即可。

安装完成后,下载mmdetection, 地址链接:https://gitee.com/open-mmlab/mmdetection。
下载完成后,解压,然后pycharm打开。
添加刚才新建的虚拟环境。


在Terminal中激活openmm虚拟环境,防止虚拟环境没有切换过来。

然后,安装mmdet,在Terminal中执行命令:
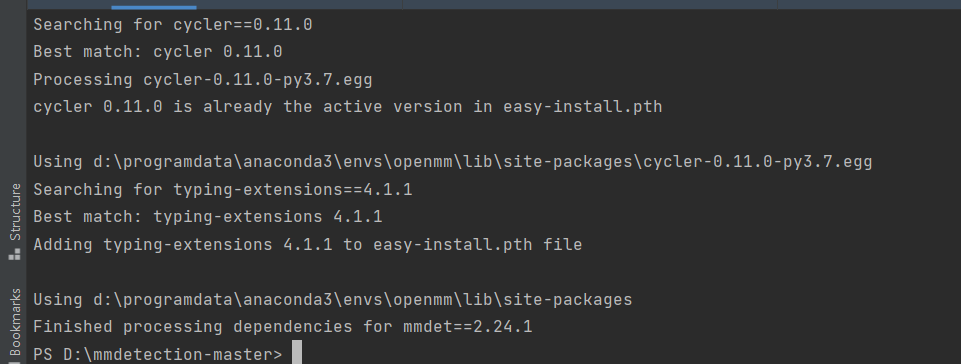
python setup.py install
在安装mmdet的过程中,会自动下载所需要的安装包。如果存在不能下载的情况,需要单独安装。直到出现下图即可。

验证环境
在工程的根目录新建checkpoints文件夹,下载预训练权重文件,链接:
http://download.openmmlab.com/mmdetection/v2.0/faster_rcnn/faster_rcnn_r50_fpn_1x_coco/faster_rcnn_r50_fpn_1x_coco_20200130-047c8118.pth
下载完成后,将其放入到checkpoints文件夹
新建demo.py文件,插入代码:
from mmdet.apis import init_detector, inference_detector

config_file = 'configs/faster_rcnn/faster_rcnn_r50_fpn_1x_coco.py'

checkpoint_file = 'checkpoints/faster_rcnn_r50_fpn_1x_coco_20200130-047c8118.pth'
device = 'cuda:0'
img='demo/demo.jpg'

model = init_detector(config_file, checkpoint_file, device=device)

result=inference_detector(model, img)
model.show_result(img, result, out_file='result.jpg')
运行代码:

看到这张图说明环境没有问题。
接下来,使用这个环境训练自定义数据集。
训练
制作数据集
Labelme标注的数据集地址链接:
https://download.csdn.net/download/hhhhhhhhhhwwwwwwwwww/63242994?spm=1001.2014.3001.5503
有32个类别,分别是:’c17′, ‘c5’, ‘helicopter’, ‘c130’, ‘f16’, ‘b2’, ‘other’, ‘b52’, ‘kc10’, ‘command’, ‘f15’, ‘kc135’, ‘a10’, ‘b1’, ‘aew’, ‘f22’, ‘p3’, ‘p8’, ‘f35’, ‘f18’, ‘v22’, ‘f4’, ‘globalhawk’, ‘u2’, ‘su-27’, ‘il-38’, ‘tu-134’, ‘su-33’, ‘an-70’, ‘su-24’, ‘tu-22’, ‘il-76’。
先将其转为COCO数据集,转换代码如下:
import json
import os
import shutil

from labelme import utils
import numpy as np
import glob
import PIL.Image
labels={'c17':0,'c5':1,'helicopter':2,'c130':3,'f16':4,
           'b2':5,'other':6,'b52':7,'kc10':8,'command':9,'f15':10,
           'kc135':11,'a10':12,'b1':13,'aew':14,'f22':15,'p3':16,'p8':17,
           'f35':18,'f18':19,'v22':20,'f4':21,'globalhawk':22,'u2':23,'su-27':24,
           'il-38':25,'tu-134':26,'su-33':27,'an-70':28,'su-24':29,'tu-22':30,'il-76':31}
class MyEncoder(json.JSONEncoder):
    def default(self, obj):
        if isinstance(obj, np.integer):
            return int(obj)
        elif isinstance(obj, np.floating):
            return float(obj)
        elif isinstance(obj, np.ndarray):
            return obj.tolist()
        else:
            return super(MyEncoder, self).default(obj)

class labelme2coco(object):
    def __init__(self, labelme_json=[], save_json_path='./tran.json'):
        '''
        :param labelme_json: 所有labelme的json文件路径组成的列表
        :param save_json_path: json保存位置
        '''
        self.labelme_json = labelme_json
        self.save_json_path = save_json_path
        self.images = []
        self.categories = []
        self.annotations = []

        self.label = []
        self.annID = 1
        self.height = 0
        self.width = 0

        self.save_json()

    def data_transfer(self):

        for num, json_file in enumerate(self.labelme_json):
            imagePath=json_file.split('.')[0]+'.jpg'
            imageName=imagePath.split('\\')[-1]

            with open(json_file, 'r') as fp:
                data = json.load(fp)
                self.images.append(self.image(data, num,imageName))
                for shapes in data['shapes']:
                    label = shapes['label'].lower()
                    if label not in self.label:
                        self.categories.append(self.categorie(label))
                        self.label.append(label)
                    points = shapes['points']

                    self.annotations.append(self.annotation(points, label, num))
                    self.annID += 1

    def image(self, data, num,imagePath):
        image = {}
        img = utils.img_b64_to_arr(data['imageData'])

        height, width = img.shape[:2]
        img = None
        image['height'] = height
        image['width'] = width
        image['id'] = num + 1

        image['file_name'] = imagePath
        self.height = height
        self.width = width

        return image

    def categorie(self, label):
        categorie = {}
        categorie['supercategory'] = 'Cancer'
        categorie['id'] = labels[label]
        categorie['name'] = label
        return categorie

    def annotation(self, points, label, num):
        annotation = {}
        annotation['segmentation'] = [list(np.asarray(points).flatten())]
        annotation['iscrowd'] = 0
        annotation['image_id'] = num + 1

        annotation['bbox'] = list(map(float, self.getbbox(points)))
        annotation['area'] = annotation['bbox'][2] * annotation['bbox'][3]

        annotation['category_id'] = self.getcatid(label)

        annotation['id'] = self.annID
        return annotation

    def getcatid(self, label):
        for categorie in self.categories:
            if label == categorie['name']:
                return categorie['id']
        return 1

    def getbbox(self, points):

        polygons = points

        mask = self.polygons_to_mask([self.height, self.width], polygons)
        return self.mask2box(mask)

    def mask2box(self, mask):
        '''从mask反算出其边框
        mask:[h,w]  0、1组成的图片
        1对应对象,只需计算1对应的行列号(左上角行列号,右下角行列号,就可以算出其边框)
        '''

        index = np.argwhere(mask == 1)
        rows = index[:, 0]
        clos = index[:, 1]

        left_top_r = np.min(rows)+1
        left_top_c = np.min(clos)+1

        right_bottom_r = np.max(rows)
        right_bottom_c = np.max(clos)

        return [left_top_c, left_top_r, right_bottom_c - left_top_c,
                right_bottom_r - left_top_r]

    def polygons_to_mask(self, img_shape, polygons):
        mask = np.zeros(img_shape, dtype=np.uint8)
        mask = PIL.Image.fromarray(mask)
        xy = list(map(tuple, polygons))
        PIL.ImageDraw.Draw(mask).polygon(xy=xy, outline=1, fill=1)
        mask = np.array(mask, dtype=bool)
        return mask

    def data2coco(self):
        data_coco = {}
        data_coco['images'] = self.images
        data_coco['categories'] = self.categories
        data_coco['annotations'] = self.annotations
        return data_coco

    def save_json(self):
        self.data_transfer()
        self.data_coco = self.data2coco()

        json.dump(self.data_coco, open(self.save_json_path, 'w'), indent=4, cls=MyEncoder)

def copy_image(dirs,files,image_type):
    for txt in files:
        image_path=txt.split('.')[0]+"."+image_type
        image_name=image_path.replace('\\','/').split('/')[-1]
        new_path=os.path.join(dirs,image_name)
        shutil.copyfile(image_path, new_path)

labelme_json = glob.glob('USA-Labelme/*.json')
from sklearn.model_selection import train_test_split
trainval_files, test_files = train_test_split(labelme_json, test_size=0.2, random_state=55)
print(trainval_files)
os.makedirs('train2017',exist_ok=True)
os.makedirs('val2017',exist_ok=True)
copy_image('train2017',trainval_files,'jpg')
copy_image('val2017',test_files,'jpg')
labelme2coco(trainval_files, 'instances_train2017.json')
labelme2coco(test_files, 'instances_val2017.json')
在mmdetection-master的根目录下面,新建data文件夹,然后再data文件夹下面新建coco文件夹,在coco文件夹下面新建annotations文件夹,将训练集和验证集的json放进去。将train2017文件夹和val2017文件夹放到coco文件夹下面,目录如下:
mmdetection
├── data
│   ├── coco
│   │   ├── annotations
│   │   ├── train2017
│   │   └── val2017
如下图:

到这里数据集制作完成了。
修改配置文件
configs/算法/配置文件。打开配置文件修改num_classes的个数,COCO默认是80,我们按照实际的类别修改即可。
例:configs/yolo/yolov3_d53_mstrain-608_273e_coco.py

但是,有的模型在的类别找不到,那么我们如何找到呢?比如
configs/ssd/ssd300_coco.py,这个配置文件里面就没有num_classes这个字段,我们寻找最上面的_base_字段。
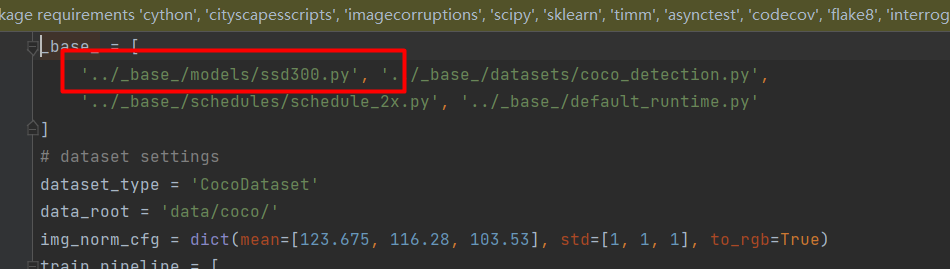
也有ssd300.py这个文件,将其打开。

找到了num_classes这个字段,将其修改为数据集的类别个数。我们本次使用的数据集的类别是32,所以将其修改为32。
修改该学习率,路径”configs/ssd/ssd300_coco.py”。如下图:

将2e-3改为2e-4,否则会出现loss为NAN的问题。
修改该BatchSize,路径”configs/ssd/ssd300_coco.py”。如下图:

这是针对每张显卡设置Batchsize。调整到合适的大小就可以训练了。
修改epoch,在configs/ssd/ssd300_coco.py中添加
runner = dict(type='EpochBasedRunner', max_epochs=500)

修改数据集的类别
mmdet/core/evaluation/classnames.py找到 def coco_classes():将COCO类别替换为自己数据的类别。本例是:
def coco_classes():
    return [
        'c17', 'c5', 'helicopter', 'c130', 'f16', 'b2',
        'other', 'b52', 'kc10', 'command', 'f15',
        'kc135', 'a10', 'b1', 'aew', 'f22', 'p3', 'p8',
        'f35', 'f18', 'v22', 'f4', 'globalhawk', 'u2', 'su-27',
        'il-38', 'tu-134', 'su-33', 'an-70', 'su-24', 'tu-22',
    'il-76']
mmdet/datasets/coco.py找到 class CoCoDataset(CustomDataset):将COCO的类别替换为自己数据集的类别。本例如下:
class CocoDataset(CustomDataset):
    CLASSES = ('c17', 'c5', 'helicopter', 'c130', 'f16', 'b2',
        'other', 'b52', 'kc10', 'command', 'f15',
        'kc135', 'a10', 'b1', 'aew', 'f22', 'p3', 'p8',
        'f35', 'f18', 'v22', 'f4', 'globalhawk', 'u2', 'su-27',
        'il-38', 'tu-134', 'su-33', 'an-70', 'su-24', 'tu-22',
        'il-76')

    PALETTE = [(220, 20, 60), (119, 11, 32), (0, 0, 142), (0, 0, 230),
               (106, 0, 228), (0, 60, 100), (0, 80, 100), (0, 0, 70),
               (0, 0, 192), (250, 170, 30), (100, 170, 30), (220, 220, 0),
               (175, 116, 175), (250, 0, 30), (165, 42, 42), (255, 77, 255),
               (0, 226, 252), (182, 182, 255), (0, 82, 0), (120, 166, 157),
               (110, 76, 0), (174, 57, 255), (199, 100, 0), (72, 0, 118),
               (255, 179, 240), (0, 125, 92), (209, 0, 151), (188, 208, 182),
               (0, 220, 176), (255, 99, 164), (92, 0, 73), (133, 129, 255)]
开始训练
由于修改了参数,在训练之前还要重新编译一次。否则之前修改的参数不会生效。再次执行命令:
python setup.py install
然后就可以开始训练了。执行命令:
python tools/train.py configs/ssd/ssd300_coco.py

--work-dir:指定训练保存模型和日志的路径--resume-from:从预训练模型chenkpoint中恢复训练--no-validate:训练期间不评估checkpoint--gpus:指定训练使用GPU的数量(仅适用非分布式训练)--gpu-ids: 指定使用哪一块GPU(仅适用非分布式训练)--seed:随机种子--deterministic:是否为CUDNN后端设置确定性选项--options: arguments in dict--launcher: {none,pytorch,slurm,mpi} job launcher--local_rank: LOCAL_RANK--autoscale-lr: automatically scale lr with the number of
测试
测试执行代码:
python tools/test.py configs/ssd/ssd300_coco.py work_dirs/ssd300_coco/epoch_348.pth --out ./test_result/mask_rcnn_r50_fpn_1x/latest.pkl --eval bbox segm --s
how
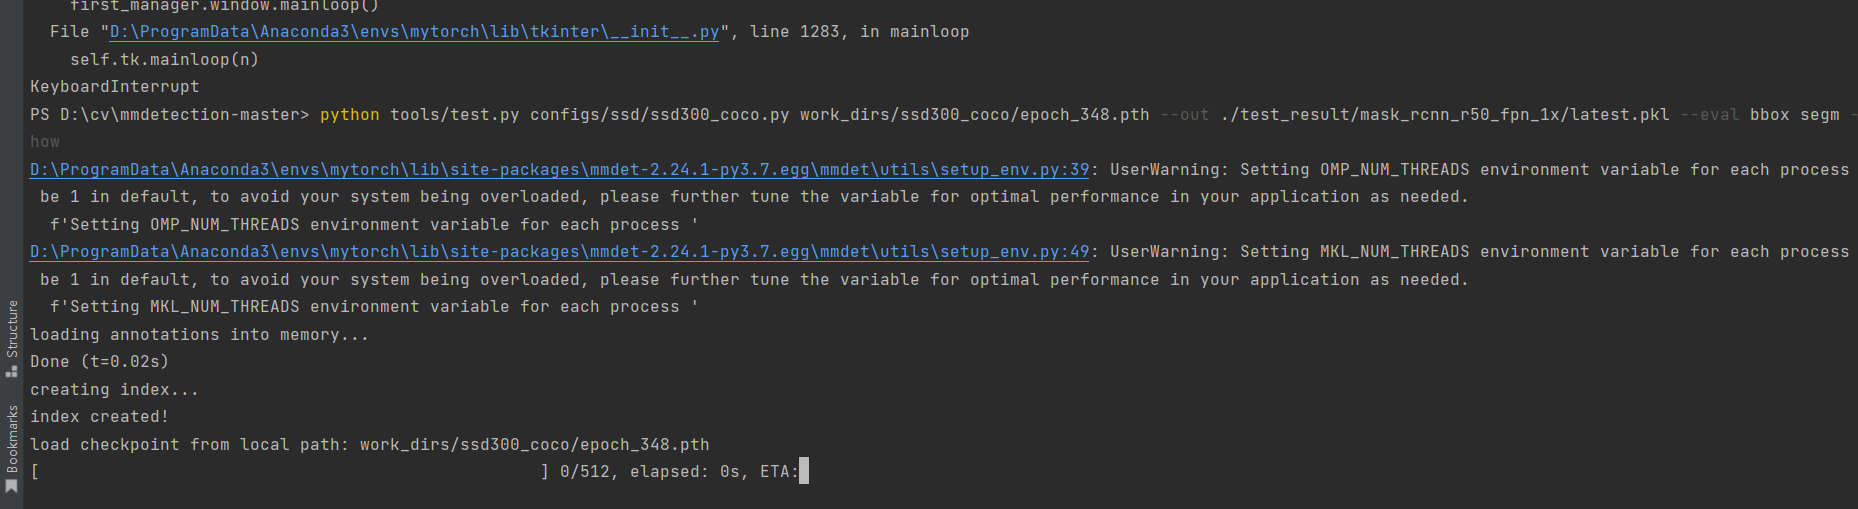
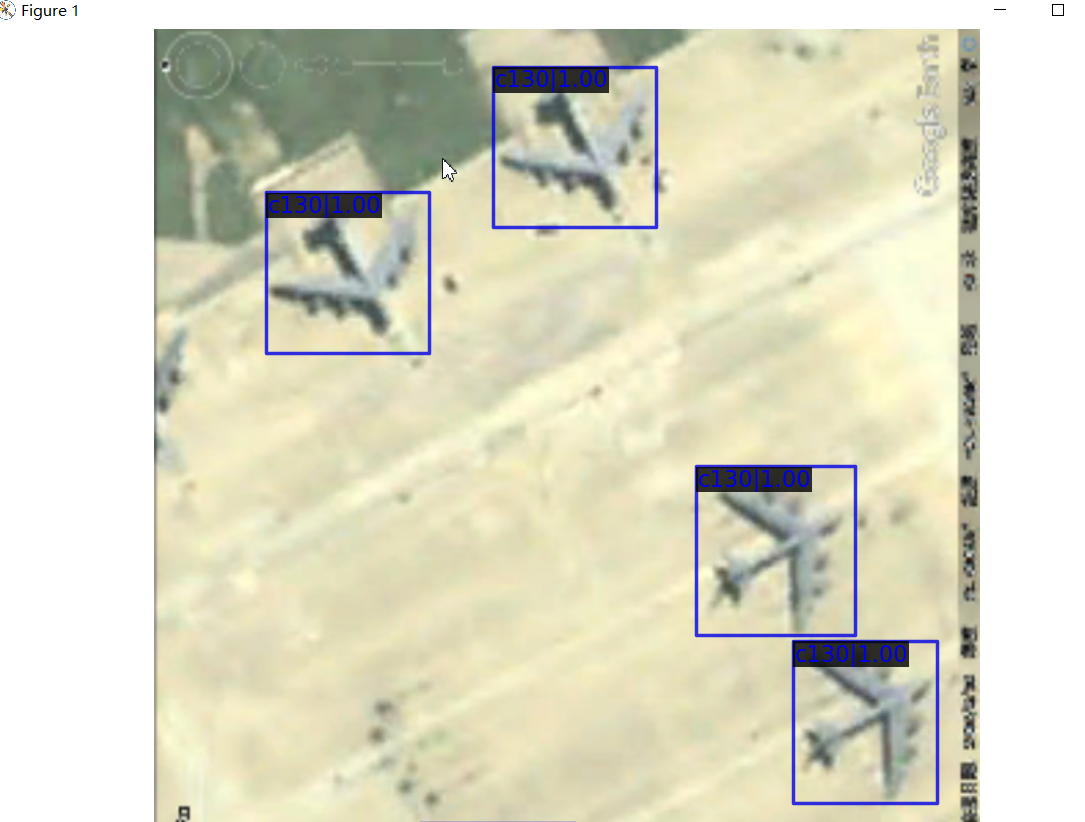
然后我们就可以看到测试结果:
完整代码和数据集:
https://download.csdn.net/download/hhhhhhhhhhwwwwwwwwww/85331635
Original: https://blog.csdn.net/hhhhhhhhhhwwwwwwwwww/article/details/124647370
Author: AI浩
Title: MMDetection实战:MMDetection训练与测试
原创文章受到原创版权保护。转载请注明出处:https://www.johngo689.com/625344/
转载文章受原作者版权保护。转载请注明原作者出处!