

今天开始学习了数据库,在安装MySQL之后启动一直报错,然后在网上找了很多解决方法,最后用以下方法解决
对于习惯了windows的小伙伴来说,直接去安装目录里边修改my.ini就可以,对于习惯了Linux的小伙伴来说,直接修改mysql默认的/etc/my.cnf配置文件就可以,可是Mac端MySQL是默认没有配置文件的,需要自己手动创建。
1.新建etc文件
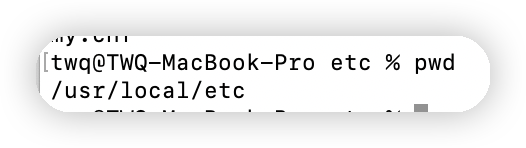
一般要在 先在/usr/local下新建一个etc 文件,注意etc为配置文件需要以管理员的身份新建 进入/usr/local目录下中,然后输入以下命令
sudo mkdir etc
然后回车即可创建etc文件
2.新建my.cnf文件
然后进入etc目录下,输入以下命令
sudo vi my.cnf
然后将以下代码全部复制进去即可
Example MySQL config file for medium systems.
#
# This is for a system with little memory (32M - 64M) where MySQL plays
# an important part, or systems up to 128M where MySQL is used together with
# other programs (such as a web server)
#
# MySQL programs look for option files in a set of
# locations which depend on the deployment platform.
# You can copy this option file to one of those
# locations. For information about these locations, see:
# http://dev.mysql.com/doc/mysql/en/option-files.html
#
# In this file, you can use all long options that a program supports.
# If you want to know which options a program supports, run the program
# with the "--help" option.
# The following options will be passed to all MySQL clients
[client]
default-character-set=utf8
#password = your_password
port = 3306
socket = /tmp/mysql.sock
# Here follows entries for some specific programs
# The MySQL server
[mysqld]
character-set-server=utf8
init_connect='SET NAMES utf8'
port = 3306
socket = /tmp/mysql.sock
skip-external-locking
key_buffer_size = 16M
max_allowed_packet = 1M
table_open_cache = 64
sort_buffer_size = 512K
net_buffer_length = 8K
read_buffer_size = 256K
read_rnd_buffer_size = 512K
myisam_sort_buffer_size = 8M
Don't listen on a TCP/IP port at all. This can be a security enhancement,
if all processes that need to connect to mysqld run on the same host.
All interaction with mysqld must be made via Unix sockets or named pipes.
Note that using this option without enabling named pipes on Windows
(via the "enable-named-pipe" option) will render mysqld useless!
#
#skip-networking
# Replication Master Server (default)
# binary logging is required for replication
log-bin=mysql-bin
# binary logging format - mixed recommended
binlog_format=mixed
# required unique id between 1 and 2^32 - 1
# defaults to 1 if master-host is not set
# but will not function as a master if omitted
server-id = 1
# Replication Slave (comment out master section to use this)
#
# To configure this host as a replication slave, you can choose between
# two methods :
#
# 1) Use the CHANGE MASTER TO command (fully described in our manual) -
# the syntax is:
#
# CHANGE MASTER TO MASTER_HOST=<host>, MASTER_PORT=<port>,
# MASTER_USER=<user>, MASTER_PASSWORD=<password> ;
#
# where you replace <host>, <user>, <password> by quoted strings and
# <port> by the master's port number (3306 by default).
#
# Example:
#
# CHANGE MASTER TO MASTER_HOST='125.564.12.1', MASTER_PORT=3306,
# MASTER_USER='joe', MASTER_PASSWORD='secret';
#
# OR
#
# 2) Set the variables below. However, in case you choose this method, then
# start replication for the first time (even unsuccessfully, for example
# if you mistyped the password in master-password and the slave fails to
# connect), the slave will create a master.info file, and any later
# change in this file to the variables' values below will be ignored and
# overridden by the content of the master.info file, unless you shutdown
# the slave server, delete master.info and restart the slaver server.
# For that reason, you may want to leave the lines below untouched
# (commented) and instead use CHANGE MASTER TO (see above)
#
# required unique id between 2 and 2^32 - 1
# (and different from the master)
# defaults to 2 if master-host is set
# but will not function as a slave if omitted
#server-id = 2
#
# The replication master for this slave - required
#master-host = <hostname>
#
# The username the slave will use for authentication when connecting
# to the master - required
#master-user = <username>
#
# The password the slave will authenticate with when connecting to
# the master - required
#master-password = <password>
#
# The port the master is listening on.
# optional - defaults to 3306
#master-port = <port>
#
# binary logging - not required for slaves, but recommended
#log-bin=mysql-bin
# Uncomment the following if you are using InnoDB tables
#innodb_data_home_dir = /usr/local/mysql/data
#innodb_data_file_path = ibdata1:10M:autoextend
#innodb_log_group_home_dir = /usr/local/mysql/data
# You can set .._buffer_pool_size up to 50 - 80 %
# of RAM but beware of setting memory usage too high
#innodb_buffer_pool_size = 16M
#innodb_additional_mem_pool_size = 2M
# Set .._log_file_size to 25 % of buffer pool size
#innodb_log_file_size = 5M
#innodb_log_buffer_size = 8M
#innodb_flush_log_at_trx_commit = 1
#innodb_lock_wait_timeout = 50
[mysqldump]
quick
max_allowed_packet = 16M
[mysql]
no-auto-rehash
# Remove the next comment character if you are not familiar with SQL
#safe-updates
default-character-set=utf8
[myisamchk]
key_buffer_size = 20M
sort_buffer_size = 20M
read_buffer = 2M
write_buffer = 2M
[mysqlhotcopy]
interactive-timeout
————————————————
</port></password></username></hostname></port></password></user></host></password></user></port></host>
然后按esc并输入:wq保存即可
3.设置my.cnf文件的权限
执行下面代码,否则mysql并不会读取my.cnf这个配置文件,执行下面一行命令前查看自己当前的目录,我当前是在etc目录里面的

sudo chmod 664 my.cnf
最后输入以下命令 即可启动MySQL
sudo /usr/local/mysql/support-files/mysql.server start
Original: https://www.cnblogs.com/twq46/p/16484537.html
Author: 剑断青丝ii
Title: mac(m1)配置my.cnf
原创文章受到原创版权保护。转载请注明出处:https://www.johngo689.com/609725/
转载文章受原作者版权保护。转载请注明原作者出处!