

Haproxy
haproxy简介
HAProxy是一个使用C语言编写的自由及开放源代码软件,其提供高可用性、负载均衡,以及基于TCP和HTTP的应用程序代理。
HAProxy特别适用于那些负载特大的web站点,这些站点通常又需要会话保持或七层处理。HAProxy运行在当前的硬件上,完全可以支持数以万计的并发连接。并且它的运行模式使得它可以很简单安全的整合进您当前的架构中, 同时可以保护你的web服务器不被暴露到网络上。
HAProxy实现了一种事件驱动, 单一进程模型,此模型支持非常大的并发连接数。多进程或多线程模型受内存限制 、系统调度器限制以及无处不在的锁限制,很少能处理数千并发连接。事件驱动模型因为在有更好的资源和时间管理的用户空间(User-Space) 实现所有这些任务,所以没有这些问题。此模型的弊端是,在多核系统上,这些程序通常扩展性较差。这就是为什么他们必须进行优化以 使每个CPU时间片(Cycle)做更多的工作。
包括 GitHub、Bitbucket、Stack Overflow、Reddit、Tumblr、Twitter和 Tuenti在内的知名网站,及亚马逊网络服务系统都使用了HAProxy。
负载均衡
二层负载均衡(mac)
用于虚拟mac地址方式,外部对虚拟mac地址请求,负载均衡接收后分配给后端实际的mac地址响应。
三层负载均衡(ip)
一般用于虚拟ip地址的方式,外部对虚拟ip地址请求,负载均衡接收后分配给后端实际的ip地址响应。
四层负载均衡(tcp)
在三层负载均衡的基础上,用ip+port接收请求,在转发到对应的机器上。
产品大概有:F5,lvs,nginx,haproxy……
七层负载均衡(http)
根据虚拟的url或者ip,主机名接收请求,在转发到相应的处理服务器上。
产品大概有:haproxy,nginx,apache,mysql proxy……
Haproxy搭建http负载均衡
环境
主机名称 IP地址 需要安装的应用 系统版本 client 192.168.222.250 无 centos 8.5 lvnanhai 192.168.222.137 haproxy centos 8.5 RS1 192.168.222.138 httpd centos 8.5 RS2 192.168.222.139 httpd centos 8.5
lvnanhai、RS1、RS2都关闭防火墙和selinux
lvnanhai:
[root@localhost ~]# hostnamectl set-hostname lvnanhai.example.com
[root@localhost ~]# bash
[root@lvnanhai ~]# systemctl stop firewalld.service
[root@lvnanhai ~]# vim /etc/selinux/config
SELINUX= disabled
[root@lvnanhai ~]# setenforce 0
[root@lvnanhai ~]# systemctl disable --now firewalld.service
Removed /etc/systemd/system/multi-user.target.wants/firewalld.service.

Removed /etc/systemd/system/dbus-org.fedoraproject.FirewallD1.service.
RS1:
root@localhost ~]# hostnamectl set-hostname RS1
[root@localhost ~]# bash
[root@RS1 ~]# systemctl stop firewalld.service
[root@RS1 ~]# vim /etc/selinux/config
SELINUX= disabled
[root@RS1 ~]# setenforce 0
[root@RS1 ~]# systemctl disable --now firewalld.service
Removed /etc/systemd/system/multi-user.target.wants/firewalld.service.

Removed /etc/systemd/system/dbus-org.fedoraproject.FirewallD1.service.
RS2:
[root@localhost ~]# hostnamectl set-hostname RS2
[root@localhost ~]# bash
[root@RS2 ~]# systemctl stop firewalld.service
[root@RS2 ~]# vim /etc/selinux/config
SELINUX= disabled
[root@RS2 ~]# setenforce 0
[root@RS2 ~]# systemctl disable --now firewalld.service
Removed /etc/systemd/system/multi-user.target.wants/firewalld.service.

Removed /etc/systemd/system/dbus-org.fedoraproject.FirewallD1.service.
RS1和RS2部署httpd
RS1:
[root@RS1 ~]# dnf -y install httpd
[root@RS1 ~]# echo RS1 > /var/www/html/index.html
[root@RS1 ~]# cat /var/www/html/index.html
RS1
[root@RS1 ~]# systemctl enable --now httpd
Created symlink /etc/systemd/system/multi-user.target.wants/httpd.service → /usr/lib/systemd/system/httpd.service.
RS2:
[root@RS2 ~]# dnf -y install httpd
[root@RS2 ~]# echo RS2 > /var/www/html/index.html
[root@RS2 ~]# cat /var/www/html/index.html
RS2
[root@RS2 ~]# systemctl enable --now httpd
Created symlink /etc/systemd/system/multi-user.target.wants/httpd.service → /usr/lib/systemd/system/httpd.service.
lvnanhai源码安装haproxy
haproxy源码包下载网站地址
下载安装包
[root@lvnanhai ~]# wget https://src.fedoraproject.org/repo/pkgs/haproxy/haproxy-2.1.3.tar.gz/sha512/4728c1177b2bba69465cbc56b1ed73a1b2d36891ba2d94d29bb49714ad98ccfac4b52947735aded211f0cd8070002f5406ddd77cabd2f8230b00438189dd7a60/haproxy-2.1.3.tar.gz
[root@lvnanhai ~]# ls
anaconda-ks.cfg  haproxy-2.1.3.tar.gz
安装编译环境
[root@lvnanhai ~]# yum -y install make gcc pcre-devel bzip2-devel openssl-devel systemd-devel
创建haproxy用户
[root@lvnanhai ~]# useradd -r -M -s /sbin/nologin haproxy
解压和安装
[root@lvnanhai ~]# tar xf haproxy-2.1.3.tar.gz
[root@lvnanhai ~]# ls
anaconda-ks.cfg  haproxy-2.1.3  haproxy-2.1.3.tar.gz
[root@lvnanhai ~]# cd haproxy-2.1.3/
[root@lvnanhai haproxy-2.1.3]# make clean
[root@lvnanhai haproxy-2.1.3]# make -j $(grep 'processor' /proc/cpuinfo |wc -l)  \
> TARGET=linux-glibc  \
> USE_OPENSSL=1  \
> USE_ZLIB=1  \
> USE_PCRE=1  \
> USE_SYSTEMD=1
[root@lvnanhai haproxy-2.1.3]# make install PREFIX=/usr/local/haproxy
[root@lvnanhai haproxy-2.1.3]# cp haproxy  /usr/sbin/
设置Linux内核参数
[root@lvnanhai haproxy-2.1.3]# vim /etc/sysctl.conf
net.ipv4.ip_nonlocal_bind = 1
net.ipv4.ip_forward = 1
//等于号前后都要空格
配置haproxy服务
[root@lvnanhai haproxy-2.1.3]# vim /etc/haproxy/haproxy.cfg
[root@lvnanhai haproxy-2.1.3]# cat /etc/haproxy/haproxy.cfg
global
 log 127.0.0.1 local0  info
    #log loghost local0 info
    maxconn 20480
#chroot /usr/local/haproxy
    pidfile /var/run/haproxy.pid
    #maxconn 4000
    user haproxy
    group haproxy
    daemon
#---------------------------------------------------------------------
#common defaults that all the 'listen' and 'backend' sections will
#use if not designated in their block
#---------------------------------------------------------------------
defaults
    mode http
    log global
    option dontlognull
    option httpclose
    option httplog
    #option forwardfor
    option redispatch
    balance roundrobin
    timeout connect 10s
    timeout client 10s
    timeout server 10s
    timeout check 10s
    maxconn 60000
    retries 3
#--------------统计页面配置------------------
listen admin_stats
    bind 0.0.0.0:8189
    stats enable
    mode http
    log global
    stats uri /haproxy_stats
    stats realm Haproxy\ Statistics
    stats auth admin:admin
    #stats hide-version
    stats admin if TRUE
    stats refresh 30s
#---------------web设置-----------------------
listen webcluster
    bind 0.0.0.0:80
    mode http
    #option httpchk GET /index.html
    log global
    maxconn 3000
    balance roundrobin
    cookie SESSION_COOKIE insert indirect nocache
    server web01 172.16.103.130:80 check inter 2000 fall 5
    #server web01 192.168.80.102:80 cookie web01 check inter 2000 fall 5
启动haproxy,配置haproxy.service服务单元文件
[root@lvnanhai ~]# vim /usr/lib/systemd/system/haproxy.service
[root@lvnanhai ~]# cat /usr/lib/systemd/system/haproxy.service
[Unit]
Description=HAProxy Load Balancer
After=syslog.target network.target

[Service]
ExecStartPre=/usr/local/haproxy/sbin/haproxy -f /etc/haproxy/haproxy.cfg   -c -q
ExecStart=/usr/local/haproxy/sbin/haproxy -Ws -f /etc/haproxy/haproxy.cfg  -p /var/run/haproxy.pid
ExecReload=/bin/kill -USR2 $MAINPID

[Install]
WantedBy=multi-user.target
配置日志信息
[root@lvnanhai ~]# vim /etc/rsyslog.conf
Don't log private authentication messages!

*.info;mail.none;authpriv.none;cron.none                /var/log/messages
local0.*        /var/log/haproxy.log  //添加
[root@lvnanhai ~]# systemctl restart rsyslog.service
[root@lvnanhai ~]# systemctl enable rsyslog.service
[root@lvnanhai ~]# systemctl restart rsyslog.service
[root@lvnanhai ~]# systemctl enable rsyslog.service
修改lvnanhai的内核参数
[root@lvnanhai ~]# vim /etc/sysctl.conf
[root@lvnanhai ~]# vim /etc/sysctl.conf
[root@lvnanhai ~]# sysctl -p
net.ipv4.ip_nonlocal_bind = 1
net.ipv4.ip_forward = 1
//等于号前后要空格
修改haproxy配置文件
[root@lvnanhai ~]# vim /etc/haproxy/haproxy.cfg
[root@lvnanhai ~]# cat /etc/haproxy/haproxy.cfg
global
    daemon
    maxconn 256

defaults
    mode http
    timeout connect 5000ms
    timeout client 50000ms
    timeout server 50000ms

frontend http-in
    bind *:80
    default_backend servers

backend servers
    server web01 192.168.222.138:80
    server web02 192.168.222.139:80
启动haproxy服务
如果没有使用systemd管理,则执行
[root@lvnanhai ~]# haproxy -f /etc/haproxy/haproxy.cfg -c
如果配置systemd管理haproxy服务,则执行
[root@lvnanhai ~]# systemctl restart haproxy.service
[root@lvnanhai ~]# systemctl enable --now haproxy.service
Created symlink /etc/systemd/system/multi-user.target.wants/haproxy.service → /usr/lib/systemd/system/haproxy.service.
客户端验证
[root@client ~]# curl http://192.168.222.137
RS1
[root@client ~]# curl http://192.168.222.137
RS2
[root@client ~]# curl http://192.168.222.137
RS1
[root@client ~]# curl http://192.168.222.137
RS2
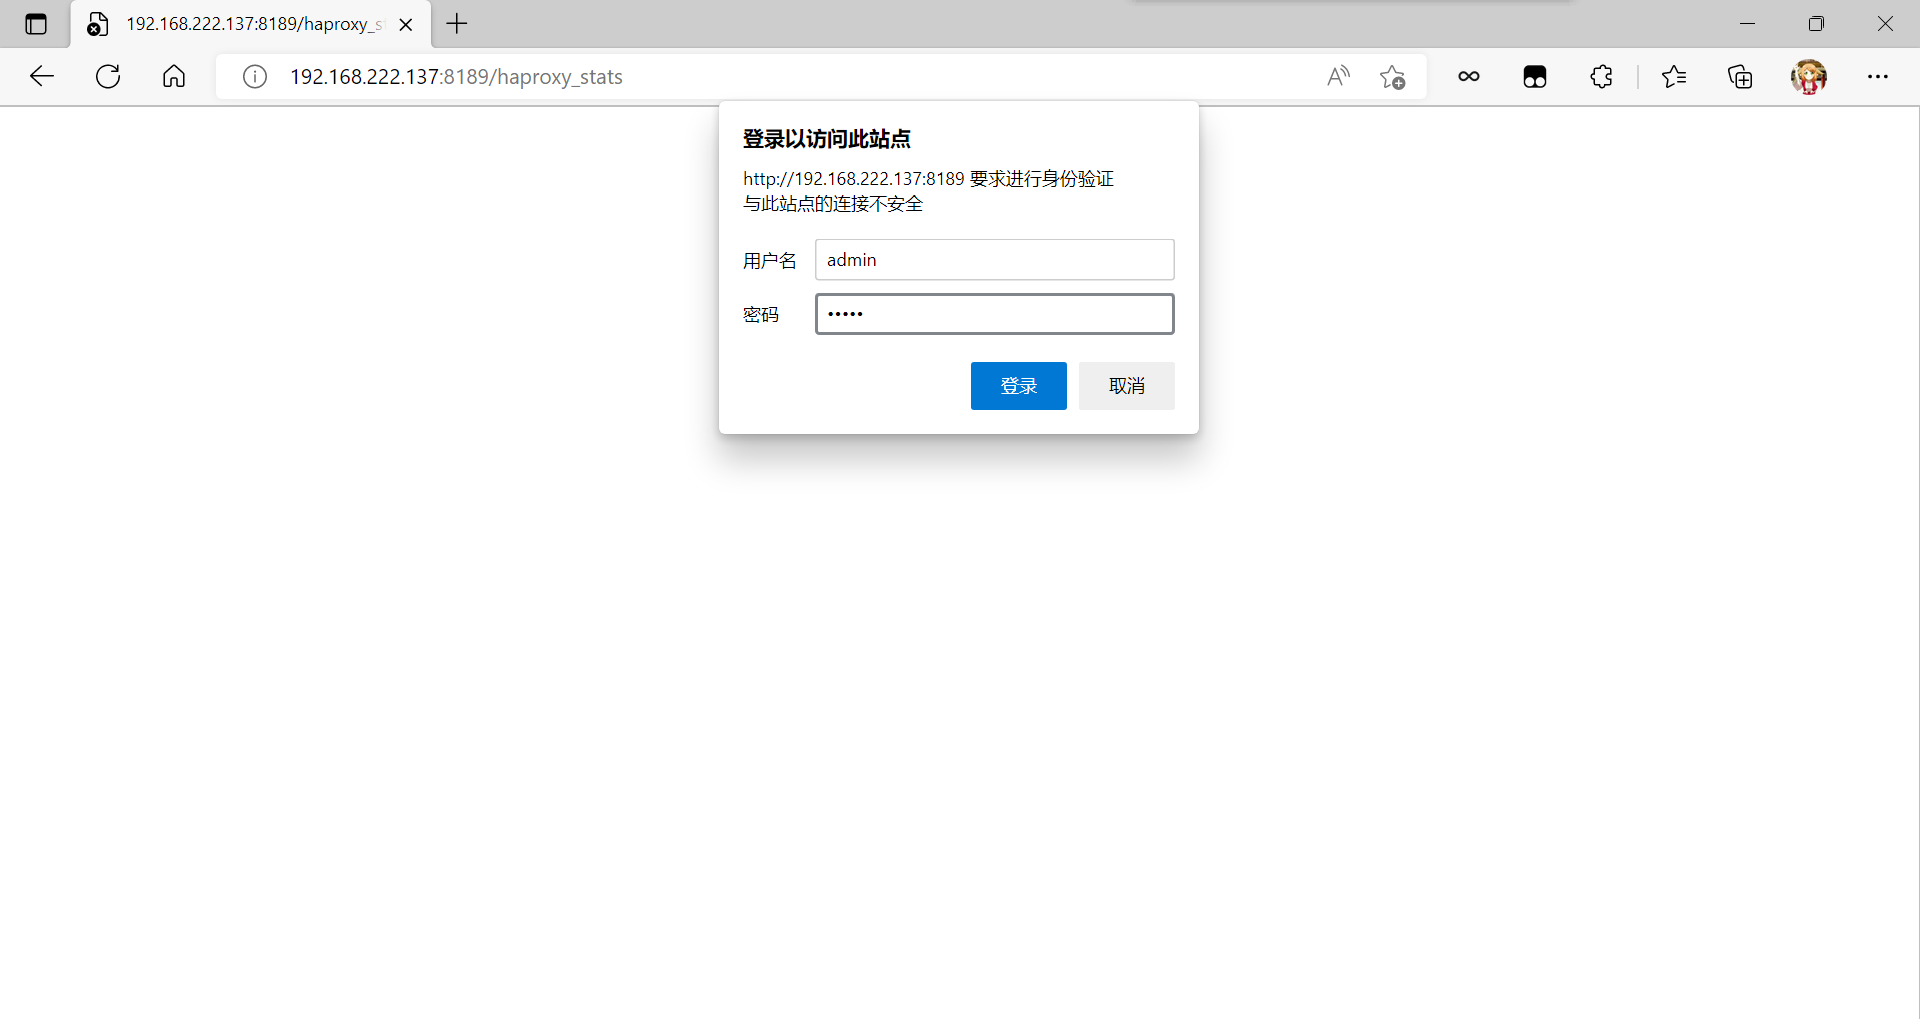
使用WEB网页访问测试
[root@lvnanhai ~]# vim /etc/haproxy/haproxy.cfg
[root@lvnanhai ~]# cat /etc/haproxy/haproxy.cfg
global
    log 127.0.0.1 local0  info
    #log loghost local0 info
    maxconn 20480
#chroot /usr/local/haproxy
    pidfile /var/run/haproxy.pid
    #maxconn 4000
    user haproxy
    group haproxy
    daemon
#---------------------------------------------------------------------
#common defaults that all the 'listen' and 'backend' sections will
#use if not designated in their block
#---------------------------------------------------------------------
defaults
    mode http
    log global
    option dontlognull
    option httpclose
    option httplog
    #option forwardfor
    option redispatch
    balance roundrobin
    timeout connect 10s
    timeout client 10s
    timeout server 10s
    timeout check 10s
    maxconn 60000
    retries 3
#--------------统计页面配置------------------
listen admin_stats
    bind 0.0.0.0:8189
    stats enable
    mode http
    log global
    stats uri /haproxy_stats            //访问网页后缀URL
    stats realm Haproxy\ Statistics
    stats auth admin:admin              //用户名和密码
    #stats hide-version
    stats admin if TRUE
    stats refresh 30s
#---------------web设置-----------------------
listen webcluster
    bind 0.0.0.0:80
    mode http
    #option httpchk GET /index.html
    log global
    maxconn 3000
    balance roundrobin
    cookie SESSION_COOKIE insert indirect nocache
    server web01 192.168.222.138:80 check inter 2000 fall 5
    server web02 192.168.222.139:80 check inter 2000 fall 5
重启服务
[root@lvnanhai ~]# systemctl restart haproxy.service
[root@lvnanhai ~]# ss -tnl
State      Recv-Q     Send-Q          Local Address:Port           Peer Address:Port     Process
LISTEN     0          128                   0.0.0.0:22                  0.0.0.0:*
LISTEN     0          128                   0.0.0.0:8189                0.0.0.0:*
LISTEN     0          128                   0.0.0.0:80                  0.0.0.0:*
LISTEN     0          128                      [::]:22                     [::]:*
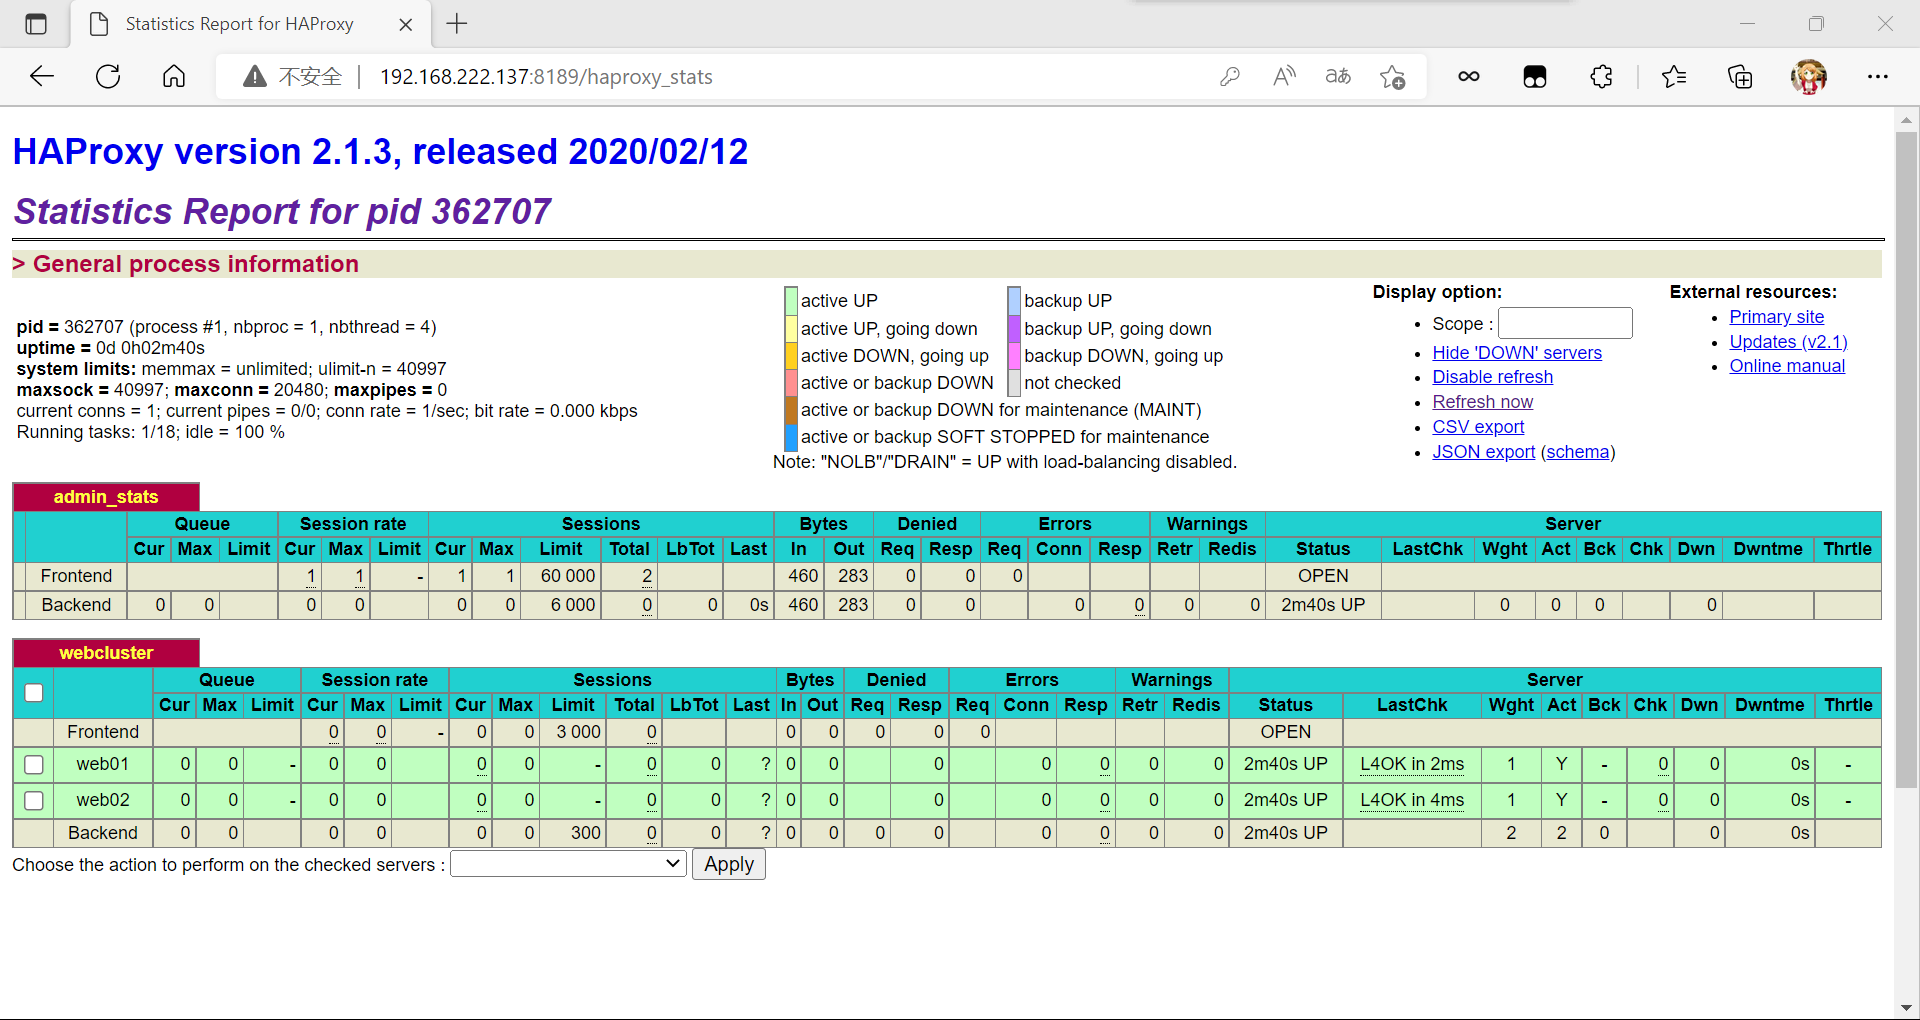
网页访问测试
用户名和密码都为admin

Original: https://www.cnblogs.com/tushanbu/p/16736582.html
Author: 涂山布
Title: Haproxy
原创文章受到原创版权保护。转载请注明出处:https://www.johngo689.com/573942/
转载文章受原作者版权保护。转载请注明原作者出处!