

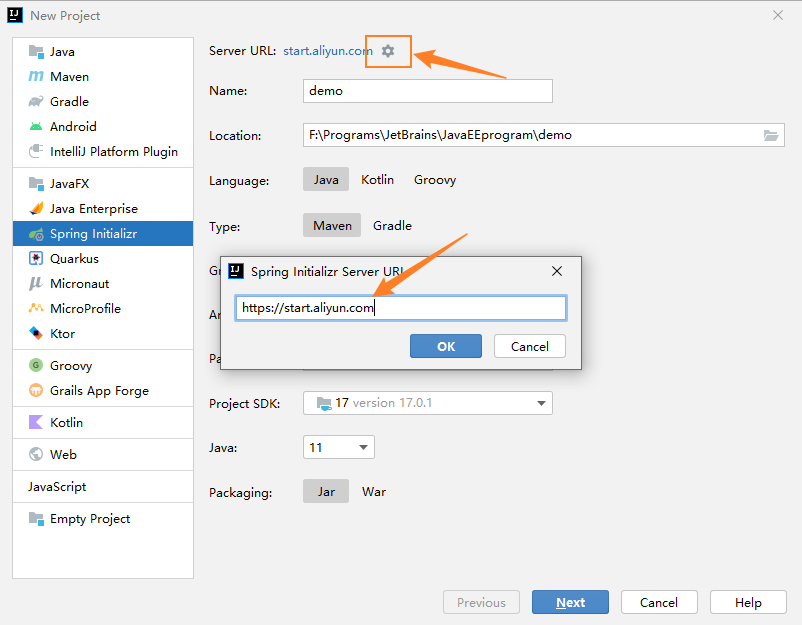
可以手动从一个 Maven 项目进行搭建,后期也可以利用 Idea 工具直接从阿里云官网进行快捷搭建,网址为Aliyun Java Initializr,类似于 SpringBoot 的初始化向导 Spring Initializr。我们逐层进行演示
一、分布式环境搭建
1. 创建父级 Spring Boot 项目
pom.xml
    4.0.0

    com.pushihao
    test
    0.0.1-SNAPSHOT
    test
    test

        11
        2.6.7

                org.springframework.boot
                spring-boot-starter-parent
                ${spring.boot.version}
                pom
                import

            org.springframework.boot
            spring-boot-starter

            org.springframework.boot
            spring-boot-starter-test
            test

                org.springframework.boot
                spring-boot-maven-plugin
2. 新建两个模块
新建子模块时最好新建 Maven 项目,因为可以设置父项目。如果新建 Spring Boot Initializr 则默认父项目是 spring-boot-starter-parent
这里以订单模块(order)和仓库模块(stock)为例
假设仓库模块为生产者,订单模块为调用者。当调用订单模块时,订单模块调用仓库模块,使库存减一
项目结构如下:
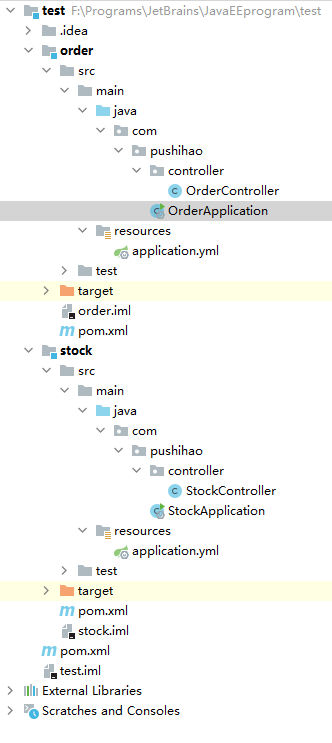

具体文件:
pom.xml (两个模块的 pom.xml 几乎相同)
        SpringCloud
        com.pushihao
        0.0.1-SNAPSHOT

    4.0.0

    stock

            org.springframework.boot
            spring-boot-starter-web
StockApplication.java
package com.pushihao;

import org.springframework.boot.SpringApplication;
import org.springframework.boot.autoconfigure.SpringBootApplication;

@SpringBootApplication
public class StockApplication {
    public static void main(String[] args) {
        SpringApplication.run(StockApplication.class, args);
    }
}
StockController.java
package com.pushihao.controller;

import org.springframework.web.bind.annotation.GetMapping;
import org.springframework.web.bind.annotation.RequestMapping;
import org.springframework.web.bind.annotation.RestController;

@RestController
@RequestMapping("/stock")
public class StockController {

    @GetMapping("reduct")
    public String reduct() {
        System.out.println("库存减一");
        return "success!";
    }
}
OrderApplication.java
package com.pushihao;

import org.springframework.boot.SpringApplication;
import org.springframework.boot.autoconfigure.SpringBootApplication;
import org.springframework.boot.web.client.RestTemplateBuilder;
import org.springframework.context.annotation.Bean;
import org.springframework.web.client.RestTemplate;

@SpringBootApplication
public class OrderApplication {
    public static void main(String[] args) {
        SpringApplication.run(OrderApplication.class, args);
    }

    @Bean
    public RestTemplate restTemplate(RestTemplateBuilder builder) {
        return builder.build();
    }
}
OrderController.java
package com.pushihao.controller;

import org.springframework.beans.factory.annotation.Autowired;
import org.springframework.web.bind.annotation.GetMapping;
import org.springframework.web.bind.annotation.RequestMapping;
import org.springframework.web.bind.annotation.RestController;
import org.springframework.web.client.RestTemplate;

@RestController
@RequestMapping("/order")
public class OrderController {

    @Autowired
    private RestTemplate restTemplate;

    @GetMapping("add")
    public String add() {
        System.out.println("订单加一");
        //result为返回结果
        String result = restTemplate.getForObject("http://localhost:9001/stock/reduct", String.class);
        return "success!";
    }
}
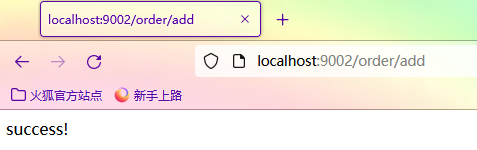
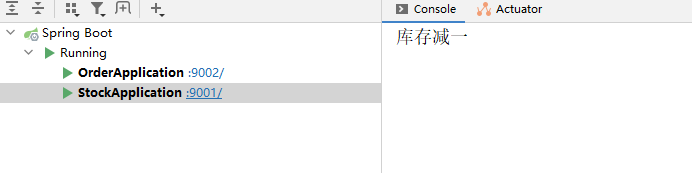
至此,一个简单的分布式环境就搭建好了,使用浏览器调用 http://localhost:9002/order/add 就可以看到结果

二、Spring Cloud Alibaba 环境搭建
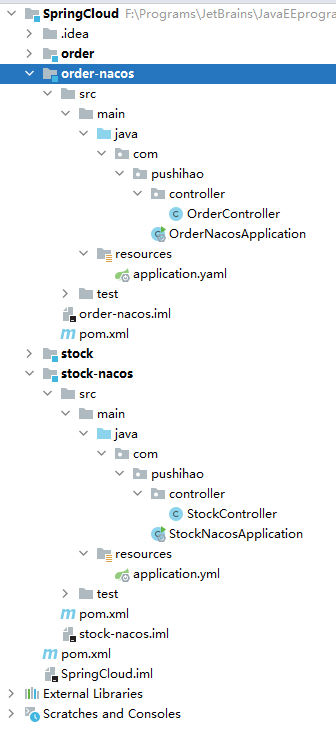
可以直接在原有的分布式环境上直接引用 Spring Cloud Alibaba 即可
项目结构如下:
1. 导入 Spring Cloud Alibaba 和 Spring Cloud 的坐标
注意:版本号一定要选对(按照要求)参考 版本说明
稳定版本依赖关系
Spring Cloud Alibaba Version Spring Cloud Version Spring Boot Version 2021.0.1.0 Spring Cloud 2021.0.1 2.6.3 2.2.7.RELEASE Spring Cloud Hoxton.SR12 2.3.12.RELEASE 2021.1 Spring Cloud 2020.0.1 2.4.2 2.2.6.RELEASE Spring Cloud Hoxton.SR9 2.3.2.RELEASE 2.1.4.RELEASE Spring Cloud Greenwich.SR6 2.1.13.RELEASE 2.2.1.RELEASE Spring Cloud Hoxton.SR3 2.2.5.RELEASE 2.2.0.RELEASE Spring Cloud Hoxton.RELEASE 2.2.X.RELEASE 2.1.2.RELEASE Spring Cloud Greenwich 2.1.X.RELEASE 2.0.4.RELEASE(停止维护,建议升级) Spring Cloud Finchley 2.0.X.RELEASE 1.5.1.RELEASE(停止维护,建议升级) Spring Cloud Edgware 1.5.X.RELEASE
组件版本关系(一般由Spring Cloud Alibaba 版本管理器直接控制,我们不用关心)
Spring Cloud Alibaba Version Sentinel Version Nacos Version RocketMQ Version Dubbo Version Seata Version 2021.0.1.0* 1.8.3 1.4.2 4.9.2 2.7.15 1.4.2 2.2.7.RELEASE 1.8.1 2.0.3 4.6.1 2.7.13 1.3.0 2.2.6.RELEASE 1.8.1 1.4.2 4.4.0 2.7.8 1.3.0 2021.1 or 2.2.5.RELEASE or 2.1.4.RELEASE or 2.0.4.RELEASE 1.8.0 1.4.1 4.4.0 2.7.8 1.3.0 2.2.3.RELEASE or 2.1.3.RELEASE or 2.0.3.RELEASE 1.8.0 1.3.3 4.4.0 2.7.8 1.3.0 2.2.1.RELEASE or 2.1.2.RELEASE or 2.0.2.RELEASE 1.7.1 1.2.1 4.4.0 2.7.6 1.2.0 2.2.0.RELEASE 1.7.1 1.1.4 4.4.0 2.7.4.1 1.0.0 2.1.1.RELEASE or 2.0.1.RELEASE or 1.5.1.RELEASE 1.7.0 1.1.4 4.4.0 2.7.3 0.9.0 2.1.0.RELEASE or 2.0.0.RELEASE or 1.5.0.RELEASE 1.6.3 1.1.1 4.4.0 2.7.3 0.7.1
这里使用最新稳定版即可
    4.0.0

    com.pushihao
    test
    pom
    0.0.1-SNAPSHOT

        order
        stock
        order-nacos
        stock-nacos

    test
    test

        11
        2.3.12.RELEASE
        Hoxton.SR12
        2.2.7.RELEASE

                org.springframework.boot
                spring-boot-starter-parent
                ${spring.boot.version}
                pom
                import

                org.springframework.cloud
                spring-cloud-dependencies
                ${spring.cloud.version}
                pom
                import

                com.alibaba.cloud
                spring-cloud-alibaba-dependencies
                ${spring.cloud.alibaba.version}
                pom
                import

            org.springframework.boot
            spring-boot-starter

            org.springframework.boot
            spring-boot-starter-test
            test

                org.springframework.boot
                spring-boot-maven-plugin
2.1 新建 stock-nacos 模块
pom.xml
        SpringCloud
        com.pushihao
        0.0.1-SNAPSHOT

    4.0.0
    stock-nacos

            org.springframework.boot
            spring-boot-starter-web

            com.alibaba.cloud
            spring-cloud-starter-alibaba-nacos-discovery

                org.apache.maven.plugins
                maven-compiler-plugin
                3.8.1

                    11
                    11
application.yml
server:
  port: 9001
spring:
  application:
    name: stock-service
  cloud:
    nacos:
      server-addr: 127.0.0.1:8848
      discovery:
        username: nacos
        password: nacos
        cluster-name: public
StockNacosApplication.java
package com.pushihao;

import org.springframework.boot.SpringApplication;
import org.springframework.boot.autoconfigure.SpringBootApplication;

@SpringBootApplication
public class StockNacosApplication {
    public static void main(String[] args) {
        SpringApplication.run(StockNacosApplication.class, args);
    }
}
StockController.java
package com.pushihao.controller;

import org.springframework.web.bind.annotation.GetMapping;
import org.springframework.web.bind.annotation.RequestMapping;
import org.springframework.web.bind.annotation.RestController;

@RestController
@RequestMapping("/stock")
public class StockController {

    @GetMapping("reduct")
    public String reduct() {
        System.out.println("库存减一");
        return "success!";
    }
}
2.2 新建 order-nacos 模块
pom.xml
        test
        com.pushihao
        0.0.1-SNAPSHOT

    4.0.0

    order-nacos

            org.springframework.boot
            spring-boot-starter-web

            com.alibaba.cloud
            spring-cloud-starter-alibaba-nacos-discovery

                org.apache.maven.plugins
                maven-compiler-plugin
                3.8.1

                    11
                    11
application.yml
server:
  port: 9001
spring:
  application:
    name: order-service
  cloud:
    nacos:
      server-addr: 127.0.0.1:8848
      discovery:
        username: nacos
        password: nacos
        namespace: public
        # ephemeral: false  #是否是临时实例 默认是true(临时实例)  永久实例:哪怕宕机了也不会删除实例
OrderNacosApplication.java
package com.pushihao;

import org.springframework.boot.SpringApplication;
import org.springframework.boot.autoconfigure.SpringBootApplication;
import org.springframework.boot.web.client.RestTemplateBuilder;
import org.springframework.cloud.client.loadbalancer.LoadBalanced;
import org.springframework.context.annotation.Bean;
import org.springframework.web.client.RestTemplate;

@SpringBootApplication
public class OrderNacosApplication {
    public static void main(String[] args) {
        SpringApplication.run(OrderNacosApplication.class, args);
    }

    //加上@LoadBalanced就配上了默认的负载均衡器Ribbon
    @Bean
    @LoadBalanced
    public RestTemplate restTemplate(RestTemplateBuilder restTemplateBuilder) {
        return restTemplateBuilder.build();
    }
}
OrderController.java
package com.pushihao.controller;

import org.springframework.beans.factory.annotation.Autowired;
import org.springframework.web.bind.annotation.GetMapping;
import org.springframework.web.bind.annotation.RequestMapping;
import org.springframework.web.bind.annotation.RestController;
import org.springframework.web.client.RestTemplate;

@RestController
@RequestMapping("/order")
public class OrderController {

    @Autowired
    RestTemplate restTemplate;

    @GetMapping("add")
    public String add() {
        System.out.println("下单成功");

        //这里就可以把IP地址替换成对应的服务名,调用时就会启用默认的负载均衡机制
        String msg = restTemplate.getForObject("http://stock-service/stock/reduct", String.class);

        return "success!";
    }
}
至此 Spring Cloud Alibaba 环境就搭建完毕了
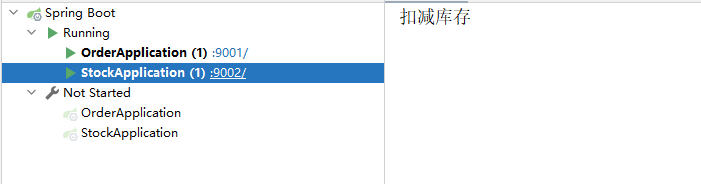
依次启动 nacos 服务器、stock-nacos、order-nacos
浏览器输入 http://localhost:8848/nacos 在服务管理一栏即可查看注册的微服务

浏览器输入 http://localhost:9001/order/add 即可查看运行结果
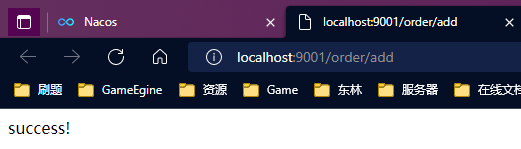

成功!
三、使用 Aliyun Java Initializr 快速构建
可以直接在网页上 Aliyun Java Initializr 进行配置,然后下载初始代码并导入编辑器工具中
不过更多情况下,都是使用 Idea 工具进行快速构建,如下:
以上!
Original: https://www.cnblogs.com/psh1024/p/16273303.html
Author: IT-Small-White
Title: Spring Cloud Alibaba 环境搭建
原创文章受到原创版权保护。转载请注明出处:https://www.johngo689.com/569301/
转载文章受原作者版权保护。转载请注明原作者出处!