

【转载:https://blog.csdn.net/blueheart20/article/details/52838093】
- Maven中的profile设置
Maven是目前主流的项目代码结构管理工具和打包发布工具,在其中提供了profile方式,可以将不同的环境下的信息,基于profile来进行管理,所有的配置信息放入profile之内;
大家可以把profile当作一套环境下的独立一套配置来理解。
示例如下, pom.xml中的配置部分内容:
dev

                true

                testkey

                    src/main/resources/config/db.properties
                    src/main/resources/config/test.xml

            test

               anothertestkey

                    src/main/resources/config/db.properties
                    src/main/resources/config/test.xml
这里使用了ab.key来表示不同环境下的配置信息,大家可以看到不同配置环境下的拥有相同key的值是各不相同的, testkey和anothertestkey.
- Profile实现配置信息动态过滤的依赖包
主要的plugins如下所示:
  <project>

     <build>
        <plugins>
            <plugin>
                <groupId>org.apache.maven.pluginsgroupId>
                <artifactId>maven-surefire-pluginartifactId>
                <version>2.19.1version>
                <configuration>
                    <skipTests>trueskipTests>
                configuration>
            plugin>

            <plugin>
                <groupId>org.apache.maven.pluginsgroupId>
                <artifactId>maven-resources-pluginartifactId>
                <version>3.0.1version>
                <configuration>
                    <encoding>UTF-8encoding>
                configuration>
            plugin>
        plugins>

         <resources>
            <resource>
                <directory>src/main/resourcesdirectory>

                <filtering>truefiltering>
            resource>
        resources>
    build>
maven-surefire-plugin, 可选组件, 插件用来在maven构建生命周期的test phase执行一个应用的单元测试。它会产生两种不同形式的测试结果报告。
使用方式: 使用该插件很简单,使用mvn surefire:test或者mvn test都可以运行工程下的单元测试。
结果信息: 在工程的${basedir}/target/surefire-reports,目录下(basedir指的是pom文件所在的目录)
主页地址: http://maven.apache.org/components/plugins/maven-surefire-plugin/
maven-resources-plugin: 必选组件, 基于profile指定动态过滤配置信息
使用方式: mvn package -P profileName (or mvn deploy etc)
结果信息: 将src/main/resources下的配置信息占位符替换为profile中指定的值
主页地址: http://maven.apache.org/components/plugins/maven-resources-plugin/
关于resources节点下的信息作用,这里是整个resources的总开关,filtering这里指定启用过滤功能,否则该功能将无法正常使用。
1中的resources filter设置如下:
   ............

    <profile>
            <id>testid>
            <properties>
               <ab.key>anothertestkeyab.key>
            properties>

            <build>
                <filters>
                    <filter>src/main/resources/config/db.propertiesfilter>
                    <filter>src/main/resources/config/test.xmlfilter>
                filters>
            build>
        profile>
     ...............
- profile文件使用示例
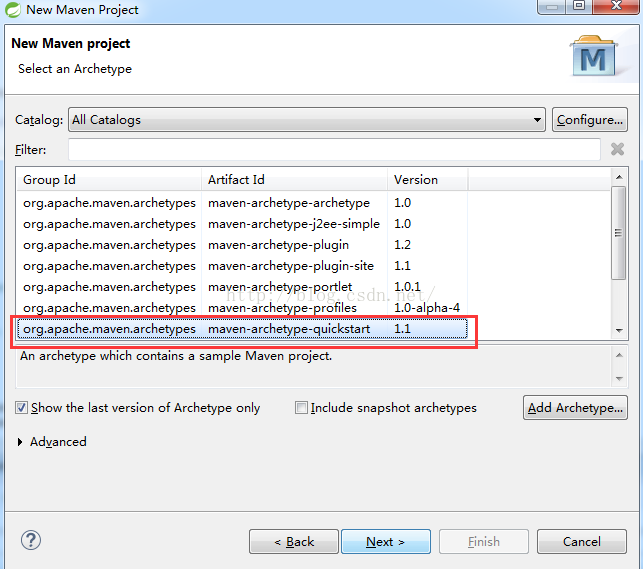
3.1 创建maven项目
打开Eclipse, 打开File–> New–> Maven Project, 创建maven项目:

填写相应的项目groupId和artifactId信息:
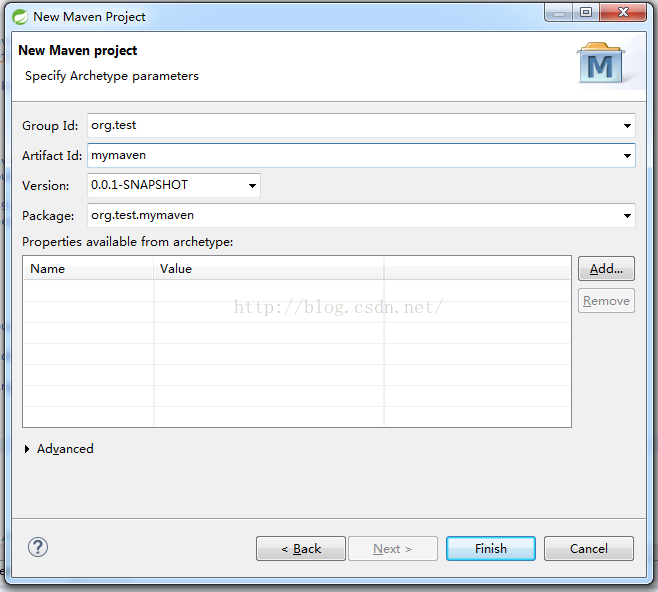
点击Finish按钮之后,创建项目成功
3.2 项目结构以及相应的配置文件信息
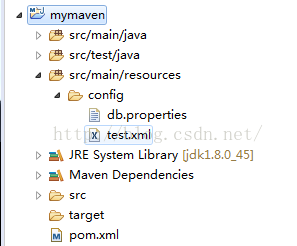
这里我们将配置文件test.xml和db.properties放入了src/main/resources目录下的config中。
同时将maven的plugins按照#1的要求配置进入pom.xml文件中。pom.xml的具体信息如下:
<project xmlns="http://maven.apache.org/POM/4.0.0" xmlns:xsi="http://www.w3.org/2001/XMLSchema-instance"
    xsi:schemaLocation="http://maven.apache.org/POM/4.0.0 http://maven.apache.org/xsd/maven-4.0.0.xsd">
    <modelVersion>4.0.0modelVersion>

    <groupId>org.testgroupId>
    <artifactId>mymavenartifactId>
    <version>0.0.1-SNAPSHOTversion>
    <packaging>jarpackaging>

    <name>mymavenname>
    <url>http://maven.apache.orgurl>

    <properties>
        <project.build.sourceEncoding>UTF-8project.build.sourceEncoding>
    properties>

    <dependencies>
        <dependency>
            <groupId>junitgroupId>
            <artifactId>junitartifactId>
            <version>3.8.1version>
            <scope>testscope>
        dependency>
    dependencies>

    <build>
        <plugins>
            <plugin>
                <groupId>org.apache.maven.pluginsgroupId>
                <artifactId>maven-surefire-pluginartifactId>
                <version>2.19.1version>
                <configuration>
                    <skipTests>trueskipTests>
                configuration>
            plugin>
            <plugin>
                <groupId>org.apache.maven.pluginsgroupId>
                <artifactId>maven-resources-pluginartifactId>
                <version>3.0.1version>
                <configuration>
                    <encoding>UTF-8encoding>
                configuration>
            plugin>
        plugins>

         <resources>
            <resource>
                <directory>src/main/resourcesdirectory>

                <filtering>truefiltering>
            resource>
        resources>
    build>

    <profiles>
        <profile>
            <id>devid>
            <activation>
                <activeByDefault>trueactiveByDefault>
            activation>
            <properties>
                <ab.key>testkeyab.key>
            properties>

            <build>
                <filters>
                    <filter>src/main/resources/config/db.propertiesfilter>
                    <filter>src/main/resources/config/test.xmlfilter>
                filters>
            build>
        profile>

        <profile>
            <id>testid>
            <properties>
               <ab.key>anothertestkeyab.key>
            properties>

            <build>
                <filters>
                    <filter>src/main/resources/config/db.propertiesfilter>
                    <filter>src/main/resources/config/test.xmlfilter>
                filters>
            build>
        profile>
    profiles>
project>
配置文件中的信息如下, test.xml中的内容:
xml version="1.0" encoding="UTF-8"?>
<info>${ab.key}info>
db.properties中的内容如下:
my.key2=${ab.key}
ab.key在pom.xml中的不同profile中设定的相应值。
在pom.xml中设定了2个profile, test和dev, dev做为缺省的profile。
- 执行打包或者发布操作,查看打包结果
mvn clean # 清理上次打包的结果和临时文件
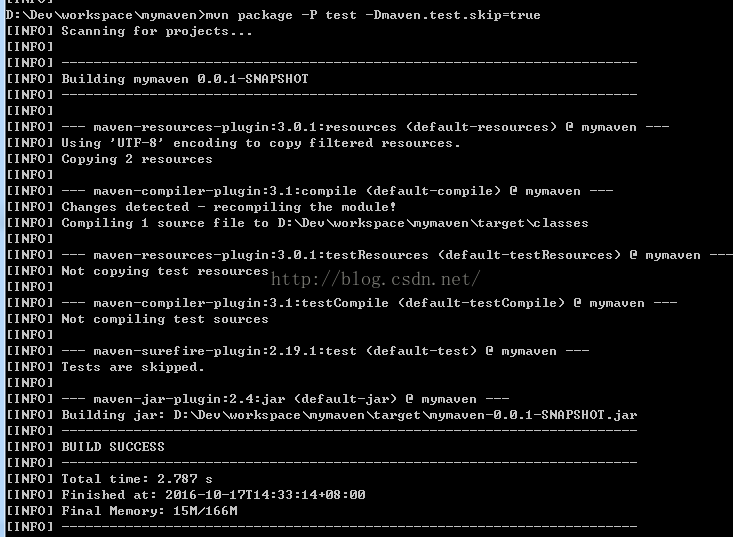
mvn package -P dev -Dmaven.test.skip=true # 打包,忽略测试部分
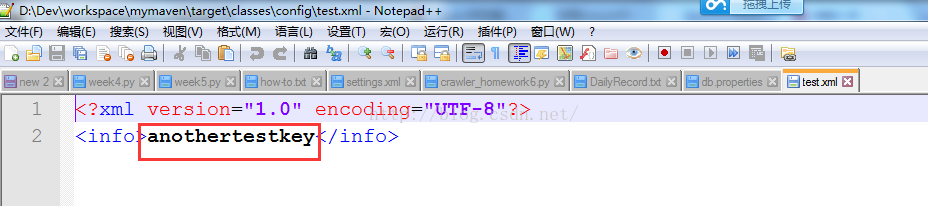
然后接入生成的target目录,查看classes目录下的config, 查看db.properties和test.xml中的内容:
maven的命令运行过程信息:
然后我们就可以在打包之后的结果中,看到过滤之后的信息了。
在Maven中-DskipTests和-Dmaven.test.skip=true的区别如下:
- -DskipTests,不执行测试用例,但编译测试用例类生成相应的class文件至target/test-classes下。
-
-Dmaven.test.skip=true,不执行测试用例,也不编译测试用例类。
-
在过程中碰到的问题以及解决办法
Q1: 在打包过程中,发现配置信息,并未被正确的profile下的信息替换掉
How to fix it?
a. 检查maven中的resources plugin是否被正确的引入, 在全局的filtering设置是否被打开,在build节点中的directory目录设置是否正确。另外,在特定的profile中设置的filter路径以及文件是否正确等
Q2: 在打包过程中,配置文件被正确过滤替换了,但是配置文件不是被复制到特定的目录,比如config下,而是被放入了classes下的根目录了,为什么?
How to fix it ?
此类情况应是build–>resources下设置了includes信息,include了所有的文件或者include文件路径为缺省值,比如下面的设置:
  .....................

  <resources>
            <resource>
                <directory>src/main/resourcesdirectory>
                <includes>
                    <include>**/*include>
                includes>
                <filtering>truefiltering>
            resource>
        resources>
    build>
project>
这种情况下,将includes节点去掉,在profile中进行配置filter即可。
Q3: 我的配置都是没有问题,但是依然发现配置文件中的占位符,没有被正确替换,问题在哪里?
How to fix it ?
请检查maven-resources-plugin是否被正确的引入到plugins的列表中。
Original: https://www.cnblogs.com/liaojie970/p/9546517.html
Author: 山高我为峰
Title: Maven中基于POM.xml的Profile来动态切换配置信息
原创文章受到原创版权保护。转载请注明出处:https://www.johngo689.com/546340/
转载文章受原作者版权保护。转载请注明原作者出处!