

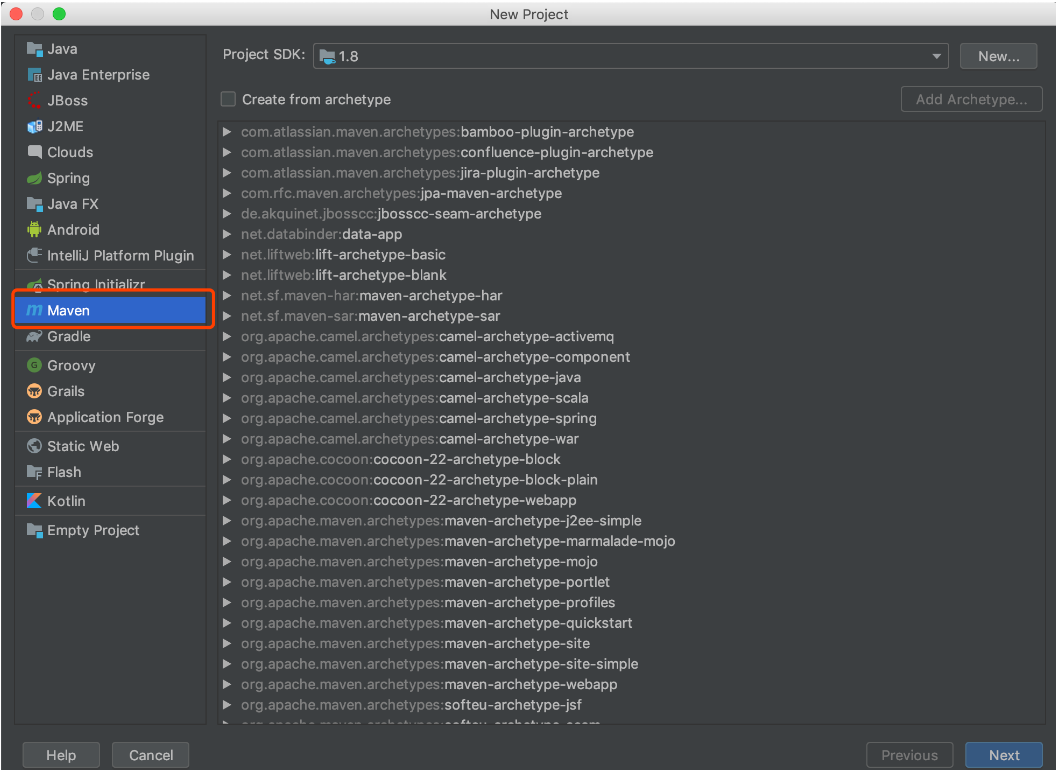
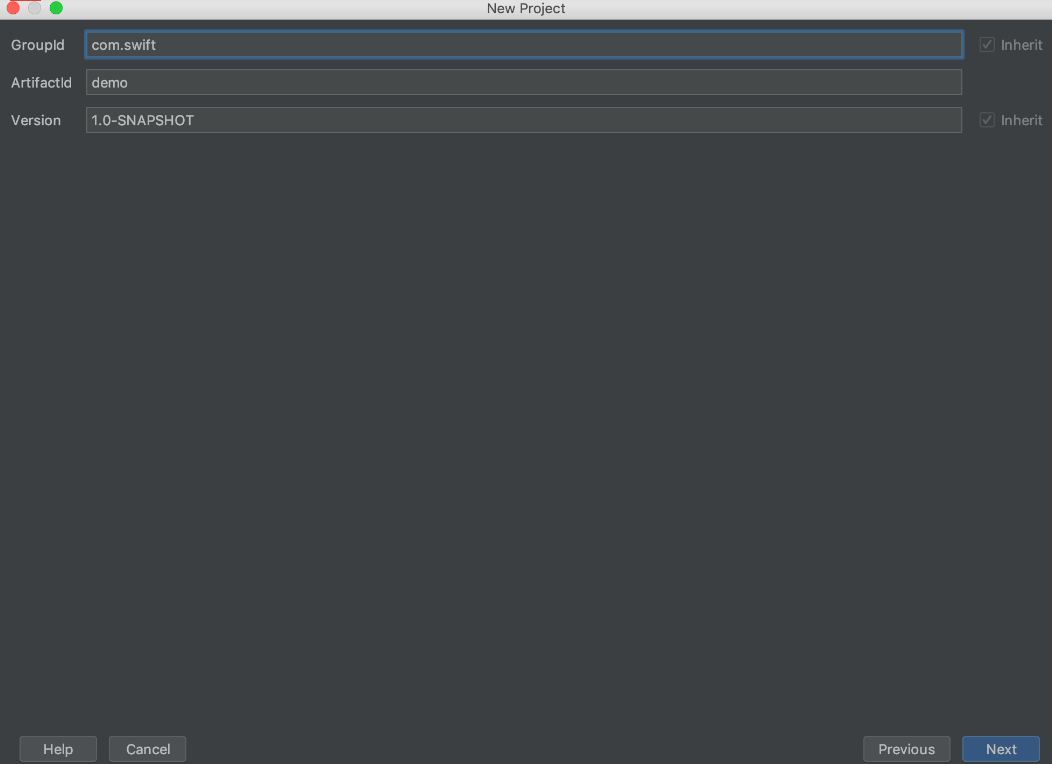
1、创建一个maven项目

next
Next
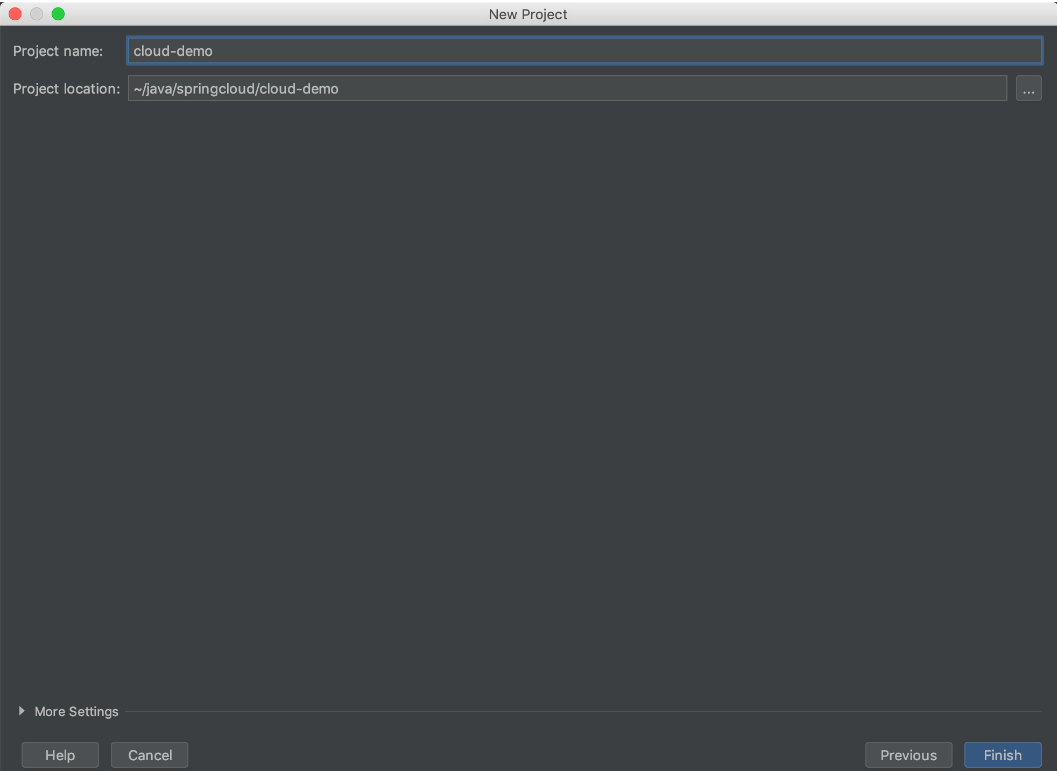
Finish完成.
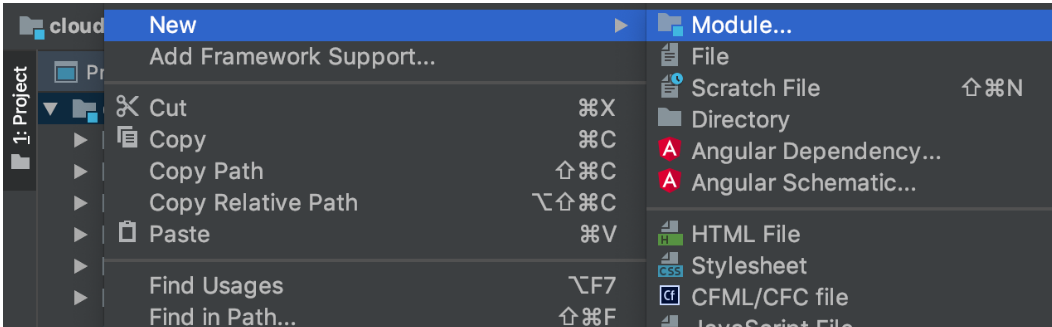
2、在创建好的maven项目上右键New->Module
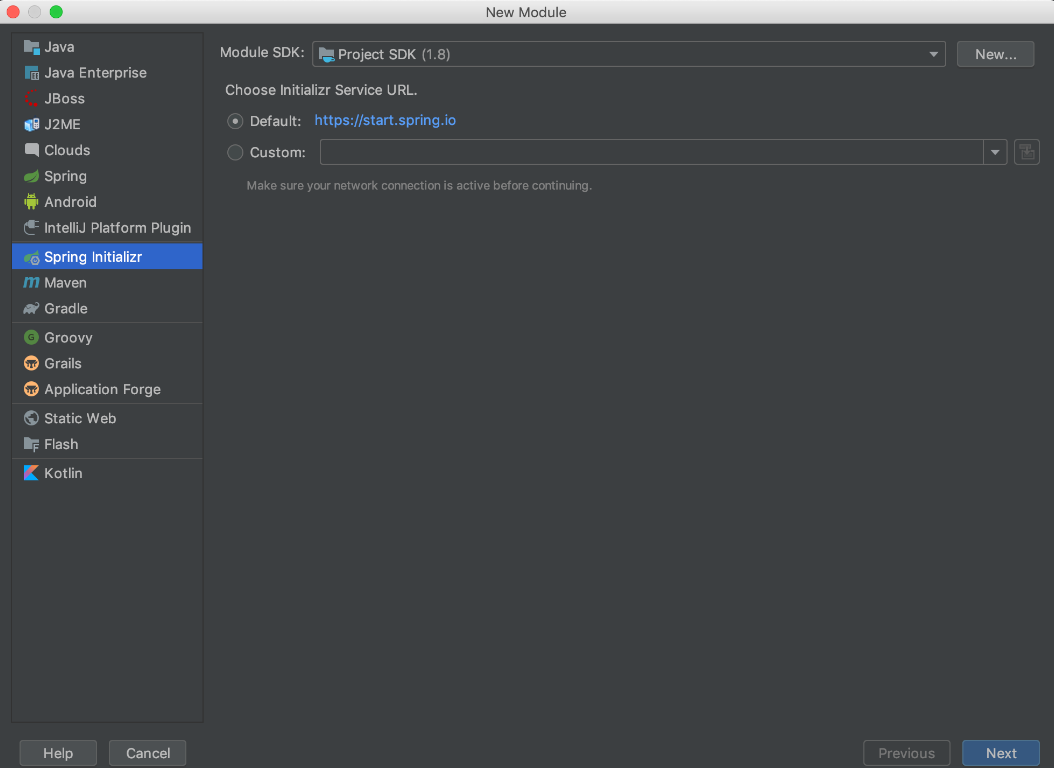
选择Spring initializr创建eureka注册中心
Next
Next
Next
Finish.
打开eureka-service项目下的application.properties配置文件,将.properties重命名为.yml,配置如下
server:
  port: 8001 #端口号

spring:
  application:
    name: eureka-service #服务名称

eureka:
  instance:
    hostname: localhost
  client:
    fetch-registry: false #是否从Eureka Server获取注册信息
    register-with-eureka: false #是否将自己注册到Eureka Server
    service-url:
      defaultZone: http://${eureka.instance.hostname}:${server.port}/eureka/ # 服务地址
然后启动类中增加@EnableEurekaServer注解就可以了
@SpringBootApplication
@EnableEurekaServer
public class EurekaApplication {

    public static void main(String[] args) {
        SpringApplication.run(EurekaApplication.class, args);
    }

}
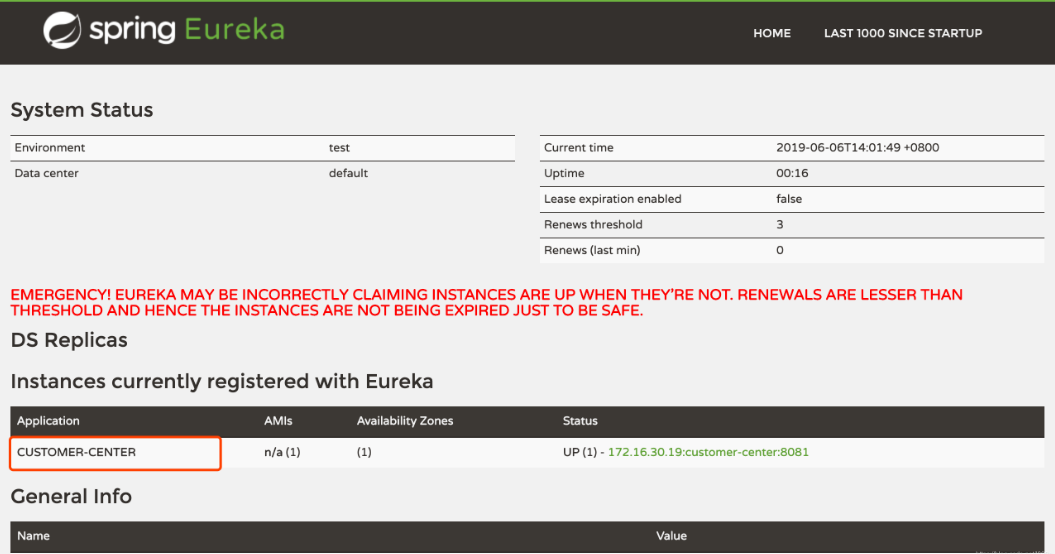
启动,浏览器输入http://localhost:8001看到如下内容说明配置成功

3、创建服务提供者
cloud-demo右键->New->Module 重复第二步时的过程,只是选择下图项目创建

完成后打开pom.xml增加如下配置
xml version="1.0" encoding="UTF-8"?> <project xmlns="http://maven.apache.org/POM/4.0.0" xmlns:xsi="http://www.w3.org/2001/XMLSchema-instance" xsi:schemaLocation="http://maven.apache.org/POM/4.0.0 https://maven.apache.org/xsd/maven-4.0.0.xsd"> <modelVersion>4.0.0modelVersion> <parent> <groupId>org.springframework.bootgroupId> <artifactId>spring-boot-starter-parentartifactId> <version>2.2.1.RELEASEversion> <relativePath/> parent> <artifactId>admin-apiartifactId> <version>0.0.1-SNAPSHOTversion> <name>admin-apiname> <description>admin apidescription> <properties> <java.version>1.8java.version> <spring-cloud.version>Hoxton.SR1spring-cloud.version> properties> <dependencies> <dependency> <groupId>org.springframework.cloudgroupId> <artifactId>spring-cloud-starter-netflix-eureka-serverartifactId> dependency>org.springframework.boot spring-boot-starter-web <dependency> <groupId>org.springframework.bootgroupId> <artifactId>spring-boot-starter-testartifactId> <scope>testscope> <exclusions> <exclusion> <groupId>org.junit.vintagegroupId> <artifactId>junit-vintage-engineartifactId> exclusion> exclusions> dependency> dependencies> <dependencyManagement> <dependencies> <dependency> <groupId>org.springframework.cloudgroupId> <artifactId>spring-cloud-dependenciesartifactId> <version>${spring-cloud.version}version> <type>pomtype> <scope>importscope> dependency> dependencies> dependencyManagement> <build> <plugins> <plugin> <groupId>org.springframework.bootgroupId> <artifactId>spring-boot-maven-pluginartifactId> plugin> plugins> build> project>
配置文件application.yml配置
server:
    port: 8081 #端口
spring:
    application:
        name: customer-center #服务名称

eureka:
    client:
        service-url:
            defaultZone: http://localhost:8001/eureka/ #注册中心地址
启动,刷新注册中心
成功。
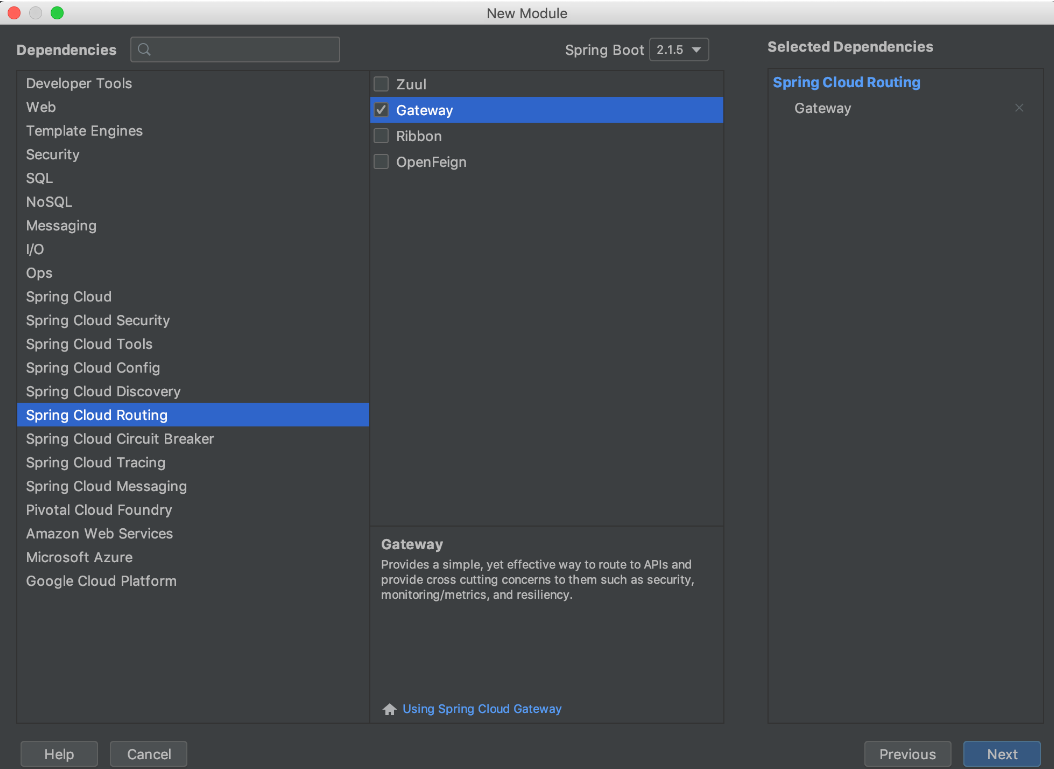
4、创建gateway服务
重复之前的创建过程,选择Spring Cloud Routing->GateWay
创建完成后pom.xml增加如下内容
xsi:schemaLocation="http://maven.apache.org/POM/4.0.0 https://maven.apache.org/xsd/maven-4.0.0.xsd">
    4.0.0

        org.springframework.boot
        spring-boot-starter-parent
        2.2.1.RELEASE

    com.xxxxxx
    getway
    0.0.1-SNAPSHOT
    getway
    getway

        1.8
        Hoxton.SR1

            org.springframework.cloud
            spring-cloud-starter-netflix-eureka-client

            org.springframework.cloud
            spring-cloud-starter-gateway
            2.2.1.RELEASE

            org.springframework.boot
            spring-boot-starter-test
            test

                    org.junit.vintage
                    junit-vintage-engine

            org.projectlombok
            lombok

            com.baomidou
            mybatis-plus-boot-starter

                    HikariCP
                    com.zaxxer

                org.springframework.cloud
                spring-cloud-dependencies
                ${spring-cloud.version}
                pom
                import

                org.springframework.boot
                spring-boot-maven-plugin
配置文件application.yml
server:
  port: 8002 # 服务端口
spring:
  application:
    name: gateway-service # 服务名称

  cloud:
    gateway:
      routes:
        - id: customer
          uri: lb://admin-api #eureka注册中心存在的服务名称
          predicates:
            - Path=/api/customer/** #路径配置
          filters:
           - StripPrefix=1     #忽略Path配置的个数,此处为1代表访问/api/customer/**时,会将api忽略,真实的访问地址为lb://admin-api/customer/**,如果为2,则为lb://admin-api/**
在customer-center中创建一个controller类提供一个简单的服务接口
import org.springframework.web.bind.annotation.GetMapping;
import org.springframework.web.bind.annotation.RequestMapping;
import org.springframework.web.bind.annotation.RestController;

@RestController
@RequestMapping(value = "customer")
public class UserController {
  @GetMapping(value = "user")
  public String user(){
    return "user";
  }
}
启动gateway服务
在浏览器中输入http://localhost:8002/api/customer/user和http://localhost:8081/customer/user得到的结果项目,说明配置成功
5、编写gateway过滤器
第一种:使用全局GlobalFilter过滤器
创建AuthorizeFilter类,只需要有@Component注解就可以了
package com.fulugame.filter;

import lombok.extern.slf4j.Slf4j;
import org.apache.commons.lang.StringUtils;
import org.springframework.cloud.gateway.filter.GatewayFilterChain;
import org.springframework.cloud.gateway.filter.GlobalFilter;
import org.springframework.core.Ordered;
import org.springframework.http.HttpHeaders;
import org.springframework.http.HttpStatus;
import org.springframework.http.server.reactive.ServerHttpRequest;
import org.springframework.http.server.reactive.ServerHttpResponse;
import org.springframework.stereotype.Component;
import org.springframework.web.server.ServerWebExchange;
import reactor.core.publisher.Mono;

/**
 * Created by ShiJiaoYun on 2020/5/13.

 */
@Component
@Slf4j
public class AuthorizeFilter  implements GlobalFilter, Ordered {

    private static final String AUTHORIZE_TOKEN = "token";

    @Override
    public Mono filter(ServerWebExchange exchange, GatewayFilterChain chain) {
        log.info("使用filter");
        ServerHttpRequest request = exchange.getRequest();
        HttpHeaders headers = request.getHeaders();
        String token = headers.getFirst(AUTHORIZE_TOKEN);
        if (null == token){
            token=request.getQueryParams().getFirst(AUTHORIZE_TOKEN);
        }
        ServerHttpResponse response = exchange.getResponse();
        if (StringUtils.isEmpty(token)){
            response.setStatusCode(HttpStatus.UNAUTHORIZED);
            return  response.setComplete();
        }
        return chain.filter(exchange);
    }

    @Override
    public int getOrder() {
        return 0;
    }
}
然后再通过http://localhost:8002/api/customer/user和http://localhost:8002/api/customer/user?token=12121访问就会有两种不同结果
这样同样可以实现过滤器效果
Original: https://www.cnblogs.com/shijiaoyun/p/12889726.html
Author: 何石-博客
Title: idea+spring boot+spring cloud+eureka+gateway整合
原创文章受到原创版权保护。转载请注明出处:https://www.johngo689.com/540034/
转载文章受原作者版权保护。转载请注明原作者出处!