

基于Arduino的智能环境监测与反馈系统
- 一、项目背景
- 二、效果展示
- 三、材料清单
* - 1.Arduino开发板——YwRduino uno
- 2.Arduino盾板——IO Sensor Shield传感器接口扩展板
- 3.8x7LED点阵显示模块
- 4.AM2302 DHT22温湿度传感器
- 5.火焰传感器——类似光敏传感器
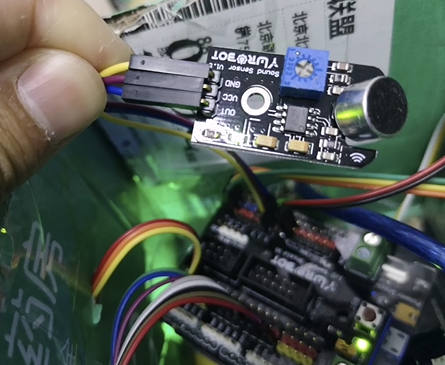
- 6.声音传感器
- 四、实现思路
* - 1.通过传感器获取环境信息
- 2.根据环境情况做出不同回应
- 五、具体步骤
* - 1.获取环境温湿度
– - 2.获取环境声音大小
– - 3.获取环境亮度
– - 4.确定反馈逻辑
– - 5.根据反馈逻辑输出表情
– - 6.根据反馈逻辑合成语音并输出
– - 六、代码汇总
一、项目背景
一个小巧轻便的环境监测系统,可以帮助人们更好地了解周围环境。
随着社会的发展和生产技术的更新,物联网的概念已经深入人心,随着传感器技术、通信技术和物联网技术的发展,它逐渐触及社会的每一个角落。
[En]
With the development of society and the update of production technology, the concept of Internet of things has been deeply rooted in the hearts of the people, and with the development of sensor technology, communication technology and Internet of things technology, it gradually touches every corner of society.
在当代社会信息化,智能化快速发展的背景下,设计了”基于Arduino的智能环境监测与反馈系统”。
近年来,随着工业化的日益发展,环境污染问题日益突出。随着环境条件的不断变化,雾霾天气日益严重,影响了人们的正常出行、生活和健康,人们对周围环境信息的了解也越来越迫切。
[En]
In recent years, with the increasing development of industrialization, the problem of environmental pollution has become increasingly prominent. With the continuous change of environmental conditions, the haze weather has become increasingly serious, which has affected people’s normal travel, life and health, so it is more and more urgent for people to know the information of their surrounding environment.
随着移动互联网技术的快速发展,人们可以随时随地了解自己所处环境的信息,为出行和生活提供便捷的服务,为寻求更健康的环境提供依据。
[En]
With the rapid development of mobile Internet technology, people can know the information of their environment anytime and anywhere, provide convenient services for travel and life, and provide a basis for seeking a healthier environment.
本文主要利用现有成熟的传感技术和互联网技术,实时获取环境状态信息,并向用户提供相应的反馈。
[En]
This paper mainly uses the existing mature sensing technology and Internet technology to obtain environmental status information in real time, and gives corresponding feedback to users.
二、效果展示
基于Arduino的智能环境监测与反馈系统
三、材料清单
1.Arduino开发板——YwRduino uno


市面上的开发板大同小异,一般都是使用Arduino UNO R3,新款开发板的性能可能要好一些,但是使用方法几乎一样
; 2.Arduino盾板——IO Sensor Shield传感器接口扩展板
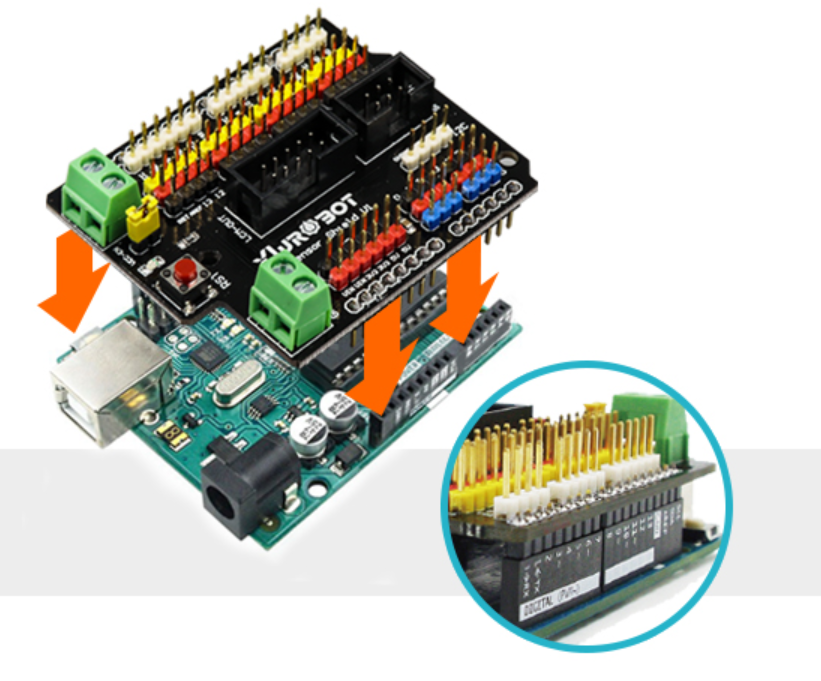
因为这个项目需要连接更多的传感器,所以我买了一块扩展板。
[En]
Because this project needs to connect more sensors, so I bought an expansion board.
如果你通常不使用很多传感器,你就不需要使用扩展板。
[En]
If you don’t normally use many sensors, you don’t have to use an expansion board.
3.8x7LED点阵显示模块
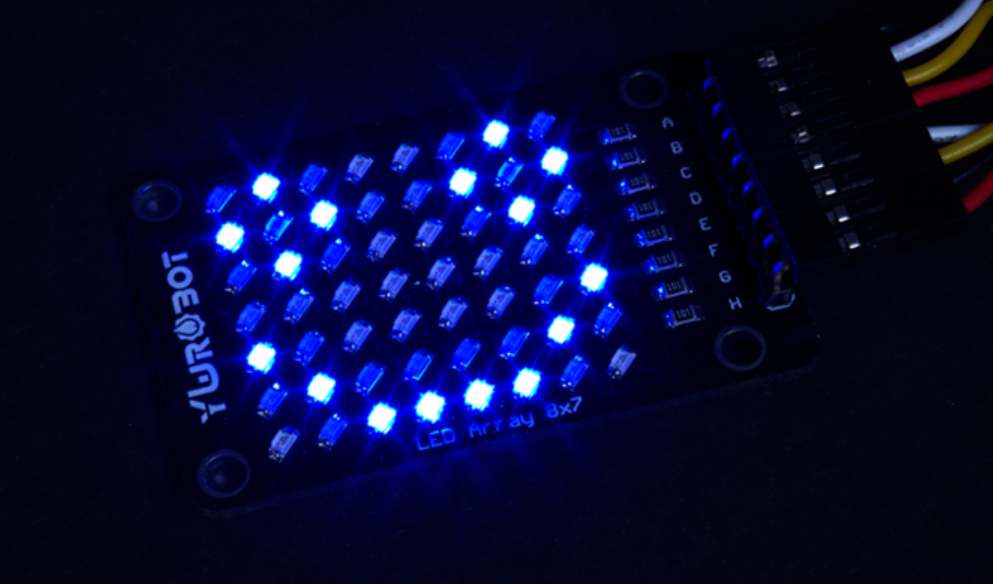
此模块用于显示面部表情,并通过面部表情反映当前环境。
[En]
This module is used to display facial expressions and reflect the current environment through facial expressions.
; 4.AM2302 DHT22温湿度传感器
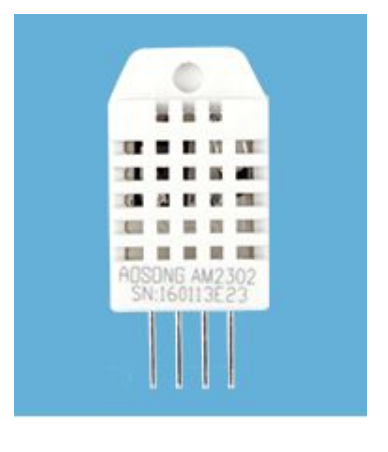
温湿度传感器,顾名思义,是用来检测环境温度和湿度的。
[En]
Temperature and humidity sensors, as the name implies, are used to detect ambient temperature and humidity.
5.火焰传感器——类似光敏传感器
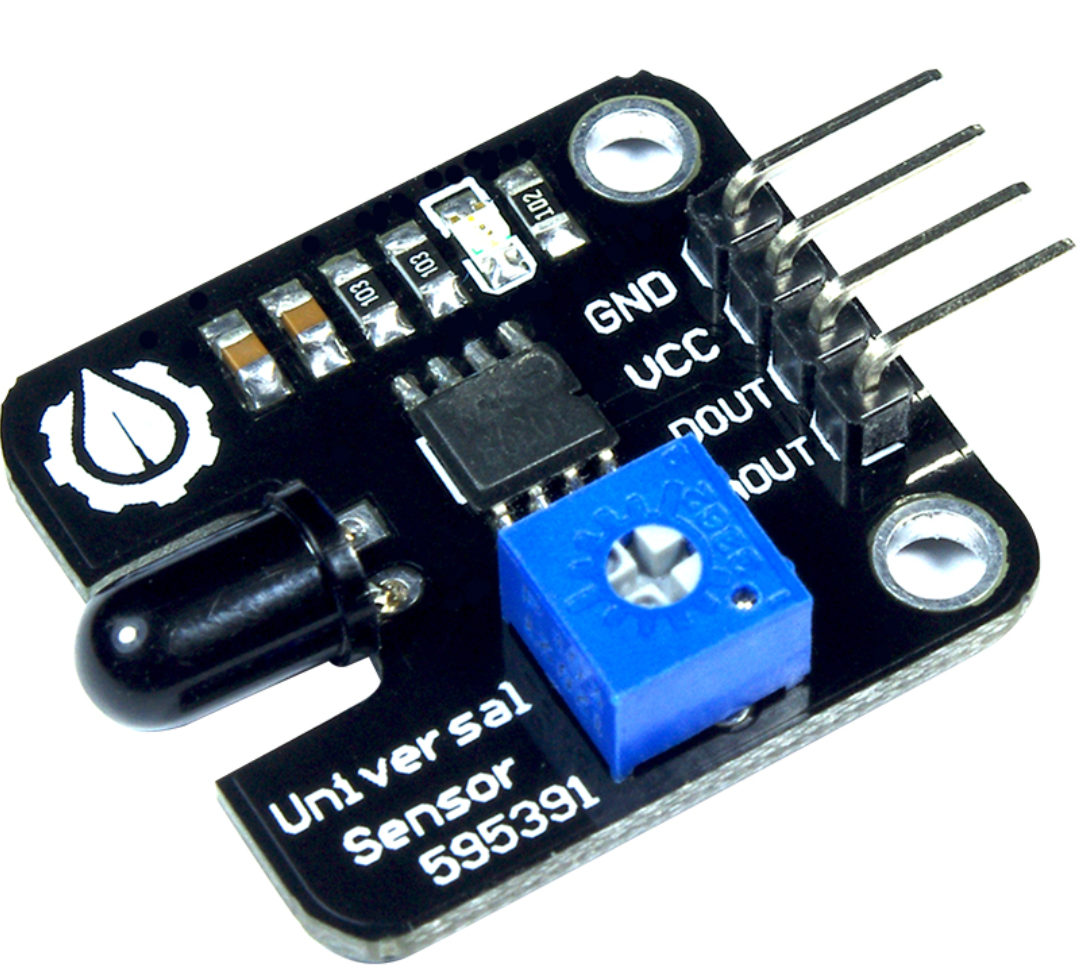
火焰传感器只对火焰最敏感,但它也对普通光线做出反应。
[En]
The flame sensor is only the most sensitive to flame, but it also responds to ordinary light.
; 6.声音传感器
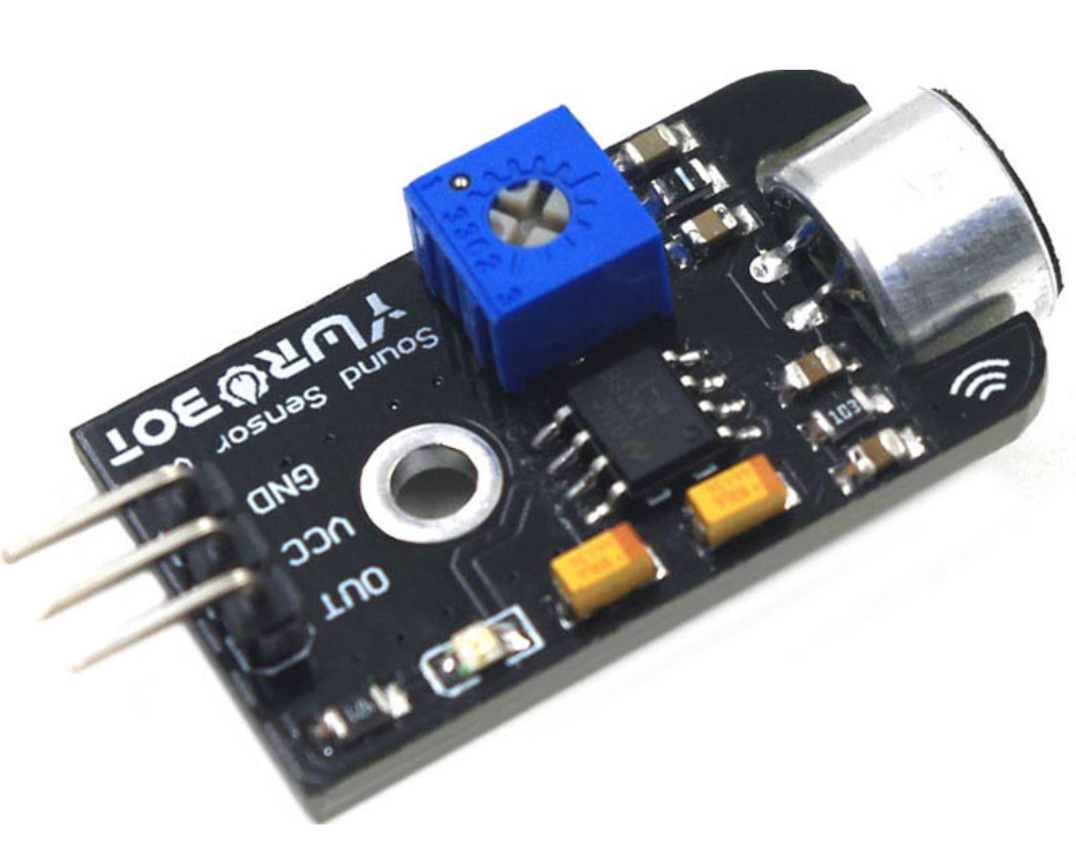
声音传感器是用于检测声音信号大小的传感器。
[En]
A sound sensor is a sensor used to detect the size of a sound signal.
四、实现思路
在采购材料之前,我们计划将系统打造成一个“人”,让他有能力感知环境,并根据环境进行反馈。
[En]
Before purchasing materials, we plan to build the system into a “person”, giving him the ability to perceive the environment and give feedback according to the environment.
因此整体的思路是:
1.通过传感器获取环境信息
当然,作为一个智能系统,信息越全面越好。因此,这里提到的传感器可以比上面提到的更多,用户可以根据自己的需求添加更多种类的传感器。
[En]
As an intelligent system, of course, the more comprehensive the information, the better. Therefore, the sensors mentioned here can be more than those mentioned above, and users can add more kinds of sensors according to their own needs.
其实,使用每个传感器查看文件,基本上都能找出如何使用,网上有很多情况,基本上可以马上使用。
[En]
In fact, the use of each sensor to check the document, basically can find how to use, there are many cases on the Internet, basically can be used immediately.
这一步的工作量主要在代码整理上,将各种传感器的代码进行整合。
2.根据环境情况做出不同回应
当我们有了需要的环境信息后,我们可以利用环境信息进行一些反馈,就像人一样,当我们感到太热或太冷时,我们会通过面部表情和语言来表达。
[En]
After we have the environmental information we need, we can use the environmental information to make some feedback, just like people, when we feel too hot or too cold, we express it through facial expressions and words.
这一步主要的工作量在于如何设计系统的判断条件,即到底什么是热,它的具体数值是多少,这是我们需要确定的。
然后写一些条件判断,当条件成立时,执行一些操作;如果条件没有建立,则执行其他操作。
[En]
Then write some conditional judgment, when the condition is established, perform some actions; if the condition is not established, then perform other operations.
五、具体步骤
1.获取环境温湿度
连接电路
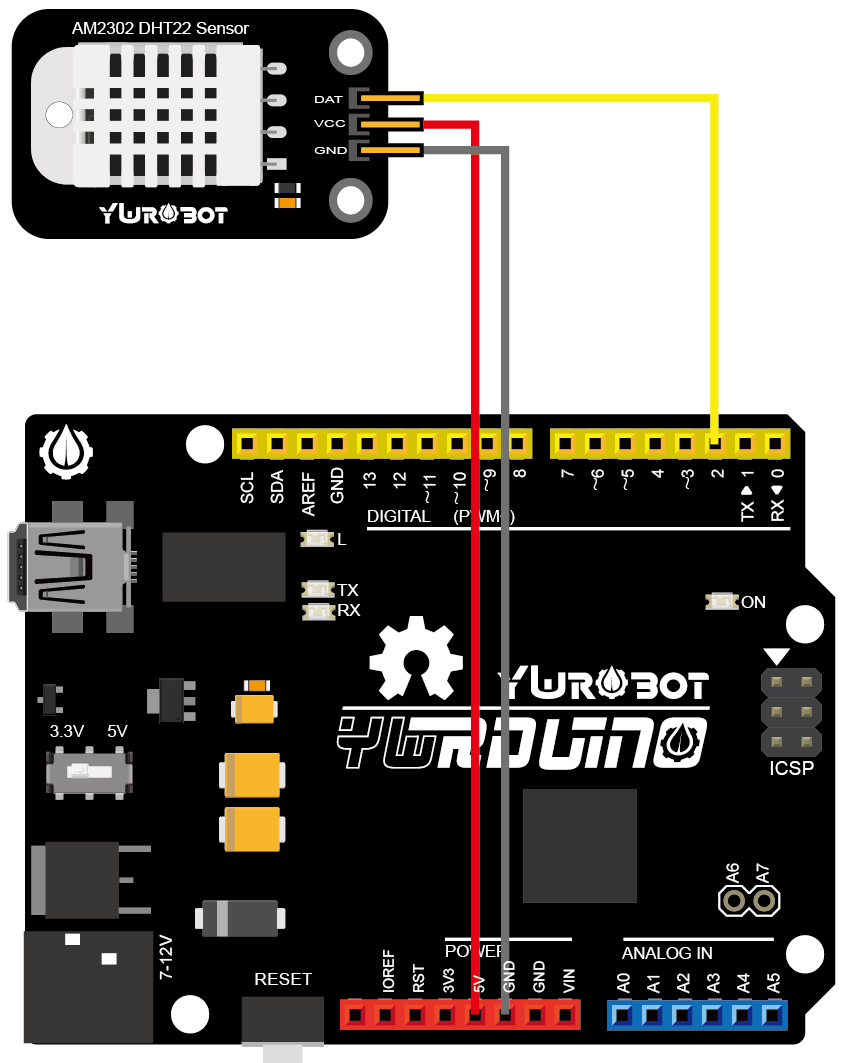
; 引入必要的库和文件
#include "DHT.h"

#define DHTPIN 2

#define DHTTYPE DHT22

DHT dht(DHTPIN, DHTTYPE);

void setup() {
  Serial.begin(9600);
  Serial.println("DHTxx test!");

  dht.begin();
}
主要函数编写
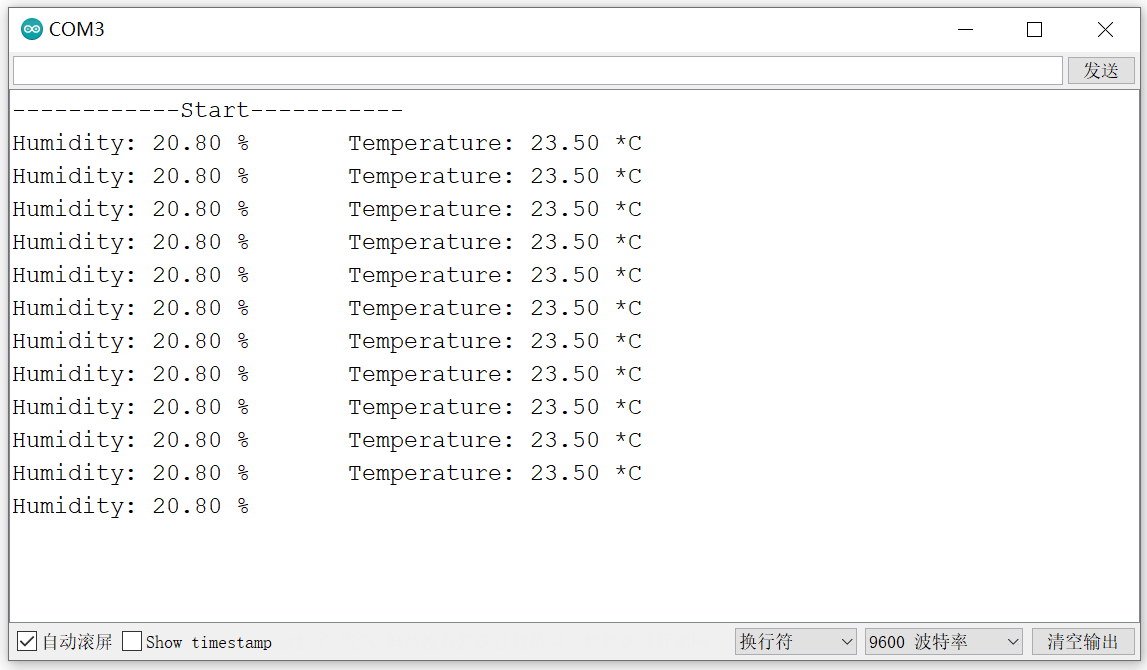
void ReadH(){
  float humidity = dht.readHumidity();
  Serial.print("Humidity: ");
  Serial.print(humidity);
  Serial.print(" %\t");
  return humidity;
}

void ReadT(){
  float temperature = dht.readTemperature();
  Serial.print("Temperature: ");
  Serial.print(temperature);
  Serial.println(" *C");
  return temperature;
}
效果展示及验证
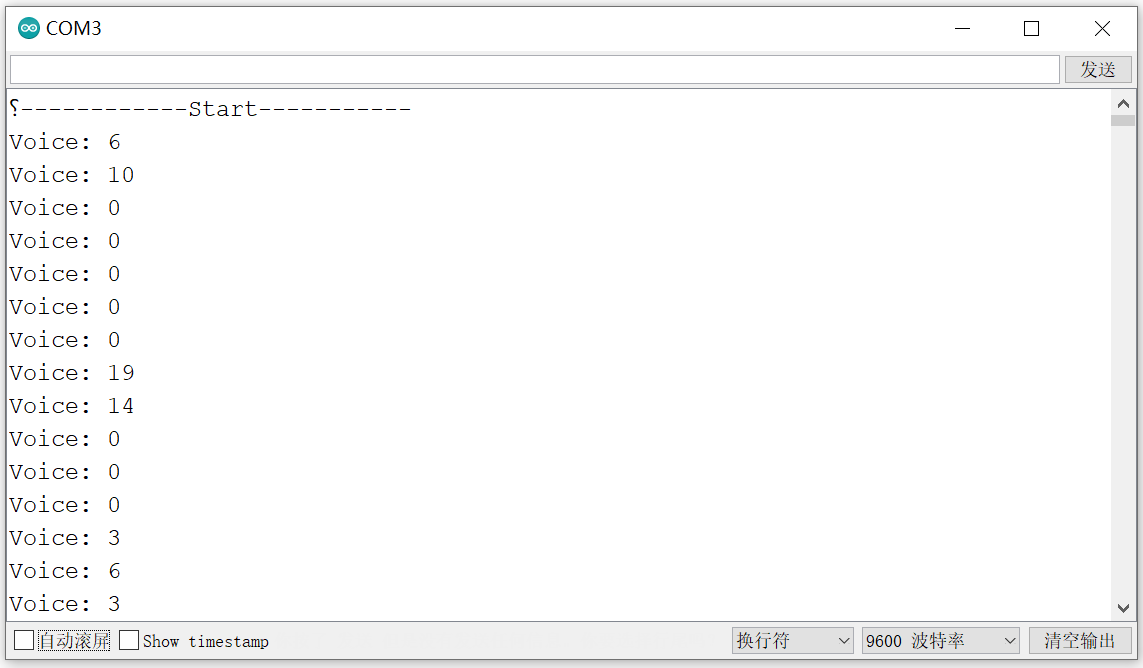
; 2.获取环境声音大小
连接电路
这里我将声音传感器的out引脚接到了模拟口0上
; 主要函数编写
void ReadVoice(){
  int Voice = analogRead(0);
  Serial.print("Voice: ");
  Serial.print(Voice);
  Serial.println();
  return Voice;
}
效果展示及验证
; 3.获取环境亮度
连接电路
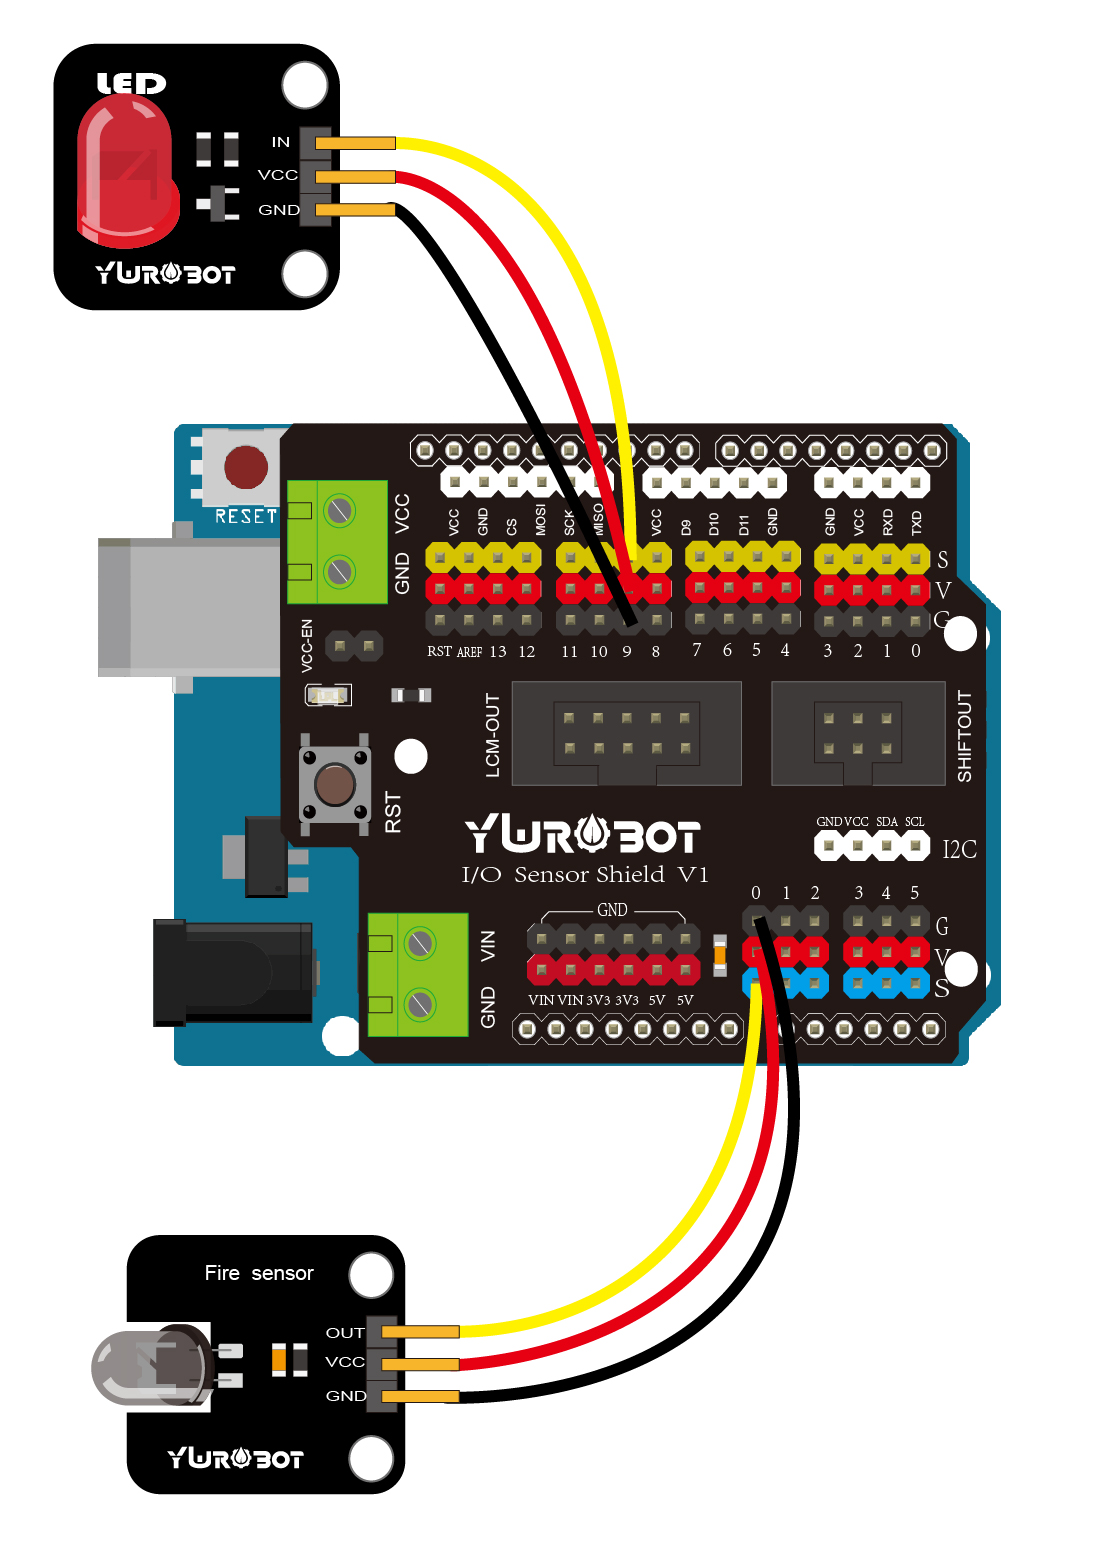
; 主要函数编写
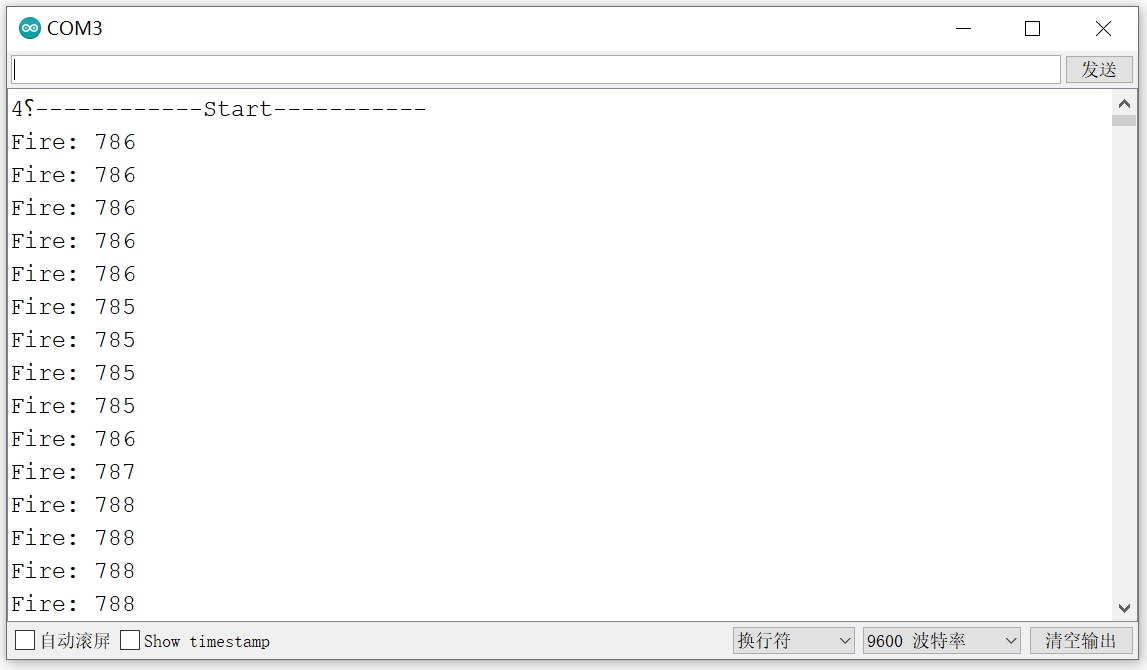
void ReadFire(){
  int Fire = analogRead(5);
  Serial.print("Fire: ");
  Serial.print(Fire);
  Serial.println();
  return Fire;
}
效果展示及验证
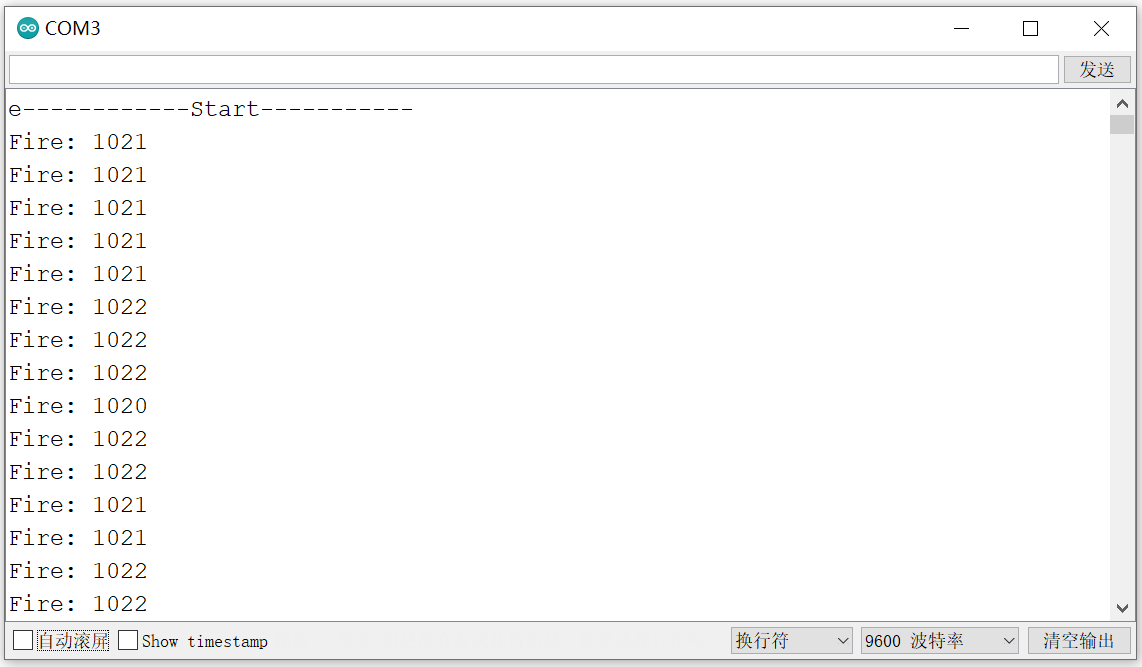
当没有光线或光线很弱时,火焰传感器的输出值较大。
[En]
When there is no light or the light is very weak, the output value of the flame sensor is larger.
当受到光照或有火焰时:
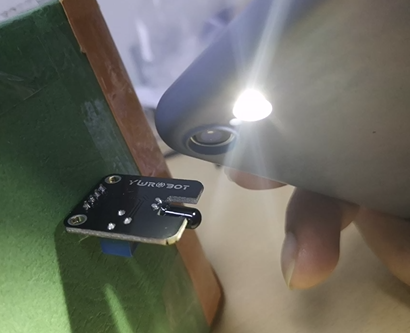
传感器输出数值变小:
; 4.确定反馈逻辑
根据传感器接收到的环境数据做出相应动作,此处参数可自行修改
代码实现
  if (humidity < 25){
    DrawEmoji(broken_emoji);
    Serial.println("broken");
  }
  else if (Fire > 1000){
    DrawEmoji(blush_emoji);
    Serial.println("blush");
  }
  else if (temperature < 15){
    DrawEmoji(sad_emoji);
    Serial.println("sad");
  }
  else if (Voice > 100){
    DrawEmoji(angry_emoji);
    Serial.println("angry");
  }
  else{
    DrawEmoji(smeil_emoji);
    Serial.println("smeil");
    }
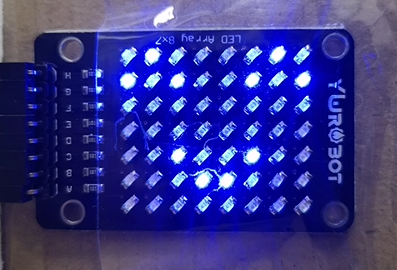
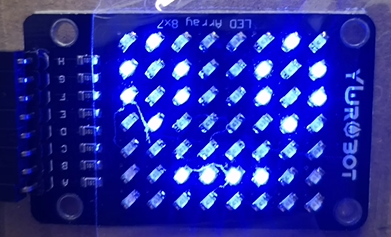
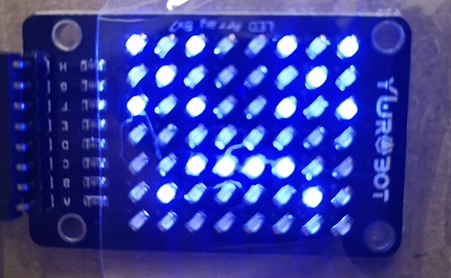
5.根据反馈逻辑输出表情
连接电路

; 引入必要的库和文件并编写表情
#include
#include

byte led_pins[] = {4, 5, 6, 7, 8, 9, 10, 11};
byte i;
byte x;
byte y;
byte radius;

const byte smeil_emoji[] = {
                             0,0,0,0,0,0,0,0,
                             0,0,0,1,1,0,0,0,
                             0,0,1,0,0,1,0,0,
                             0,0,0,0,0,0,0,0,
                             0,0,0,0,0,0,0,0,
                             1,0,1,0,0,1,0,1,
                             0,1,0,0,0,0,1,0};

const byte sad_emoji[] = {
                             0,0,0,0,0,0,0,0,
                             0,0,1,0,0,1,0,0,
                             0,0,0,1,1,0,0,0,
                             0,0,0,0,0,0,0,0,
                             0,0,0,0,0,0,0,0,
                             1,0,1,0,0,1,0,1,
                             0,1,0,0,0,0,1,0};

const byte shy_emoji[] = {
                             0,0,0,0,0,0,0,0,
                             0,0,0,1,1,0,0,0,
                             0,0,1,0,0,1,0,0,
                             0,1,0,0,0,0,1,0,
                             0,0,0,0,0,0,0,0,
                             0,1,1,0,0,1,1,0,
                             1,0,0,1,1,0,0,1};

const byte blush_emoji[] = {
                             0,0,0,0,0,0,0,0,
                             0,0,1,1,1,1,0,0,
                             0,0,0,0,0,0,0,0,
                             0,1,0,0,0,0,1,0,
                             1,0,1,0,0,1,0,1,
                             1,0,1,0,0,1,0,1,
                             0,1,0,0,0,0,1,0};

const byte angry_emoji[] = {
                             0,0,0,0,0,0,0,0,
                             0,1,0,0,0,1,0,0,
                             0,0,1,1,1,0,0,0,
                             0,0,0,0,0,0,0,0,
                             0,1,1,0,0,1,1,0,
                             1,0,1,0,0,1,0,1,
                             1,0,0,0,1,0,0,1};

const byte broken_emoji[] = {
                             0,0,0,0,0,0,0,0,
                             0,1,0,0,0,0,1,0,
                             0,0,1,1,1,1,0,0,
                             0,0,0,0,0,0,0,0,
                             1,0,1,0,0,1,0,1,
                             0,1,0,0,0,0,1,0,
                             1,0,1,0,0,1,0,1};
主要函数编写
void DrawEmoji(const byte emojy[]){
  Plex.clear();
  Plex.drawBitmap(emojy);
  Plex.display();
}
效果展示及验证
- 输出笑脸:
- 蒙圈表情:
- 难受表情:
; 6.根据反馈逻辑合成语音并输出
通过Python获取Arduino串口数据
这里需要一个serial库,用于和Arduino通信,使用以下命令进行安装:
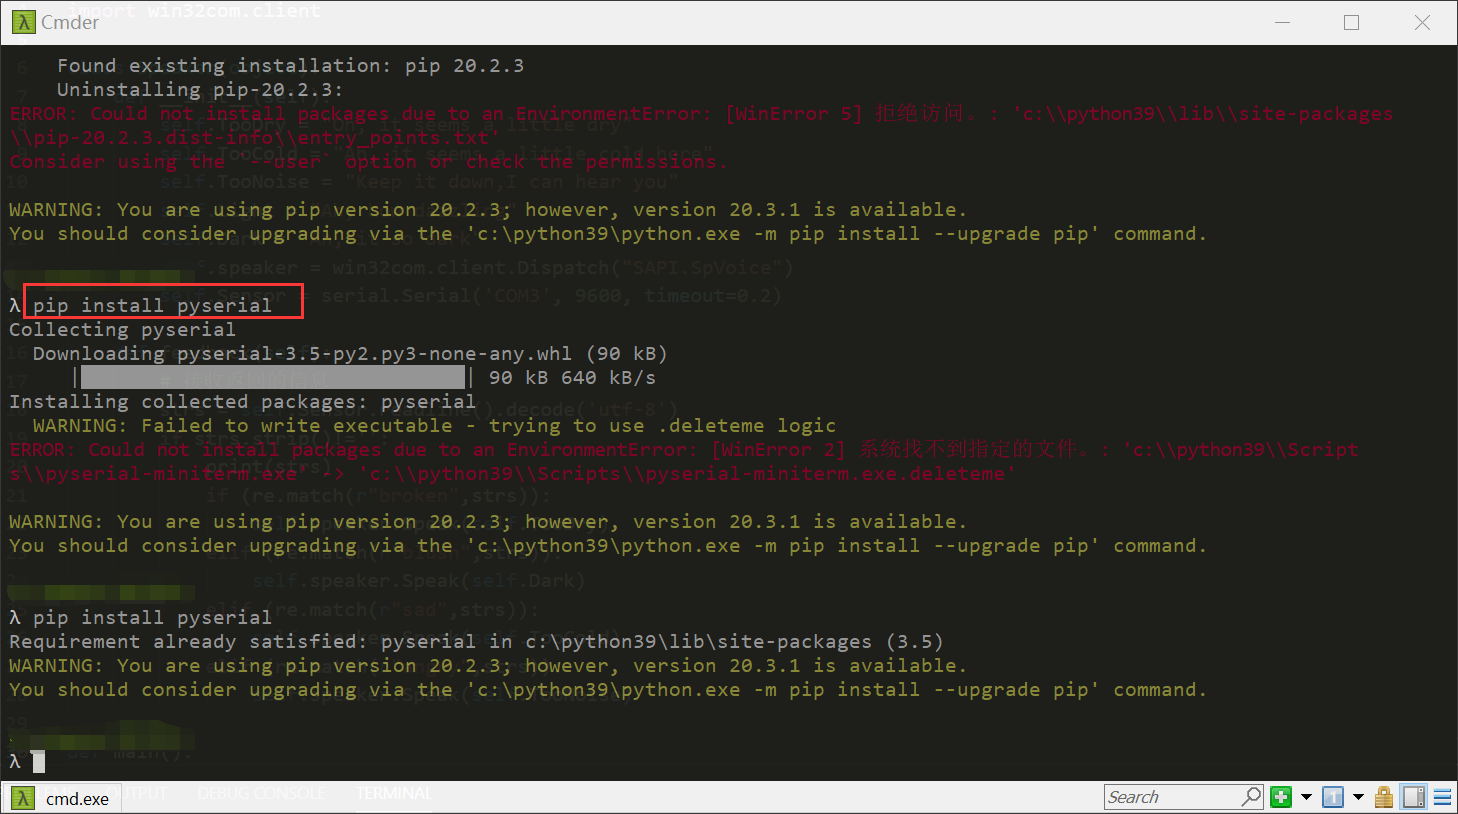
pip install pyserial
pyserial的官方文档:https://pypi.org/project/pyserial/
这里简单带大家过一下pyserial库的使用方法。
打开串口
插入Arduino后,可以看到对应的串口,一般是COM3

下面通过serial库打开COM3:
import serial

Sensor = serial.Serial('COM3', 9600, timeout=0.2)
读取串口输出
strs = Sensor.readline().decode('utf-8')
if strs.strip()!='':
    print(strs)
通过win32com库语音合成
import win32com.client

speaker = win32com.client.Dispatch("SAPI.SpVoice")
text = "输入要语音合成的内容"
speaker.Speak(text)
六、代码汇总
本项目使用的代码已上传至GitHub:
https://github.com/zbp-xxxp/EMF
Original: https://blog.csdn.net/zbp_12138/article/details/111149026
Author: Mr.郑先生_
Title: 基于Arduino的智能环境监测与反馈系统
原创文章受到原创版权保护。转载请注明出处:https://www.johngo689.com/525279/
转载文章受原作者版权保护。转载请注明原作者出处!