

zabbix监控详解
本章是基于zabbix的基础使用和监控服务zabbix部署基础之上.
本章进行的操作是zabbix监控linux,windows以及配置邮件告警
环境 IP 要安装的服务 服务器 192.168.222.250 lamp架构
zabbix server
zabbix agent 客户端 192.168.222.251 zabbix agent
在web界面进行linux部署agentd
zabbix客户端部署
zabbix6.2源码包
[root@localhost ~]# cd /usr/local/etc/
[root@localhost etc]# useradd -rMs /sbin/nologin zabbix
//创建zabbix用户
[root@localhost etc]# cd /usr/src/
[root@localhost src]# wget https://cdn.zabbix.com/zabbix/sources/stable/6.2/zabbix-6.2.2.tar.gz
//下载源码包
[root@localhost src]# ls
debug kernels zabbix-6.2.2.tar.gz
[root@localhost src]# tar xf zabbix-6.2.2.tar.gz //解压
[root@localhost src]# cd zabbix-6.2.2/
[root@localhost zabbix-6.2.2]# dnf -y install openssl-devel pcre-devel expat-devel gcc gcc-c++ make
//安装依赖包
[root@localhost zabbix-6.2.2]# ./configure --enable-agent
//编译
....
***********************************************************
* Now run 'make install' *
* *
* Thank you for using Zabbix! *
* <http: www.zabbix.com> *
***********************************************************
[root@localhost zabbix-6.2.2]# make install
//安装
[root@localhost zabbix-6.2.2]# cd /usr/local/etc/
[root@localhost etc]# ls
zabbix_agentd.conf zabbix_agentd.conf.d
[root@localhost etc]# vim zabbix_agentd.conf
//修改配置文件
Server=192.168.222.250 //服务端ip
ServerActive=192.168.222.250 //服务端ip
Hostname=Zabbix xbz //zabbix系统内主机名,可自定义,但要确保唯一性
[root@localhost etc]# ldconfig //刷新配置
[root@localhost etc]# zabbix_agentd //启动zabbix_agentd
[root@localhost etc]# ss -antl //查看端口
State Recv-Q Send-Q Local Address:Port Peer Address:Port Process
LISTEN 0 128 0.0.0.0:10050 0.0.0.0:*
LISTEN 0 128 0.0.0.0:22 0.0.0.0:*
LISTEN 0 128 [::]:22 [::]:*
</http:>
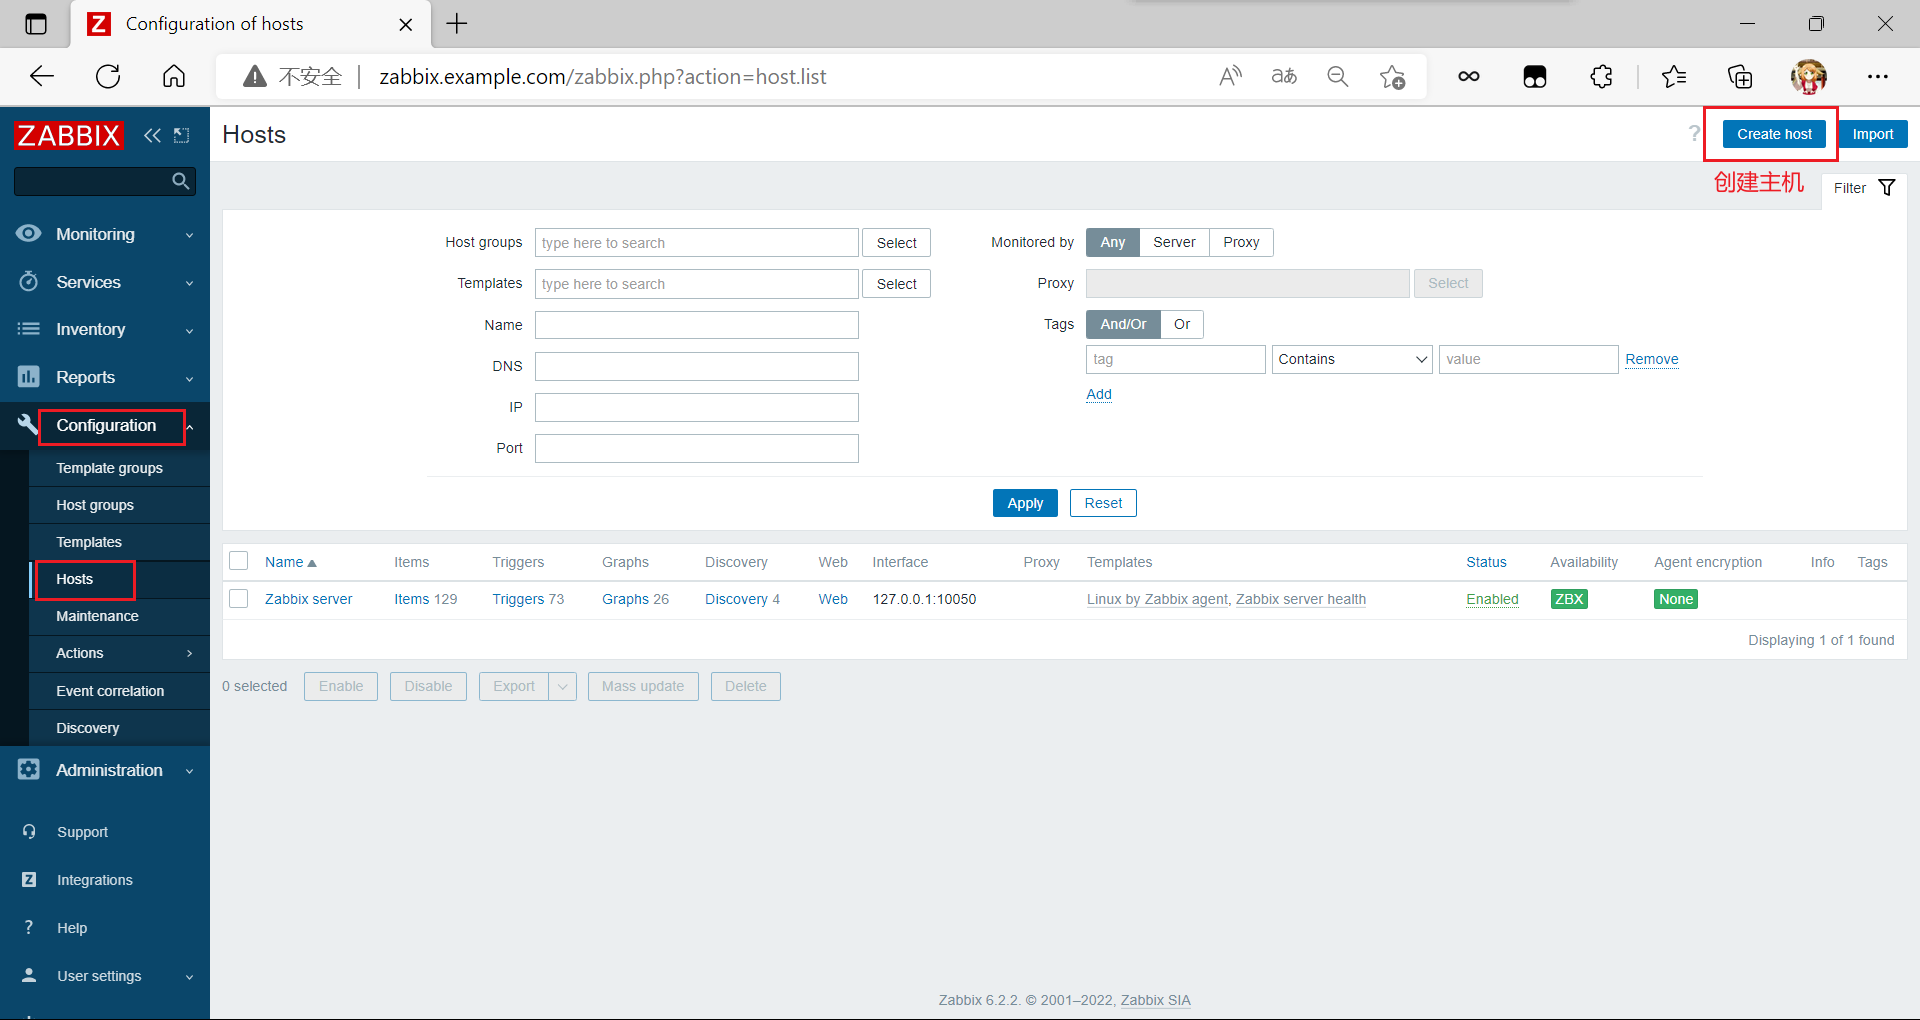
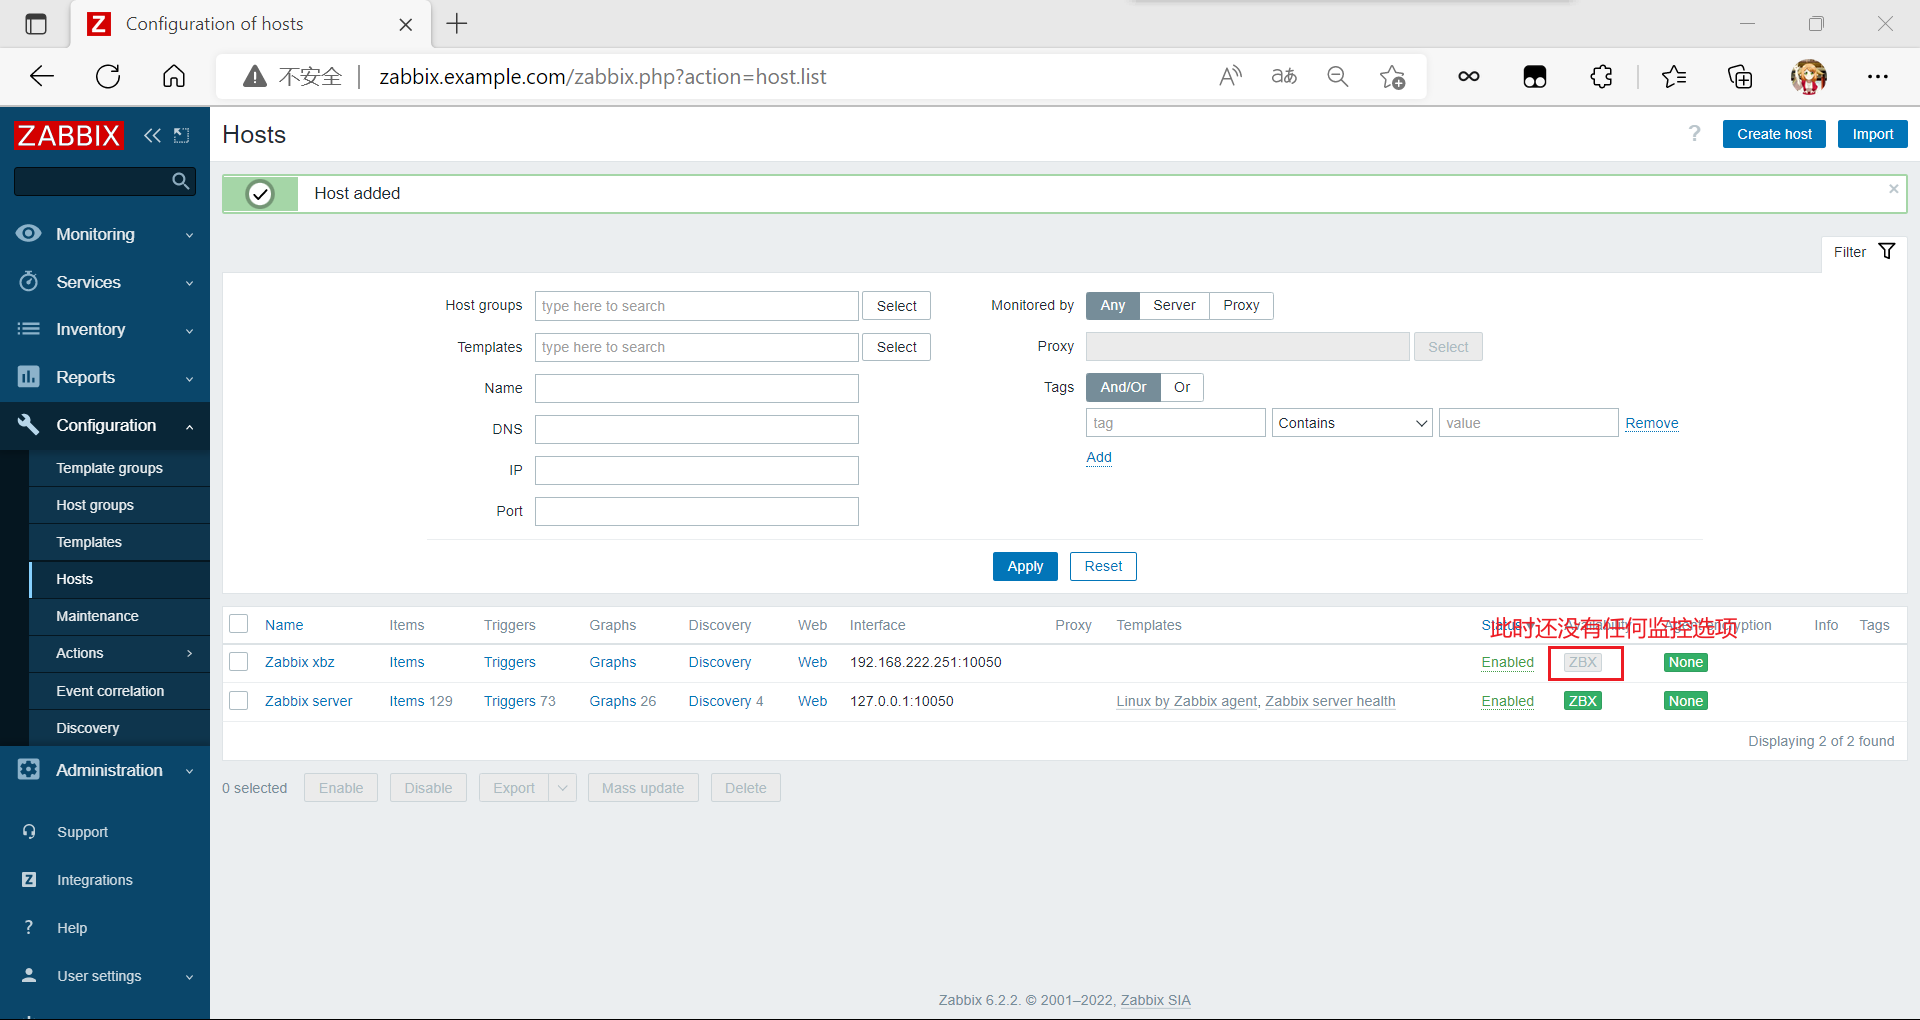
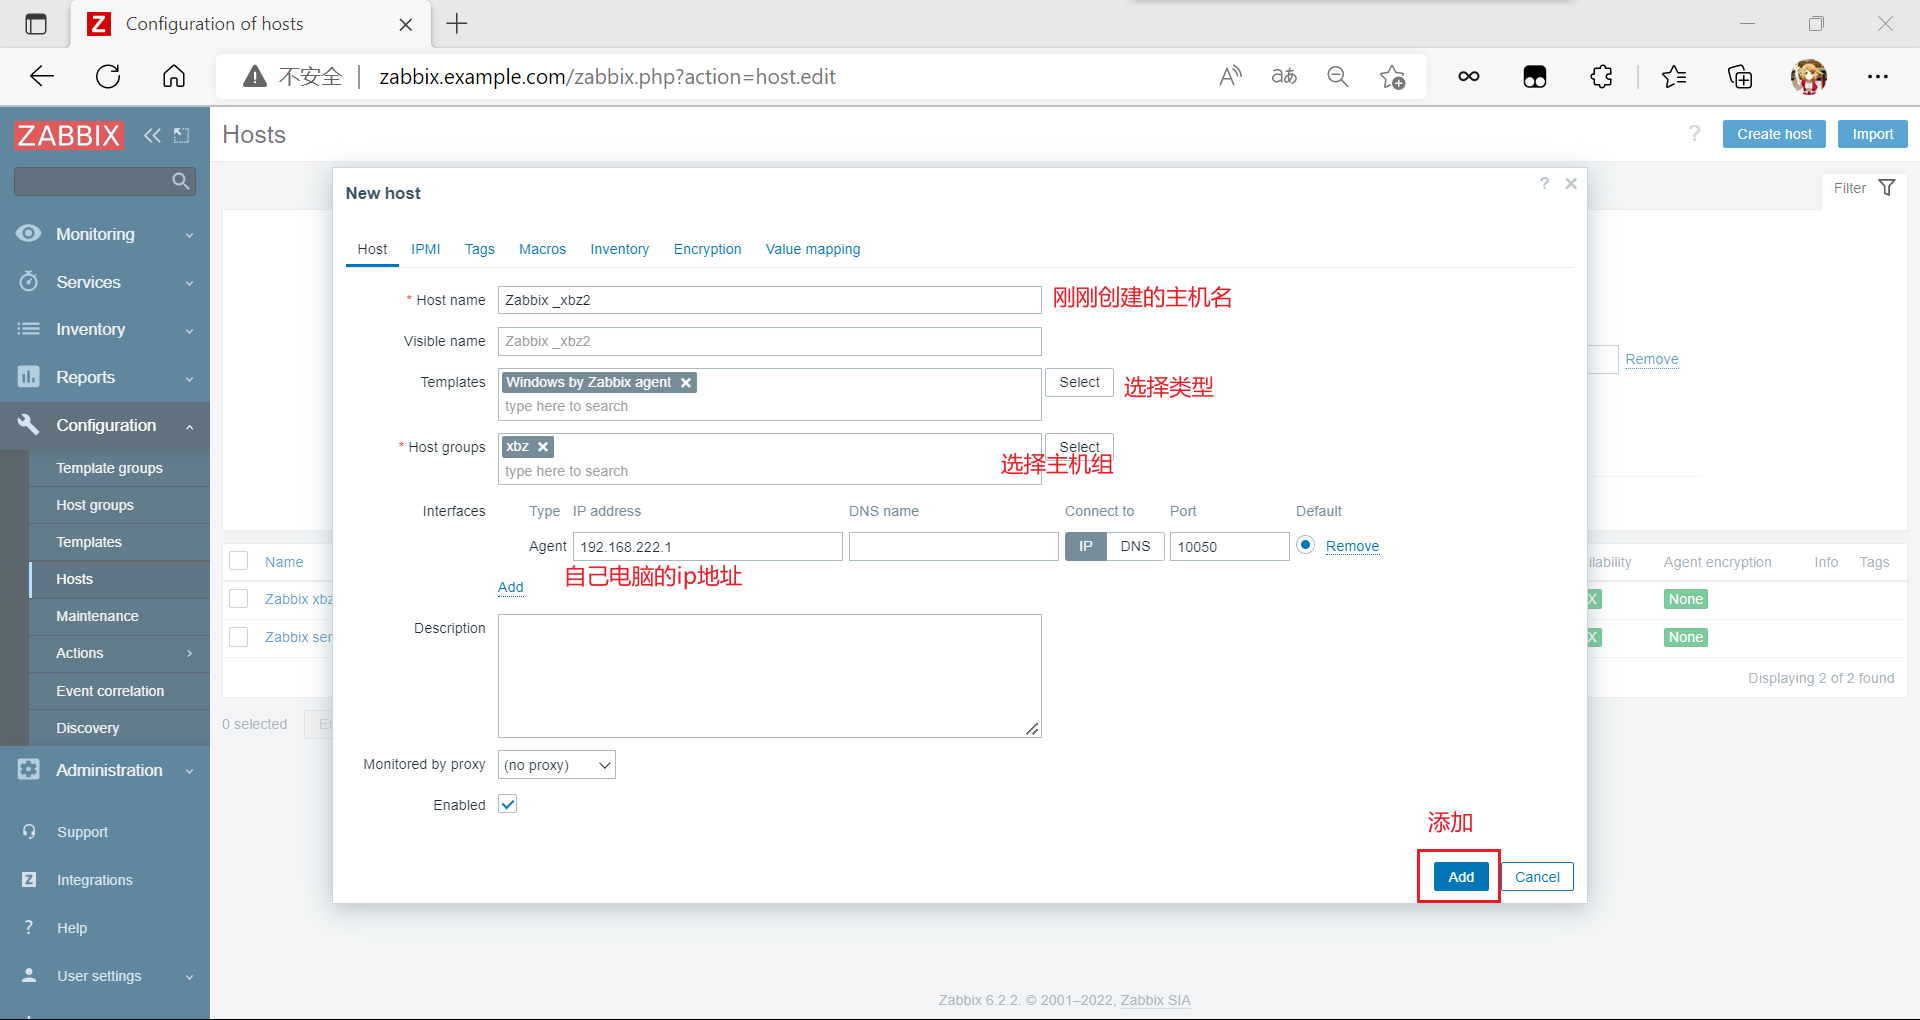
创建监控主机
点击右上角的创建

设置好后点右下角的添加
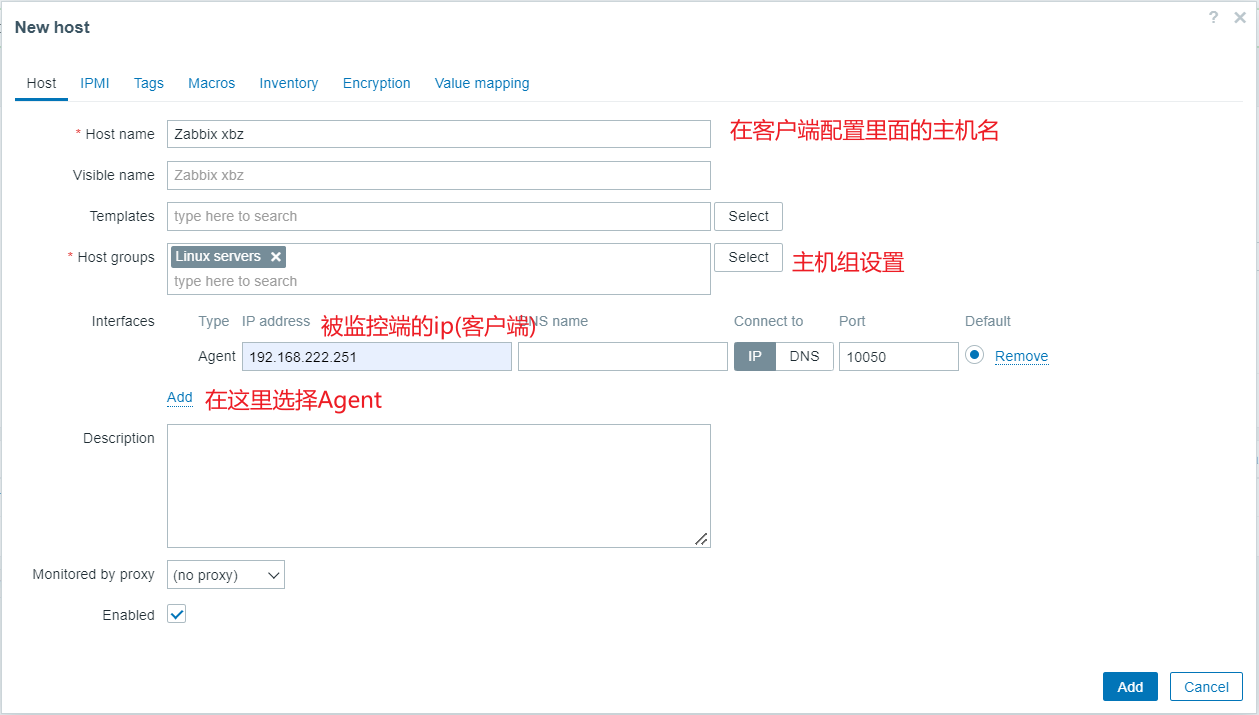
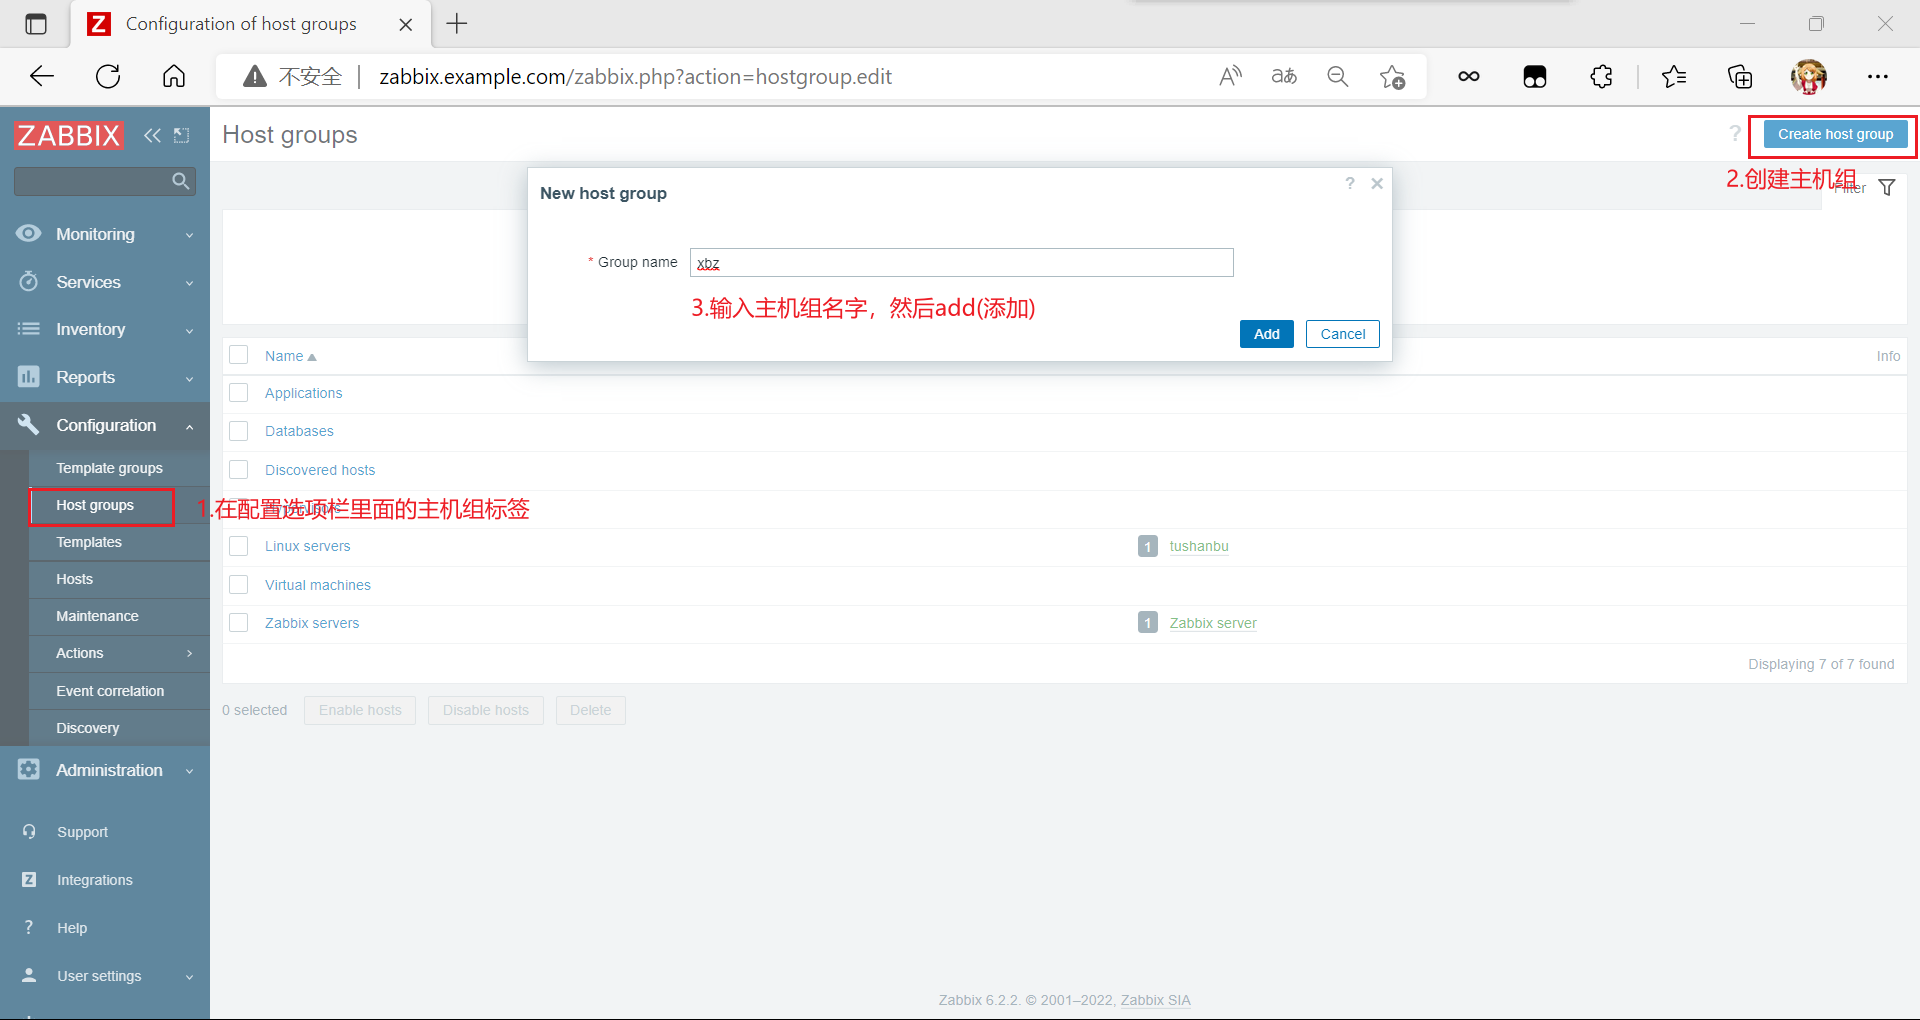
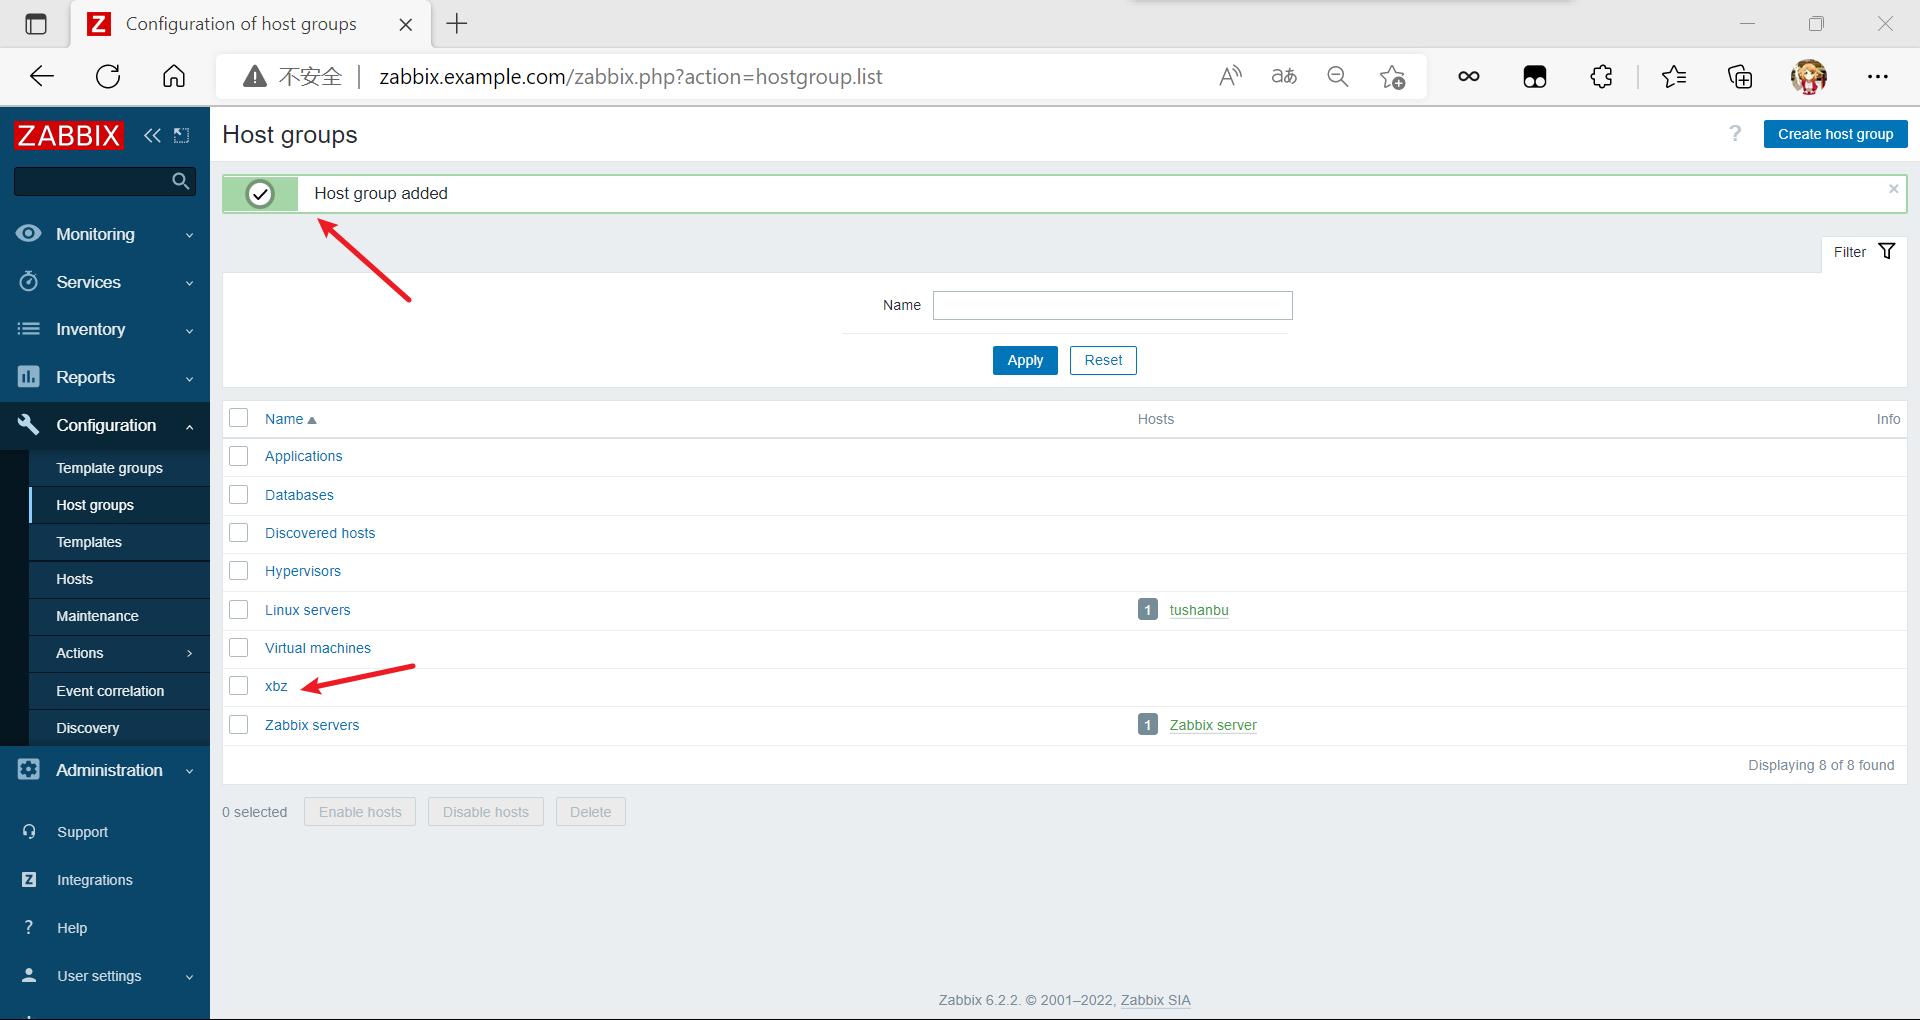
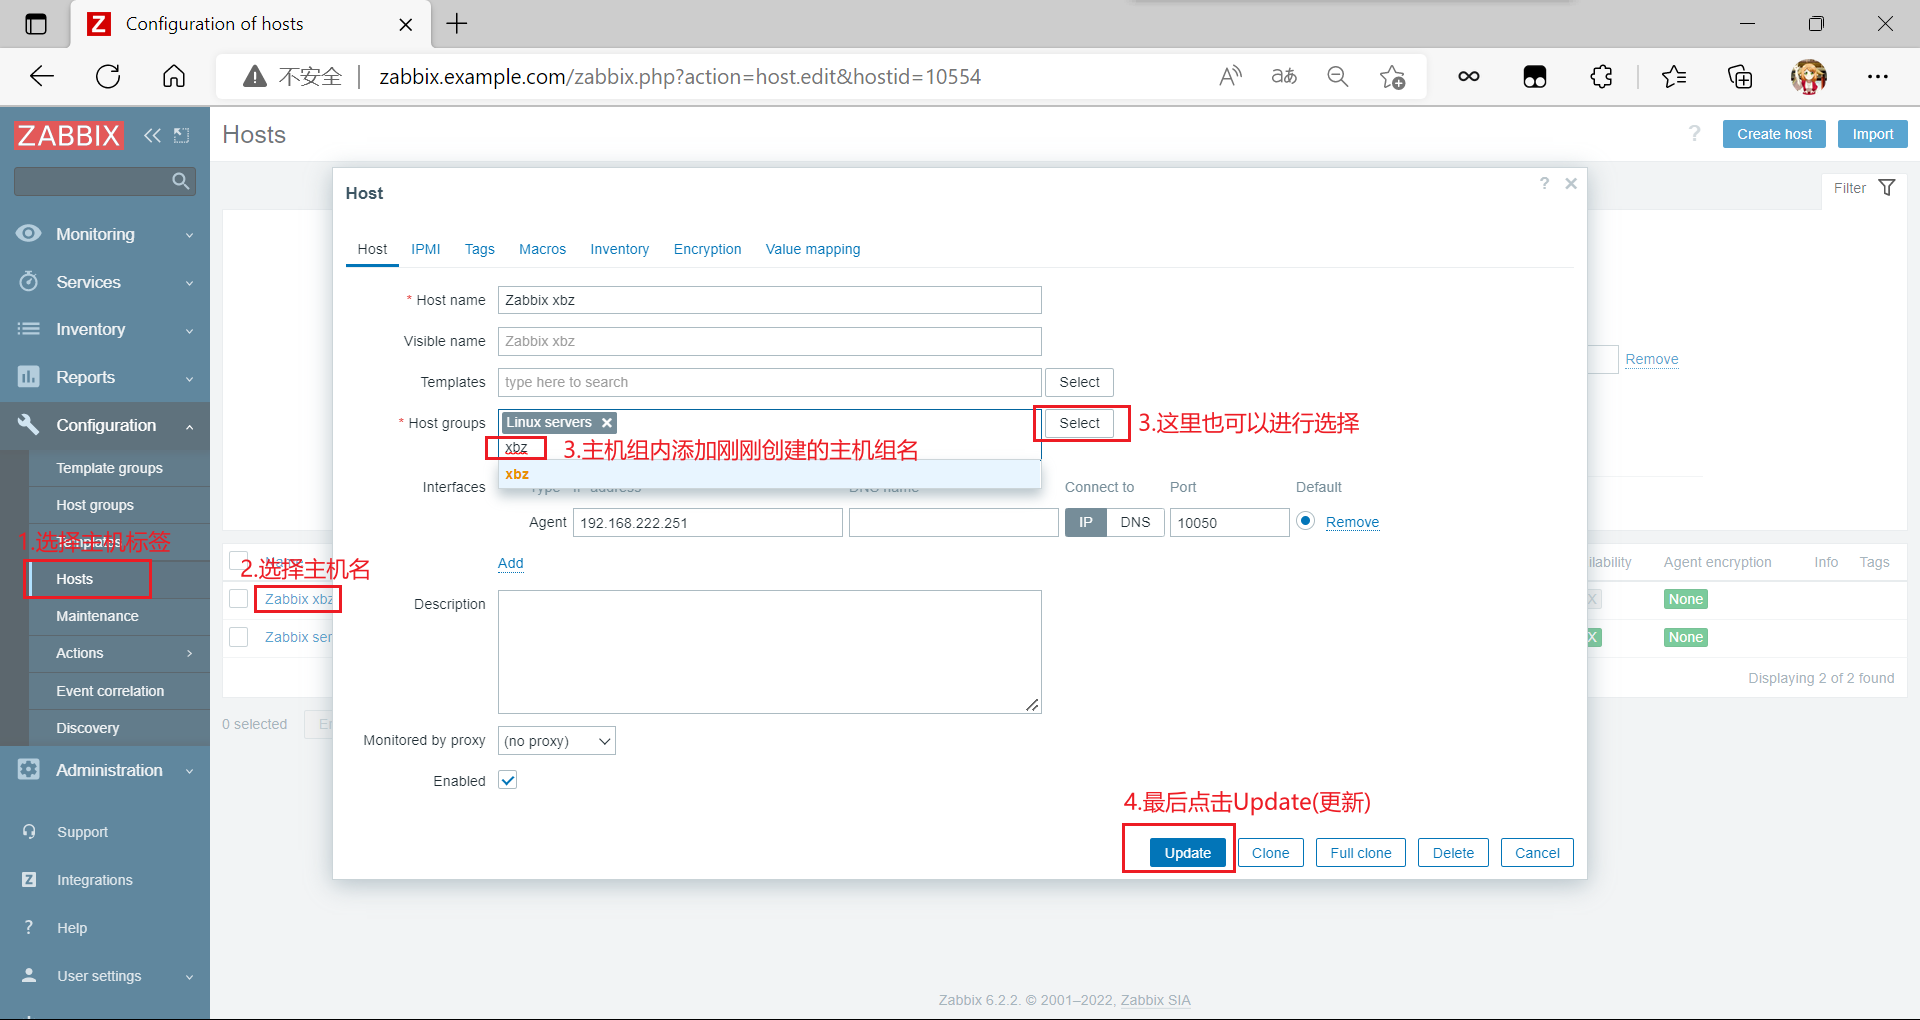
创建主机组并加入主机
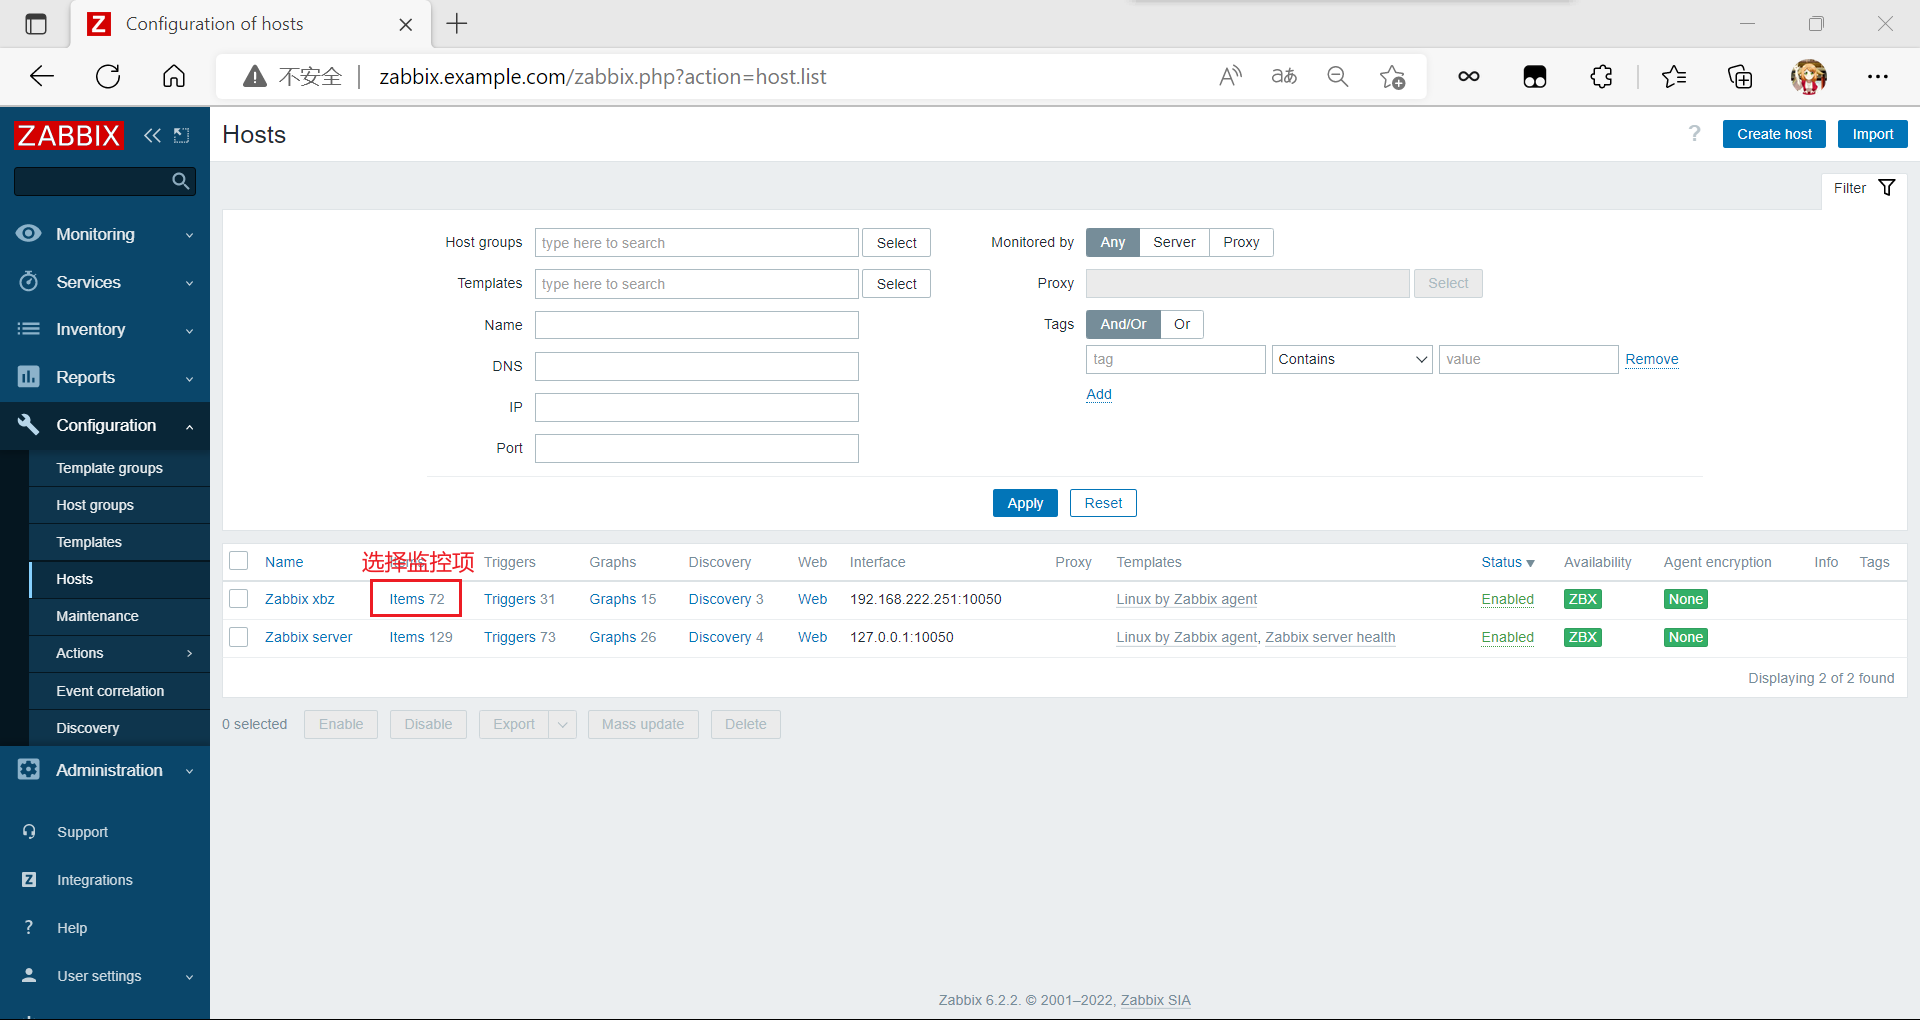
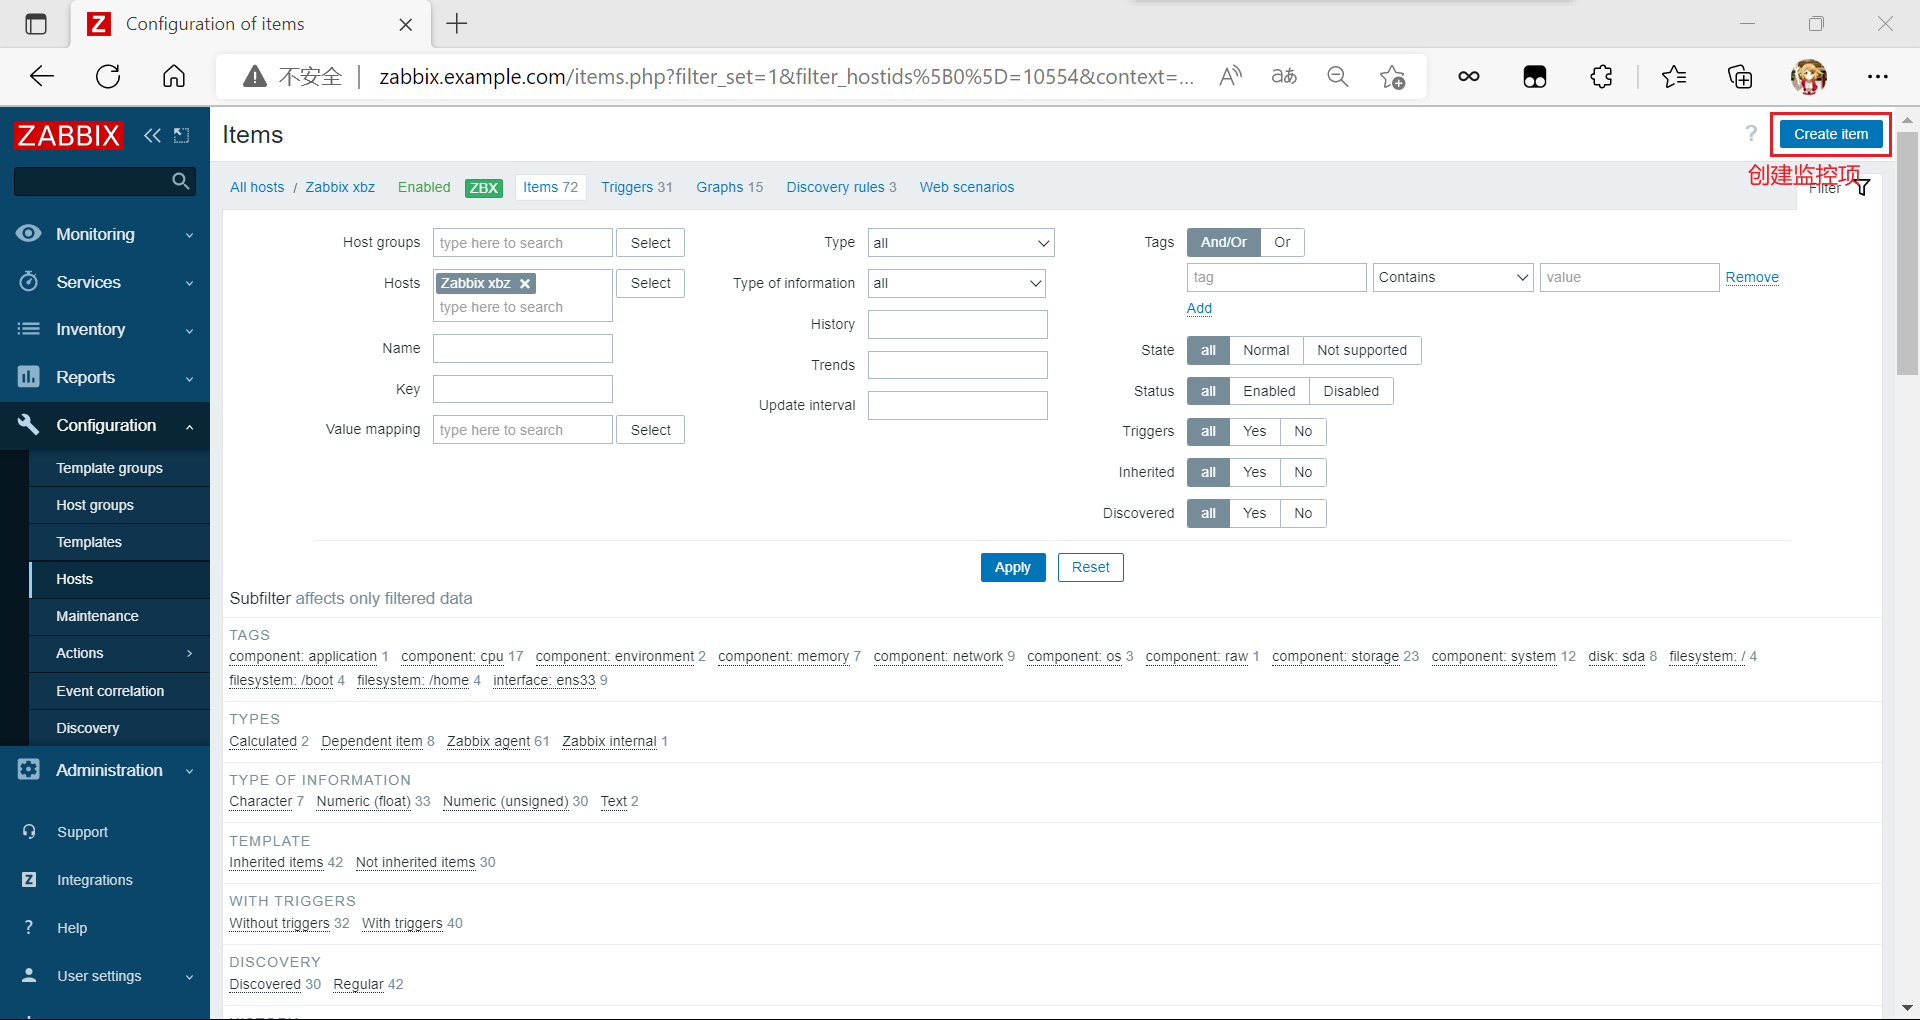
添加监控项
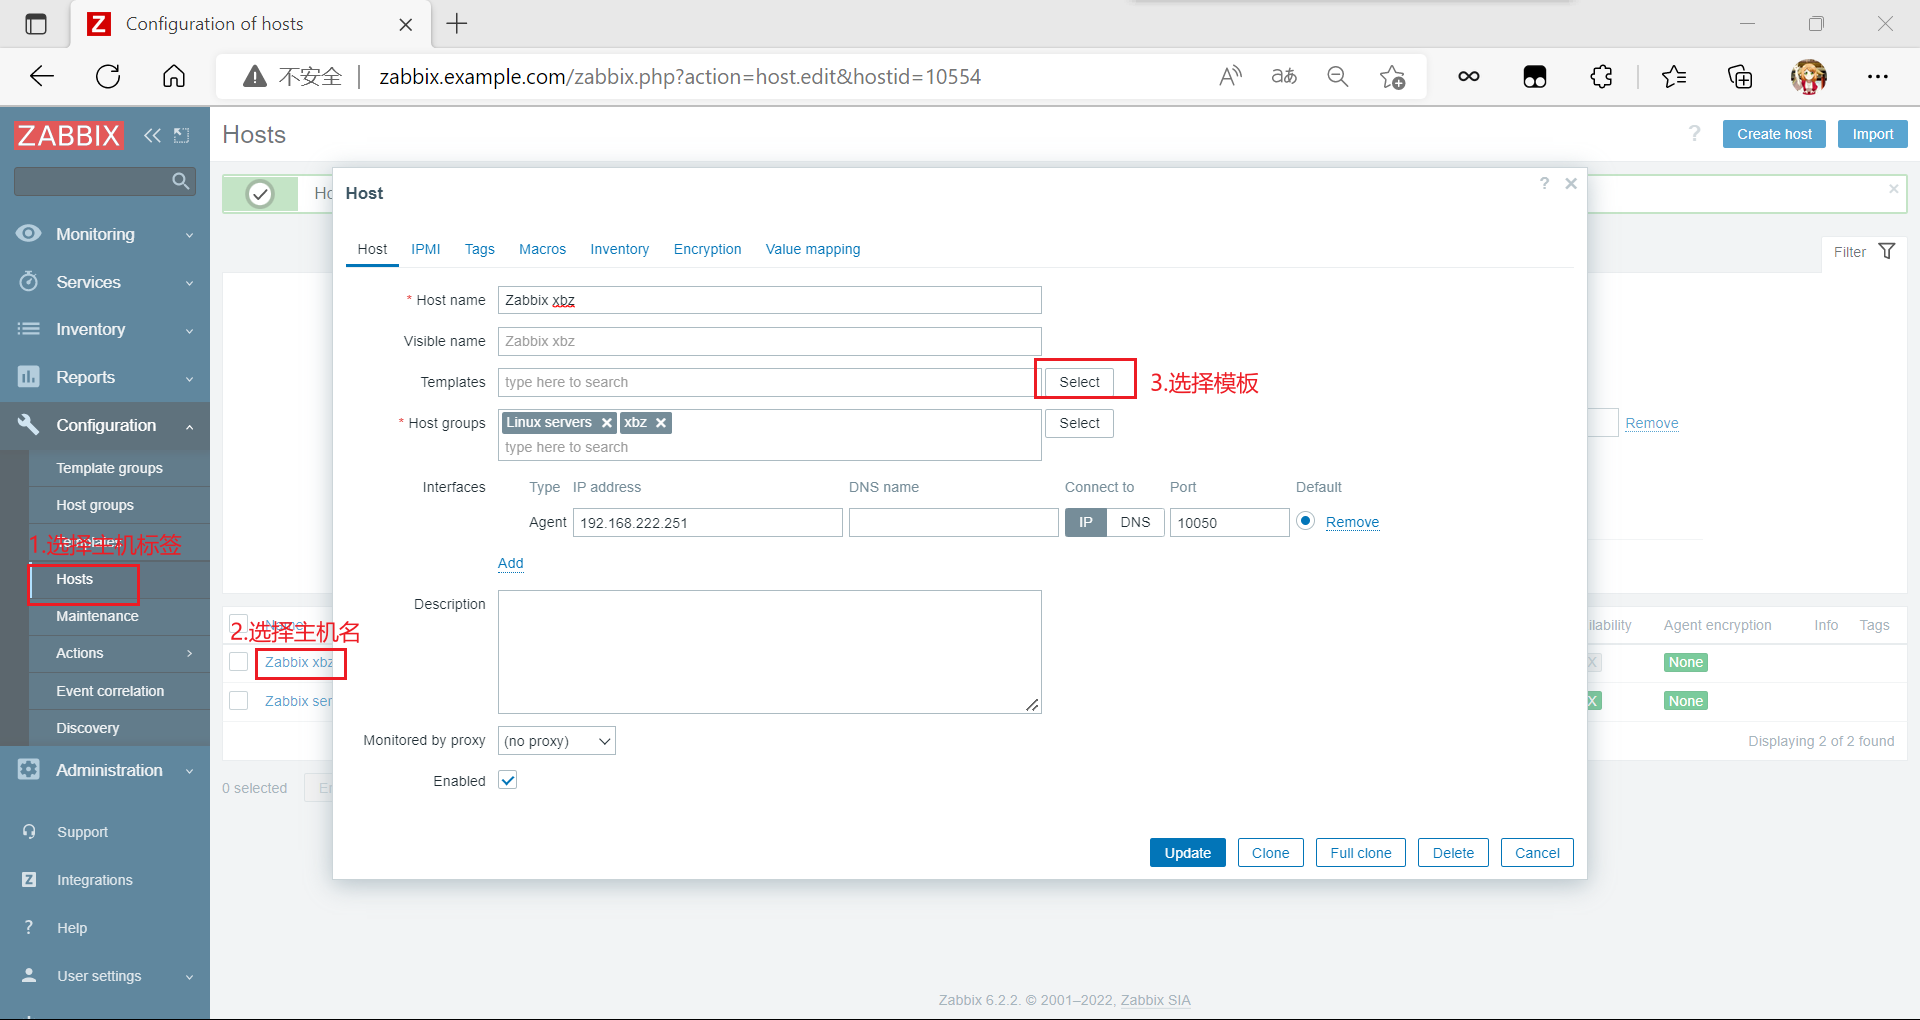
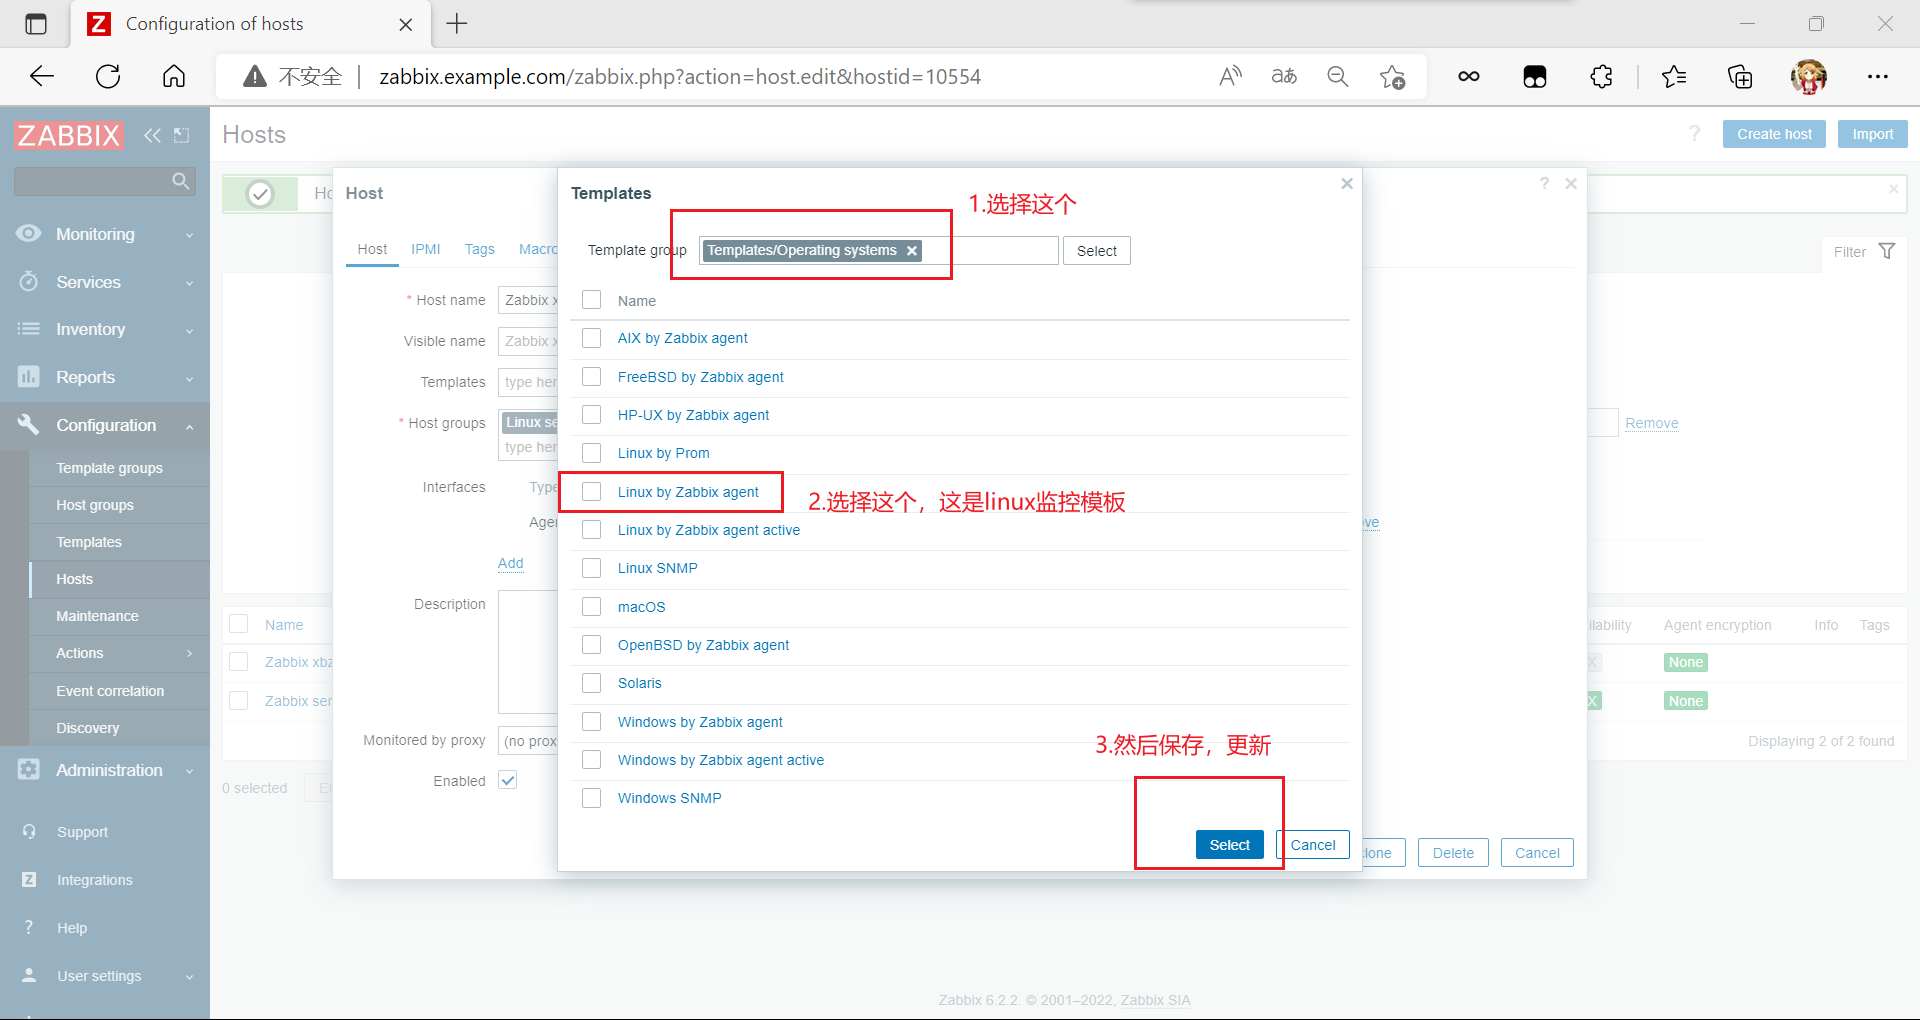
用模板方式添加
您需要在此处关闭客户端的防火墙。
[En]
You need to turn off the client’s firewall here.
[root@localhost ~]# systemctl stop firewalld.service
[root@localhost ~]# vim /etc/selinux/config
[root@localhost ~]# cat /etc/selinux/config

This file controls the state of SELinux on the system.

SELINUX= can take one of these three values:
    enforcing - SELinux security policy is enforced.

    permissive - SELinux prints warnings instead of enforcing.

    disabled - No SELinux policy is loaded.

SELINUX= disabled
SELINUXTYPE= can take one of these three values:
    targeted - Targeted processes are protected,
    minimum - Modification of targeted policy. Only selected processes are protected.

    mls - Multi Level Security protection.

SELINUXTYPE=targeted

[root@localhost ~]# systemctl status firewalld.service
● firewalld.service - firewalld - dynamic firewall daemon
   Loaded: loaded (/usr/lib/systemd/system/firewalld.service; enabled; vendor preset: enabled)
   Active: inactive (dead) since Mon 2022-09-05 22:26:01 CST; 34s ago
     Docs: man:firewalld(1)
  Process: 634412 ExecStart=/usr/sbin/firewalld --nofork --nopid $FIREWALLD_ARGS (code=exited,>
 Main PID: 634412 (code=exited, status=0/SUCCESS)

Sep 05 21:54:24 localhost systemd[1]: Starting firewalld - dynamic firewall daemon...

Sep 05 21:54:25 localhost systemd[1]: Started firewalld - dynamic firewall daemon.

Sep 05 21:54:25 localhost firewalld[634412]: WARNING: AllowZoneDrifting is enabled. This is co>
Sep 05 22:26:01 localhost systemd[1]: Stopping firewalld - dynamic firewall daemon...

Sep 05 22:26:01 localhost systemd[1]: firewalld.service: Succeeded.

Sep 05 22:26:01 localhost systemd[1]: Stopped firewalld - dynamic firewall daemon.
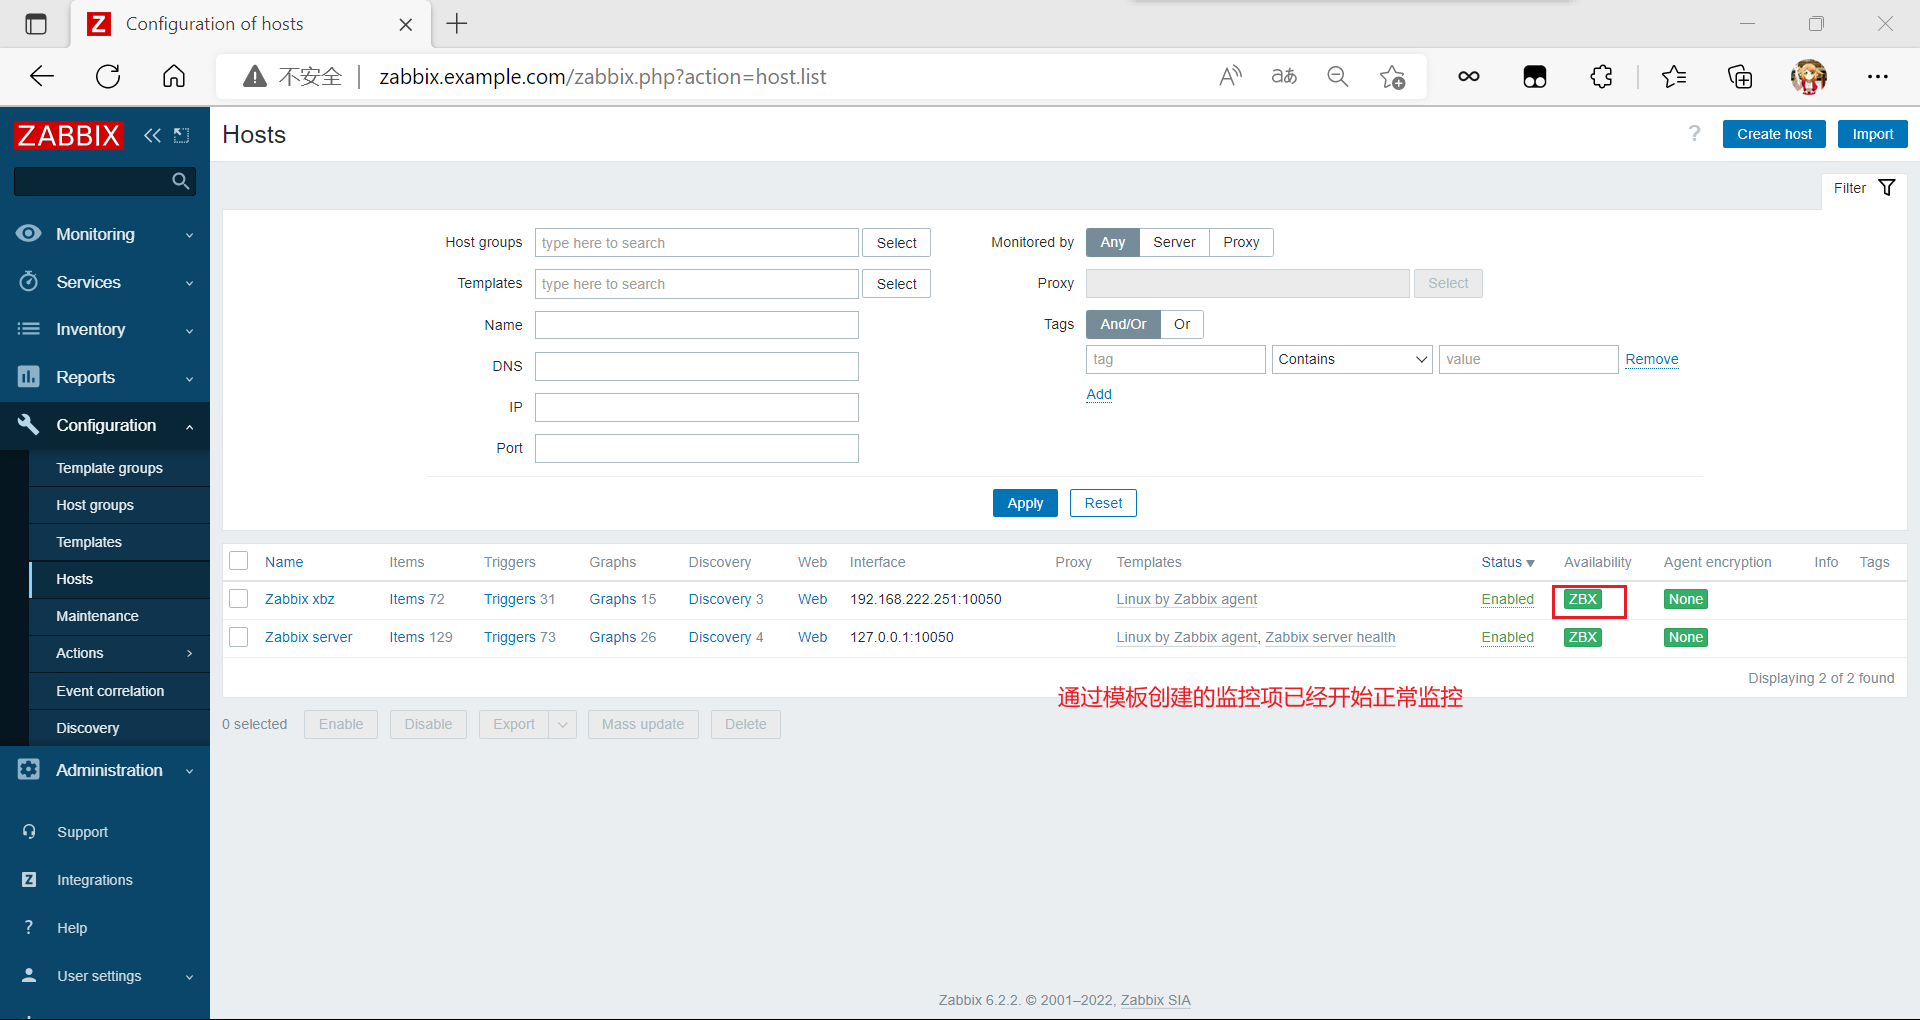
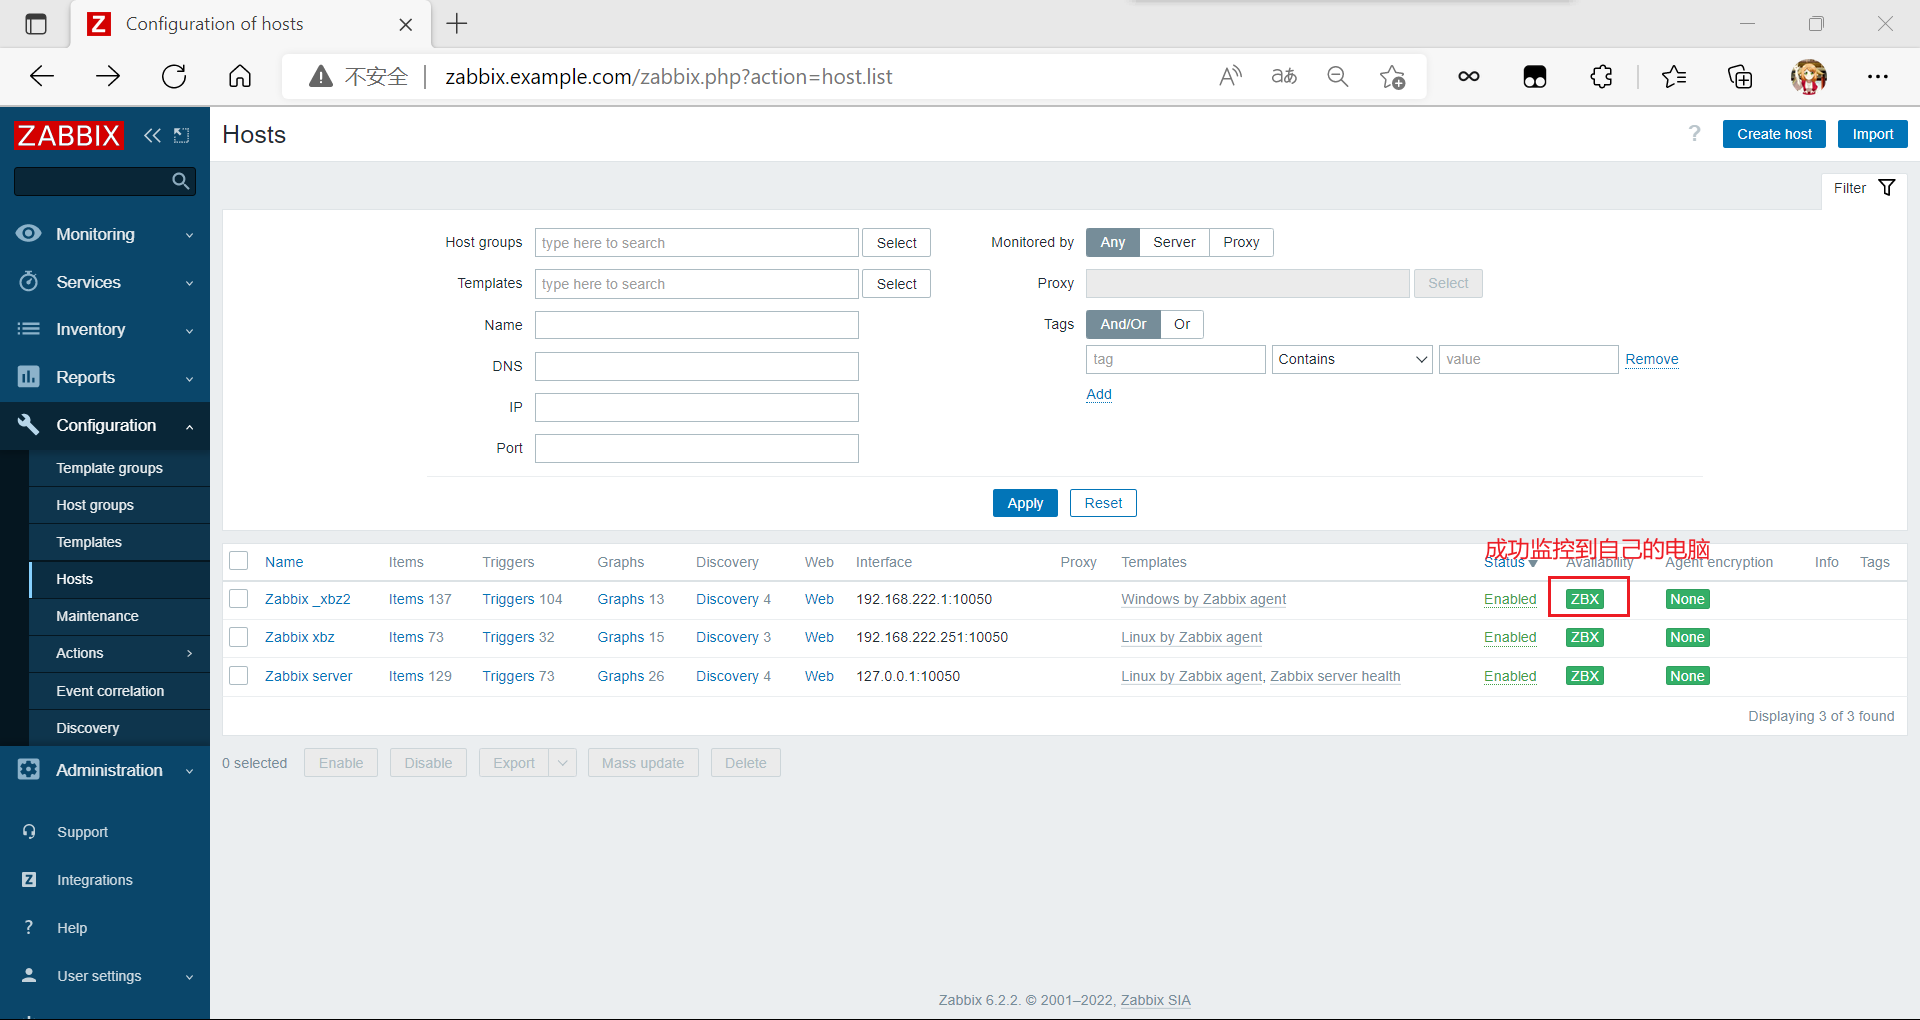
此外已经在进行监控
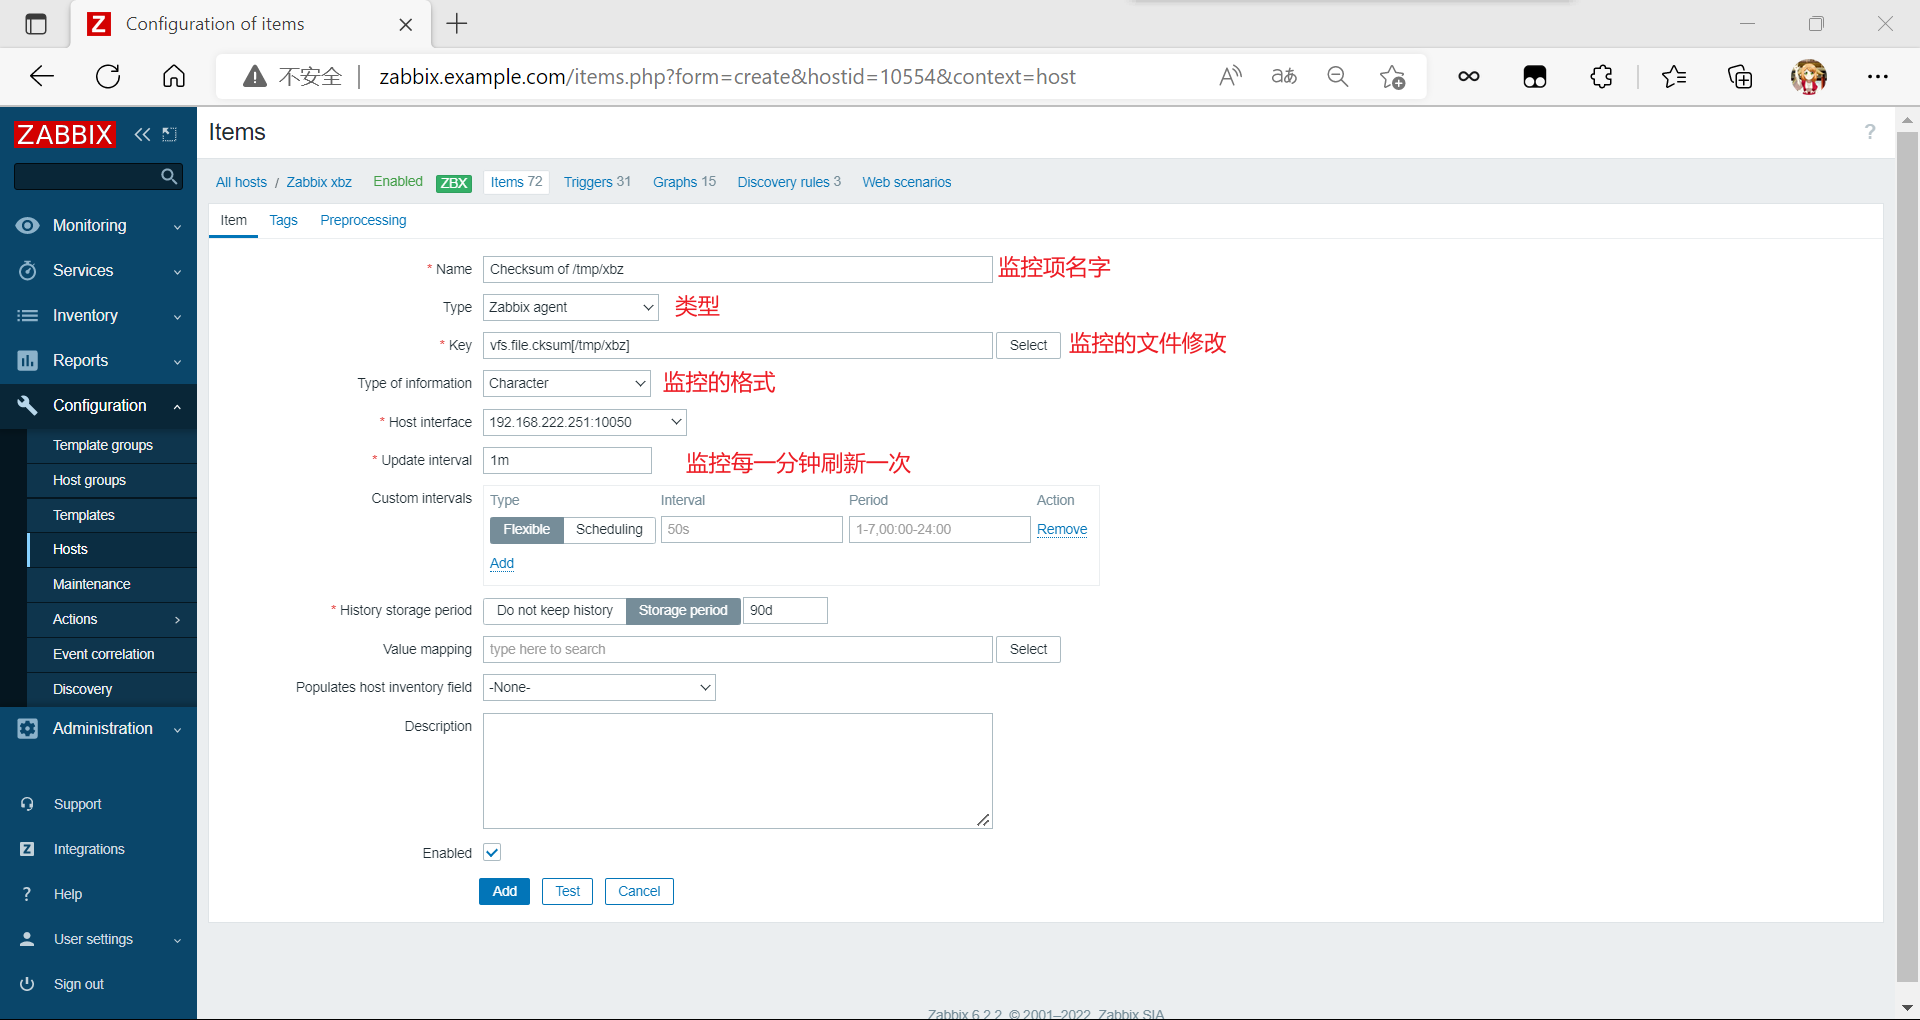
手动添加监控项
我们可以首先在被监视端创建一个测试文件。
[En]
We can first create a test file on the monitored side.
[root@localhost ~]# touch /tmp/xbz
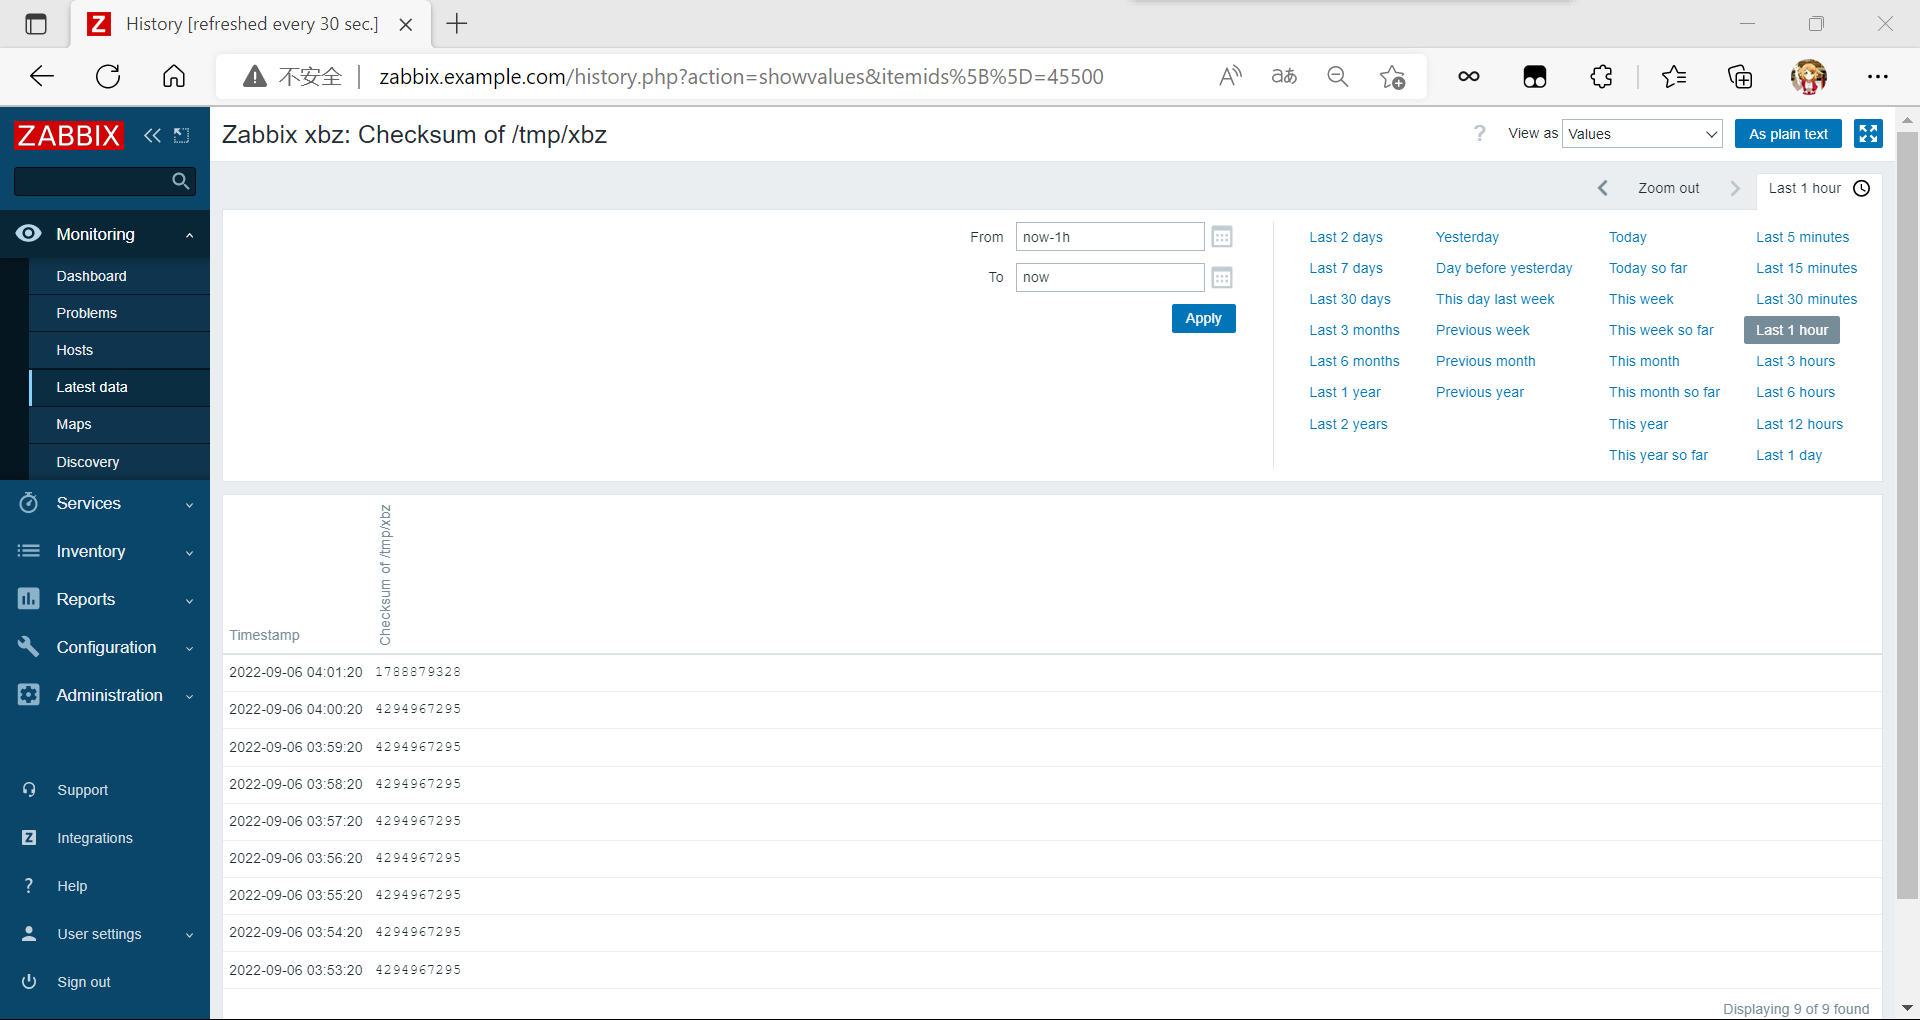
查看监控数据
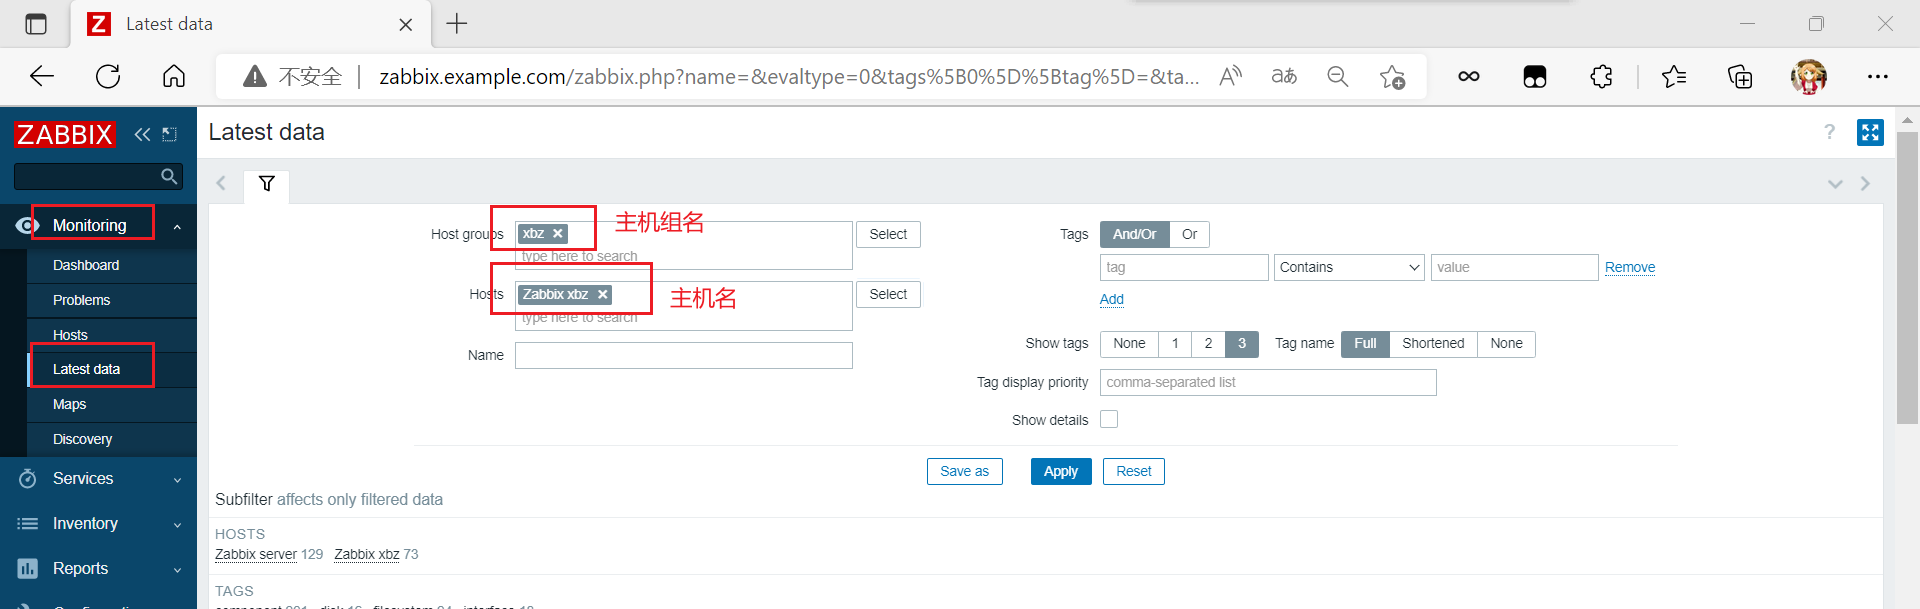
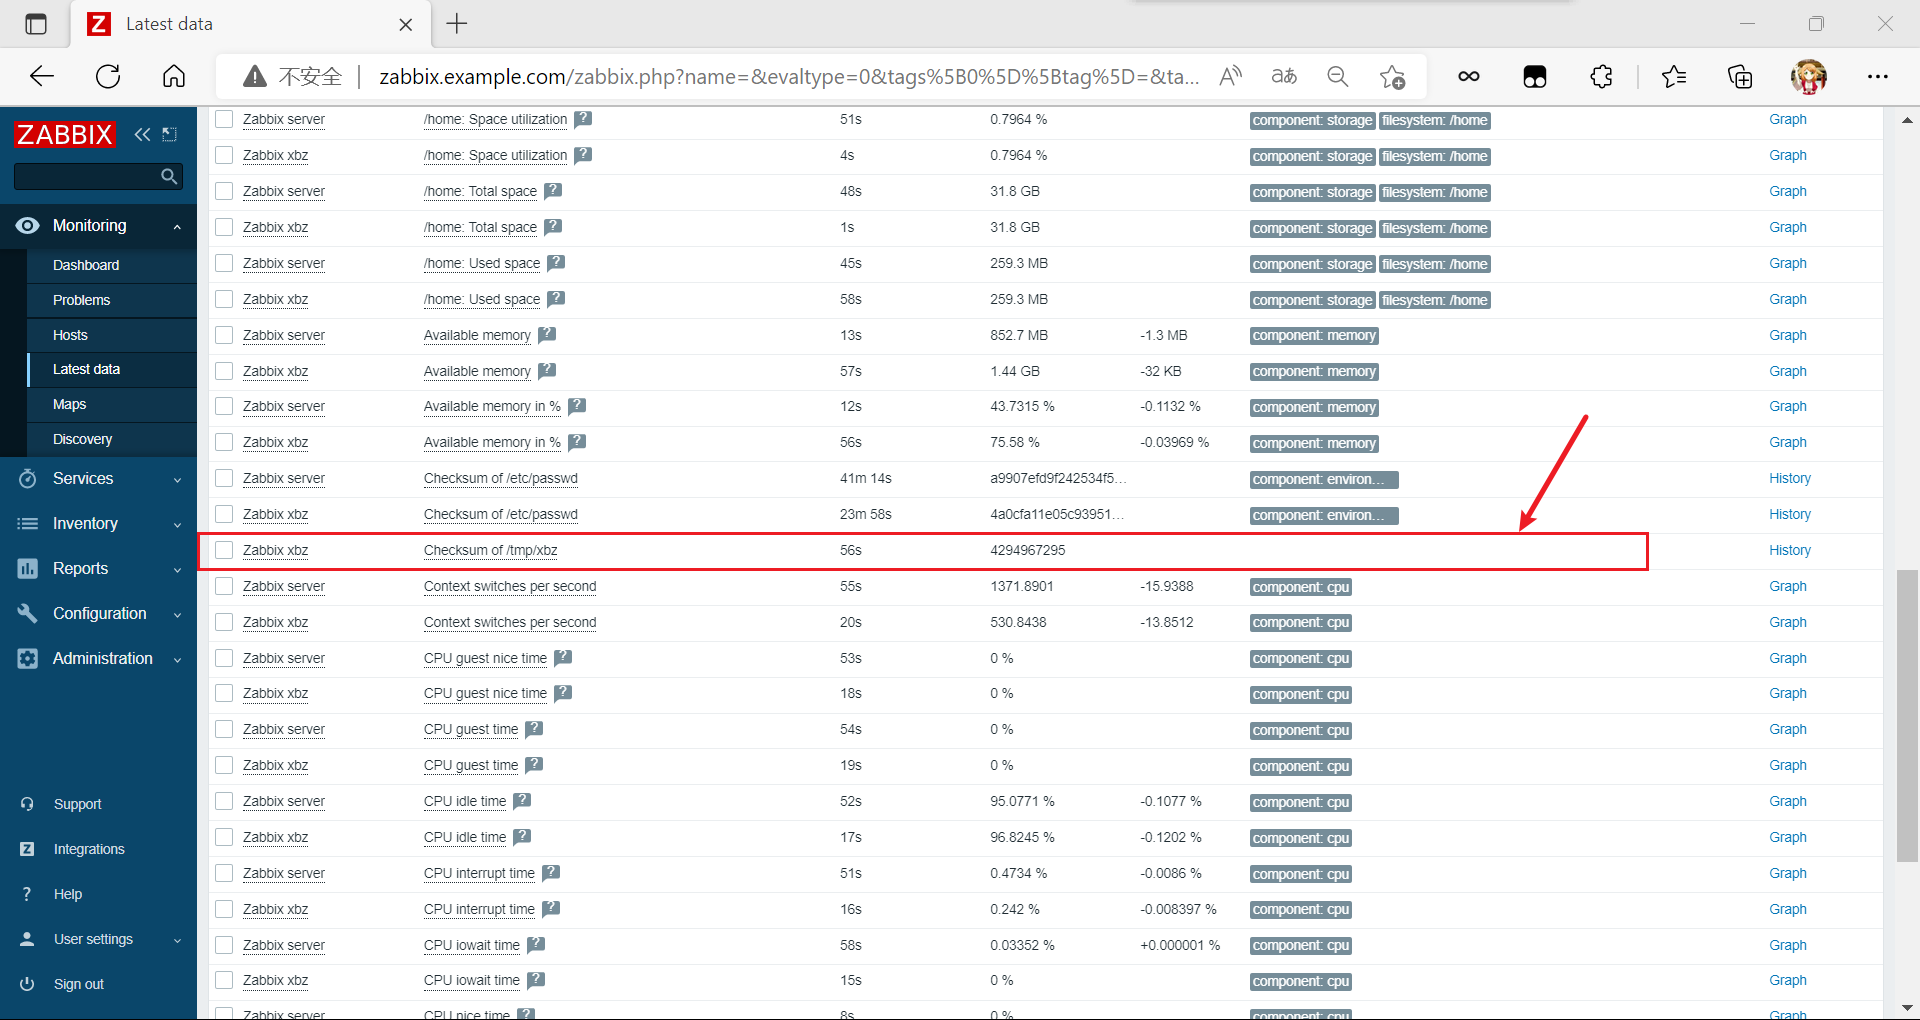
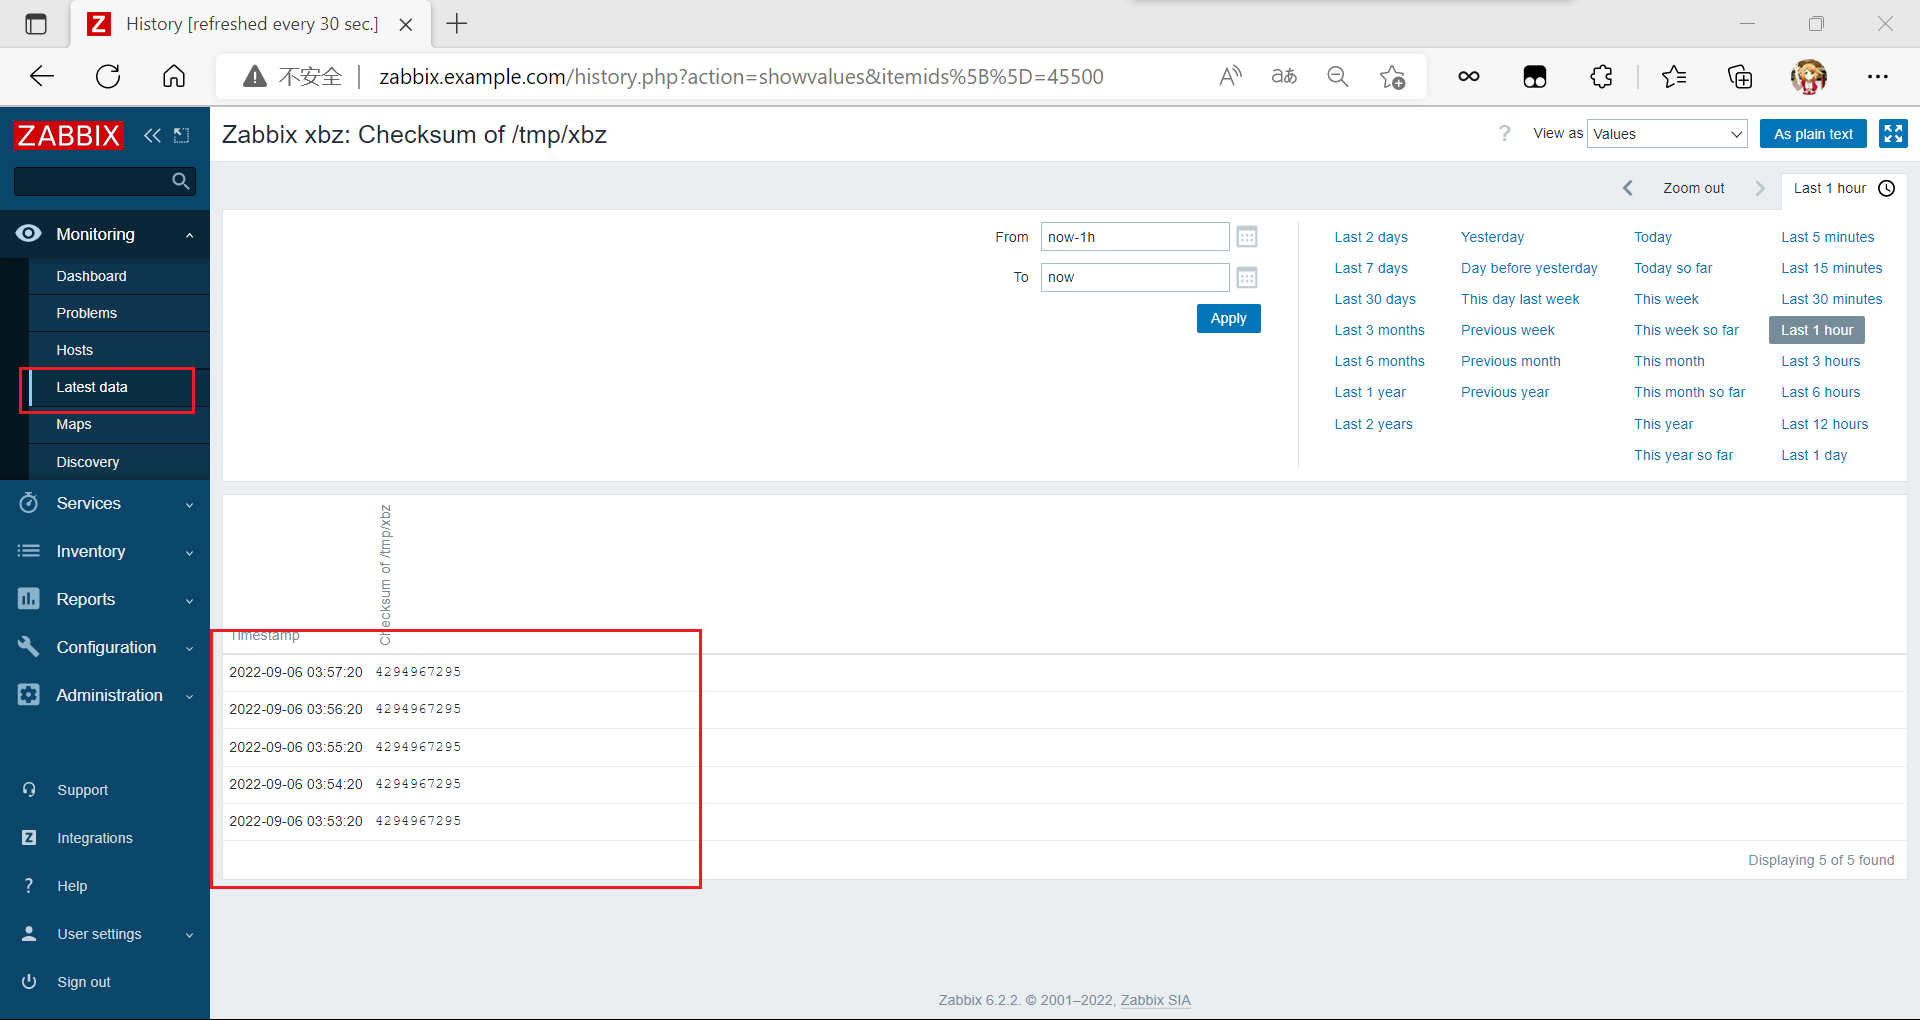
测试:修改一下文件
[root@localhost ~]# echo "xxx" >> /tmp/xbz
刷新查看
可以看到value发生了改变
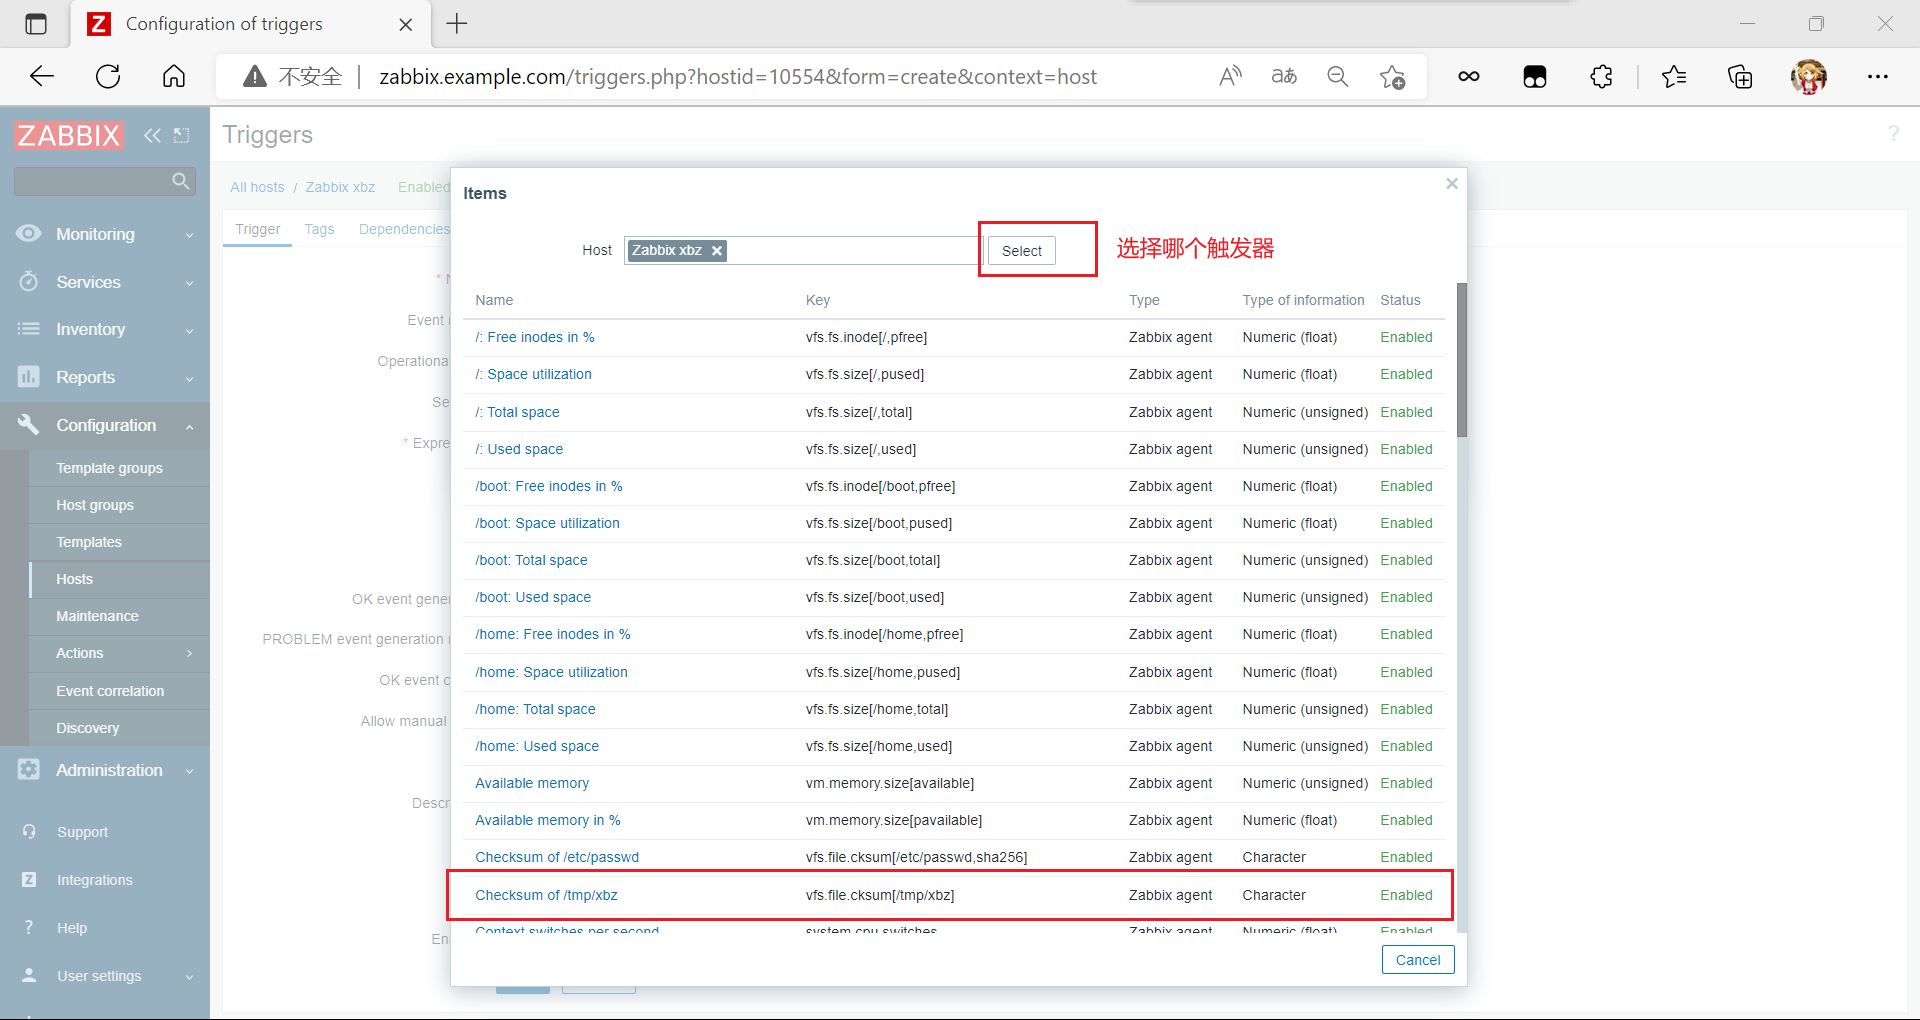
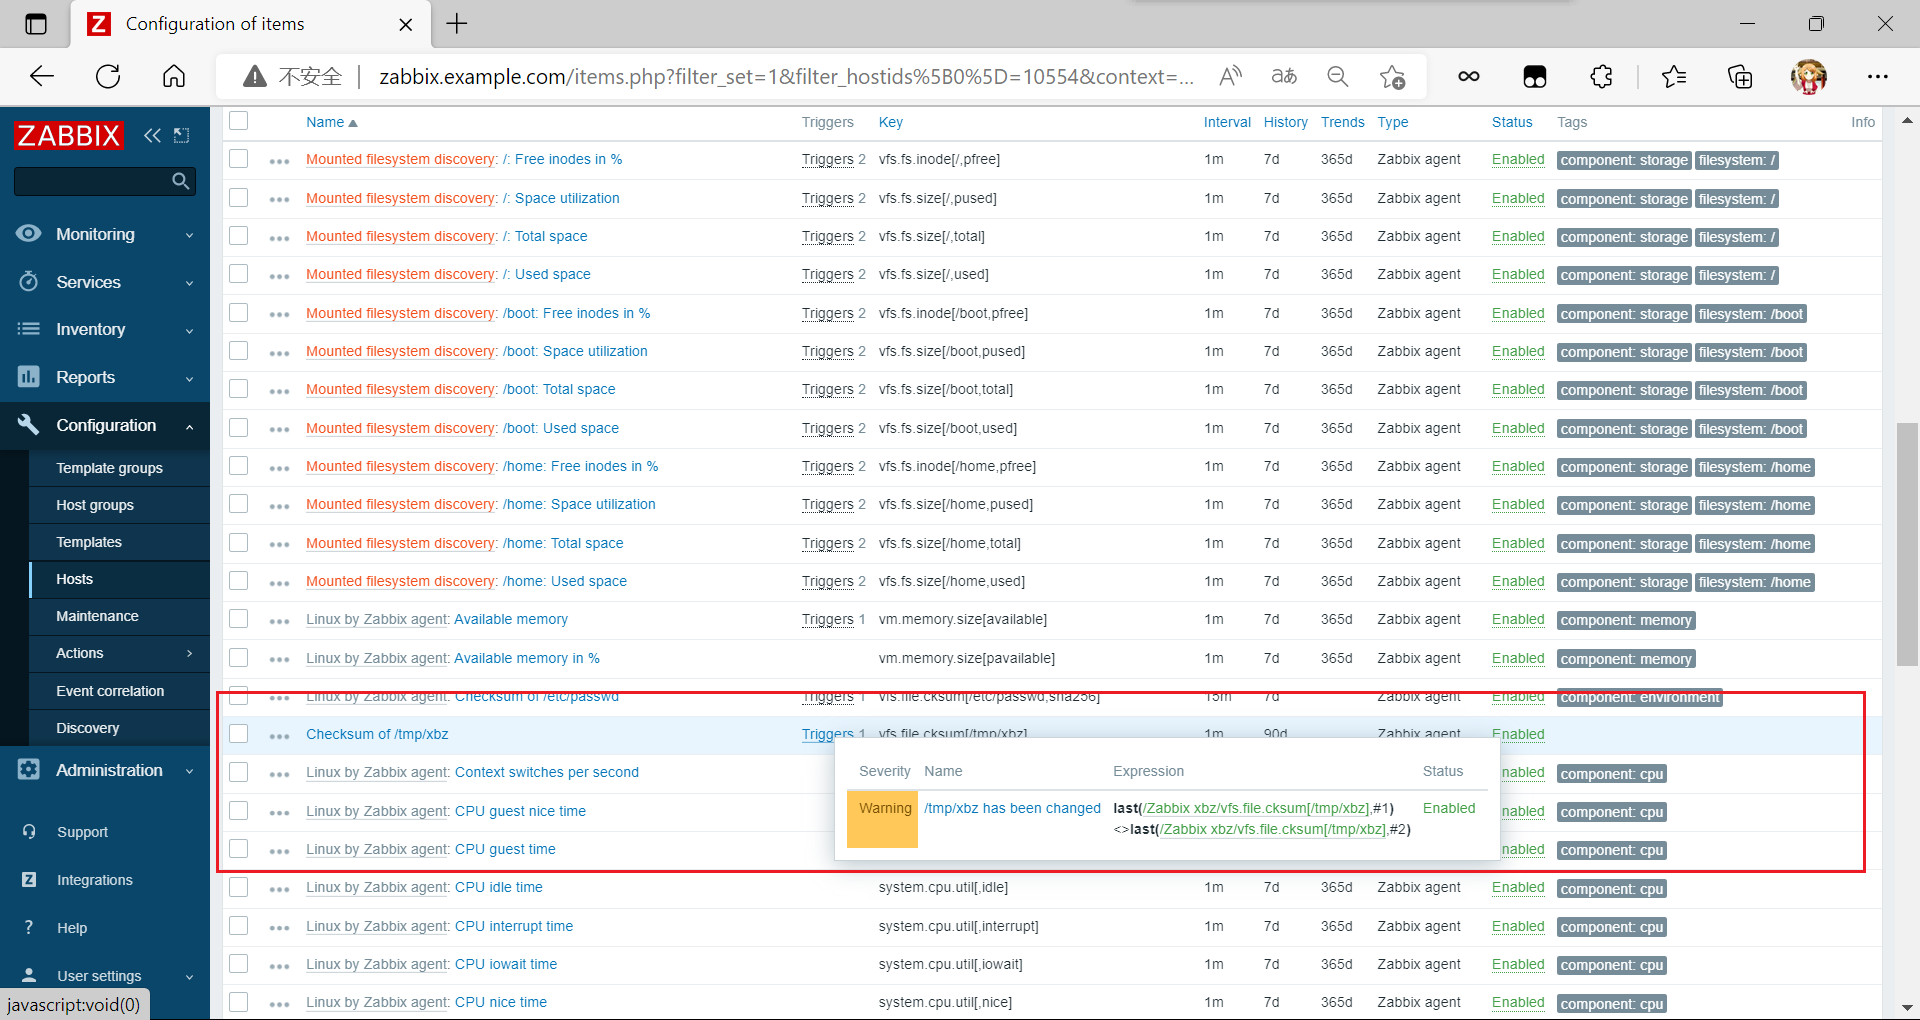
添加触发器
开始添加触发器以监视该文件
[En]
Start adding a trigger to monitor the file

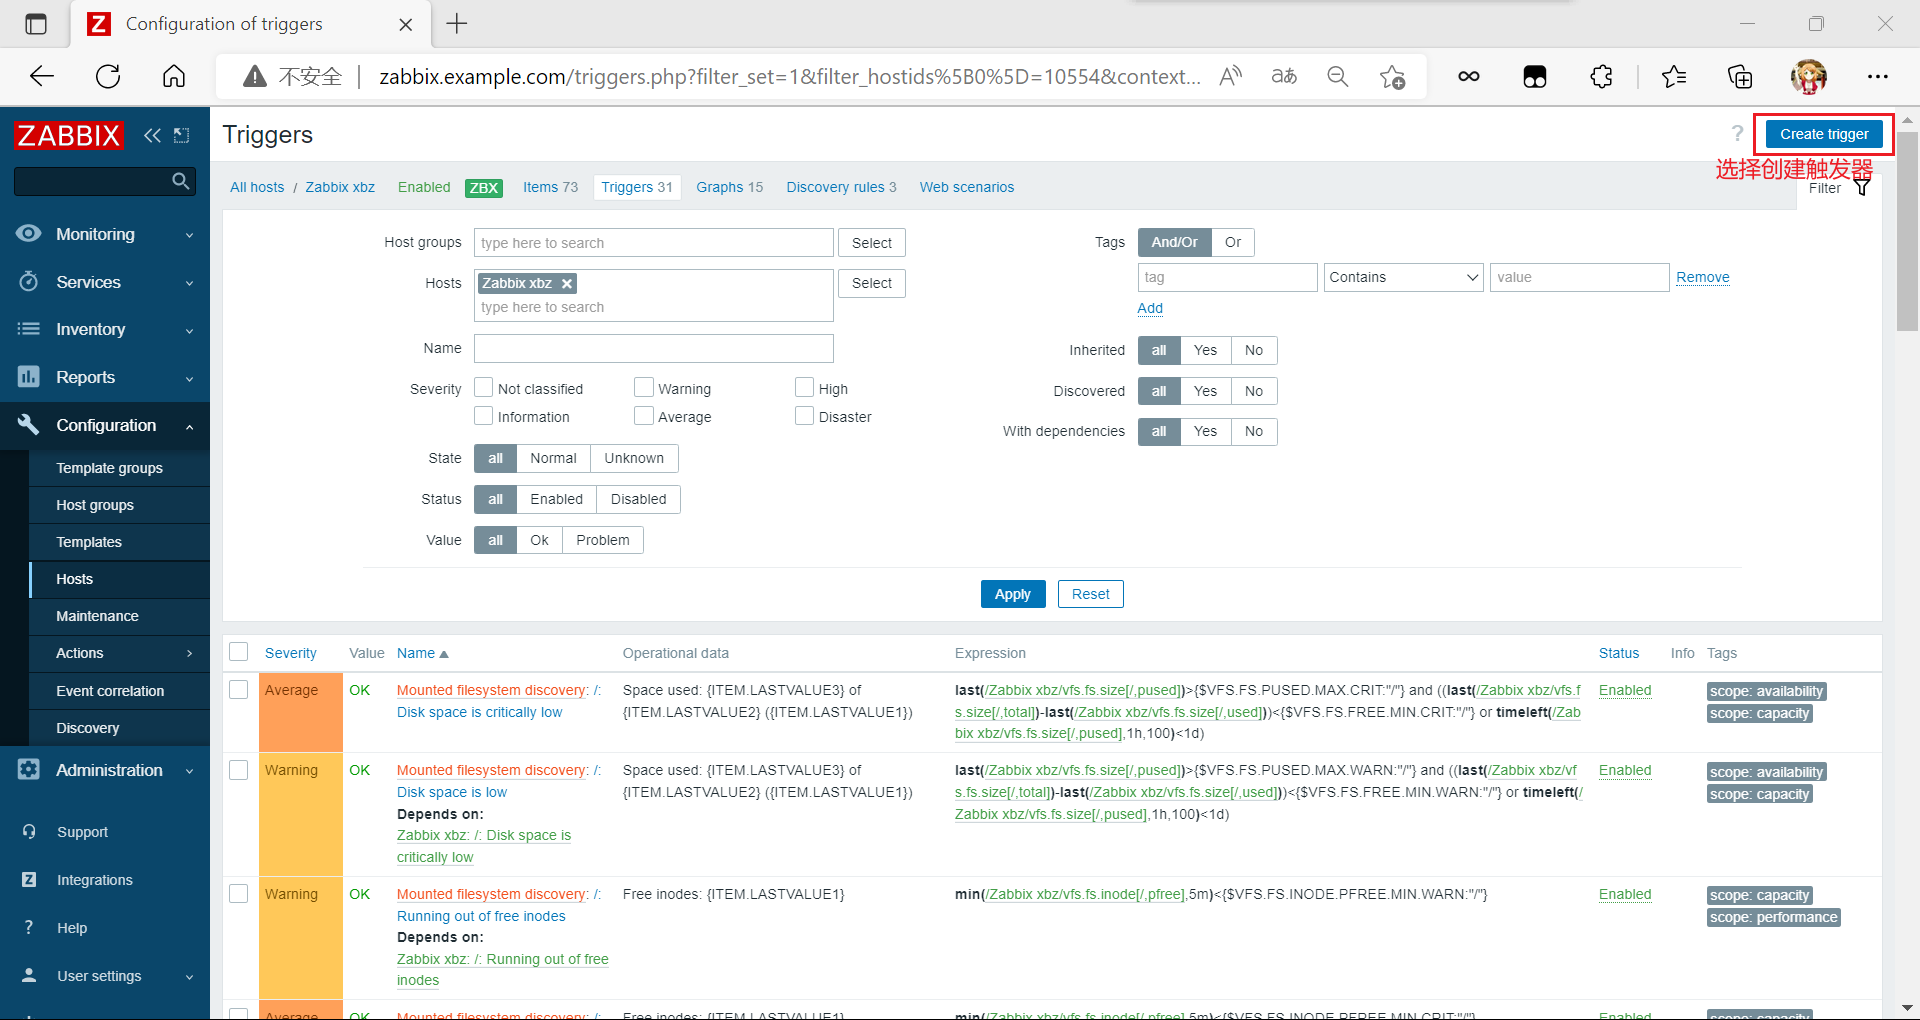
选择错误级别添加
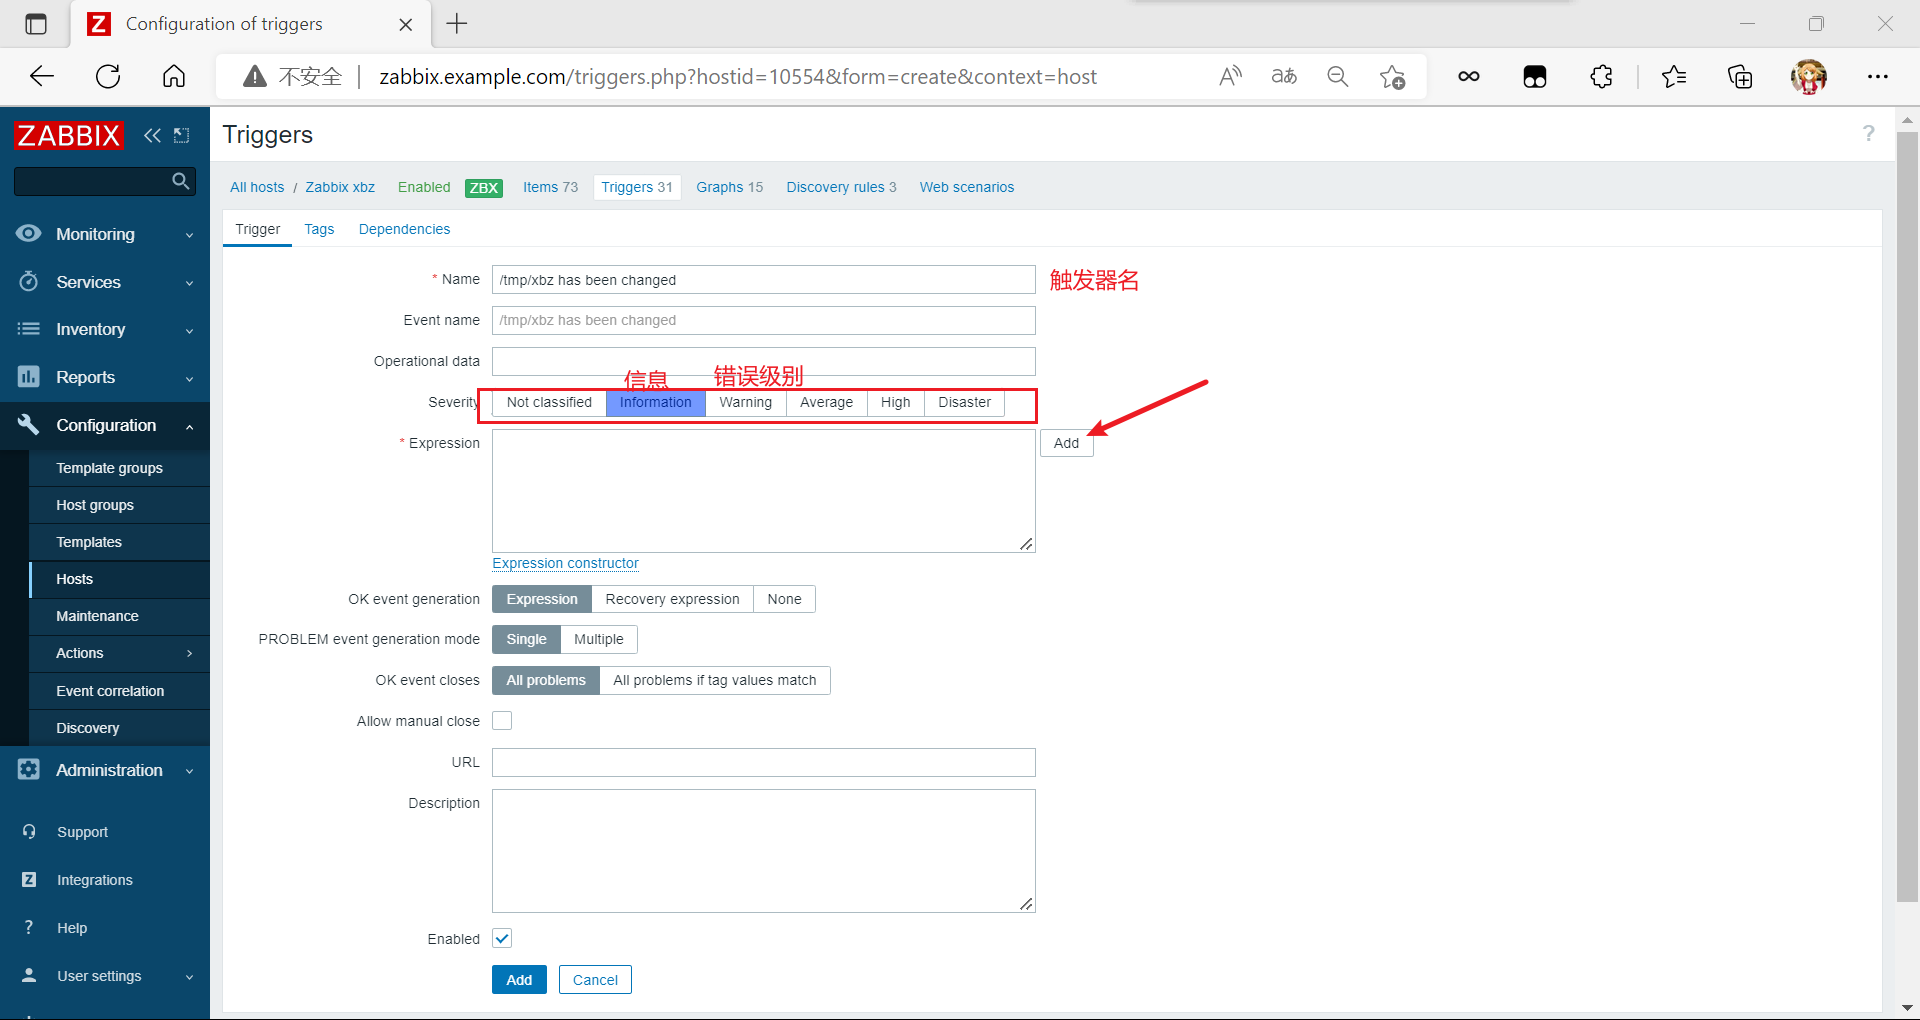
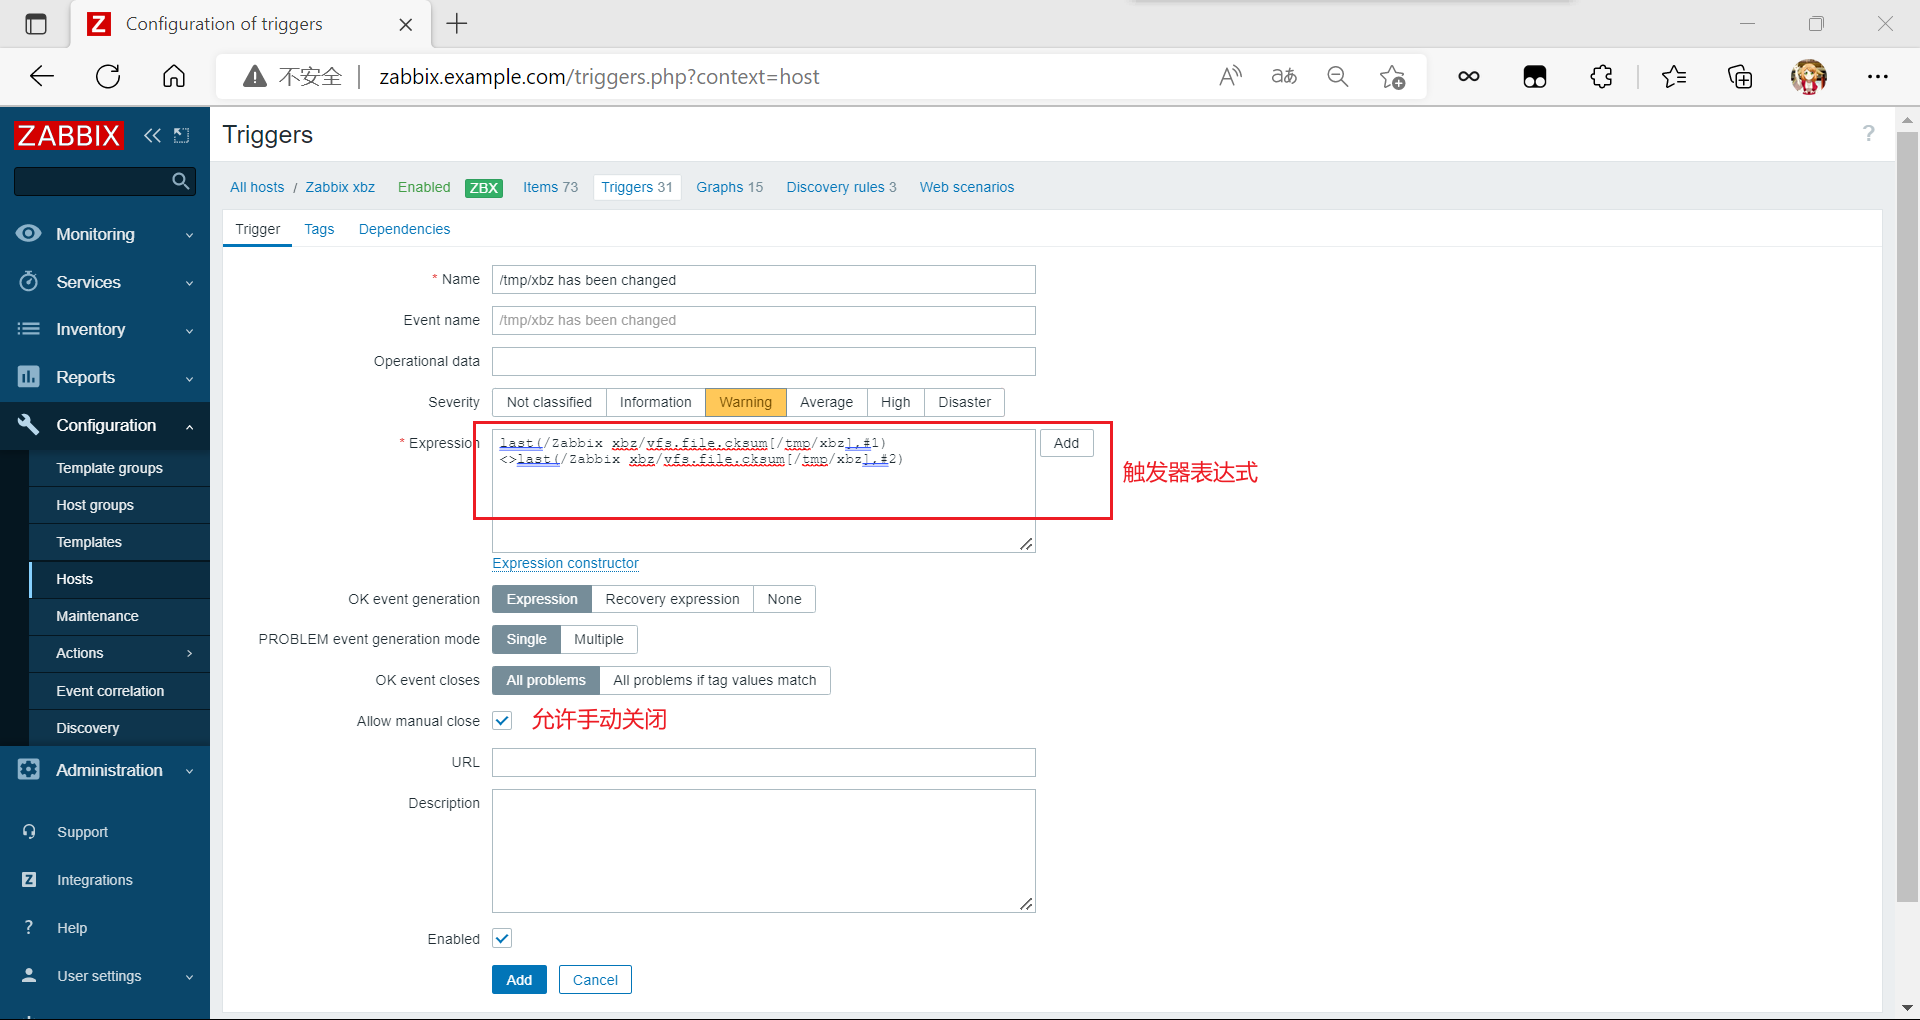
单击添加,然后找到您刚刚添加的触发器。您可以看到触发器已经启动。
[En]
Click add, and then find the trigger you just added. You can see that the trigger has been started.
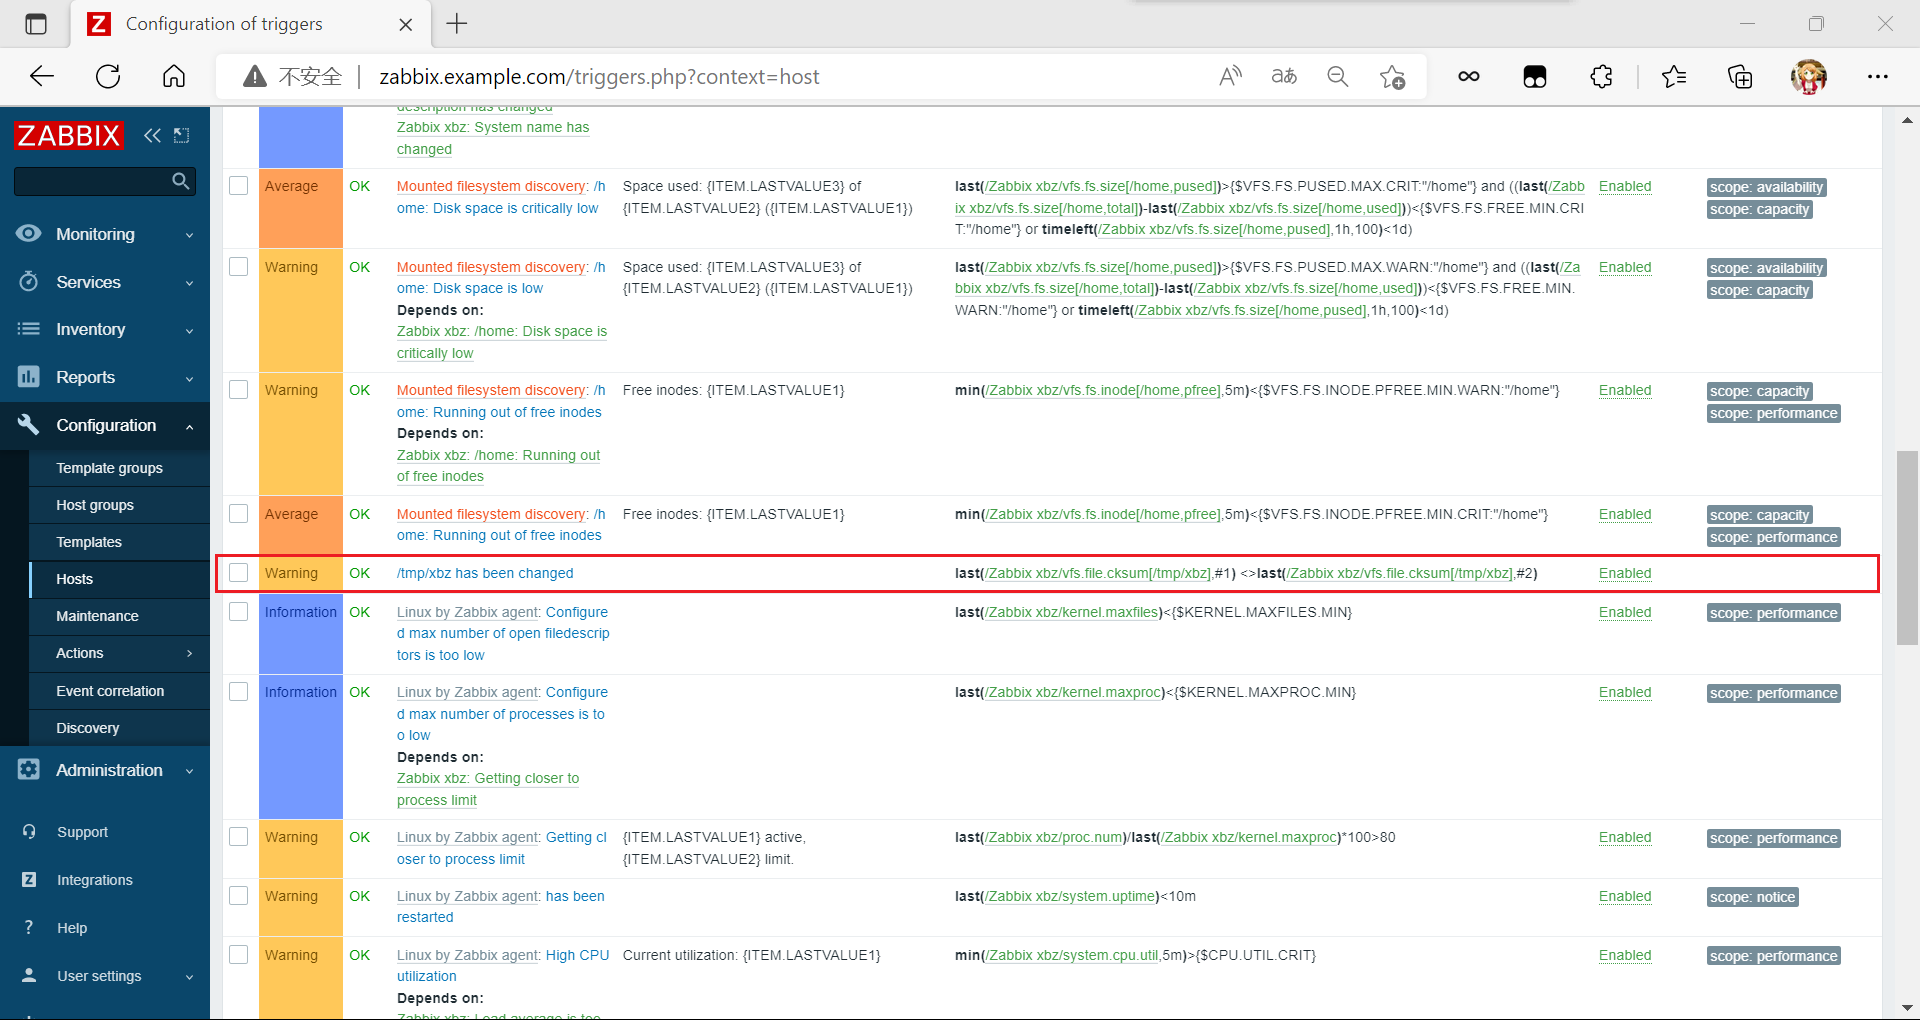
如果您查看监控项,您就已经有了触发器。
[En]
If you look at the monitoring item, you already have a trigger.
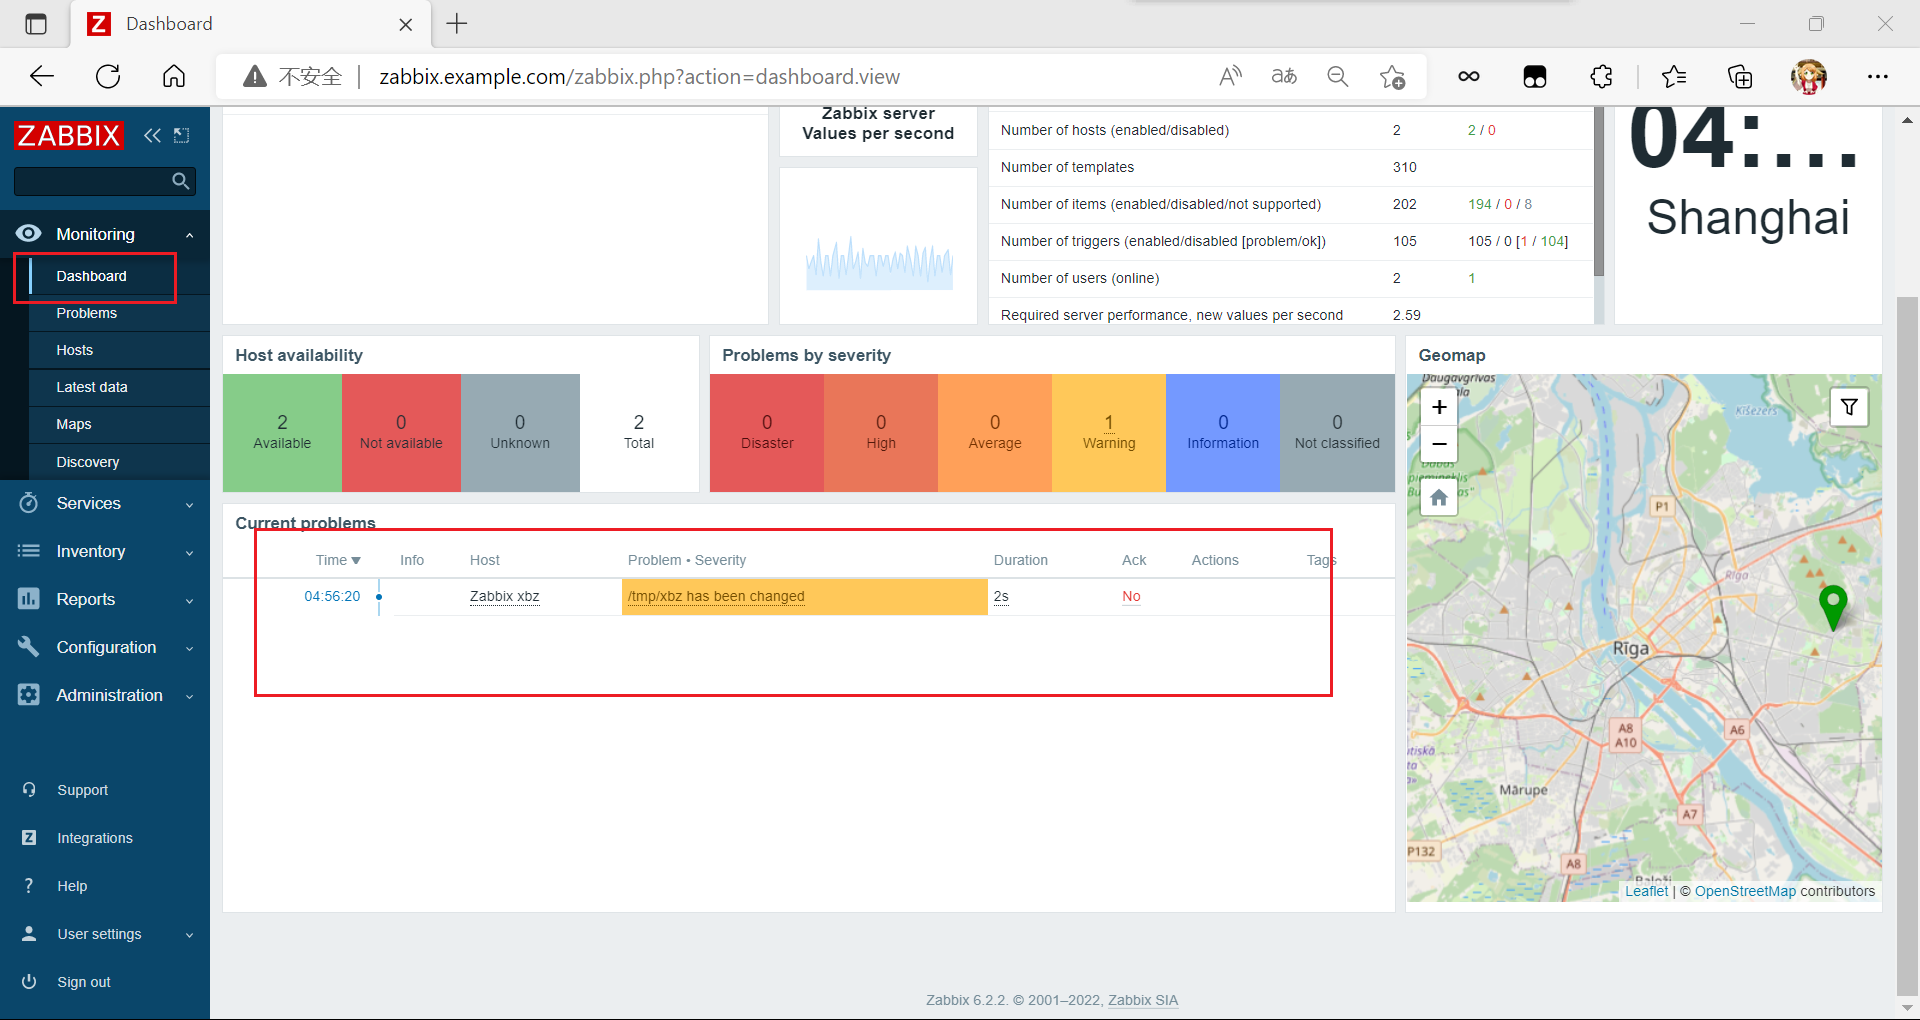
进行测试
[root@localhost ~]# echo "333" >> /tmp/xbz
//修改/tmp/xbz文件
查看数据

查看主页告警信息
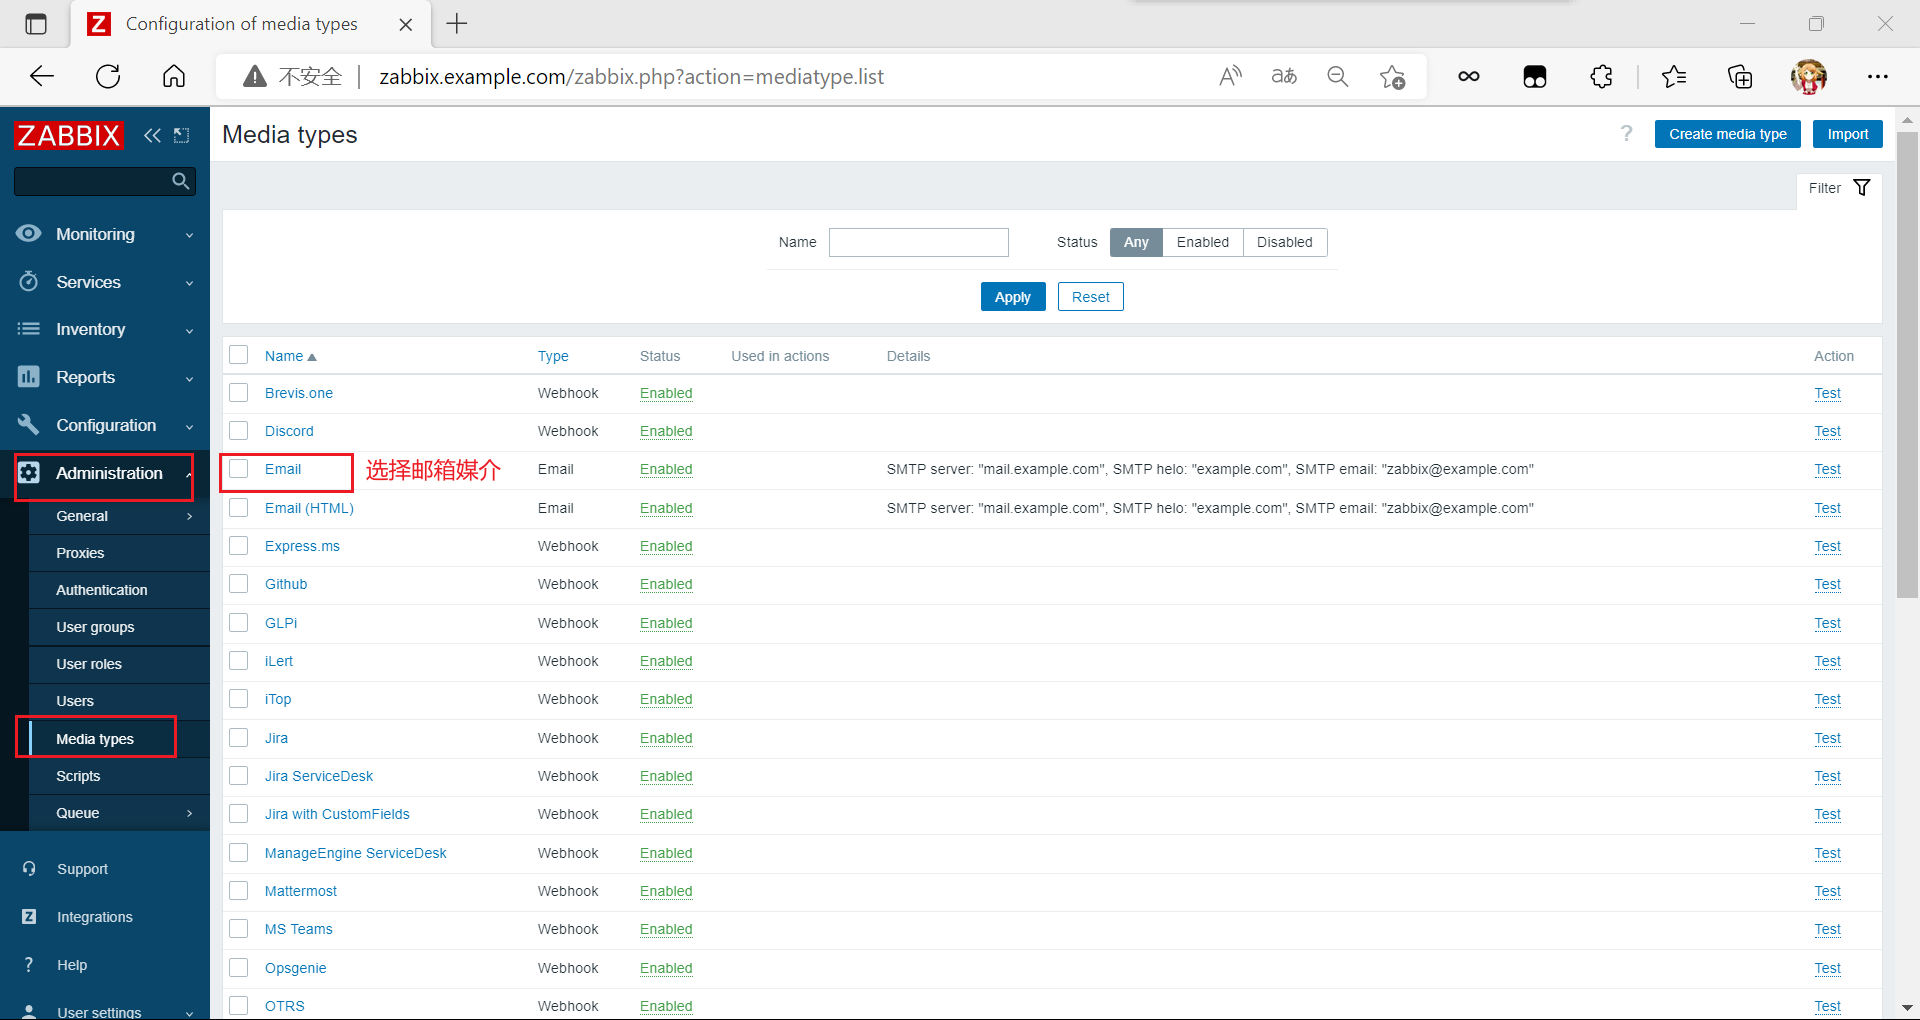
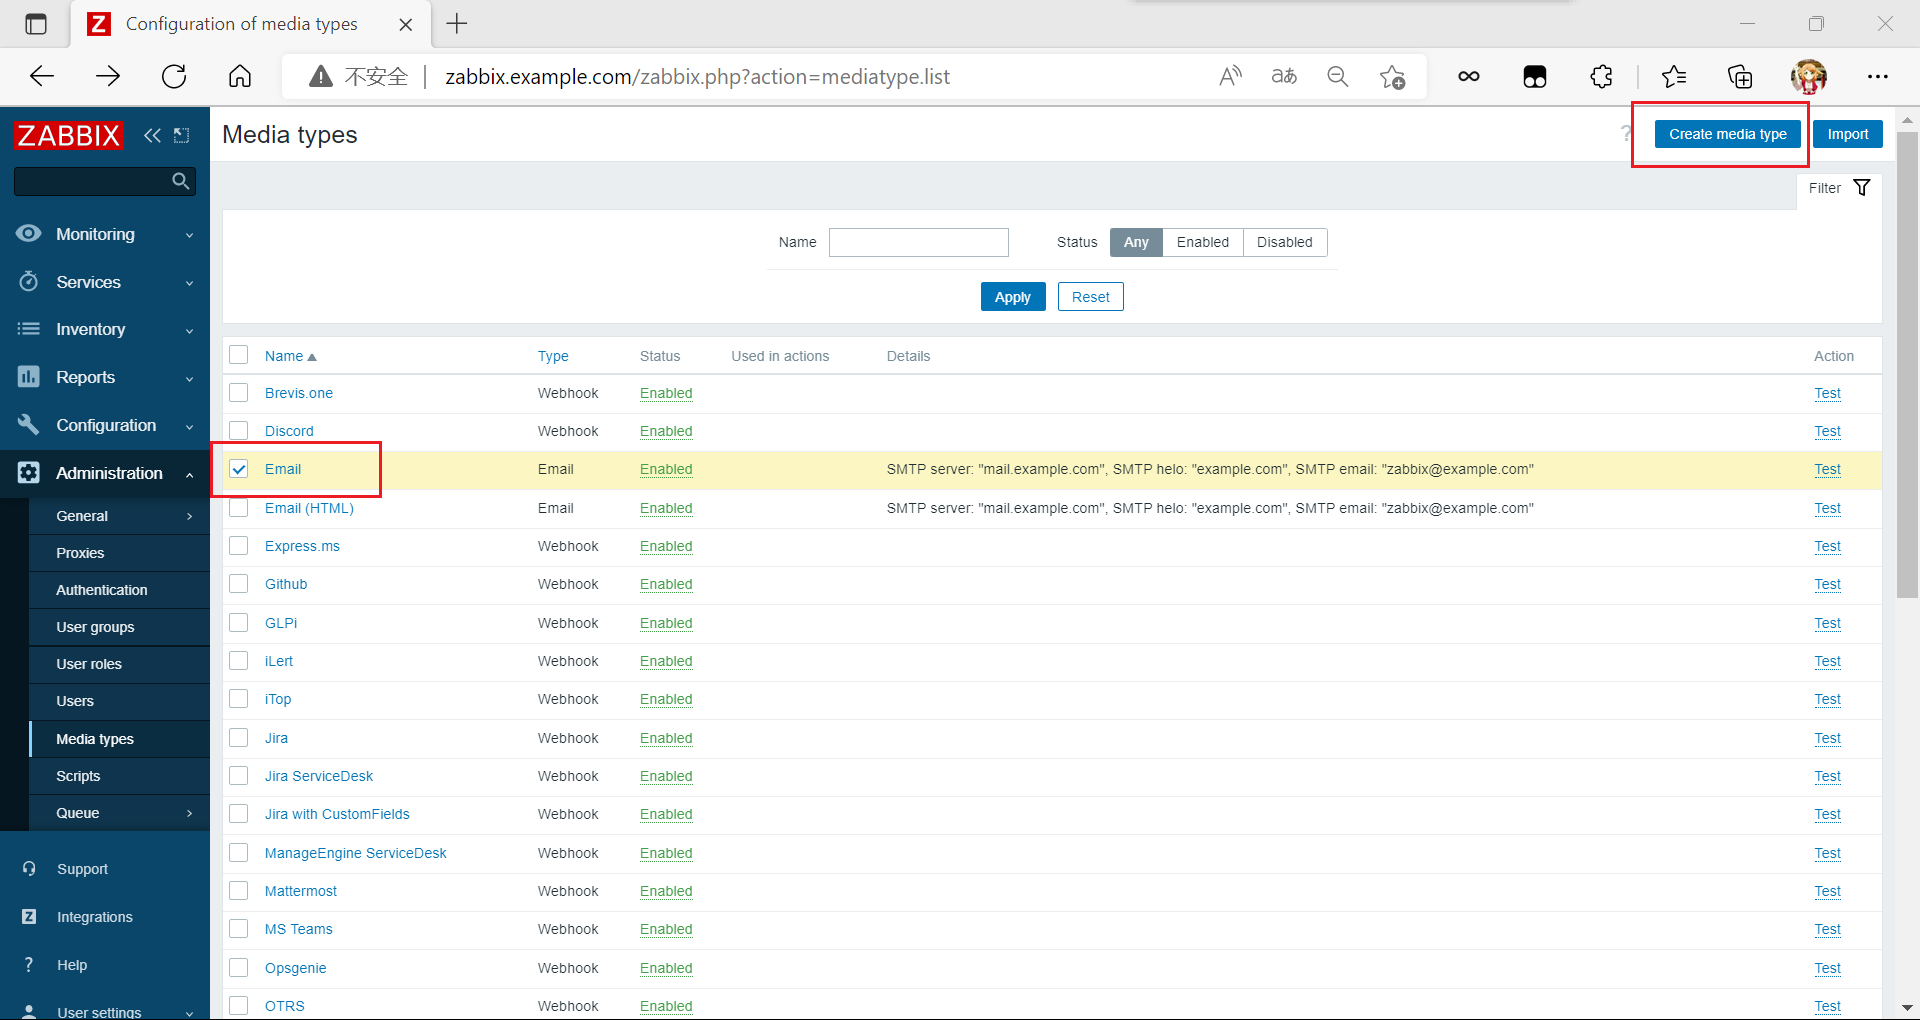
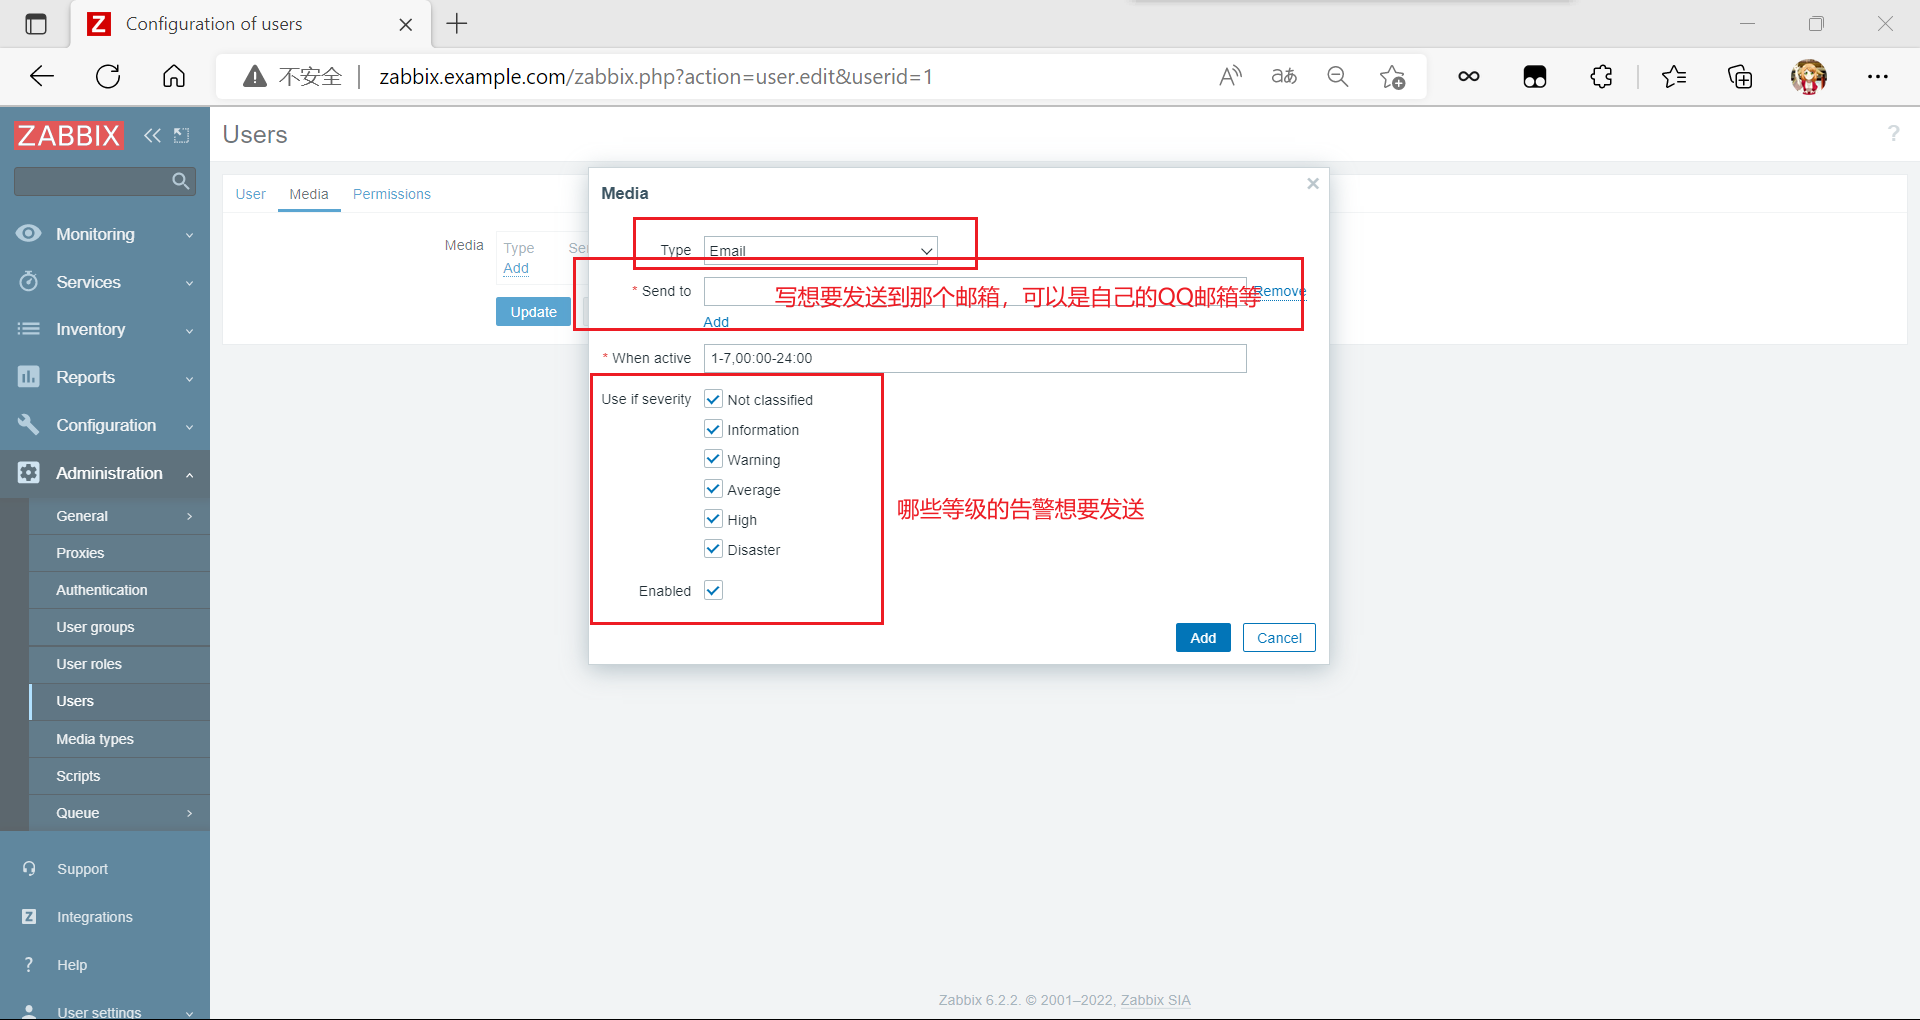
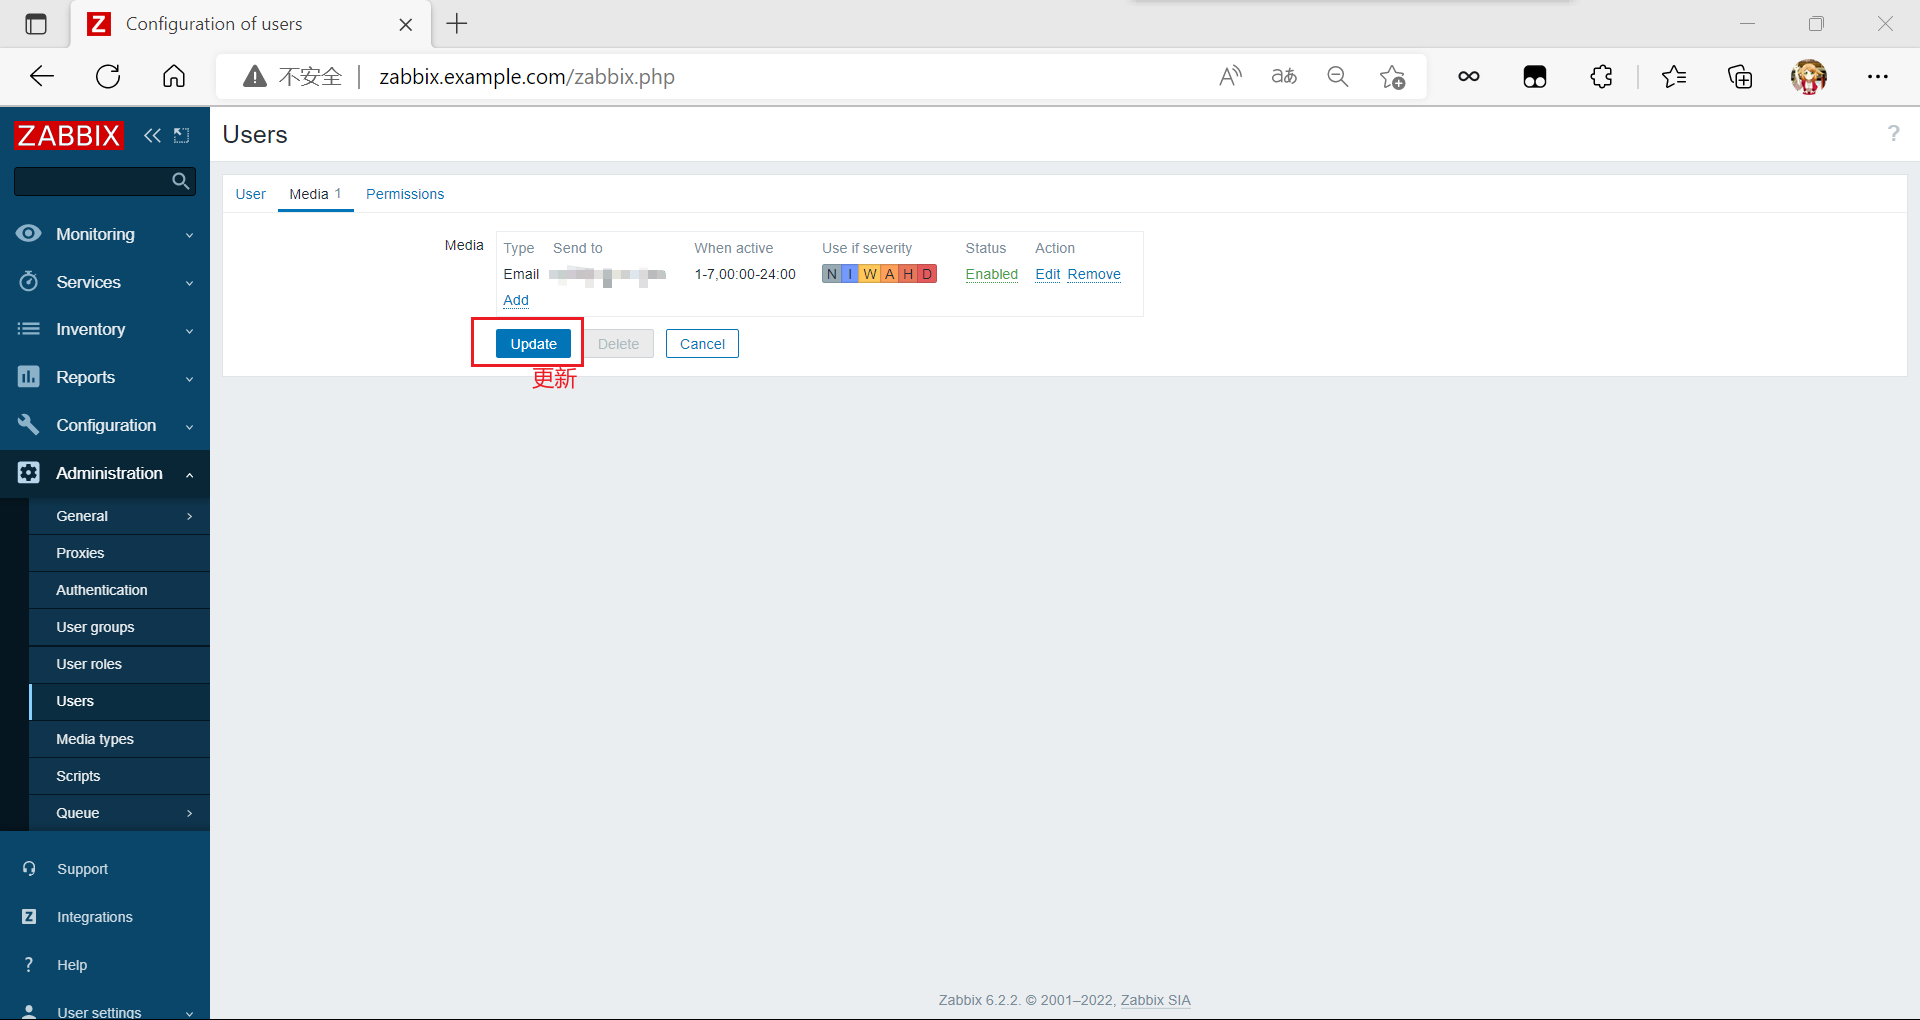
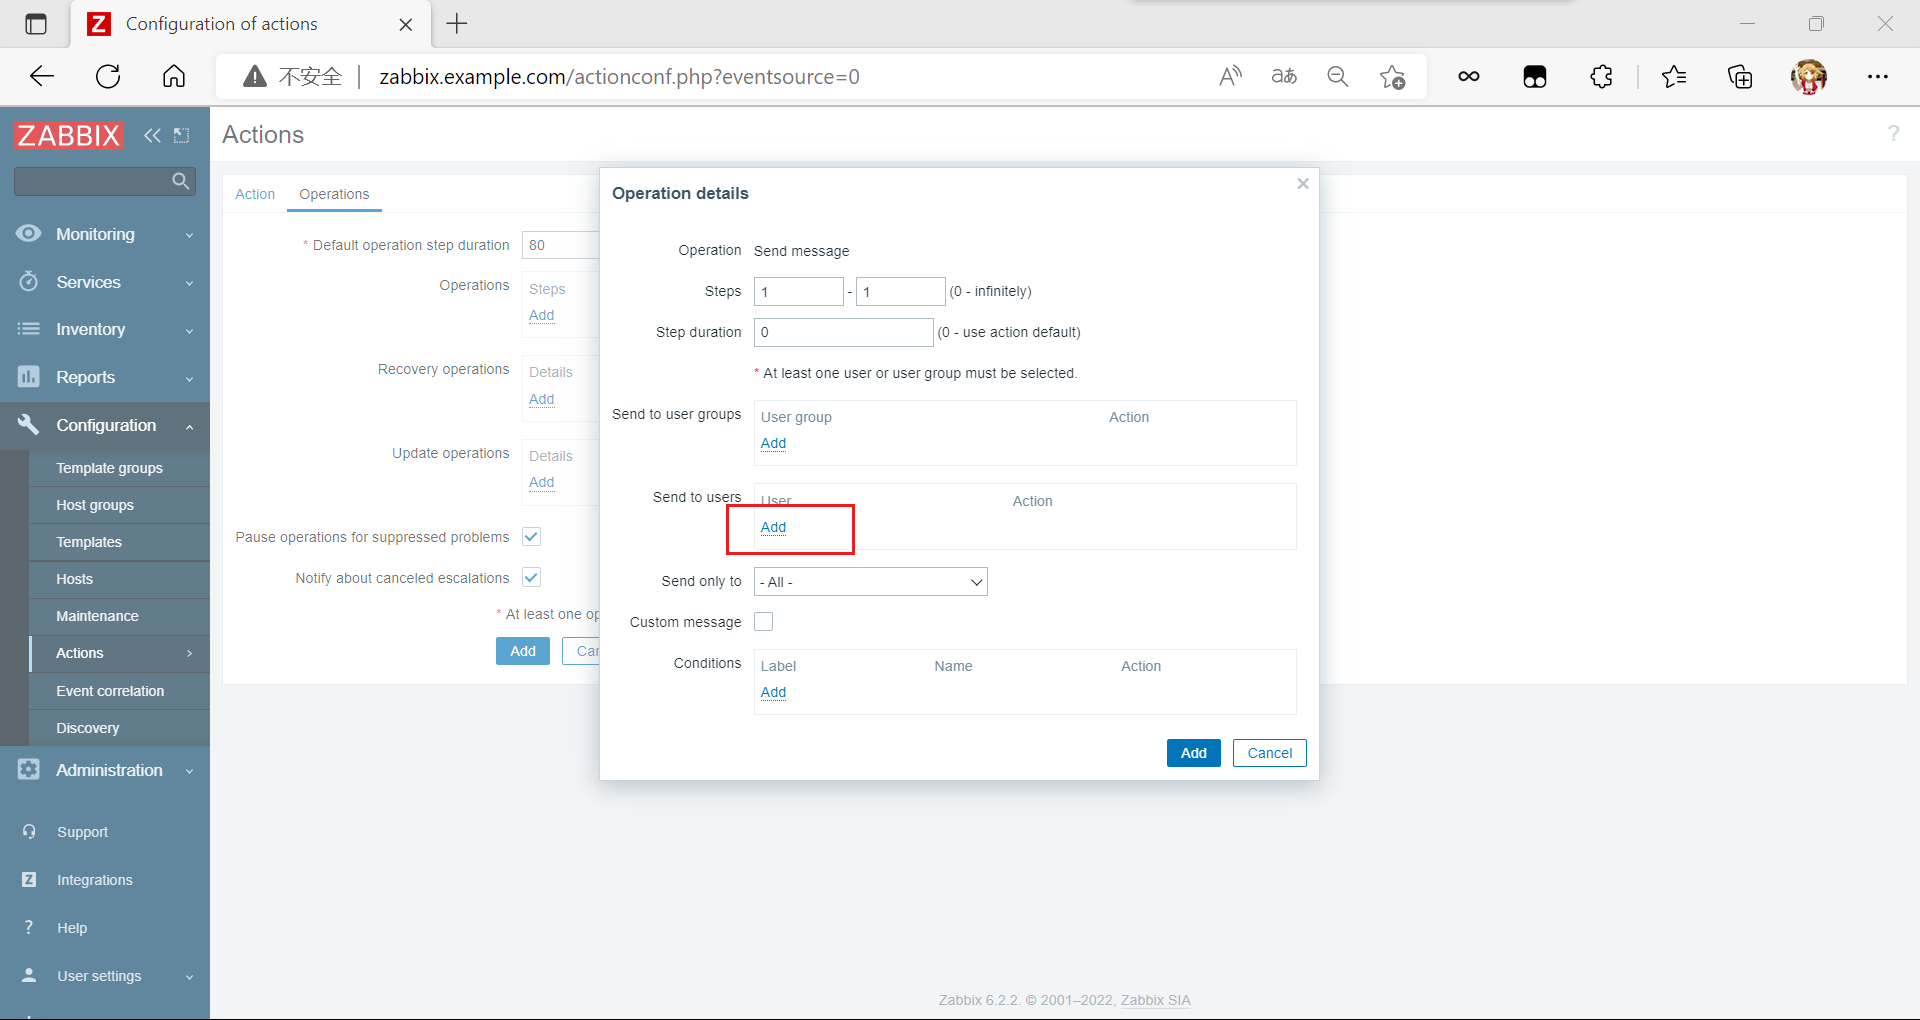
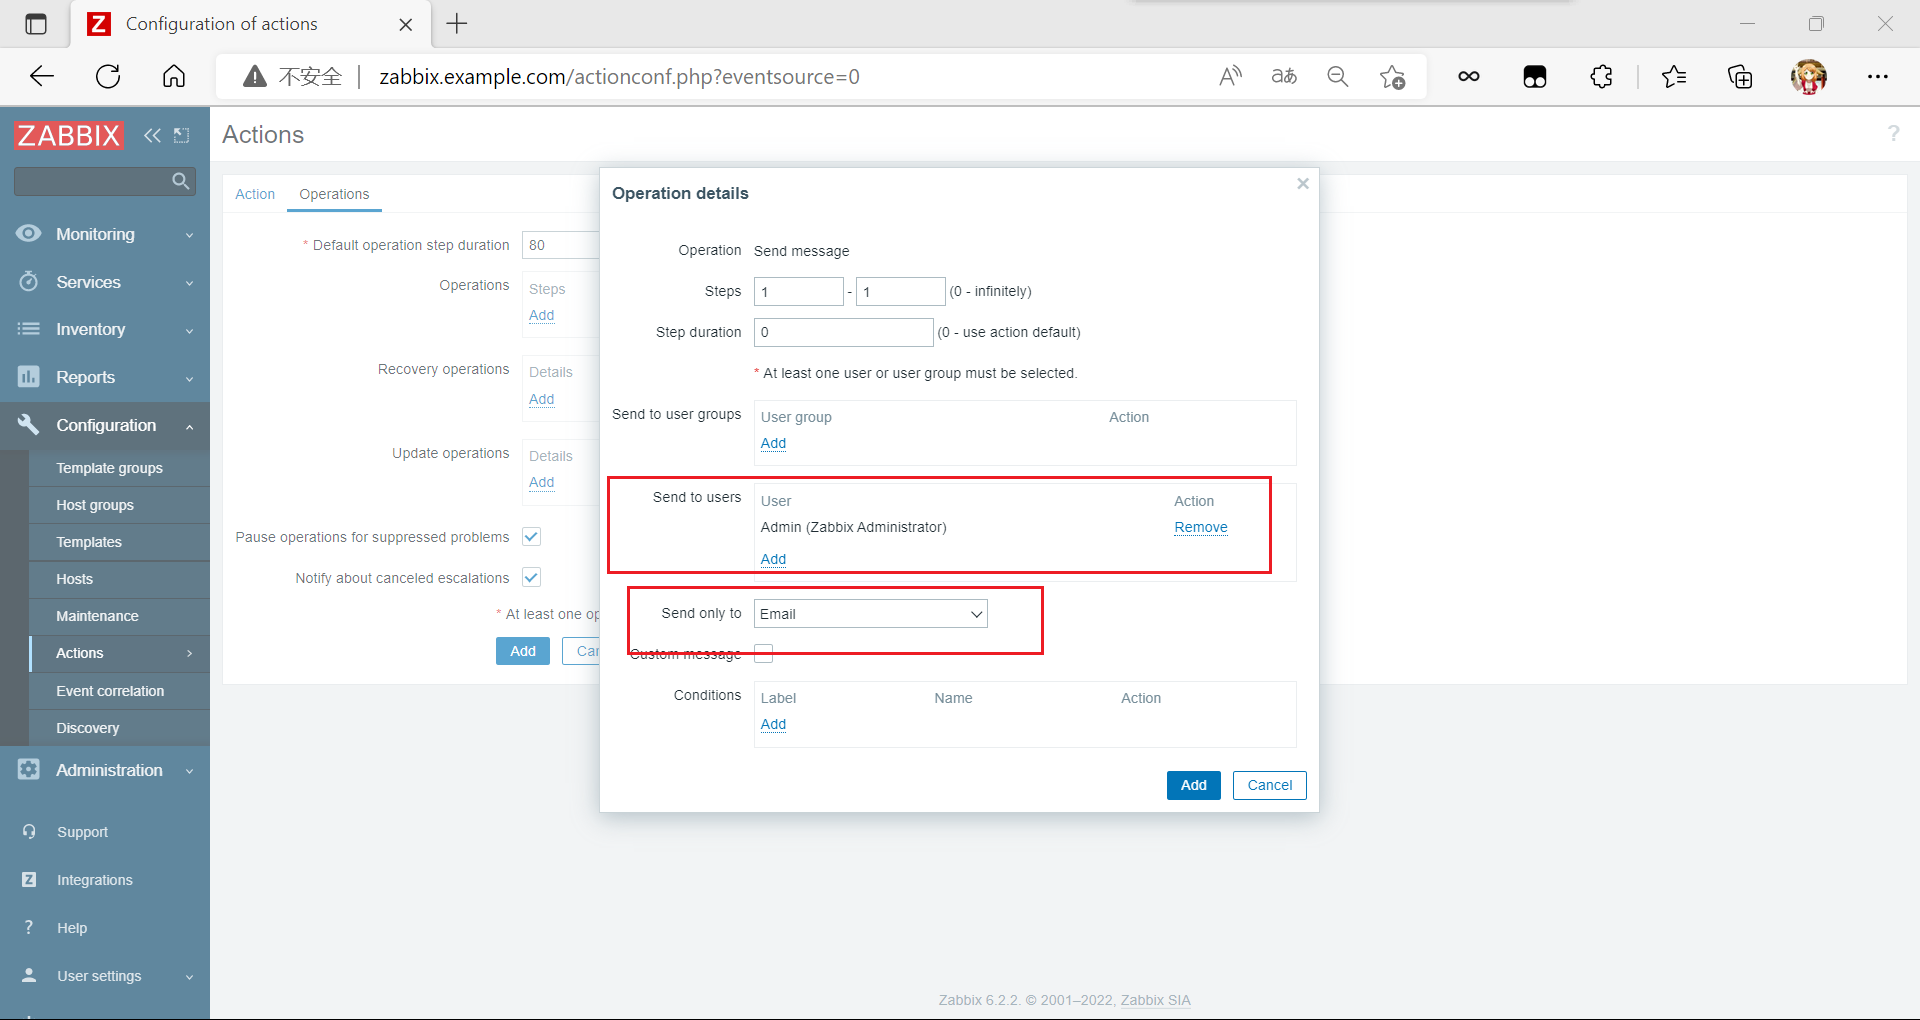
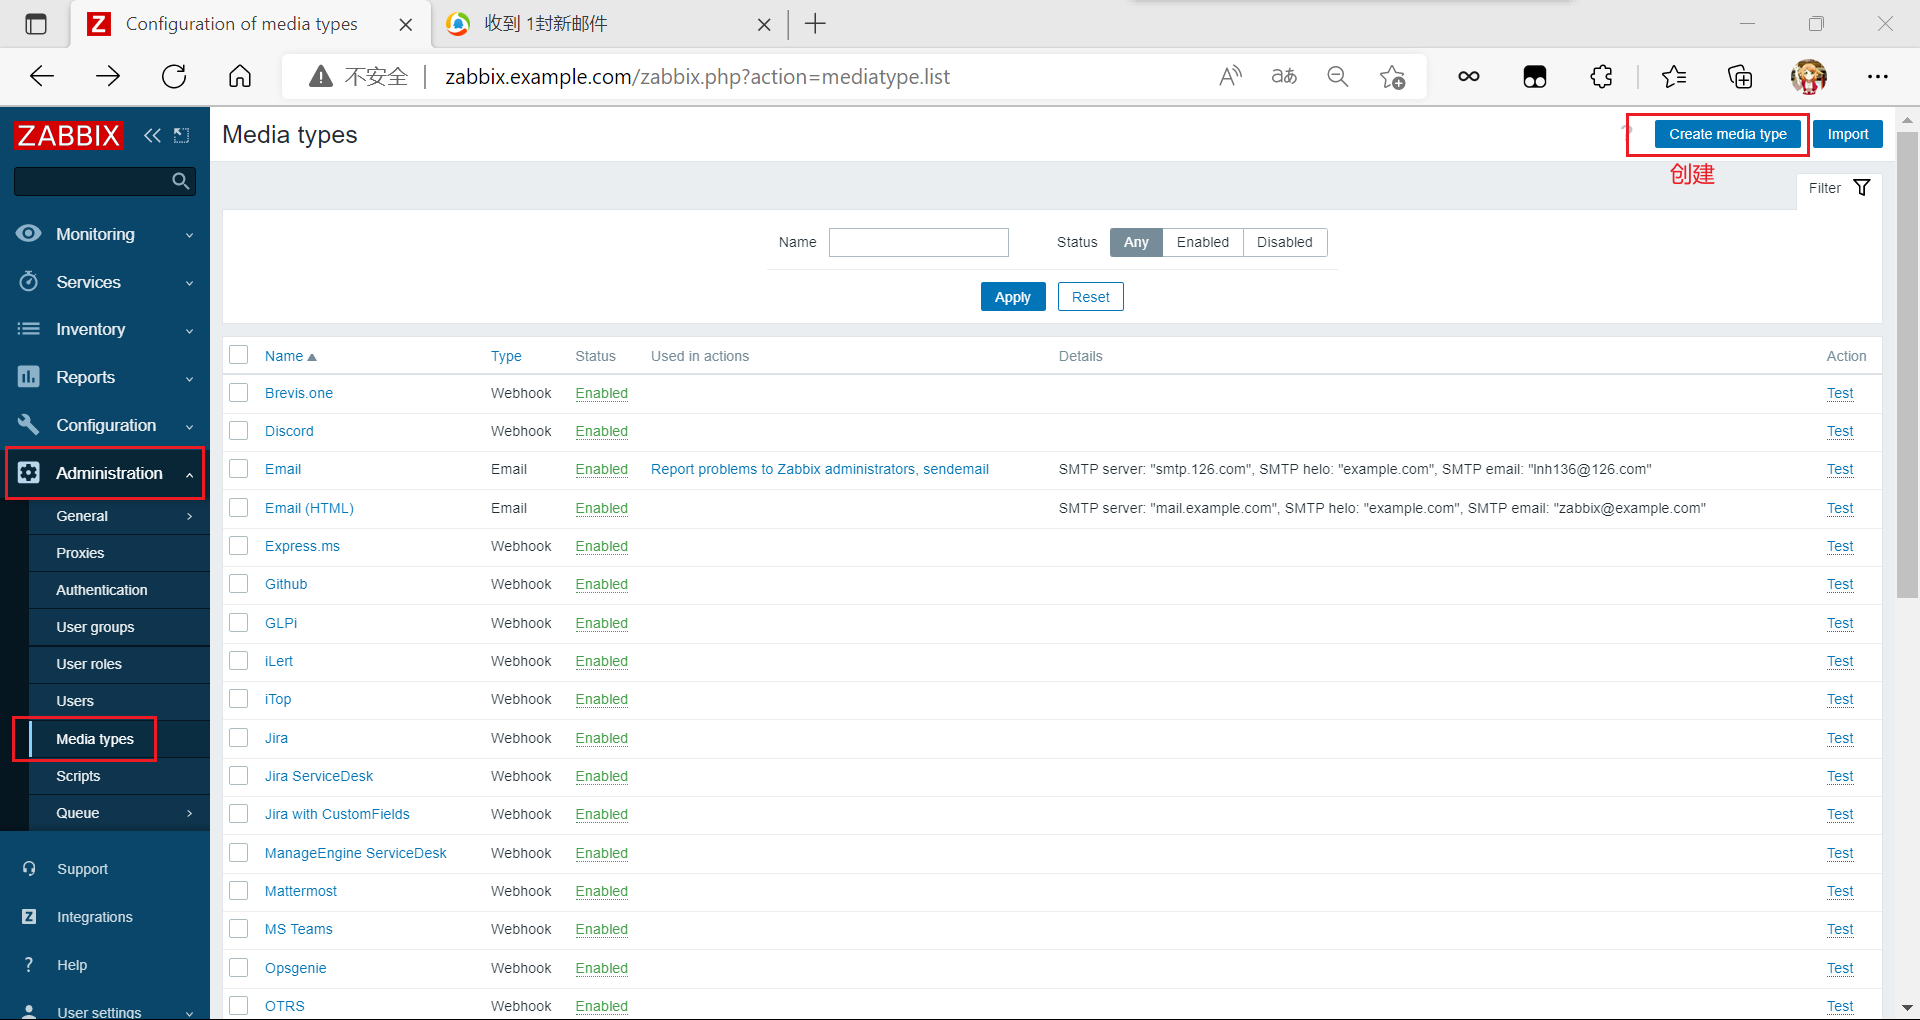
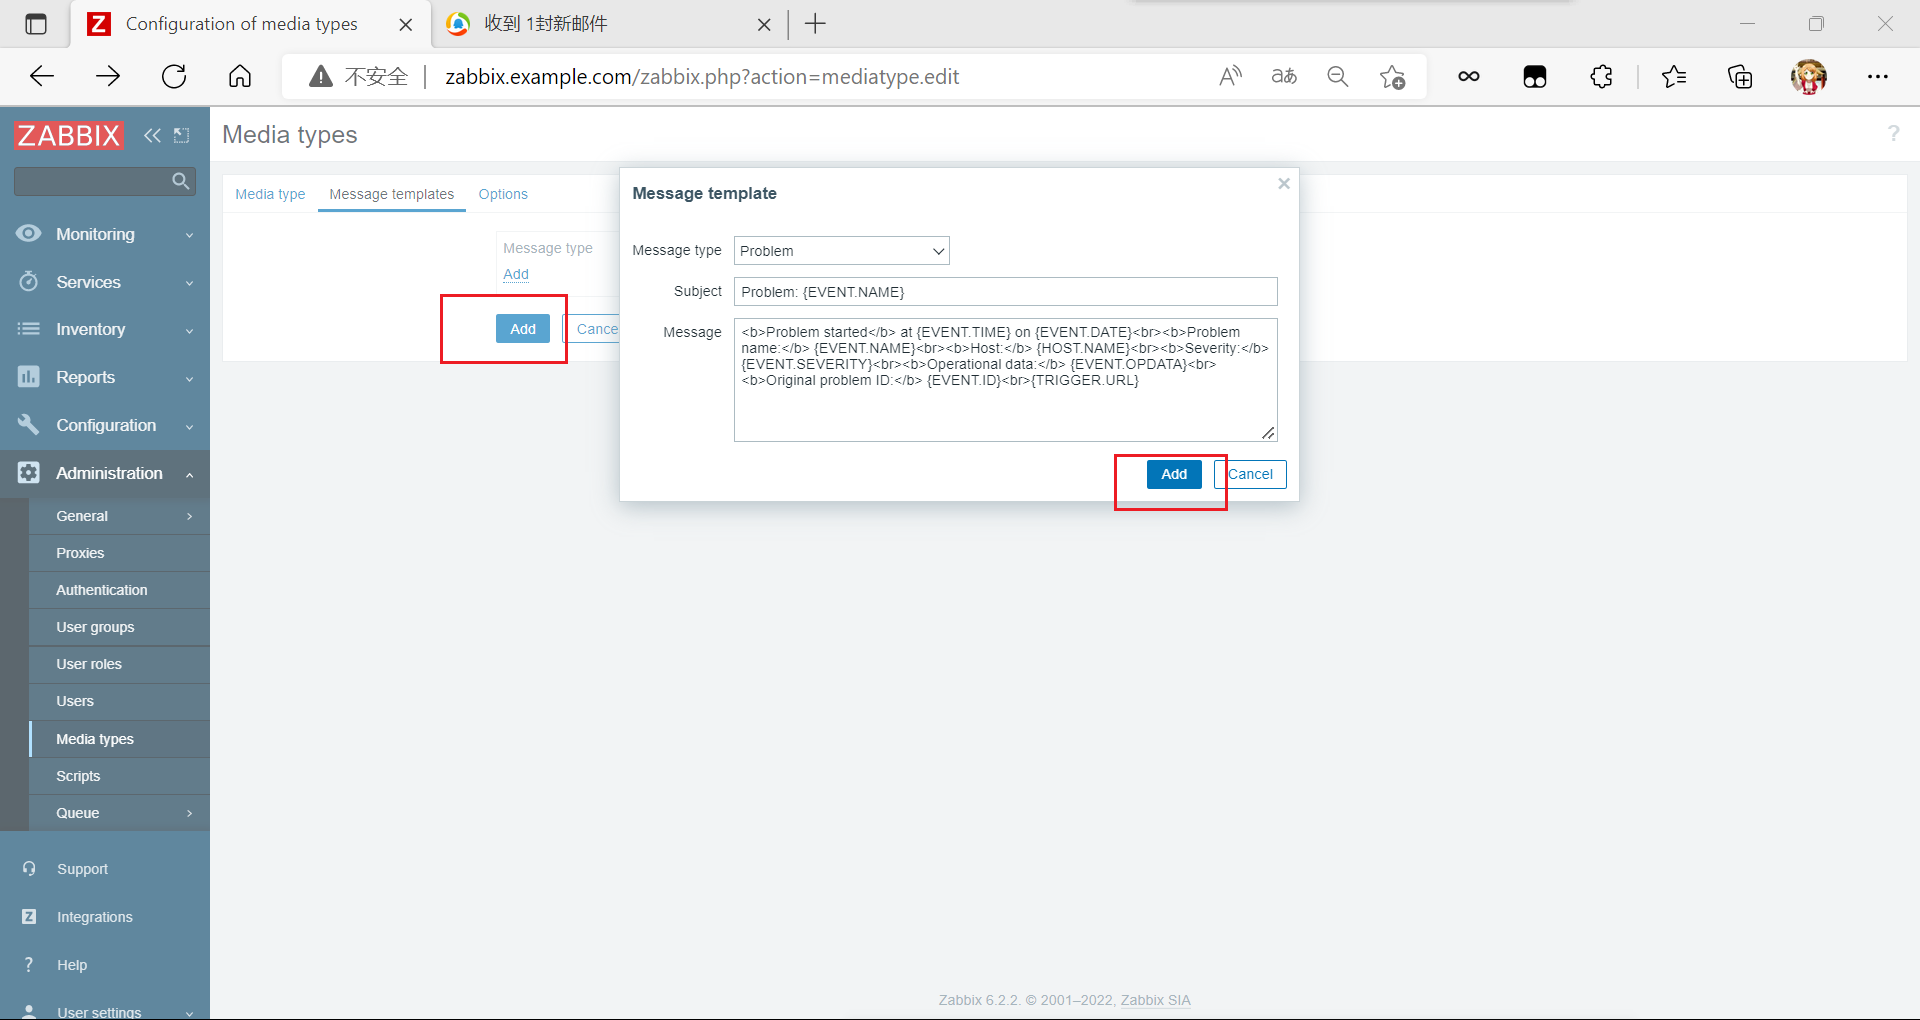
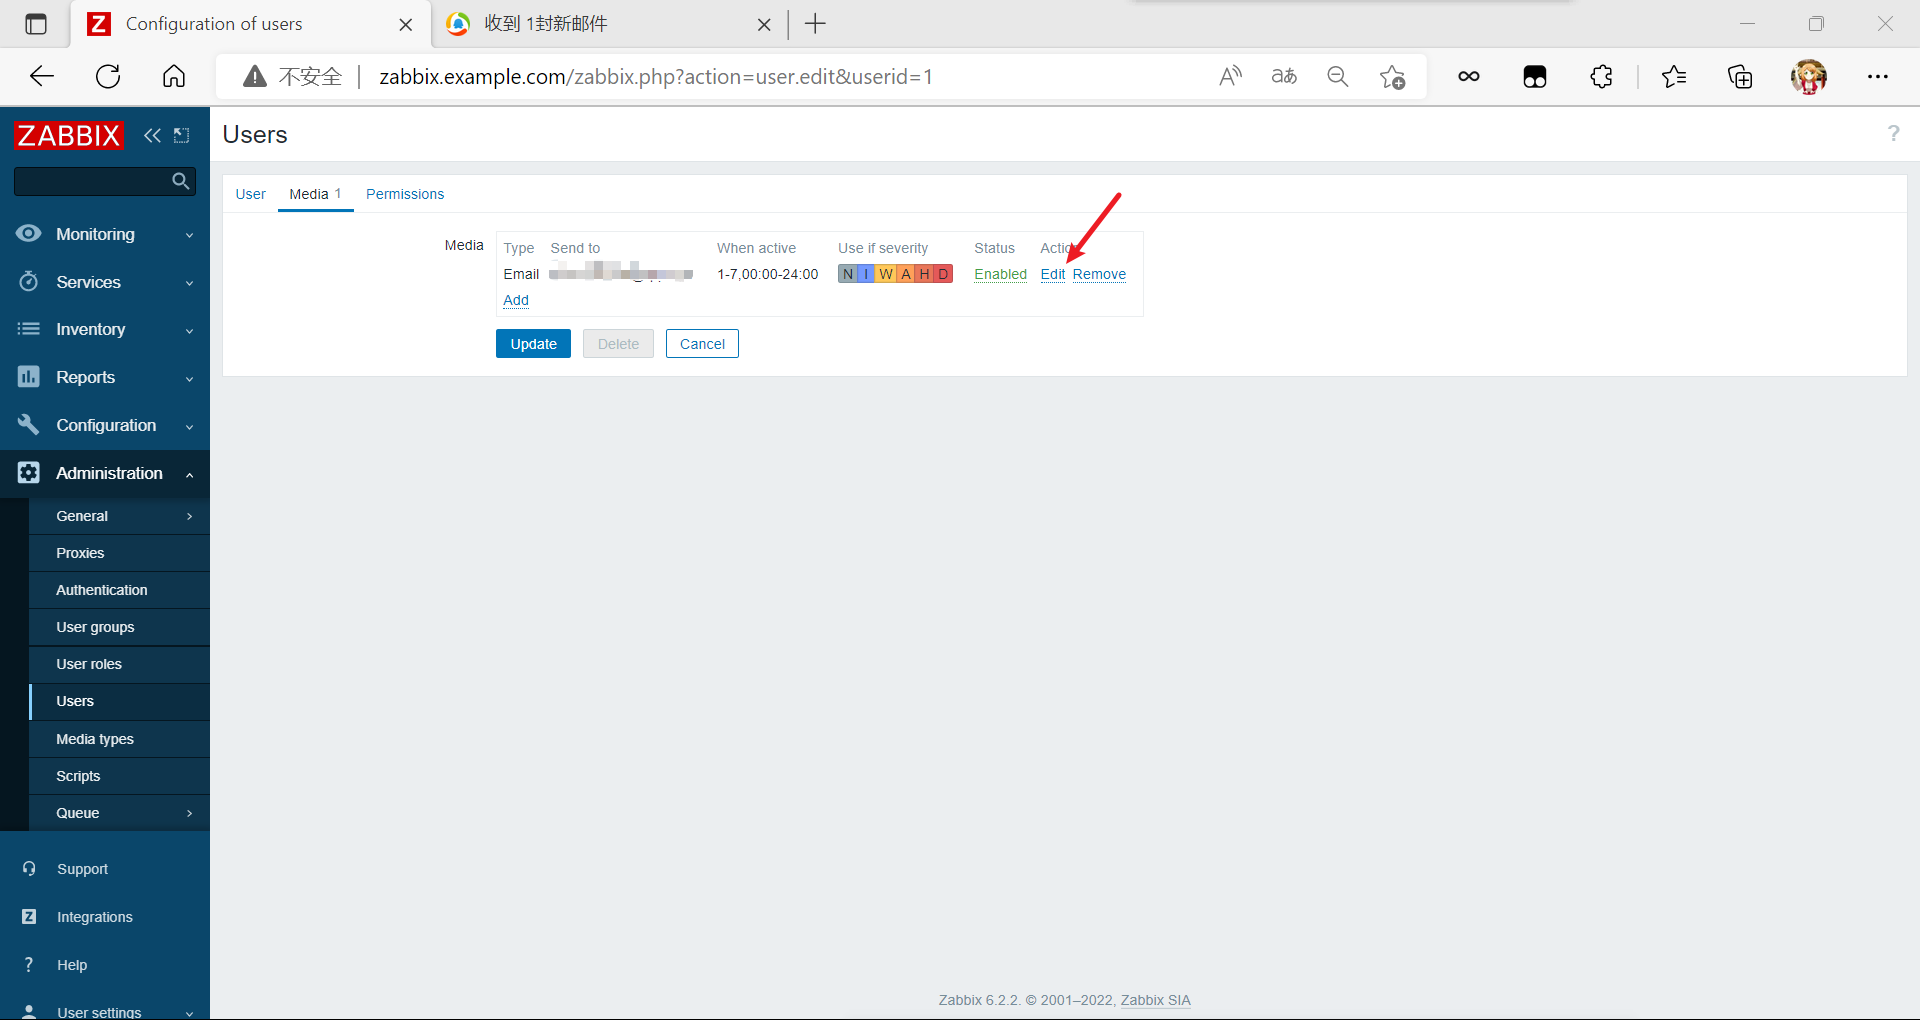
添加媒介(email方式)
如果要实现邮箱告警,则需要添加媒体。
[En]
If you want to achieve mailbox alarm, you need to add media.
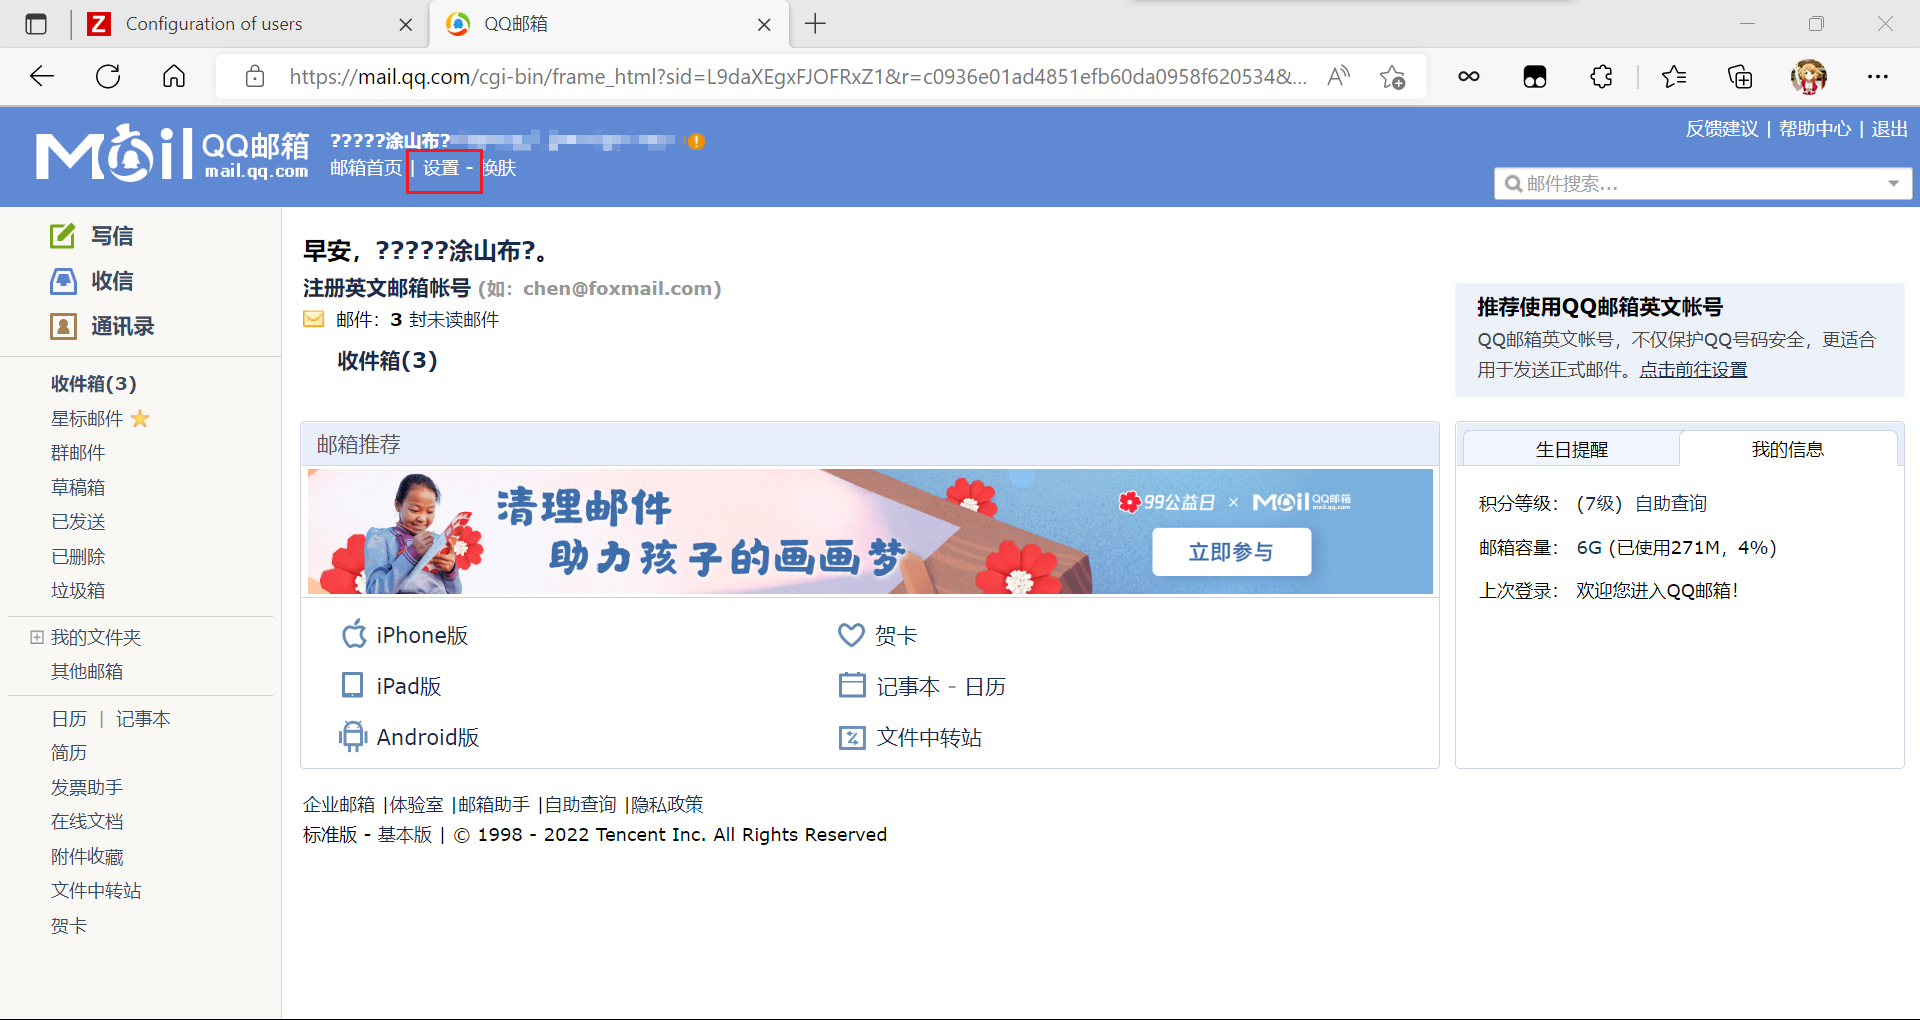
这里用网易126邮箱作为演示:
设置——常规设置

BCKKTNWDZOMCXJOS
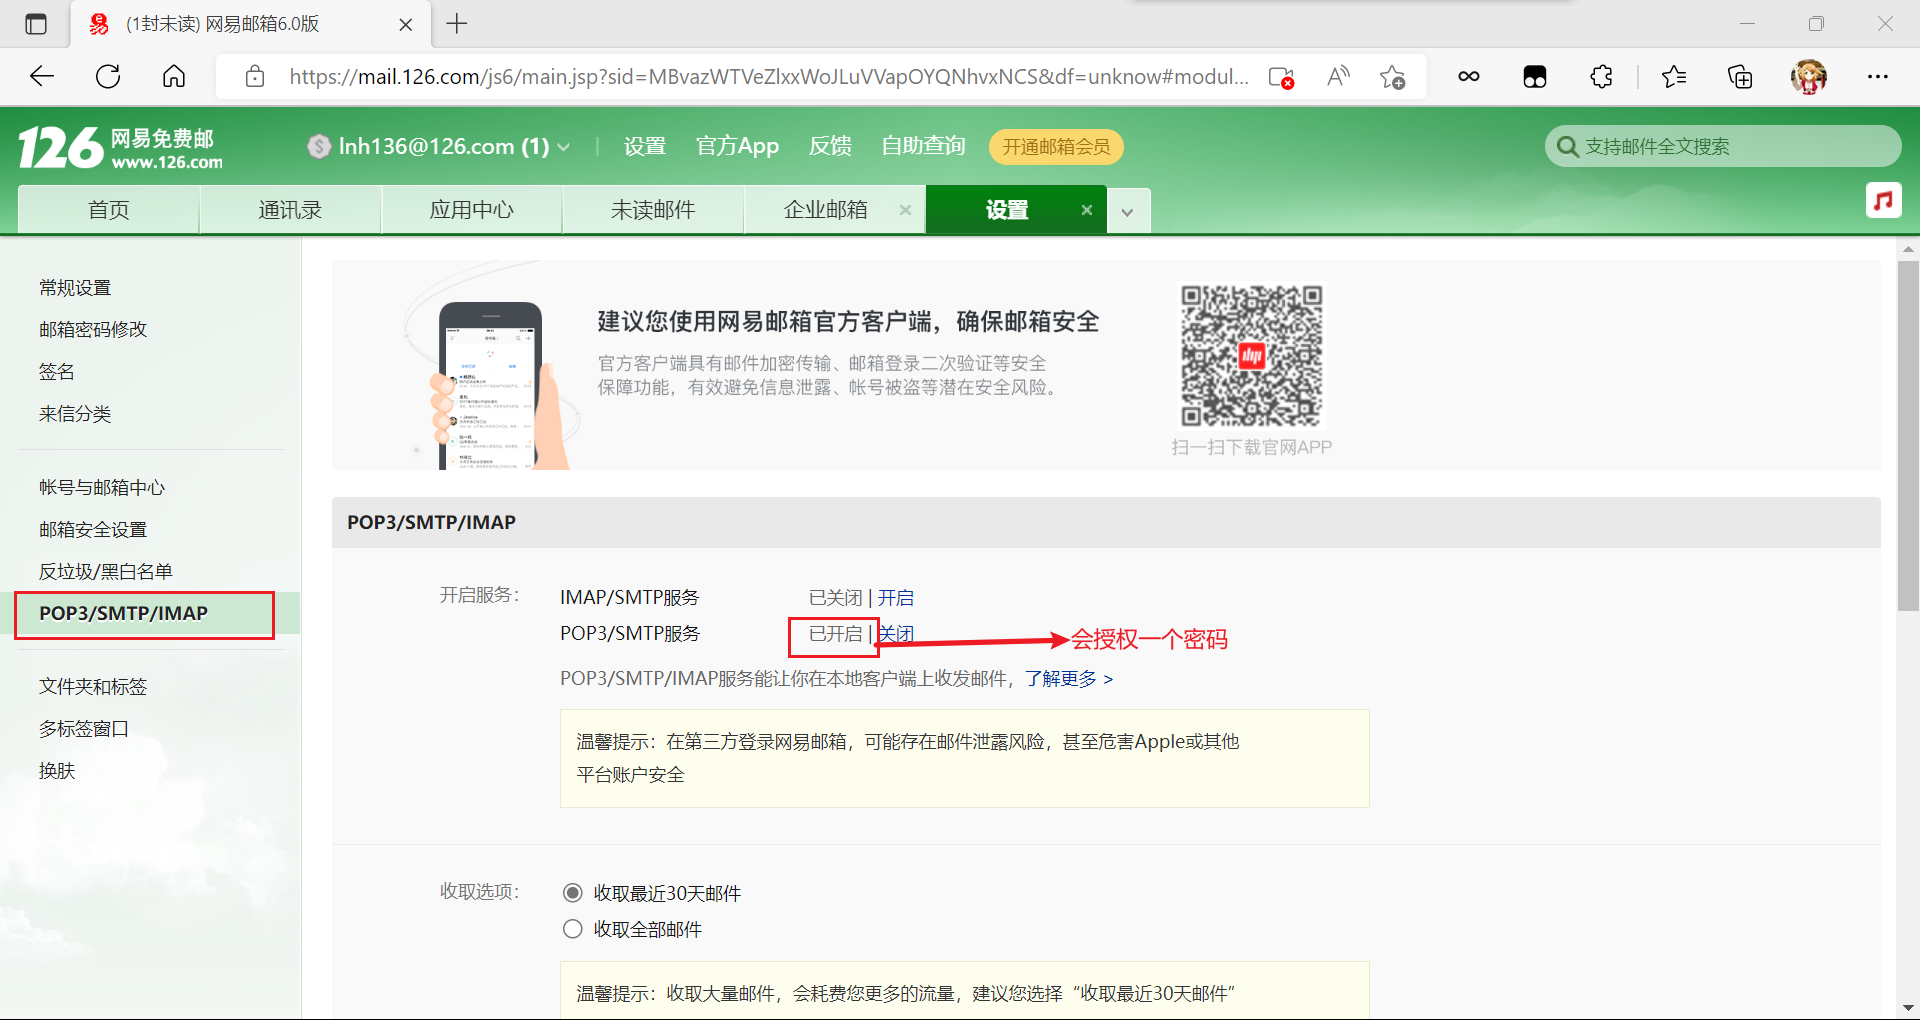
打开后,您将获得授权密码,该密码将被保存,稍后将使用。
[En]
After opening it, you will get an authorization password, which will be saved and will be used later.
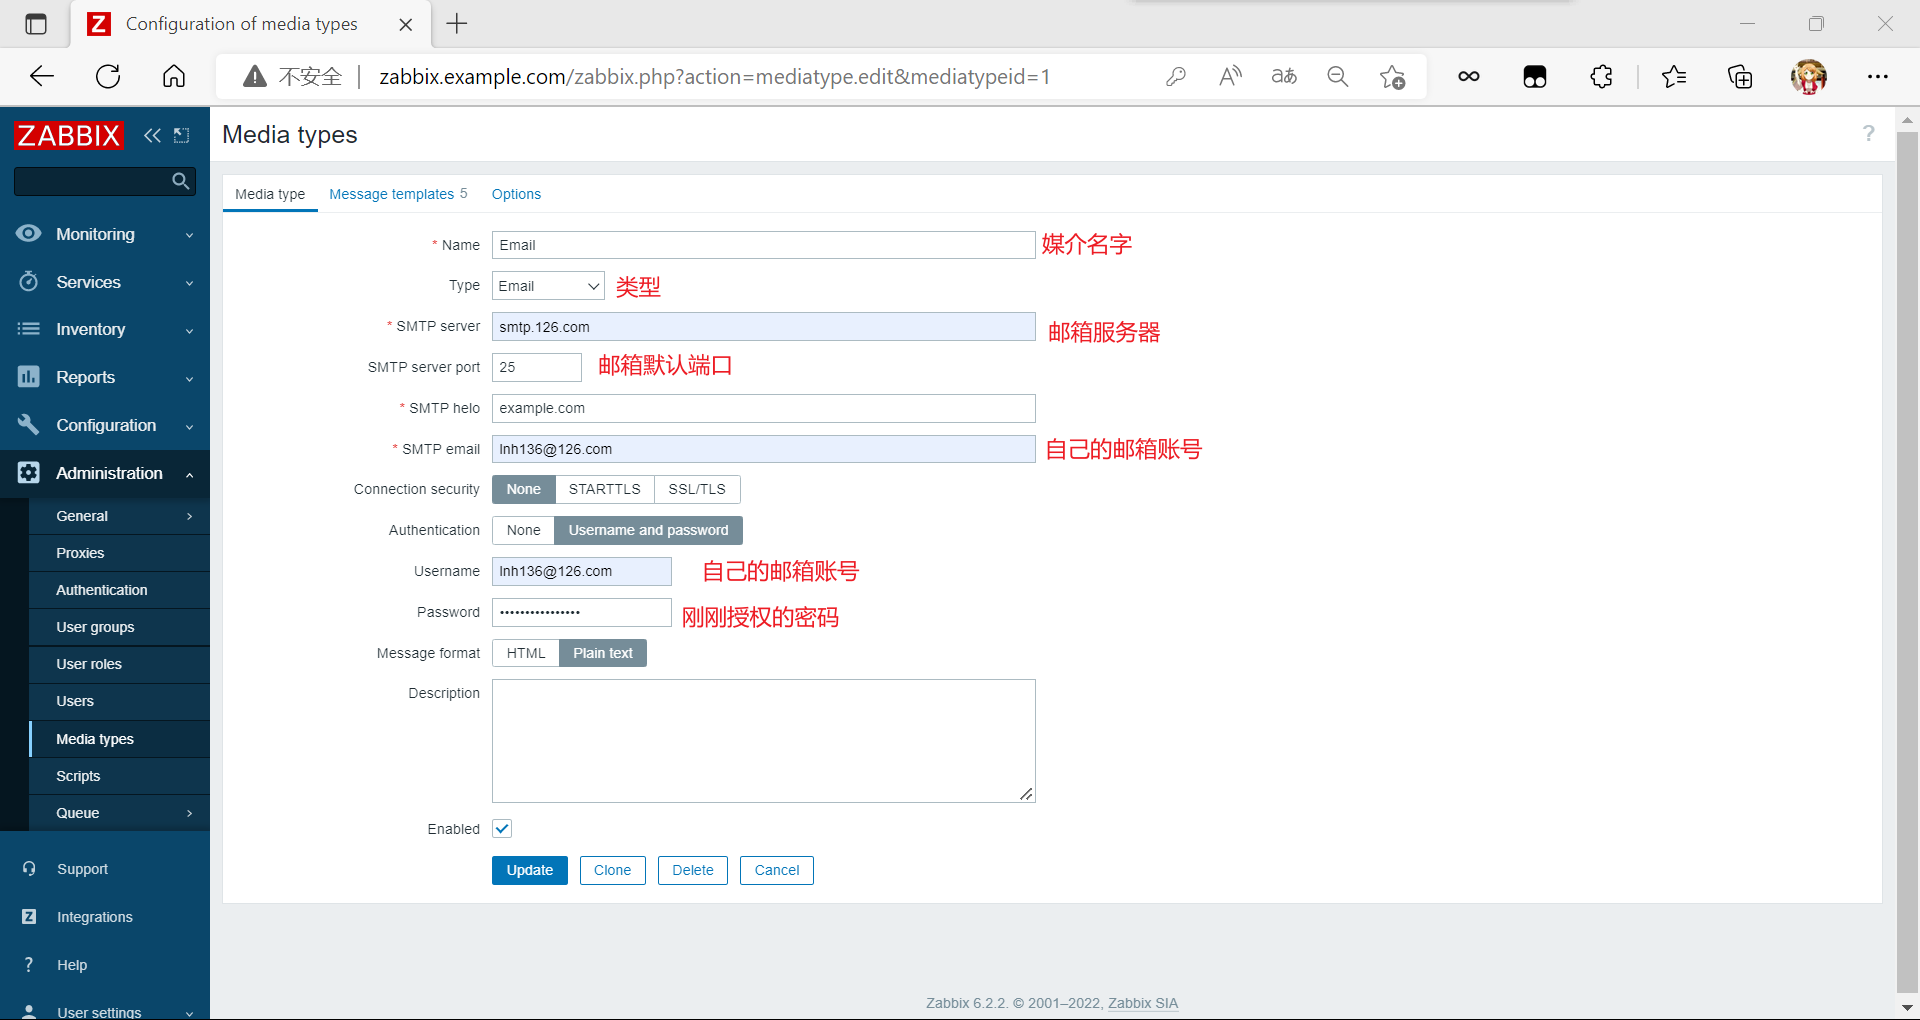
此媒体希望通过哪个用户发送邮件,以及发送给谁?
[En]
Through which user does this medium want to send mail, and to whom?


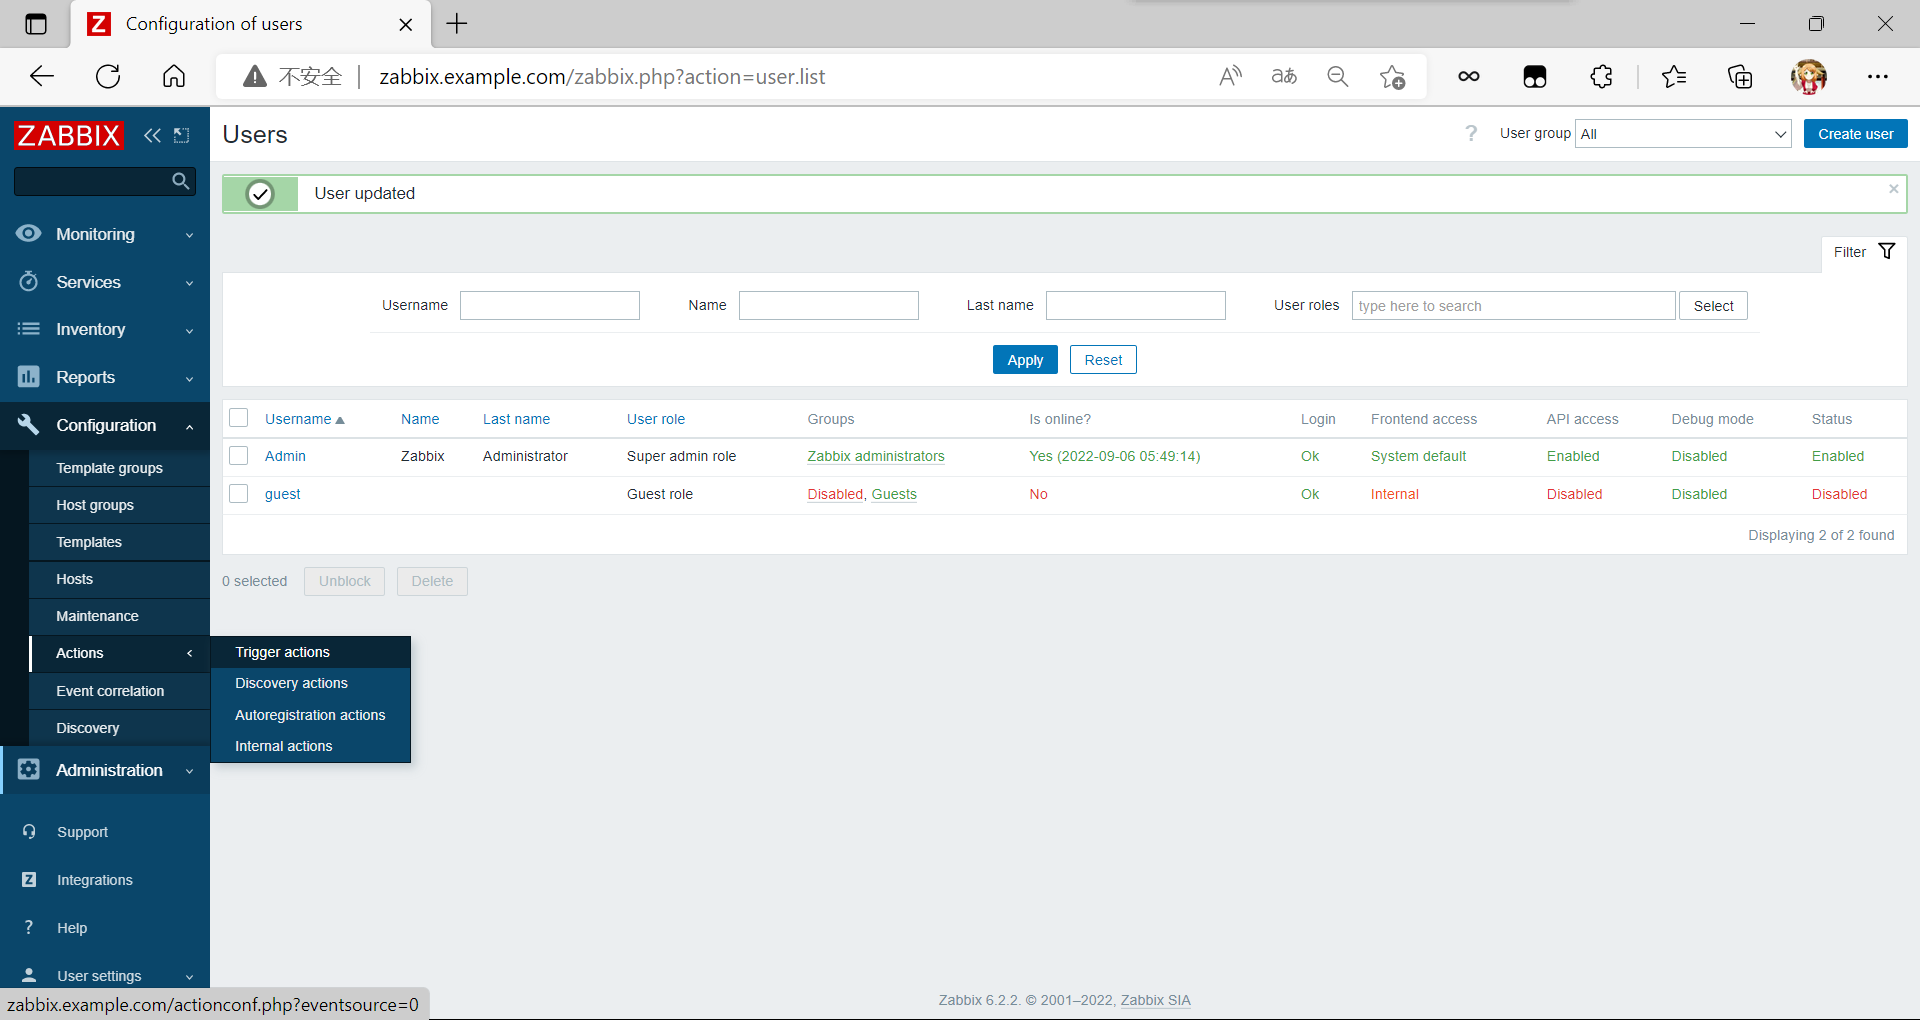
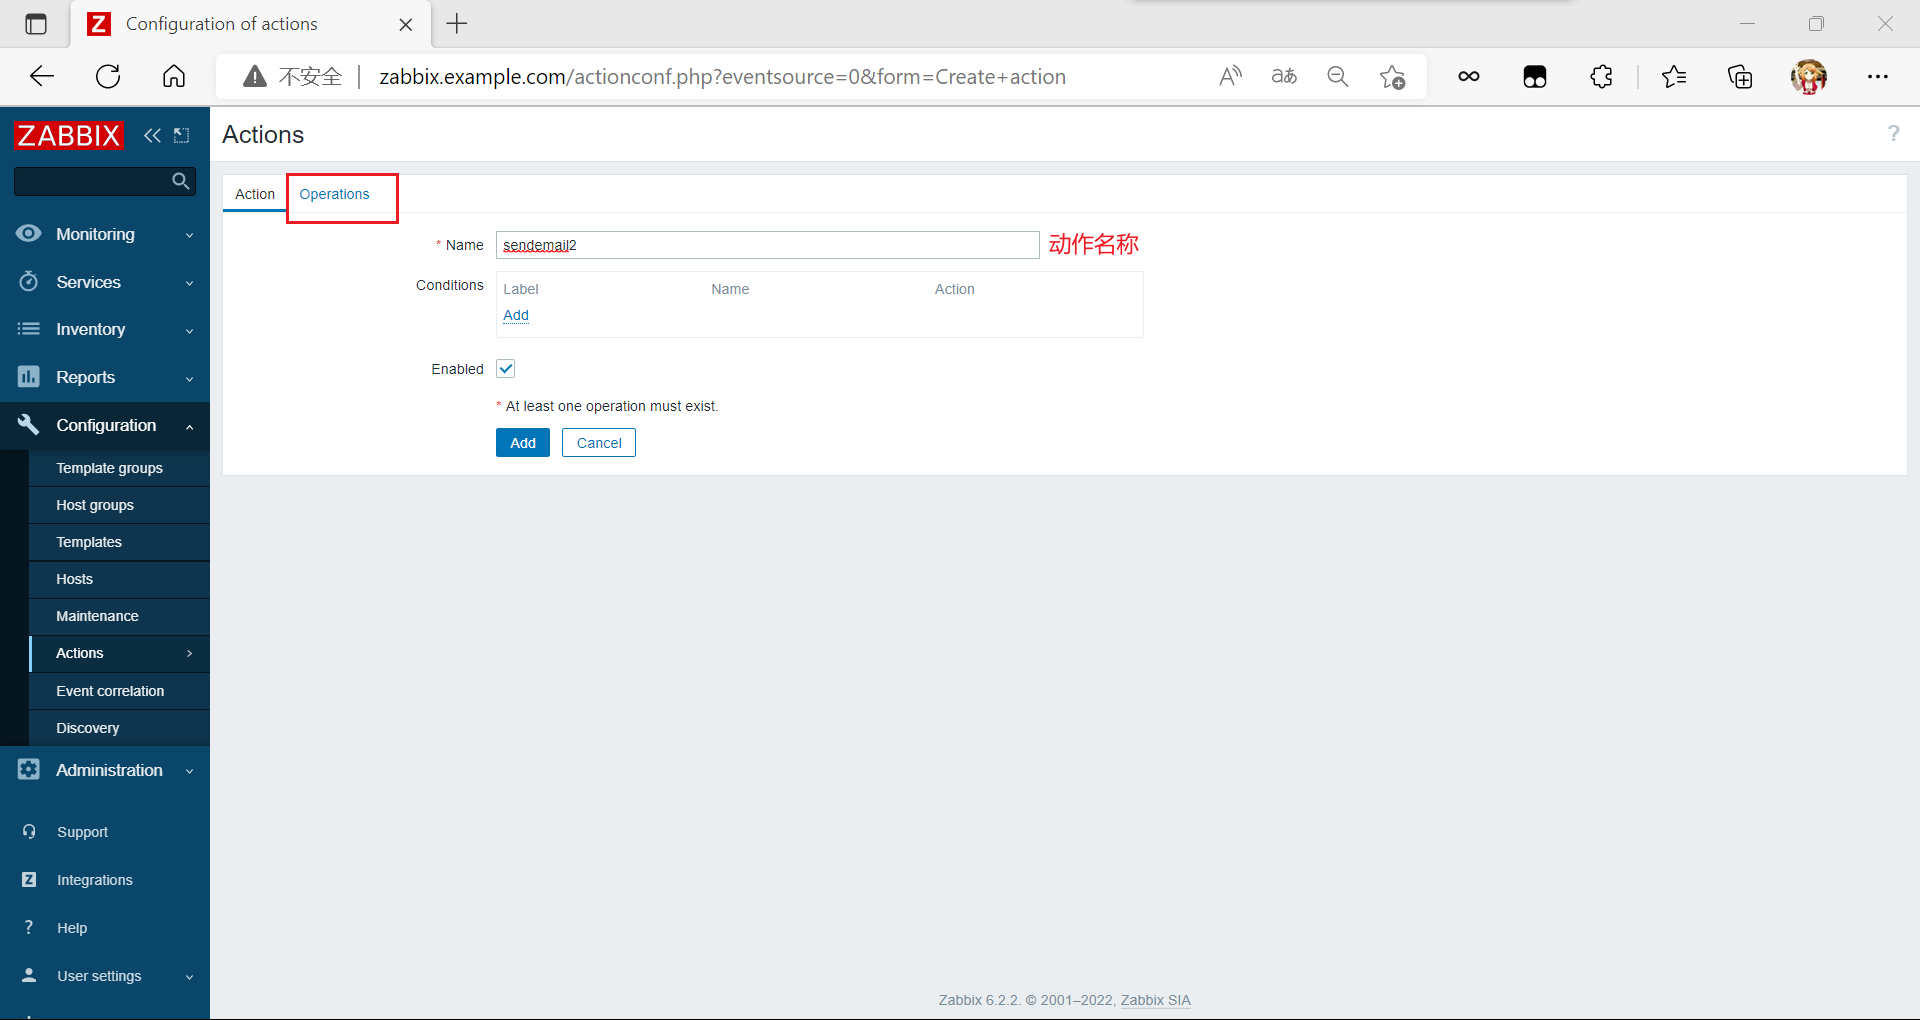
添加动作
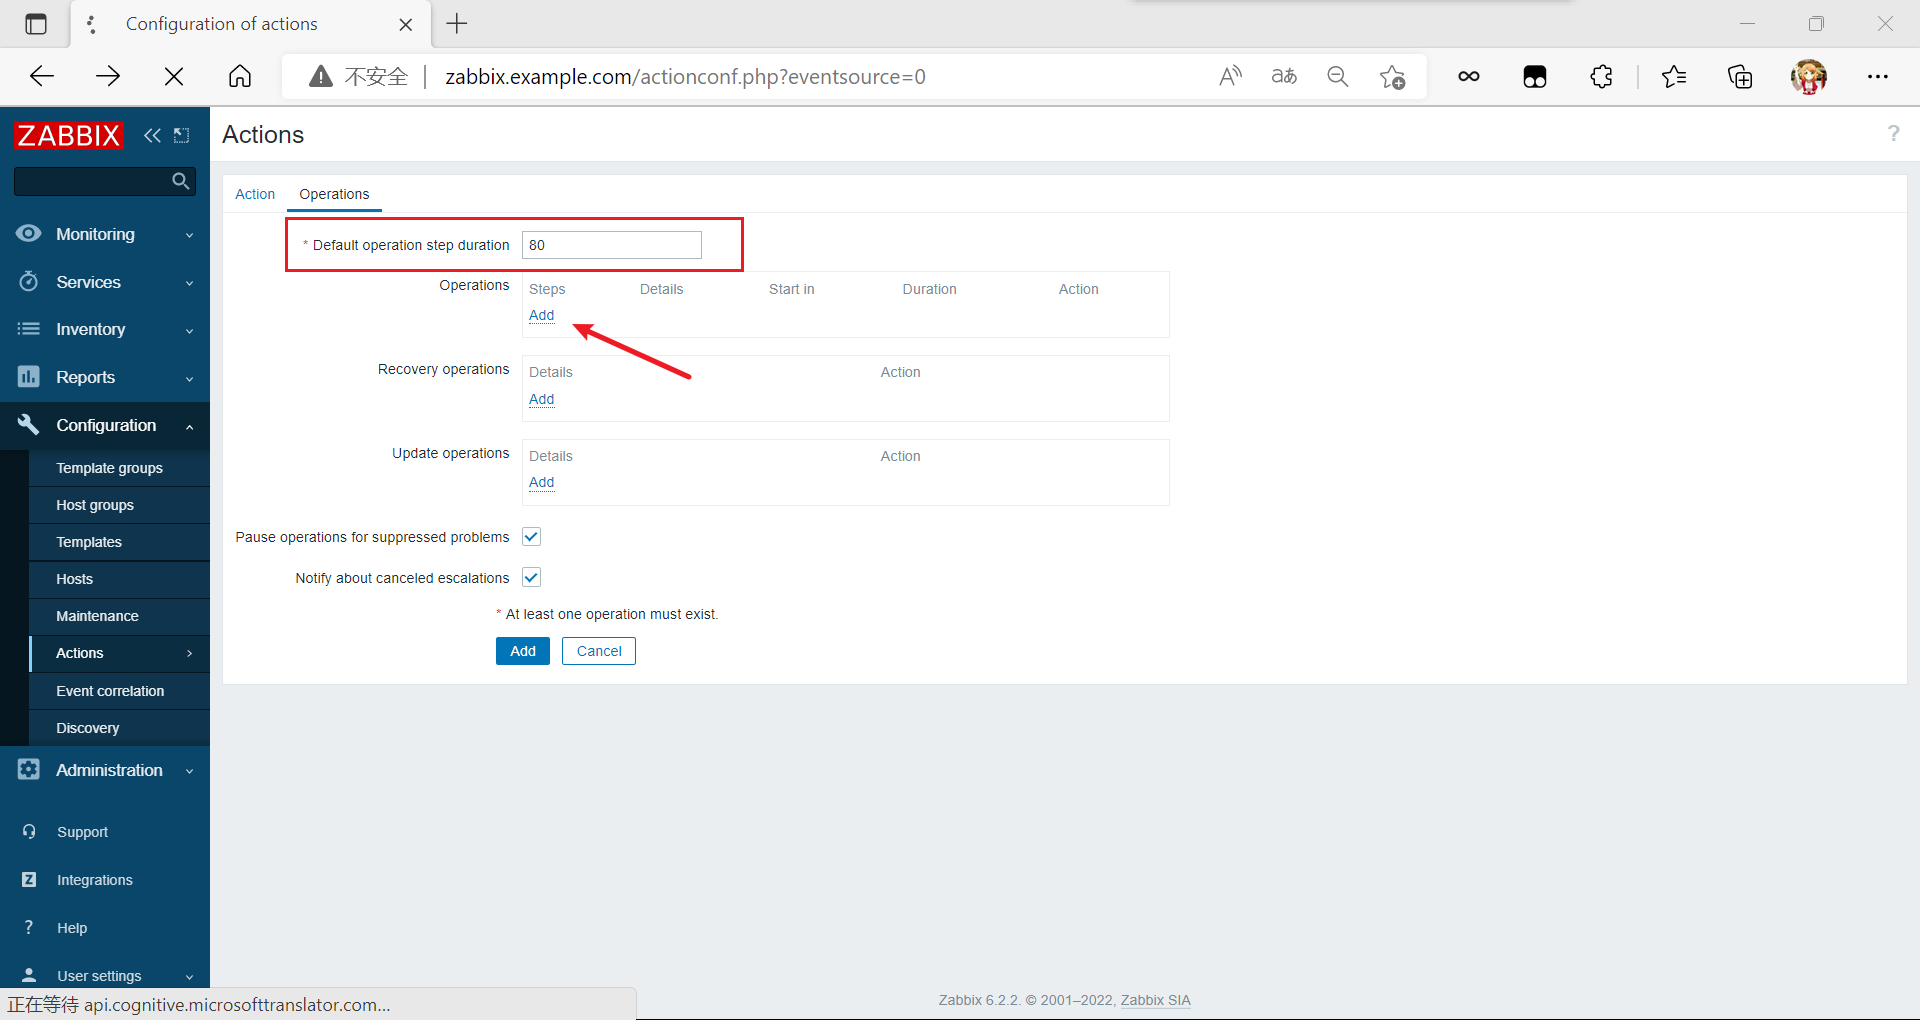


手动触发报警
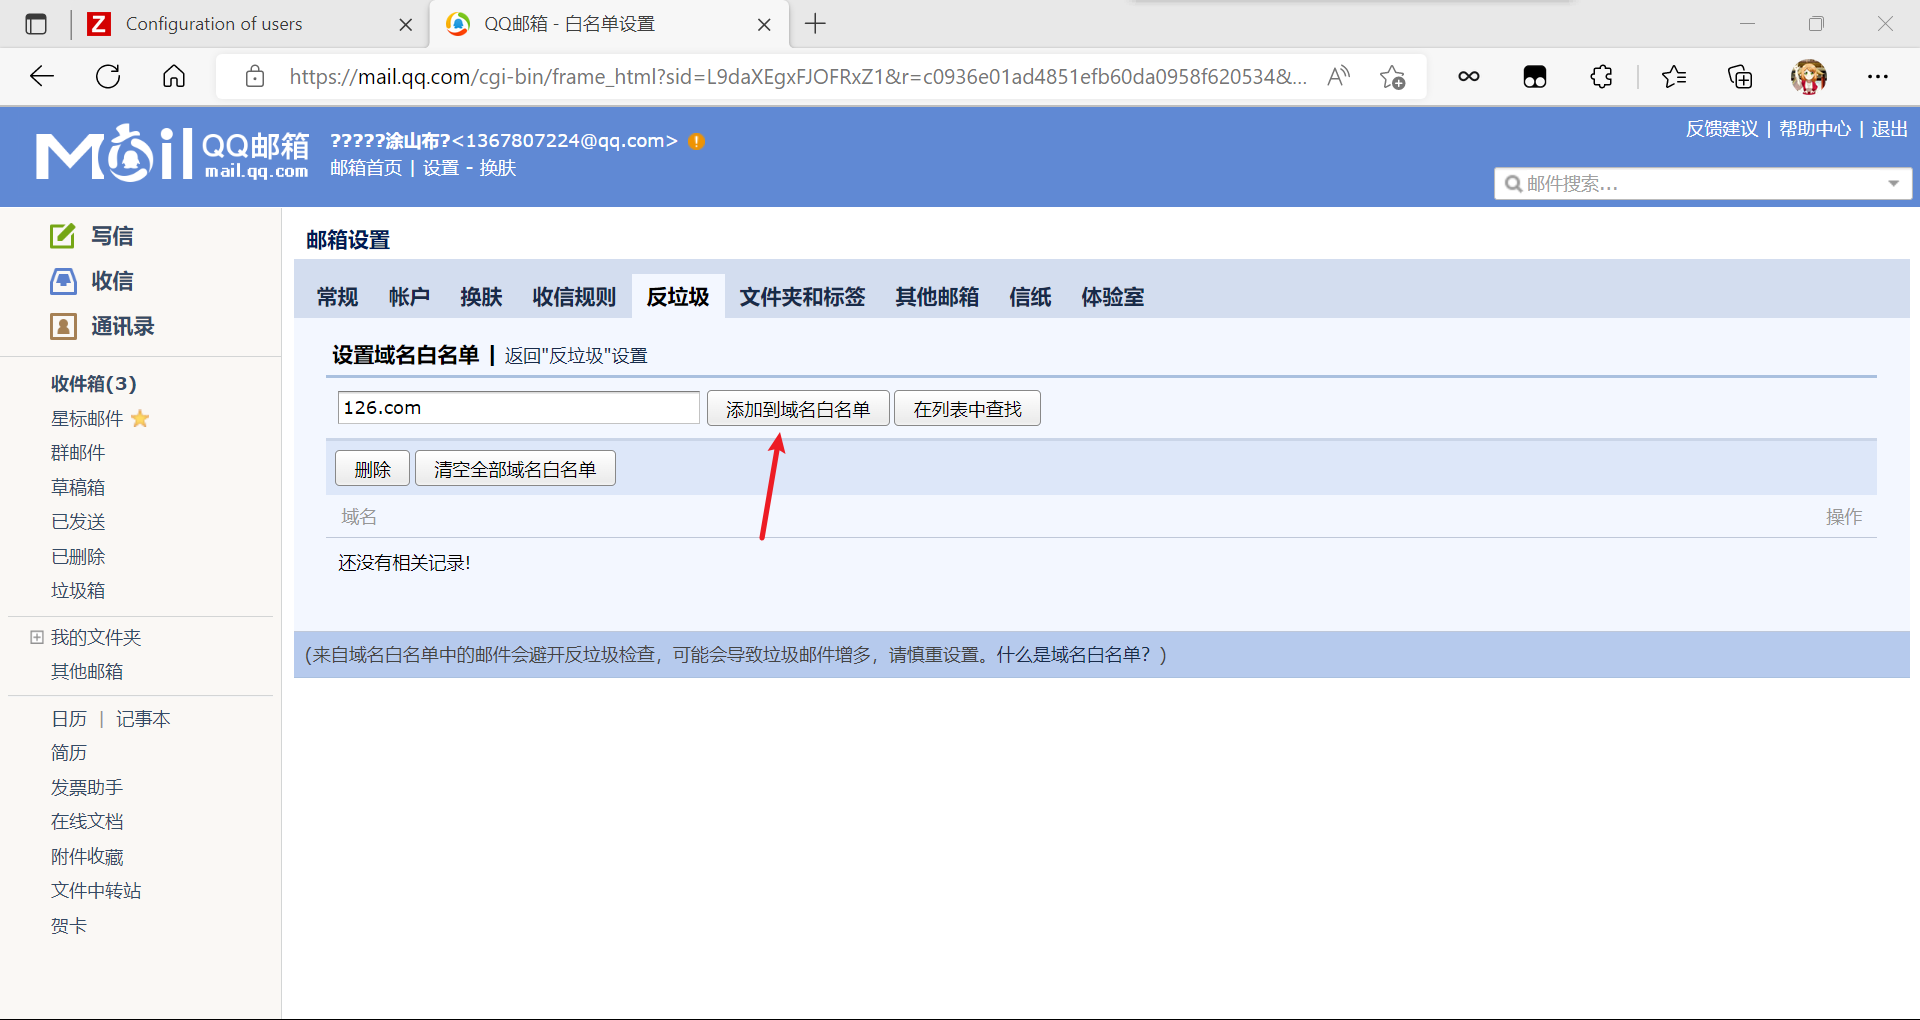
您需要在收件人邮箱中设置白名单后再进行验证,否则会被当作垃圾邮件拒绝。
[En]
You need to set up a whitelist in the recipient’s mailbox before verification, otherwise it will be rejected as spam.
设置——反垃圾
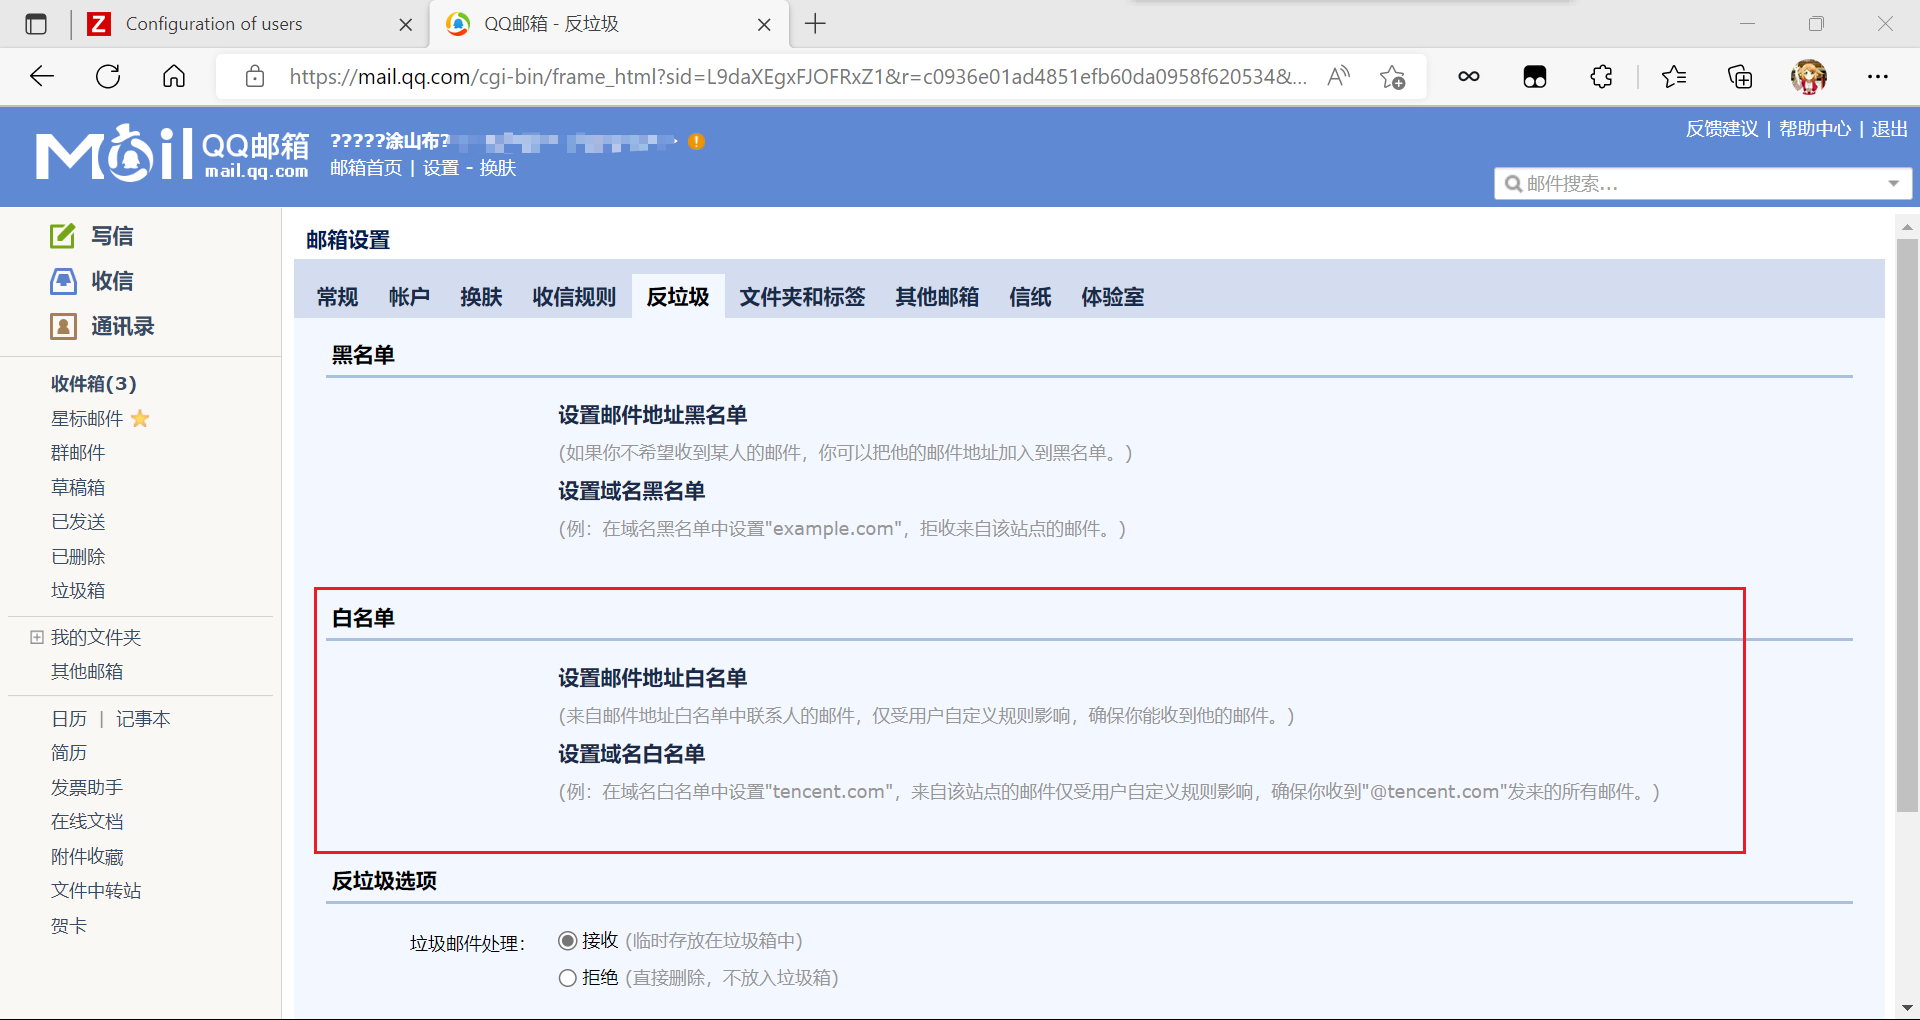
两个都很好。在这里选择域名白名单。
[En]
Both are fine. Choose the whitelist of domain names here.
手动触发告警
[root@localhost ~]# echo "555" >> /tmp/xbz
//修改/tmp/zic文件
等待数据更新,触发告警
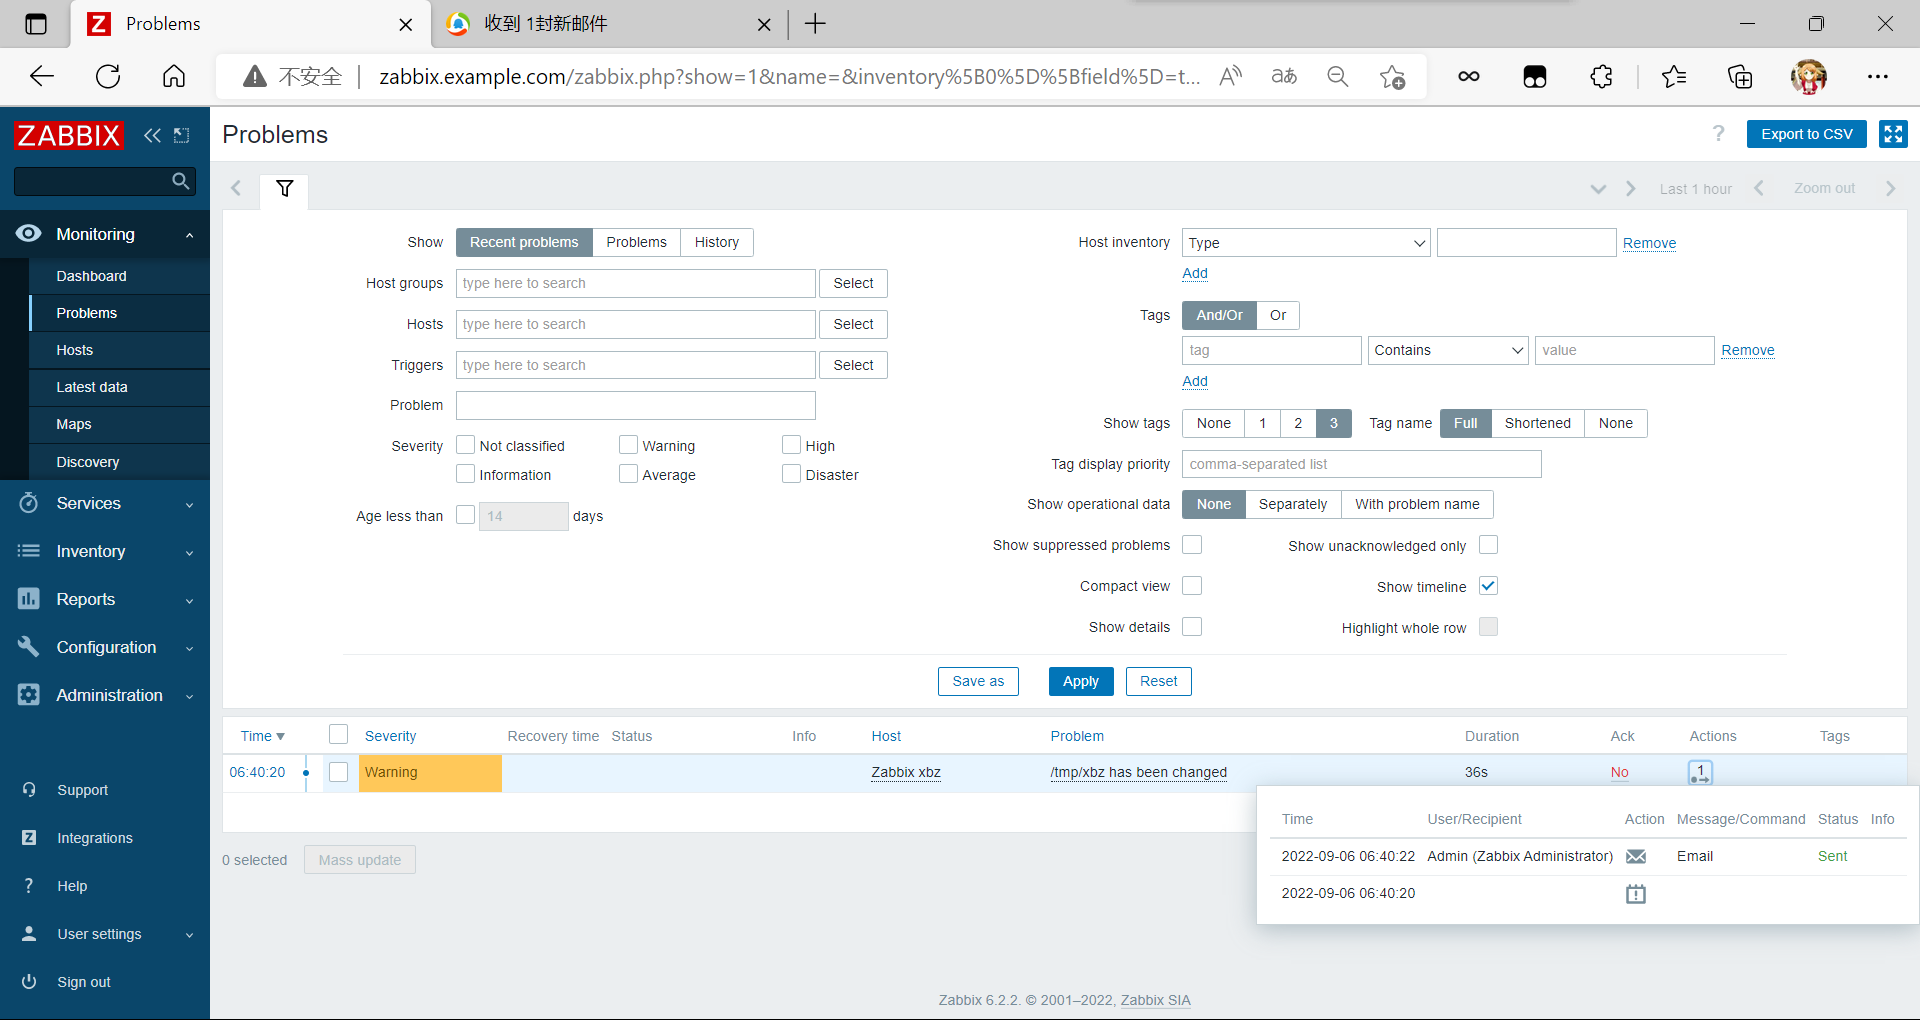
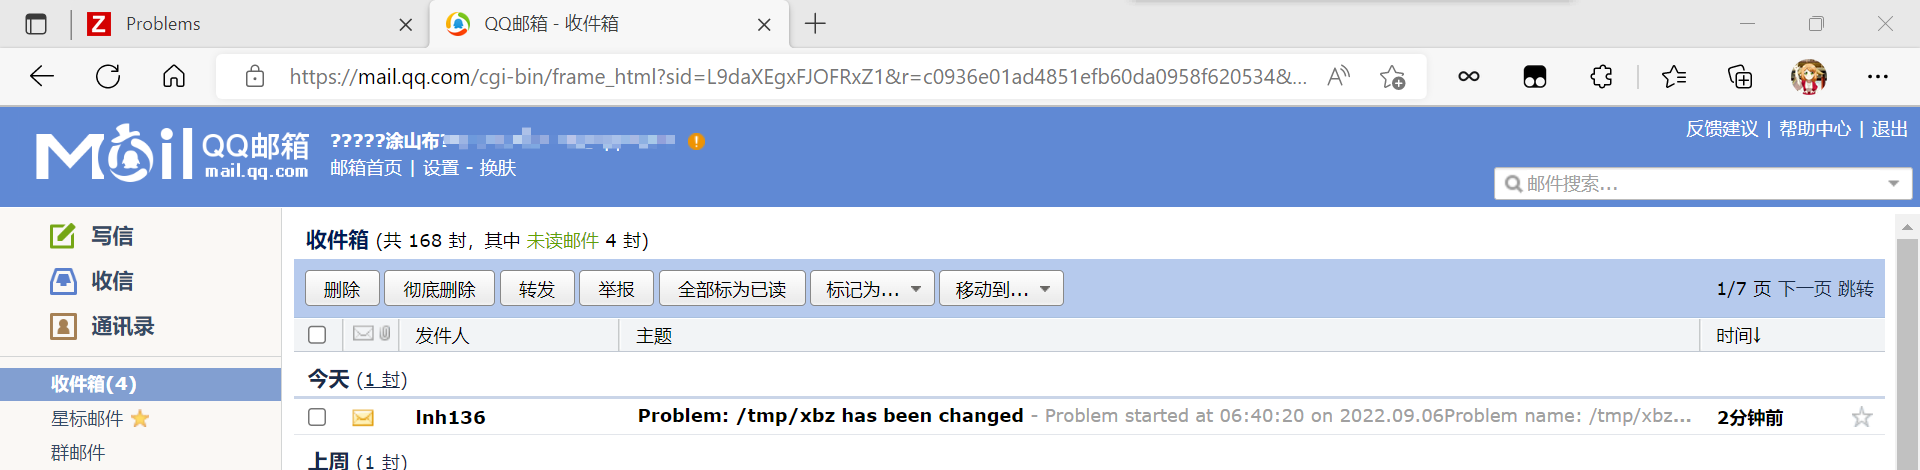
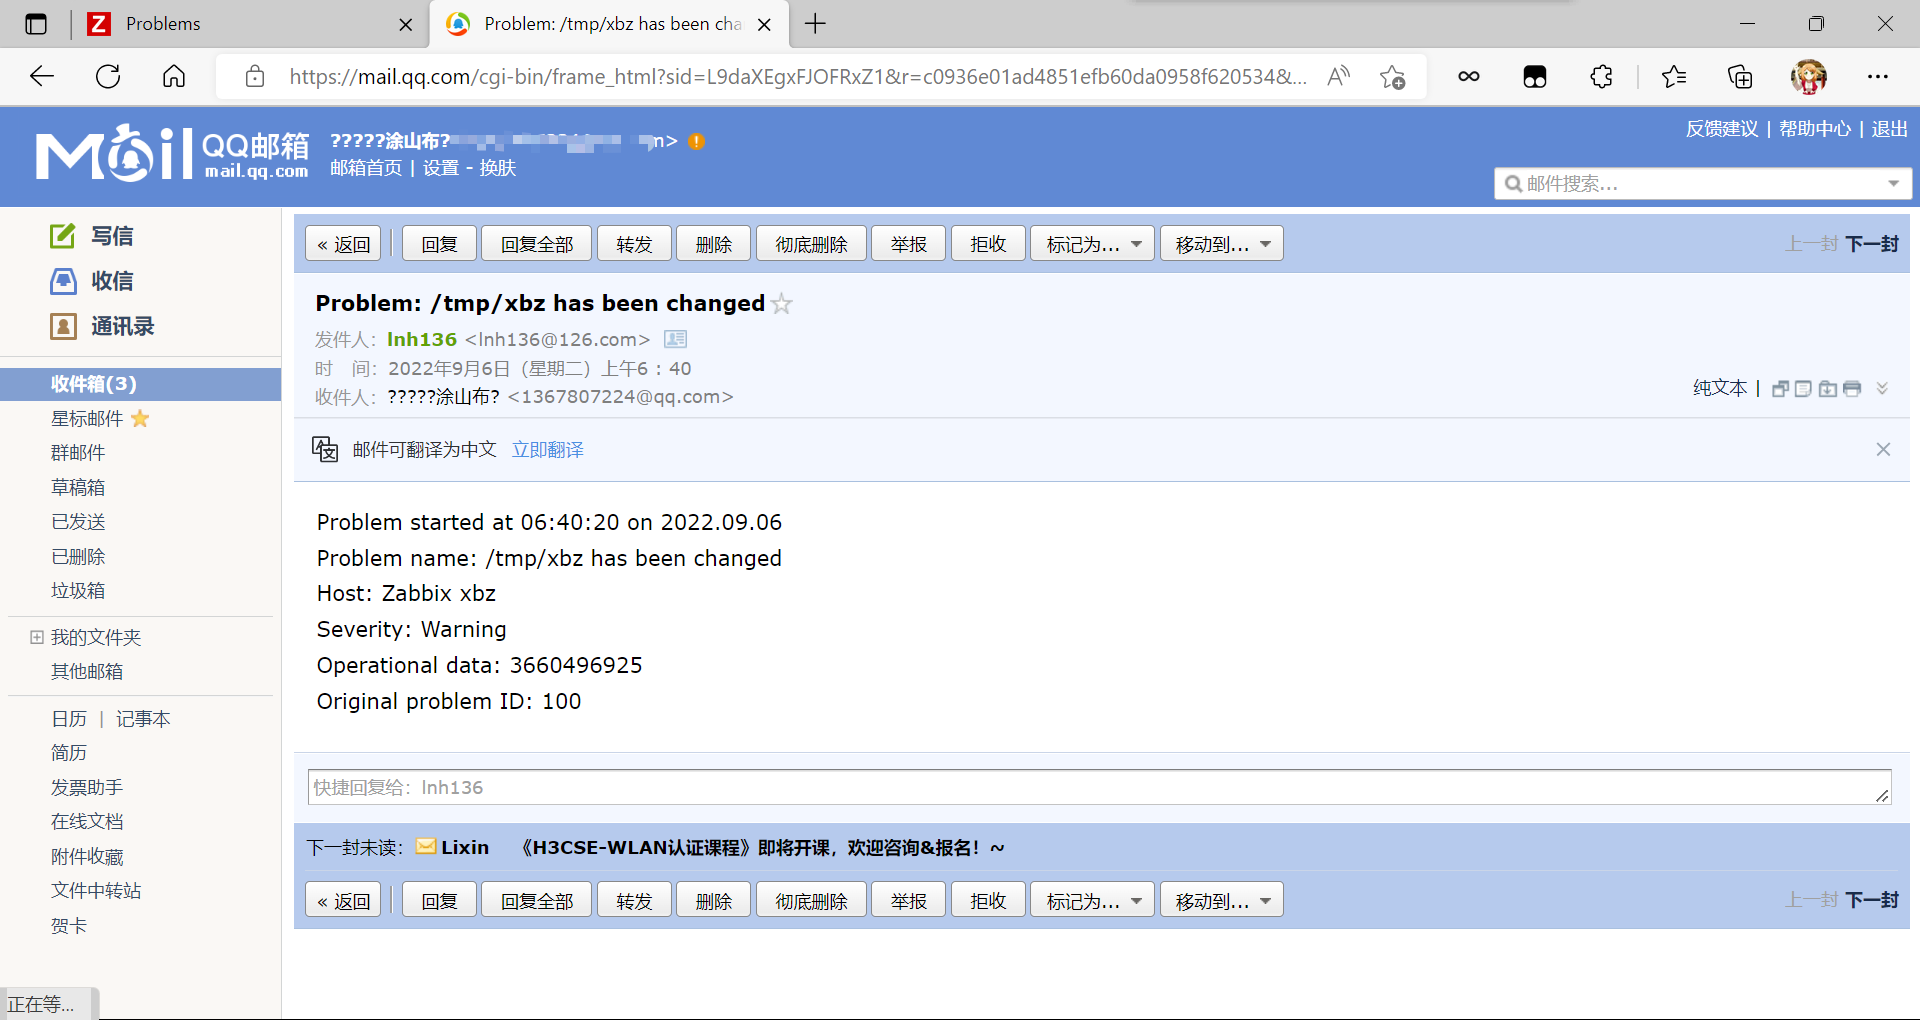
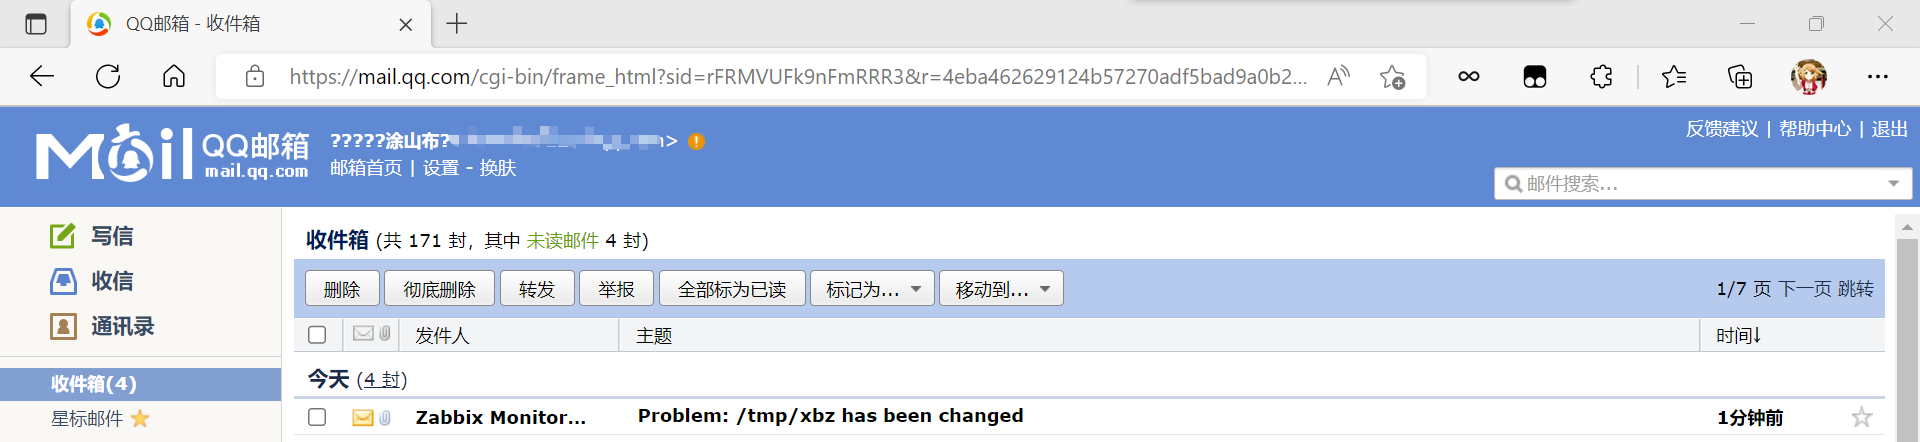
进入邮箱查看
通过命令行配置邮件告警
前面有监控项目和触发器,只需配置介质即可。
[En]
There are monitoring items and triggers in front, so you just need to configure the media.
在zabbix服务端进行配置
[root@localhost ~]# hostnamectl set-hostname localhost.example.com
[root@localhost ~]# bash
[root@localhost ~]# hostname
localhost.example.com
//修改服务端的主机名
[root@localhost ~]# dnf -y install mailx postfix
//安装eamil和postfix
[root@localhost ~]# systemctl enable --now postfix.service
Created symlink /etc/systemd/system/multi-user.target.wants/postfix.service → /usr/lib/systemd/system/postfix.service.
//设置开机自启
[root@localhost ~]# dnf -y install net-tools
[root@localhost ~]# netstat -tunlp | grep 25
tcp 0 0 127.0.0.1:25 0.0.0.0:* LISTEN 2334677/master
tcp6 0 0 ::1:25 :::* LISTEN 2334677/master
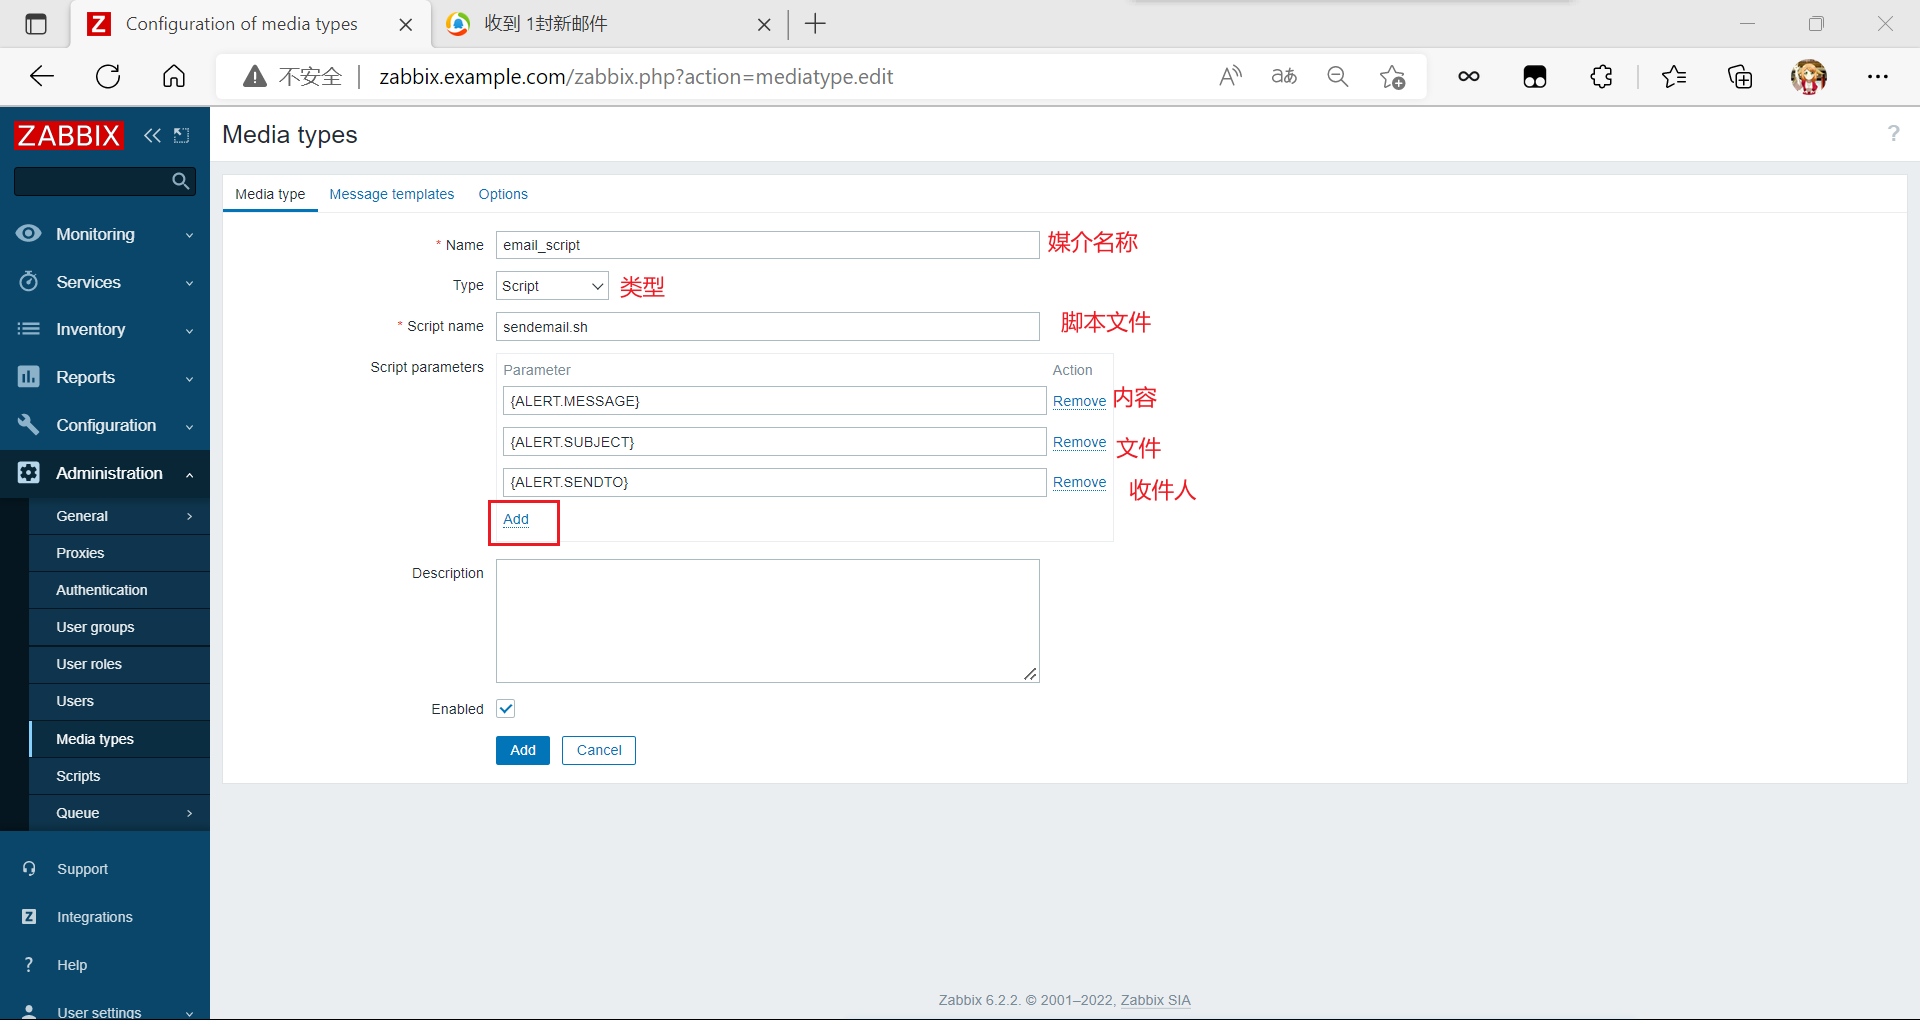
[root@localhost ~]# vim /usr/local/etc/zabbix_server.conf
//编辑/usr/local/etc/zabbix_server.conf
AlertScriptsPath=/scripts/zabbix/
[root@localhost ~]# mkdir -p /scripts/zabbix/
[root@localhost ~]# cd /scripts/zabbix/
[root@localhost zabbix]# vim sendemail.sh
[root@localhost zabbix]# cat sendemail.sh
#!/bin/bash
echo "$1" | mail -s "$2" $3
//编写脚本
[root@localhost zabbix]# chmod +x sendemail.sh
//赋予执行权限
[root@localhost zabbix]# pkill zabbix_server
[root@localhost zabbix]# zabbix_server
//先杀死再重启
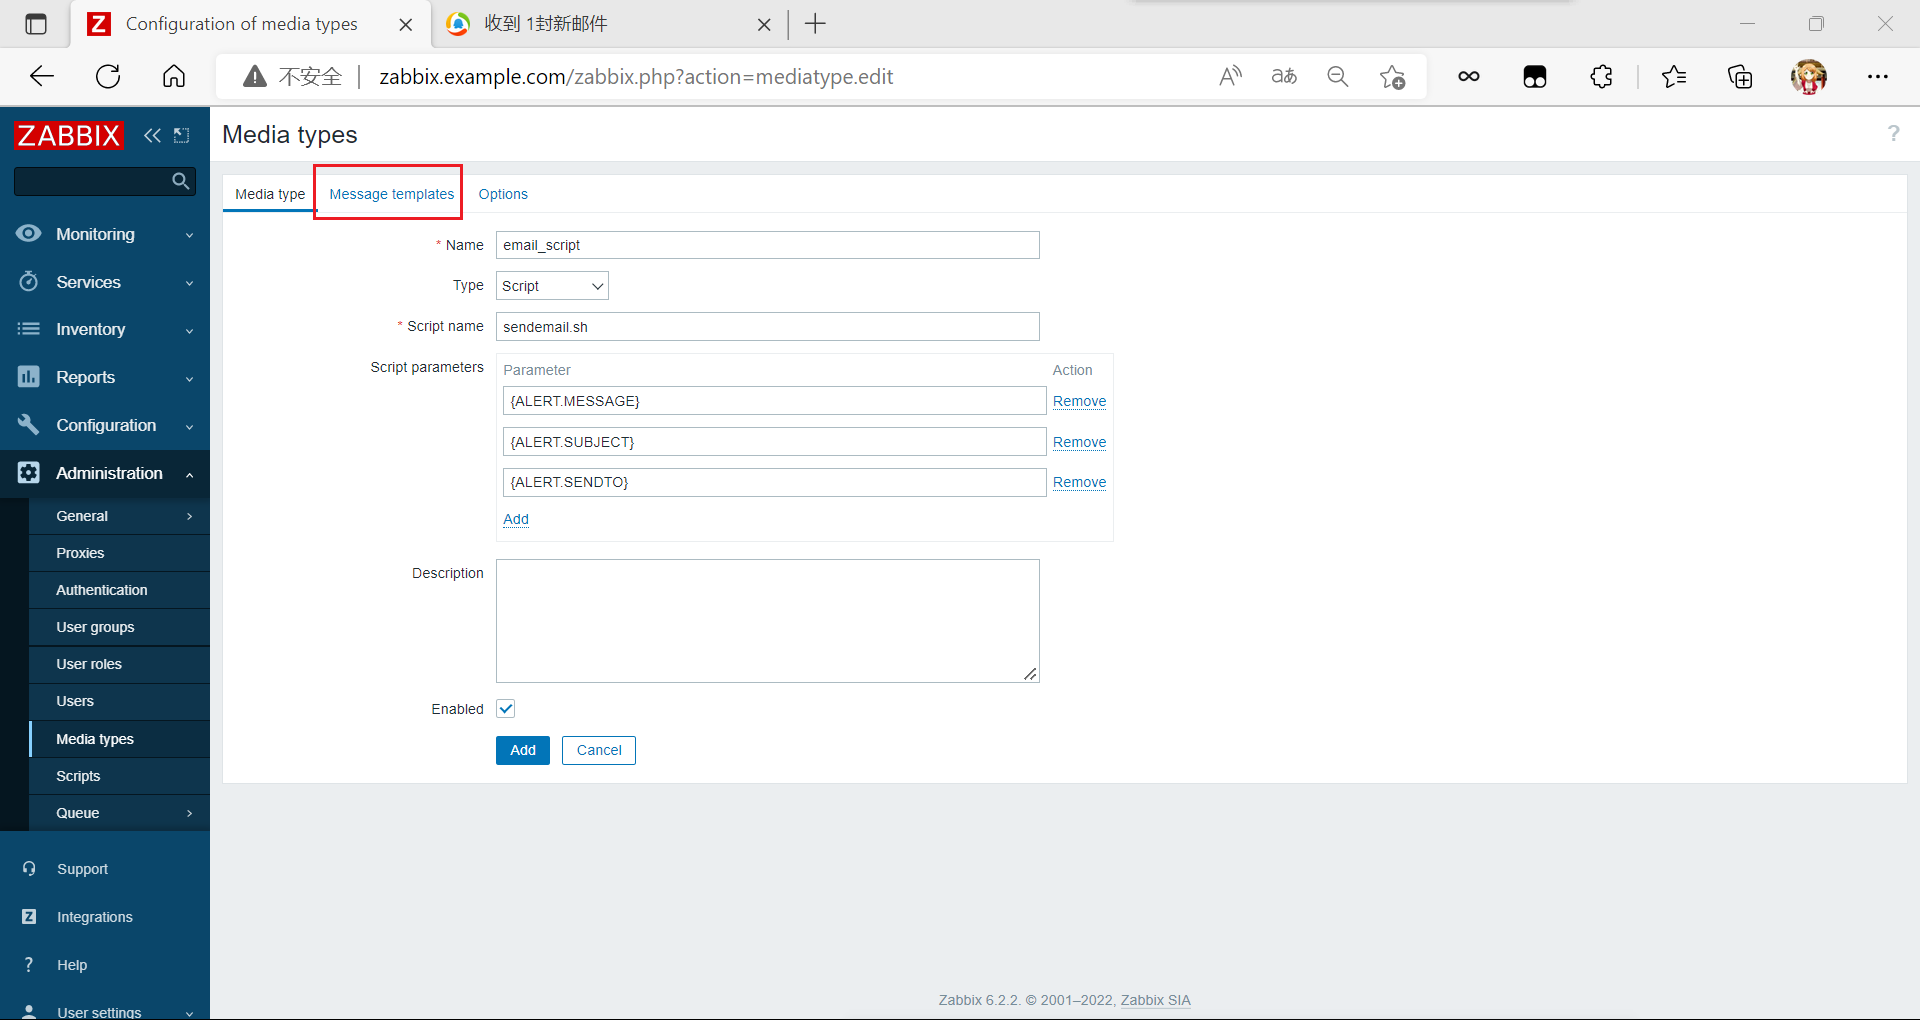
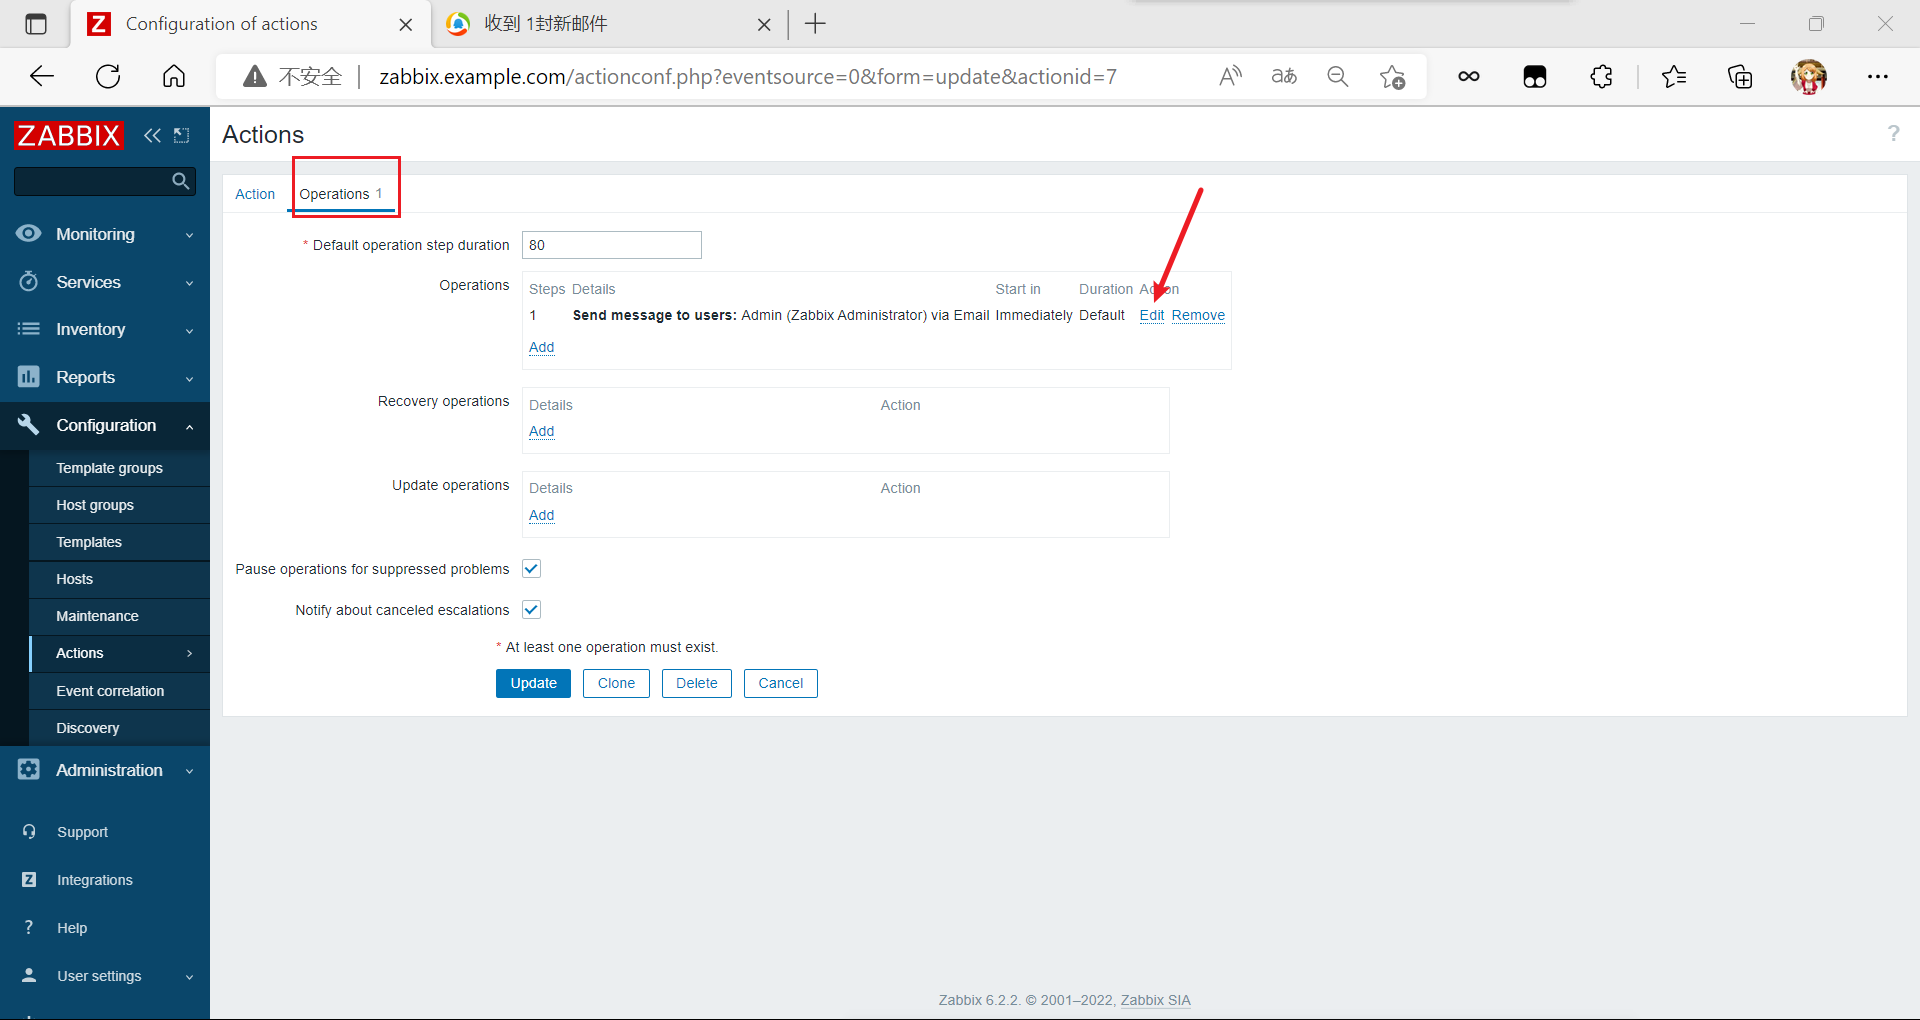
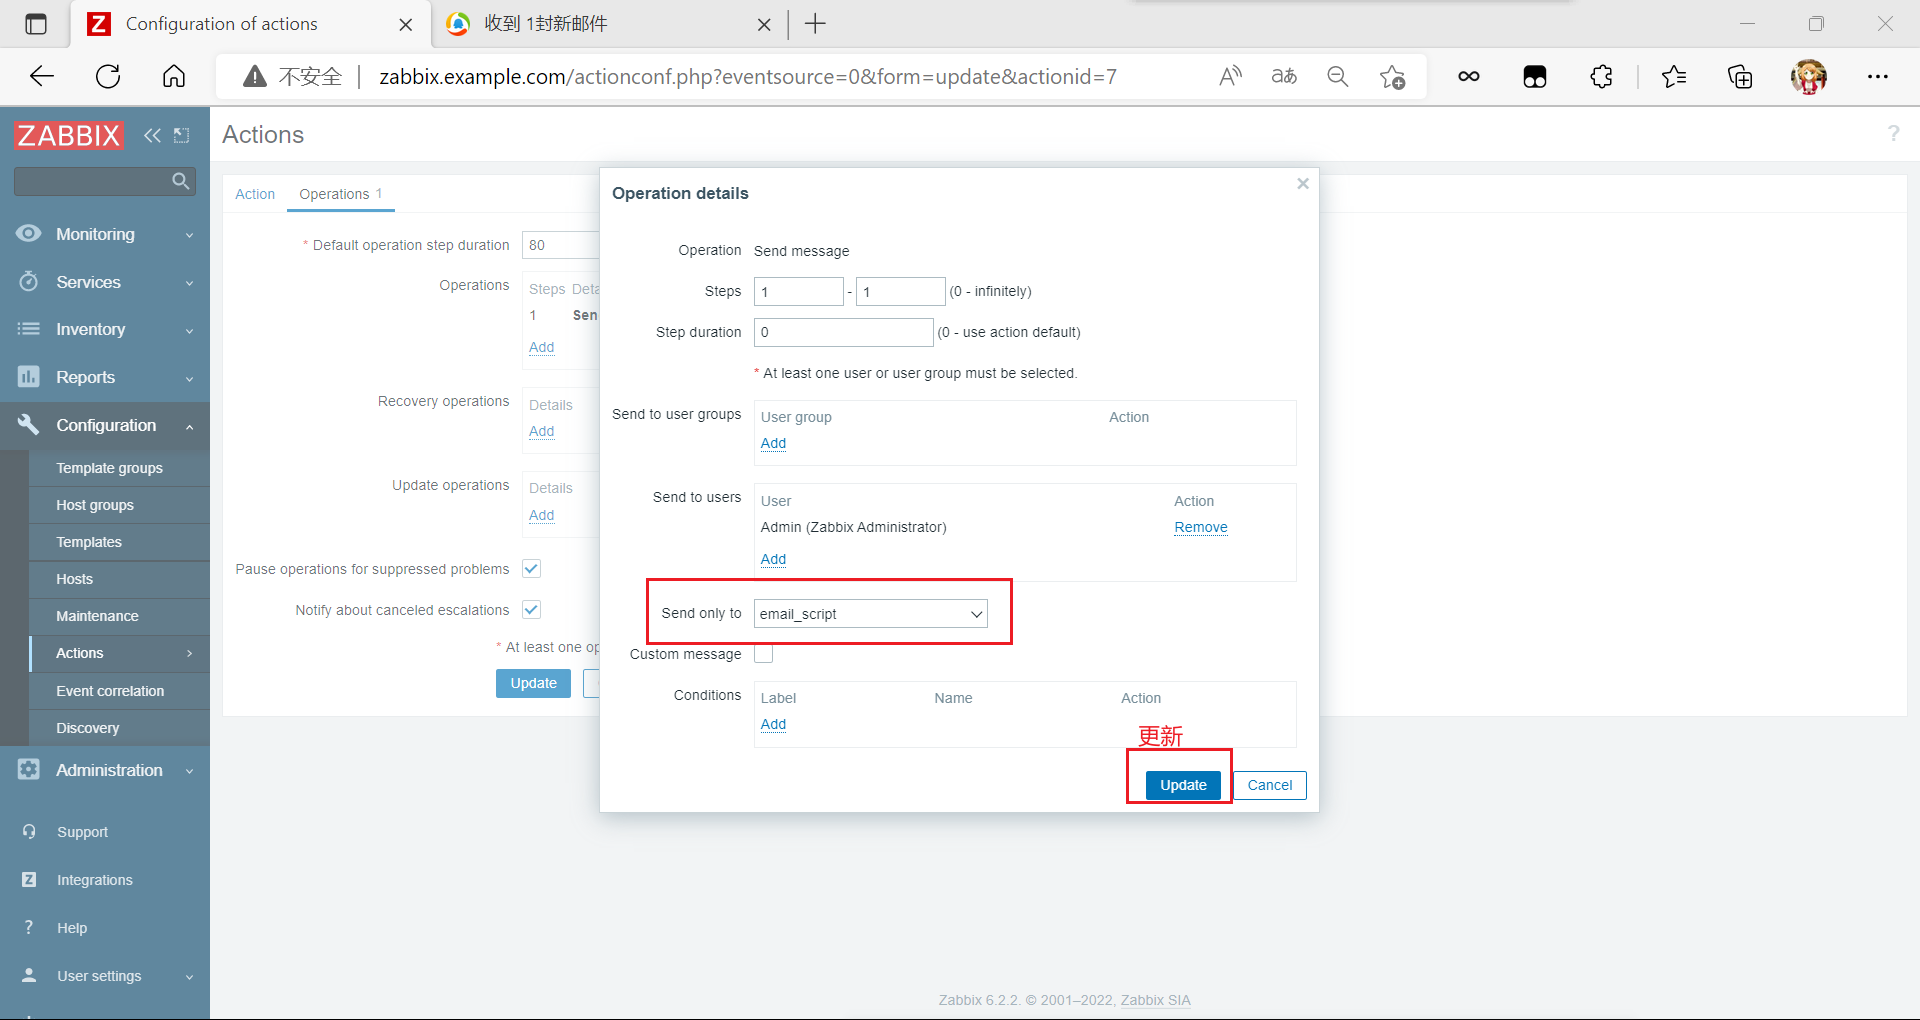
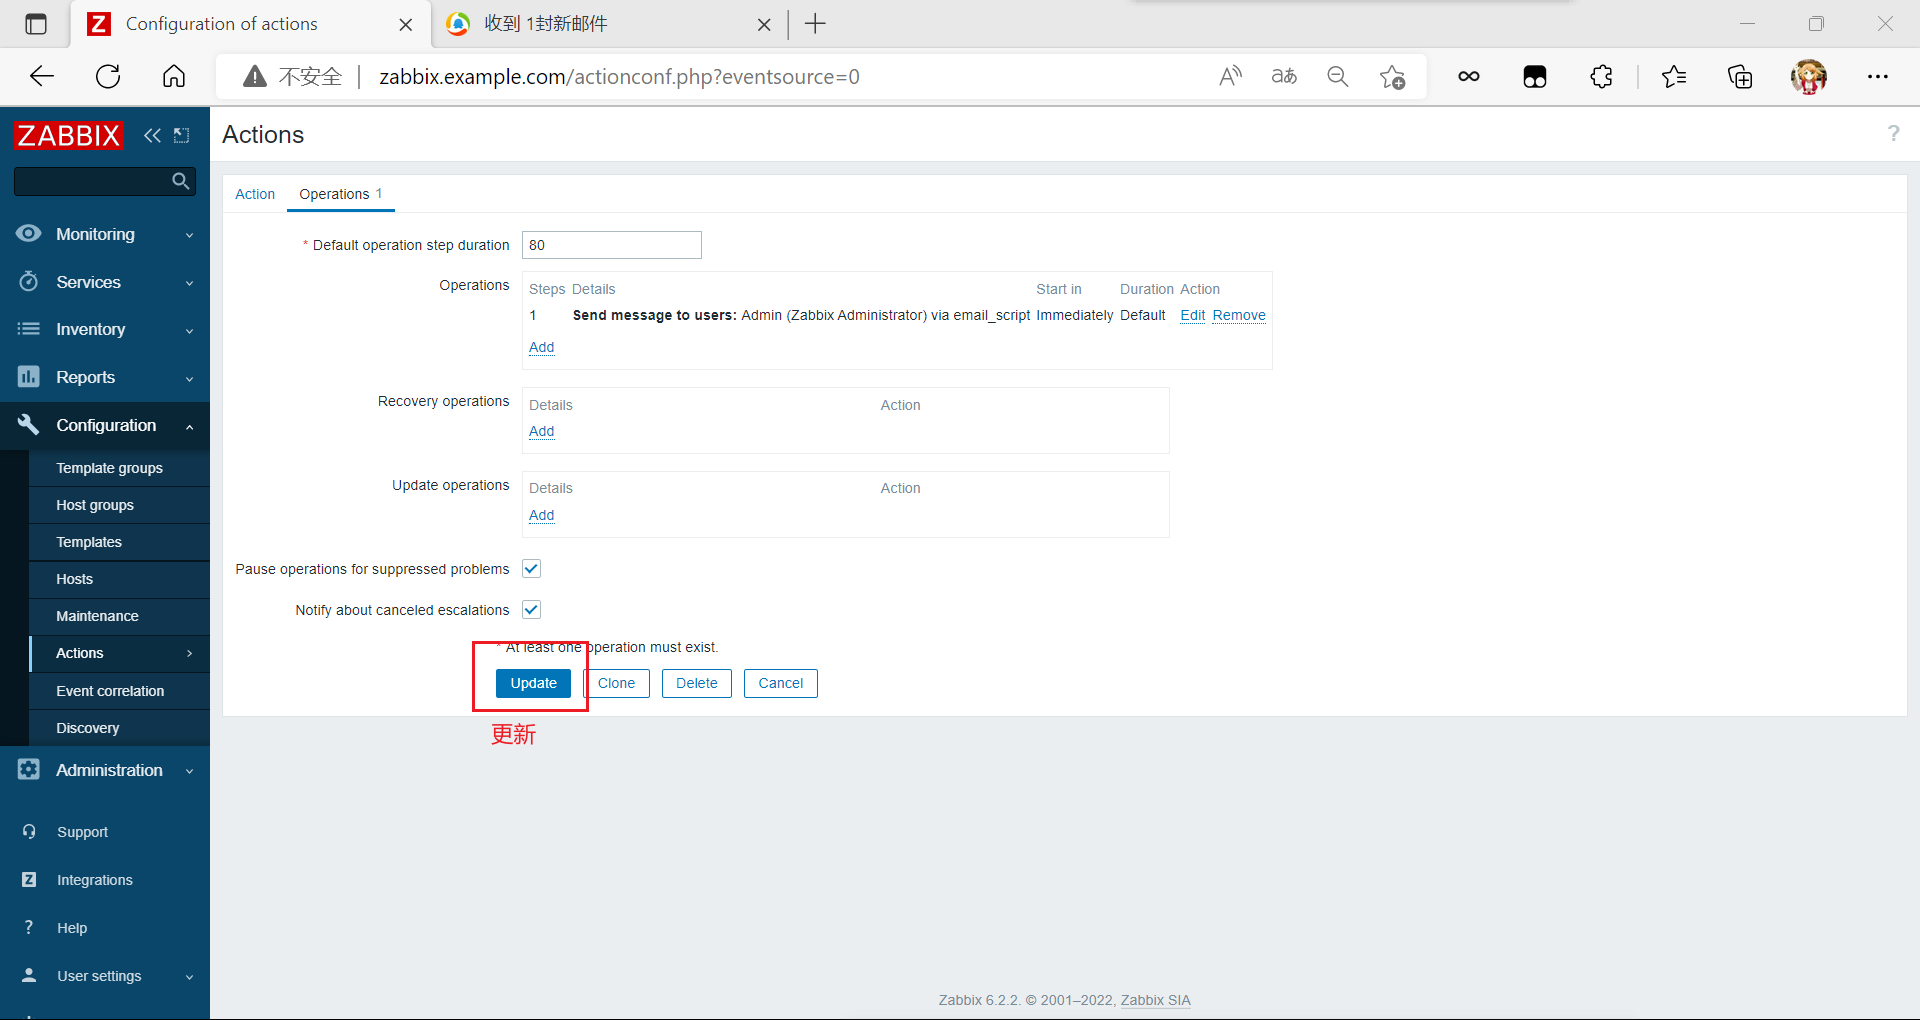
配置媒介


配置动作
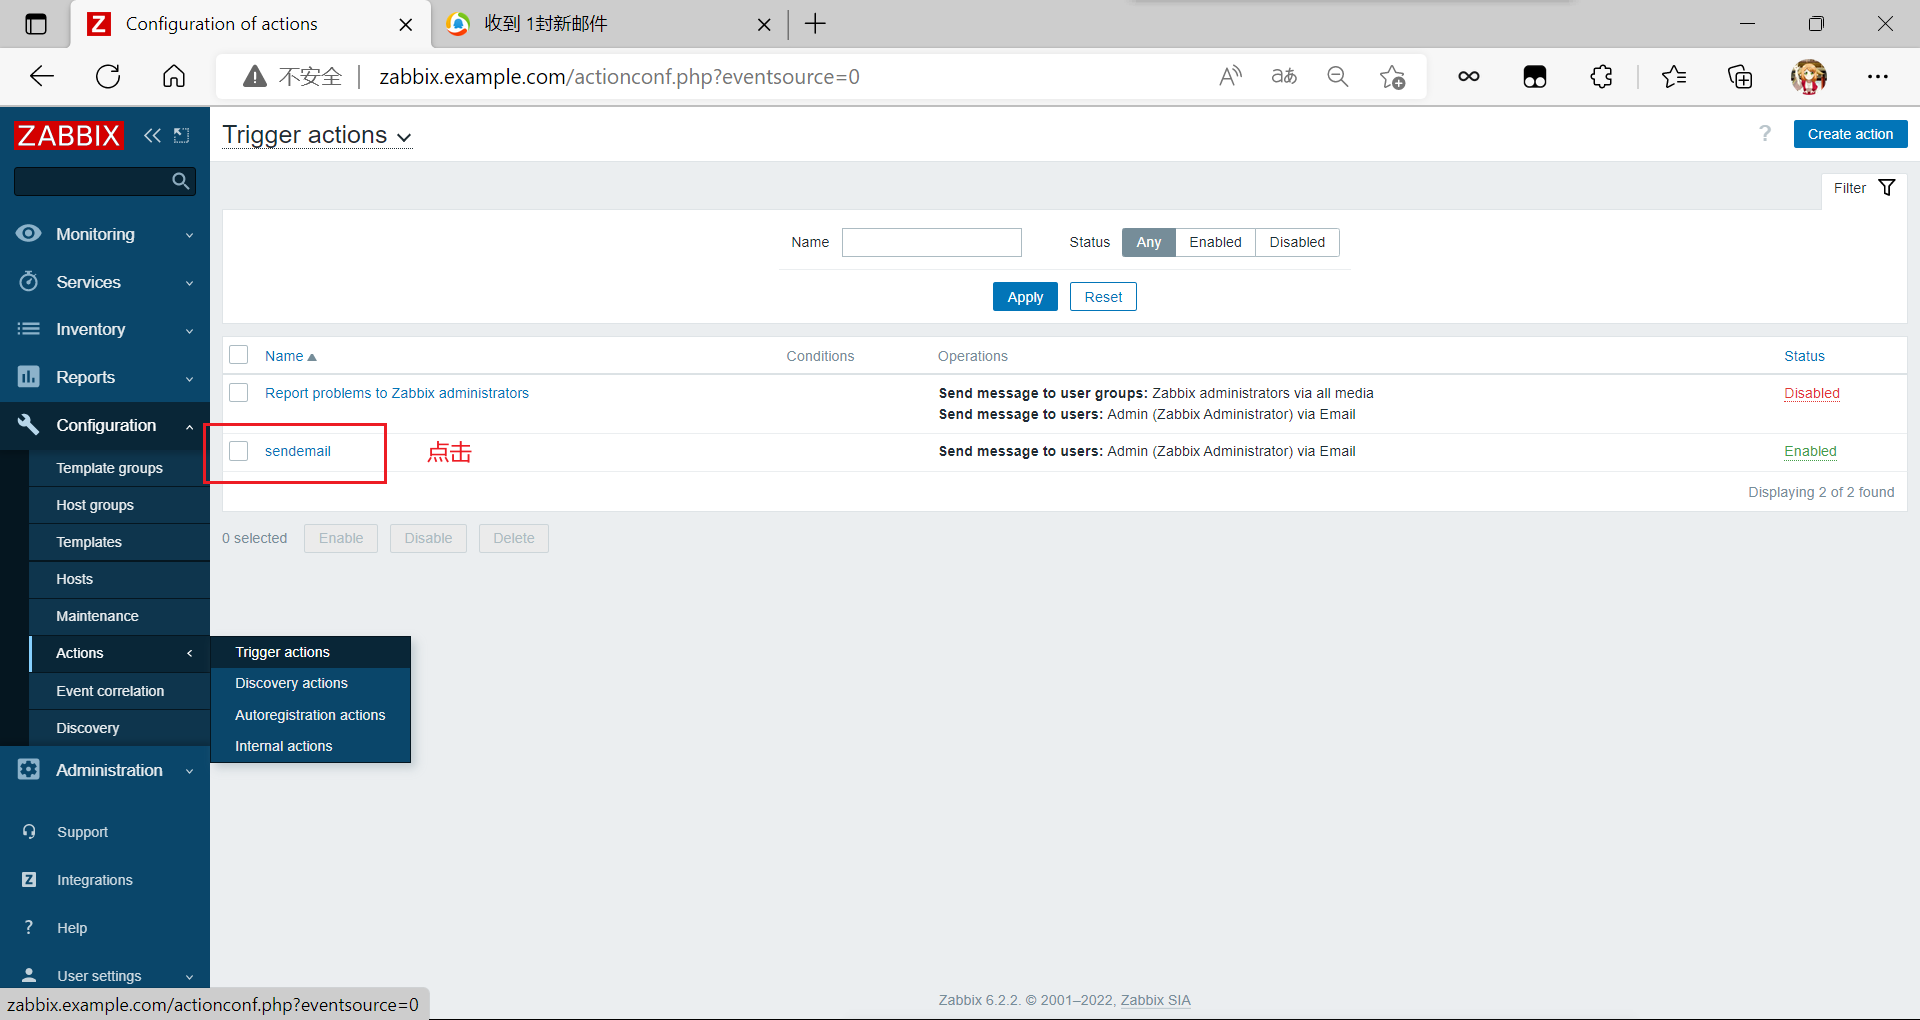
手动触发告警
[root@localhost ~]# echo "555" >> /tmp/xbz
//修改/tmp/xbz
等待最新数据产生

查看邮箱
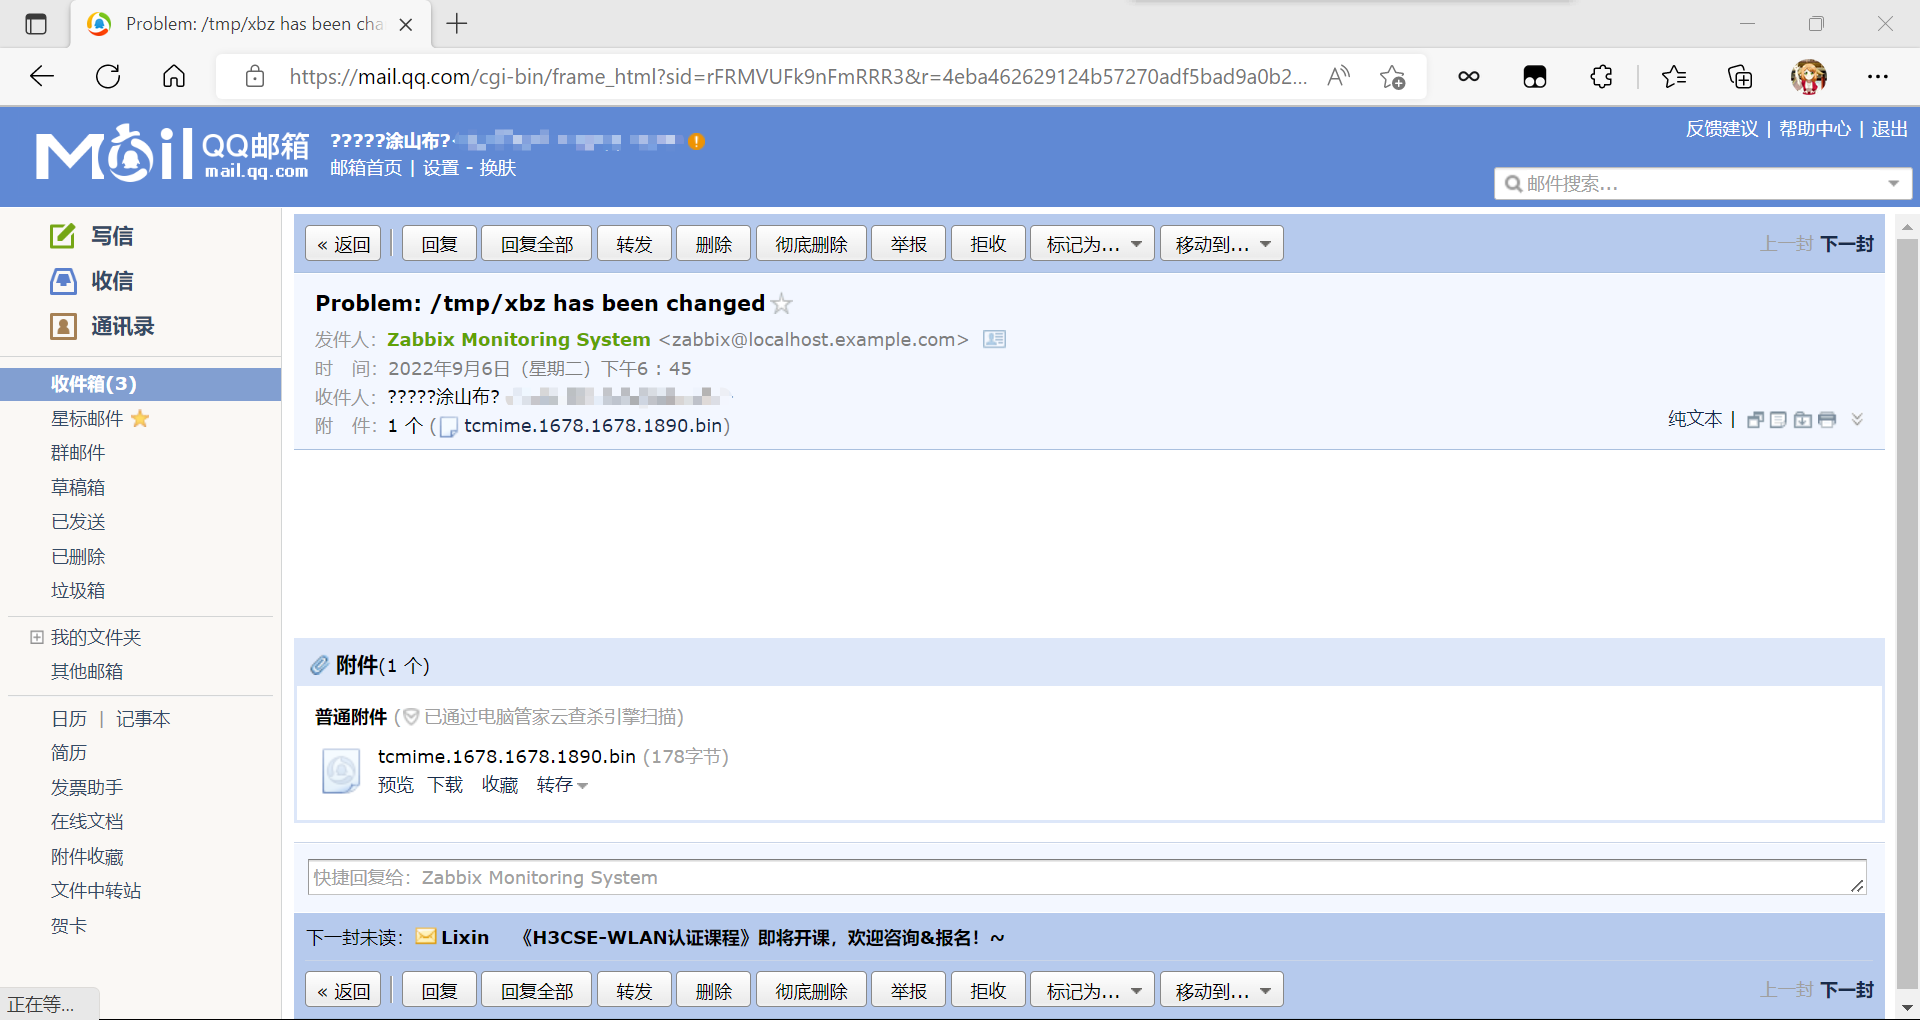
下载文件并在记事本中查看。
[En]
Download the file and look at it in the notepad.

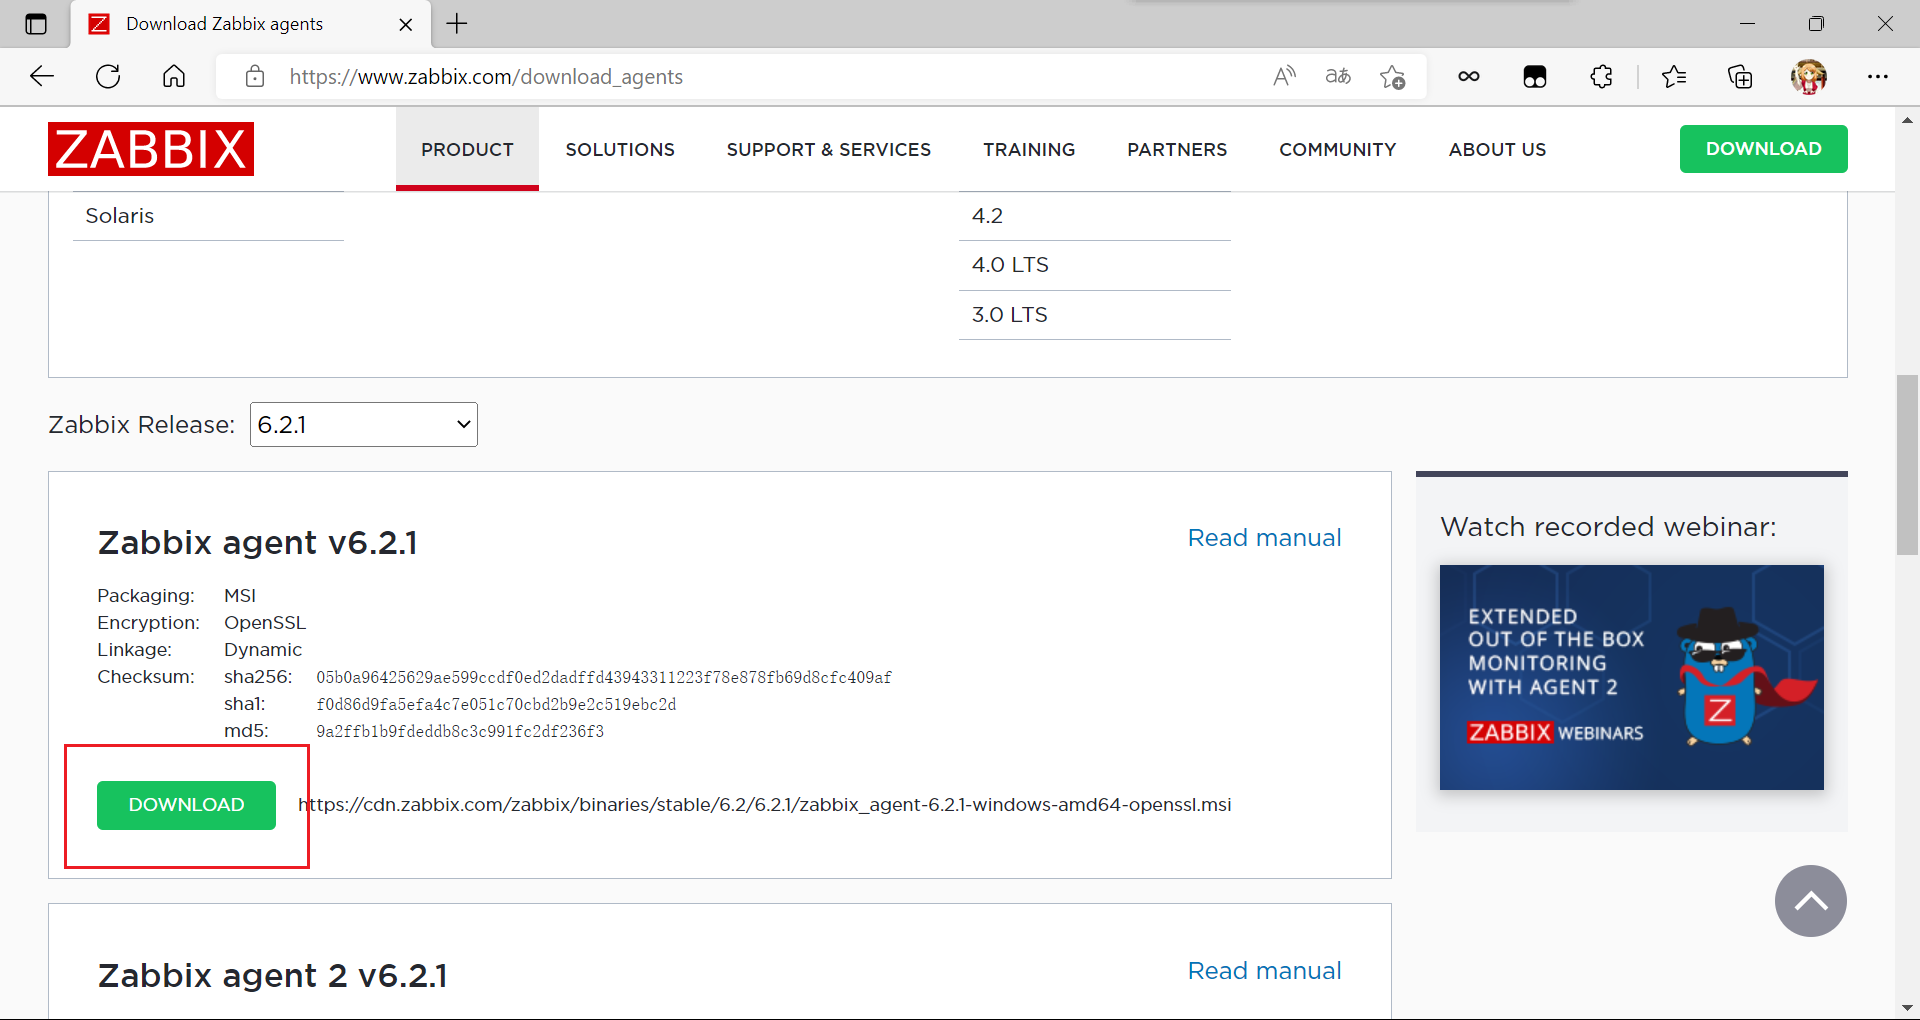
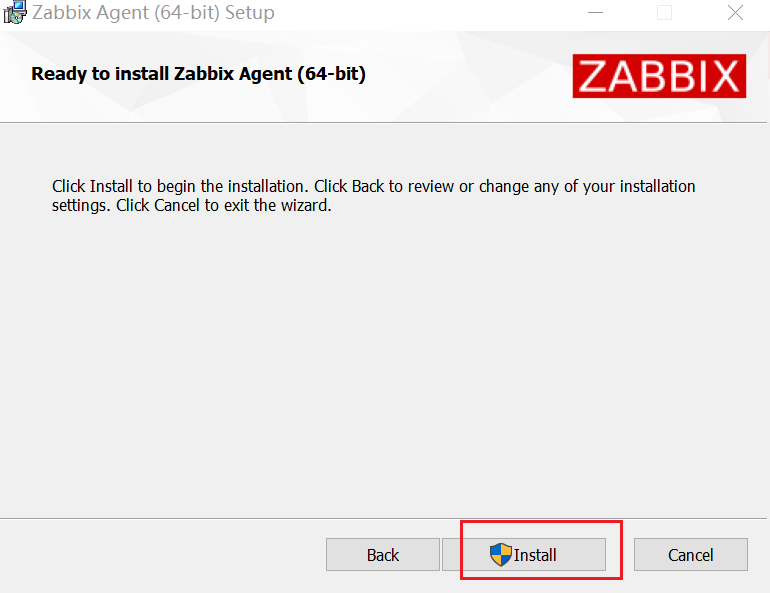
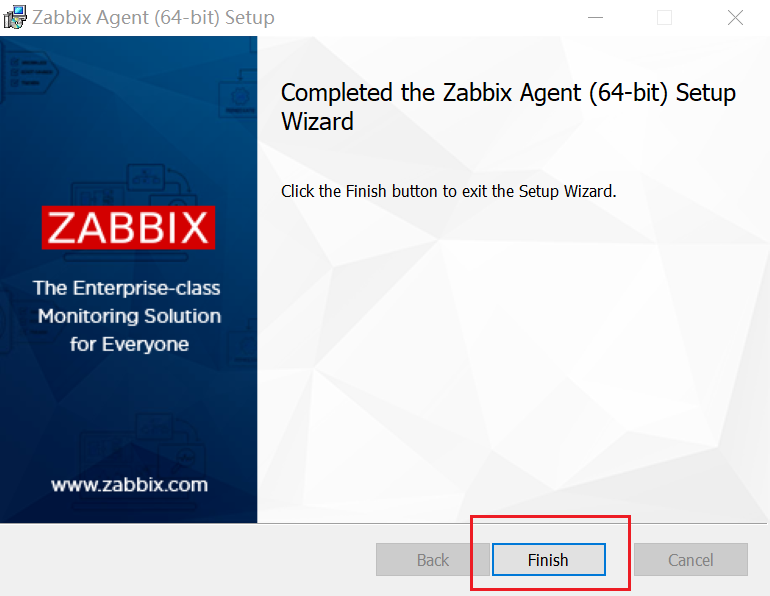
zabbix监控Windows客户端
zabbix官网
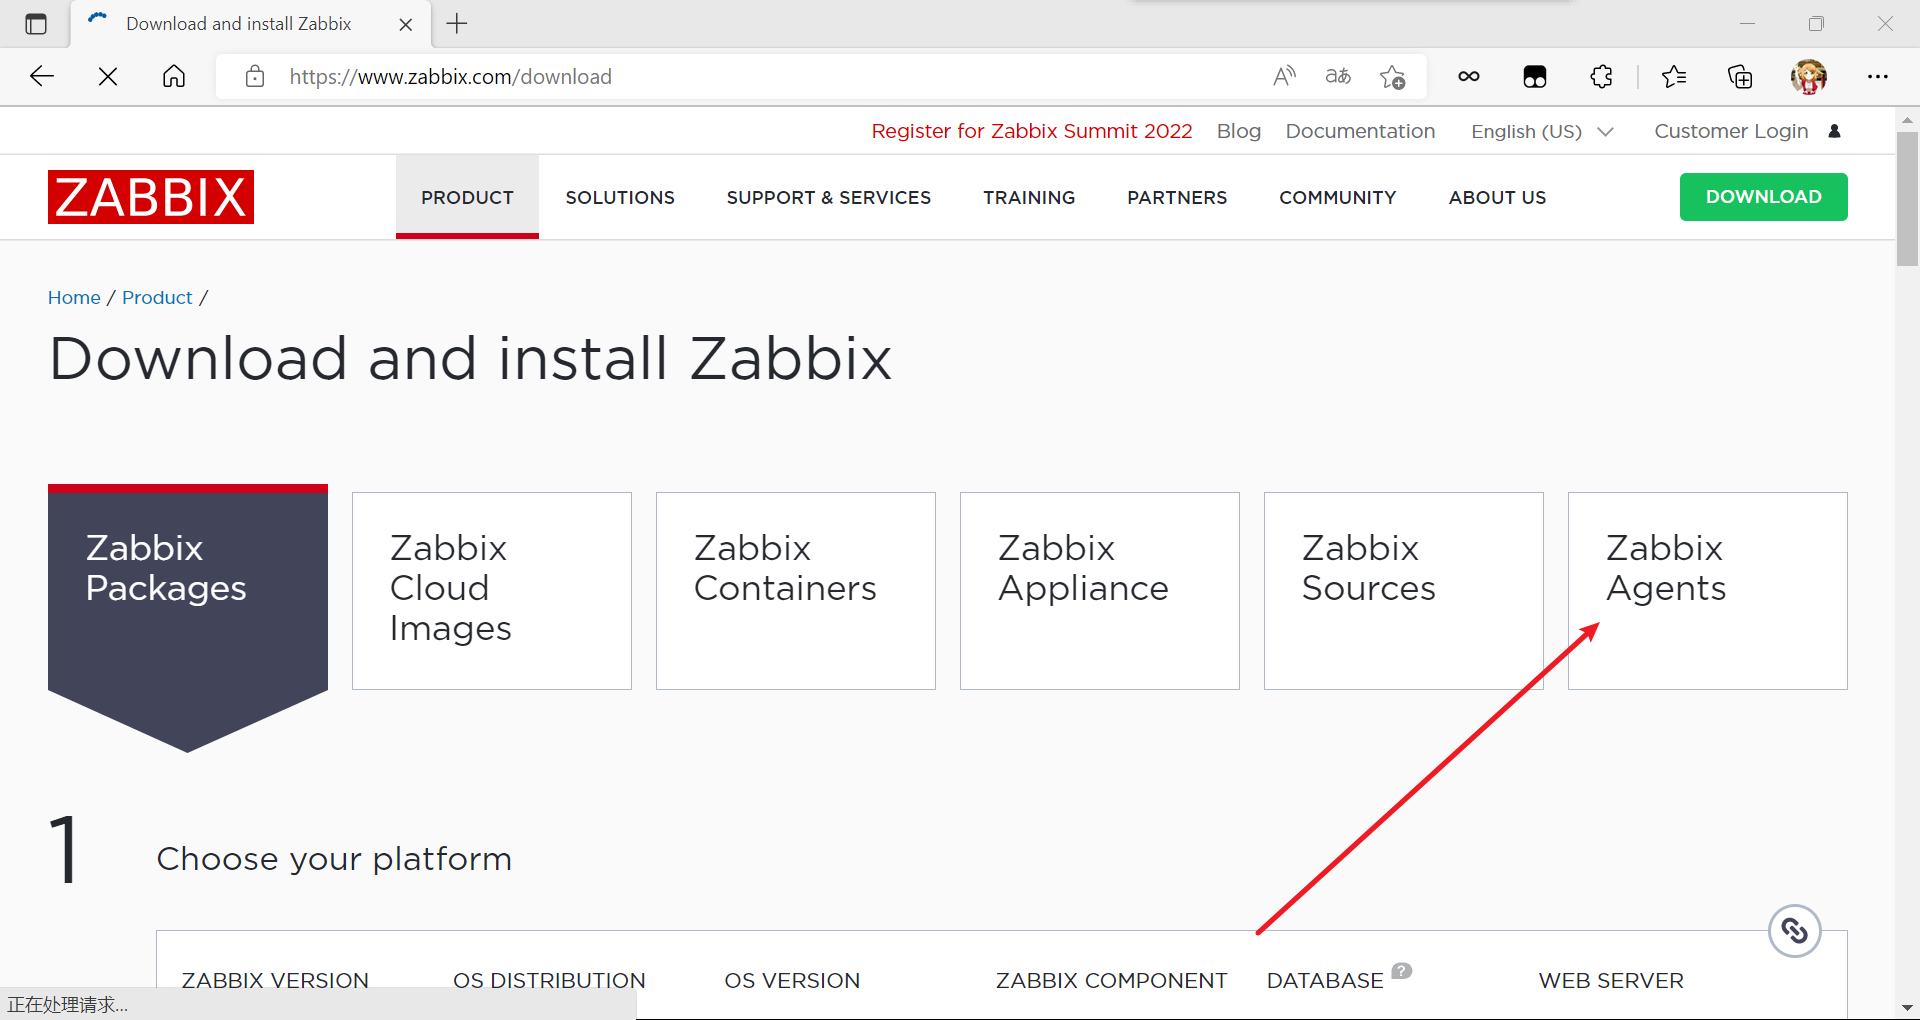
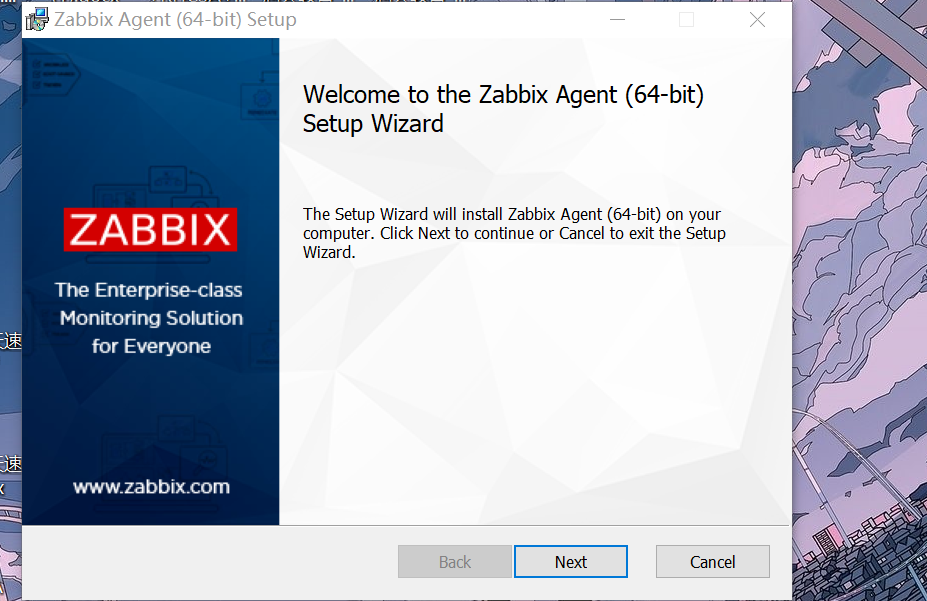
下载windows安装包
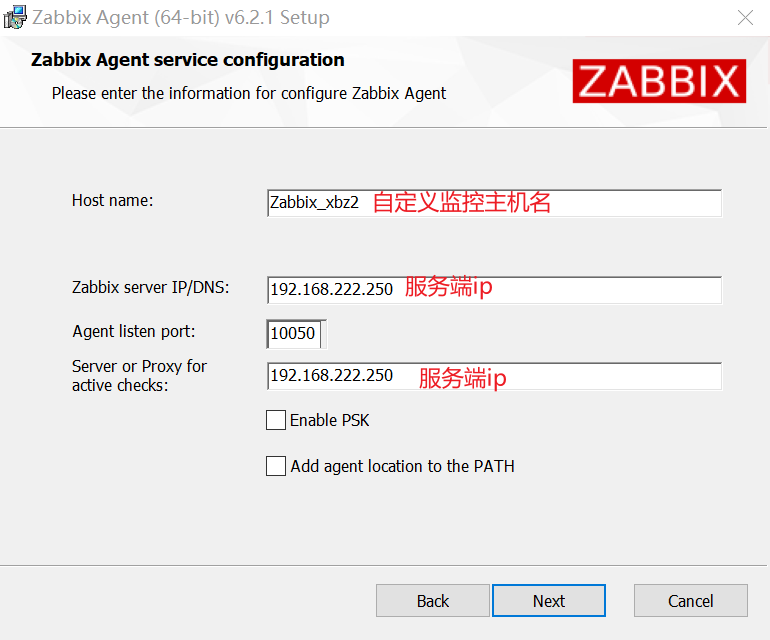
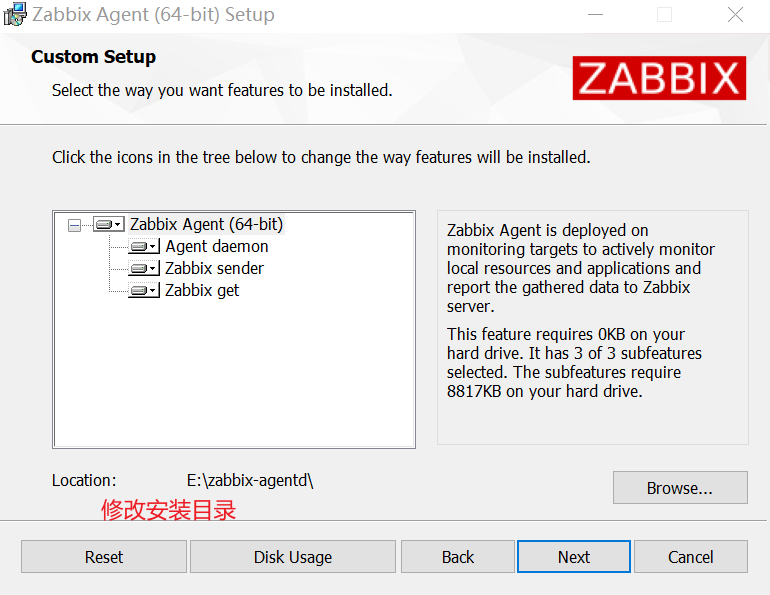
要创建主机,不要忘记关闭防火墙或添加防火墙入站规则
[En]
To create a host, don’t forget to turn off the firewall or add firewall inbound rules

Original: https://www.cnblogs.com/tushanbu/p/16660335.html
Author: 涂山布
Title: zabbix监控详解
原创文章受到原创版权保护。转载请注明出处:https://www.johngo689.com/522747/
转载文章受原作者版权保护。转载请注明原作者出处!