

1. 对原始图片打标
利用LabelImg工具打标,输出格式选择为PascalVOC,得到xml格式的文件
2. 数据预处理
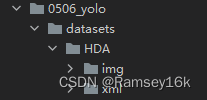
(1)将打标后的文件拷贝到当前工作目录,即放在和代码同一级目录下的datasets文件夹中
"""将打标好的图片和xml分别放在img和xml文件夹中"""
import os
import glob
import shutil

root_path = os.getcwd()
xml_file_path = r'D:\YOLO\0506\labels\\'
png_file_path = r'D:\YOLO\0506\images\\'
png_name_list = []
xml_name_list = []
for xml_name in glob.glob(xml_file_path + "*.xml"):
    filepath, temp_file_name = os.path.split(xml_name)
    filename, extension = os.path.splitext(temp_file_name)
    png_name_list.append(filename + '.png')
    xml_name_list.append(filename + '.xml')

new_dataset_png = root_path + '\\datasets\\HDA\\img\\'
if not os.path.exists(new_dataset_png):
    os.makedirs(new_dataset_png)
new_dataset_xml = root_path + '\\datasets\\HDA\\xml\\'
if not os.path.exists(new_dataset_xml):
    os.makedirs(new_dataset_xml)

for i in range(len(png_name_list)):
    shutil.copy(png_file_path + str(png_name_list[i]), new_dataset_png)
    shutil.copy(xml_file_path + str(xml_name_list[i]), new_dataset_xml)
运行以上代码后,当前代码路径下的目录框架如下:

(2)将xml文件转换成txt文件
目标检测的坐标格式有:
VOC(XML)格式:
(Xmin, Ymin, Xmax, Ymax),分别代表左上角和右下角的两个坐标
YOLO(TXT)格式:
(Xcenter, Ycenter, W, H),其中x,y,w,h为归一化后的数值,分别代表中心点坐标和宽、高
COCO(JSON)格式:
(Xmin, Ymin, W, H),其中x,y,w,h均不是归一化后的数值,分别代表左上角坐标和宽、高
由于不同格式的坐标表示方式不同,所以需要进行转换,将转换后的坐标文件存放到txt目录下
"""将xml格式的坐标转换成txt格式,放入txt文件夹中"""
import xml.etree.ElementTree as ET
import os
import glob

classes = ["A", "T"]

def convert(size, box):
    dw = 1.0 / size[0]
    dh = 1.0 / size[1]
    x = (box[0] + box[1]) / 2.0
    y = (box[2] + box[3]) / 2.0
    w = box[1] - box[0]
    h = box[3] - box[2]
    x = x * dw
    y = y * dh
    w = w * dw
    h = h * dh
    return x, y, w, h

def convert_annotation(img_name, xml_path, txt_path):
    in_file = open(xml_path + img_name[:-3] + 'xml')
    out_file = open(txt_path + img_name[:-3] + 'txt', 'w')

    xml_text = in_file.read()
    root = ET.fromstring(xml_text)
    in_file.close()
    size = root.find('size')
    w = int(size.find('width').text)
    h = int(size.find('height').text)

    for obj in root.iter('object'):
        cls = obj.find('name').text
        if cls not in classes:
            print(cls)
            continue
        cls_id = classes.index(cls)
        xmlbox = obj.find('bndbox')
        b = (float(xmlbox.find('xmin').text), float(xmlbox.find('xmax').text), float(xmlbox.find('ymin').text),
             float(xmlbox.find('ymax').text))
        bb = convert((w, h), b)
        out_file.write(str(cls_id) + " " + " ".join([str(a) for a in bb]) + '\n')

if __name__ == '__main__':
    path = os.getcwd()
    xml_path = path + '\\datasets\\HDA\\xml\\'
    img_path = path + '\\datasets\\HDA\\img\\'
    txt_path = path + '\\datasets\\HDA\\txt\\'
    if not os.path.exists(txt_path):
        os.makedirs(txt_path)
    for image_path in glob.glob(img_path + "*.png"):

        image_name = image_path.split('\\')[-1]
        try:
            convert_annotation(image_name, xml_path, txt_path)
        except:
            print('This picture has not xml file')
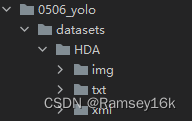
运行以上代码后,当前代码路径下的目录框架如下所示,可以看到,多了一个txt目录
(3)将数据集划分成训练集、测试集、验证集
"""
将数据集划分成训练集、测试集、验证集
仅仅是把划分好的png和xml文件名写入到不同集合的txt文件
"""
import os
import random

root_path = os.getcwd()
xml_file_path = root_path + '\\datasets\\HDA\\xml'
config_txt_save_path = root_path + '\\datasets\\HDA\\config'

if not os.path.exists(config_txt_save_path):
    os.makedirs(config_txt_save_path)

train_test_percent = 0.9
train_val_percent = 0.9

total_xml = os.listdir(xml_file_path)
num = len(total_xml)
train_val_size = int(num * train_test_percent)
test_size = int(num - train_val_size)
val_size = int(train_val_size * train_val_percent)
train_size = int(train_val_size - val_size)
train_val = random.sample(range(num), train_val_size)
train = random.sample(train_val, val_size)

print("train and valid size:", train_val_size)
print("train size:", train_size)
print("test size:", test_size)
print("valid size:", val_size)

test_txt = open(config_txt_save_path + '\\test.txt', 'w')
train_txt = open(config_txt_save_path + '\\train.txt', 'w')
val_txt = open(config_txt_save_path + '\\val.txt', 'w')

img_test_txt = open(config_txt_save_path + '\\img_test.txt', 'w')
img_train_txt = open(config_txt_save_path + '\\img_train.txt', 'w')
img_val_txt = open(config_txt_save_path + '\\img_val.txt', 'w')

for i in range(num):
    txt_name = total_xml[i][:-4] + '.txt' + '\n'
    img_name = total_xml[i][:-4] + '.png' + '\n'
    if i in train_val:
        if i in train:
            train_txt.write(txt_name)
            img_train_txt.write(img_name)
        else:
            val_txt.write(txt_name)
            img_val_txt.write(img_name)
    else:
        test_txt.write(txt_name)
        img_test_txt.write(img_name)

train_txt.close()
val_txt.close()
test_txt.close()

img_train_txt.close()
img_val_txt.close()
img_test_txt.close()
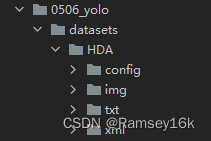
运行以上代码后,当前代码路径下的目录框架如下所示,可以看到,多了一个config目录
(4)重构数据集
"""重构数据集,根据txt文件划分图片,分别创建训练集、验证集、测试集的图片文件夹"""
import os
import shutil

img_train_txt = []
img_test_txt = []
img_valid_txt = []
label_train_txt = []
label_test_txt = []
label_valid_txt = []

path = os.getcwd() + '\\datasets\\HDA\\config\\'
for line in open(path + "img_train.txt"):
    line = line.strip('\n')
    img_train_txt.append(line)
for line1 in open(path + "img_test.txt"):
    line1 = line1.strip('\n')
    img_test_txt.append(line1)
for line2 in open(path + "img_val.txt"):
    line2 = line2.strip('\n')
    img_valid_txt.append(line2)

for line3 in open(path + "train.txt"):
    line3 = line3.strip('\n')
    label_train_txt.append(line3)
for line4 in open(path + "test.txt"):
    line4 = line4.strip('\n')
    label_test_txt.append(line4)
for line5 in open(path + "val.txt"):
    line5 = line5.strip('\n')
    label_valid_txt.append(line5)

new_train_img_dir = 'datasets\\HDA\\split\\images\\train\\'
new_test_img_dir = 'datasets\\HDA\\split\\images\\test\\'
new_valid_img_dir = 'datasets\\HDA\\split\\images\\val\\'

new_train_label_dir = 'datasets\\HDA\\split\\labels\\train\\'
new_test_label_dir = 'datasets\\HDA\\split\\labels\\test\\'
new_valid_label_dir = 'datasets\\HDA\\split\\labels\\val\\'

if not os.path.exists(new_train_img_dir):
    os.makedirs(new_train_img_dir)
if not os.path.exists(new_test_img_dir):
    os.makedirs(new_test_img_dir)
if not os.path.exists(new_valid_img_dir):
    os.makedirs(new_valid_img_dir)
if not os.path.exists(new_train_label_dir):
    os.makedirs(new_train_label_dir)
if not os.path.exists(new_test_label_dir):
    os.makedirs(new_test_label_dir)
if not os.path.exists(new_valid_label_dir):
    os.makedirs(new_valid_label_dir)

origin_img_dir = 'datasets\\HDA\\img\\'
origin_label_dir = 'datasets\\HDA\\txt\\'

for i in range(len(img_train_txt)):
    shutil.copy(origin_img_dir + str(img_train_txt[i]), new_train_img_dir)
    shutil.copy(origin_label_dir + str(label_train_txt[i]), new_train_label_dir)

for j in range(len(img_test_txt)):
    shutil.copy(origin_img_dir + str(img_test_txt[j]), new_test_img_dir)
    shutil.copy(origin_label_dir + str(label_test_txt[j]), new_test_label_dir)

for k in range(len(img_valid_txt)):
    shutil.copy(origin_img_dir + str(img_valid_txt[k]), new_valid_img_dir)
    shutil.copy(origin_label_dir + str(label_valid_txt[k]), new_valid_label_dir)
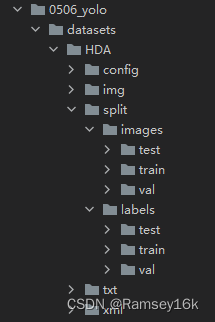
运行以上代码后,当前代码路径下的目录框架如下所示,可以看到,多了一个split目录,split目录下又包括images和labels目录,分别代表图片和标签,这2个目录下都分别有训练集、验证集和测试集的目录。
至此,对原始图片数据集的预处理完成,可以开始训练了
3.训练
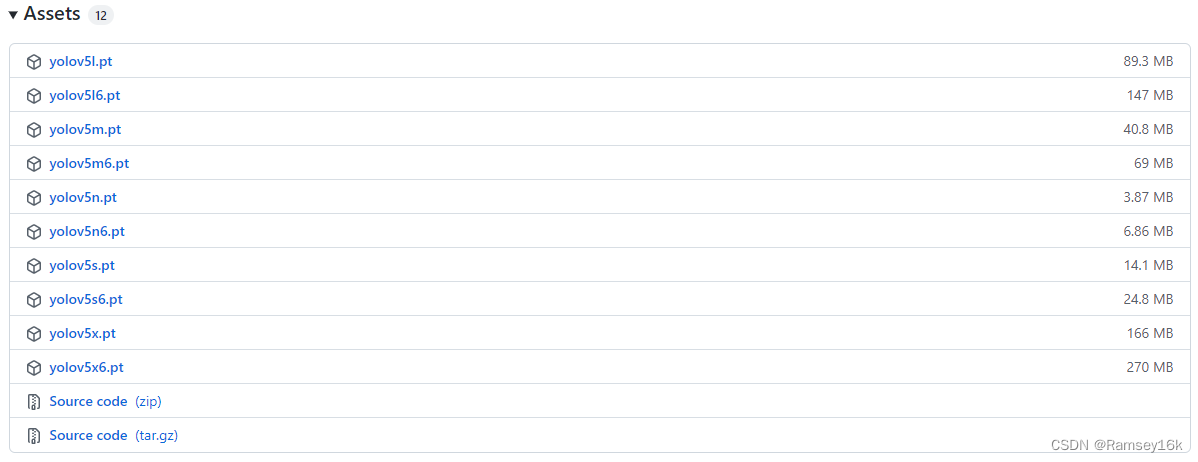
(1)从GitHub下载YOLOv5代码和pt文件
pt文件也就是PyTorch的模型文件,我使用的是yolov5x.pt
其他类型的model也可以在GitHub找到,进入https://github.com/ultralytics/yolov5/releases/tag/v6.1,划到页面最下方,Assets下有各种模型
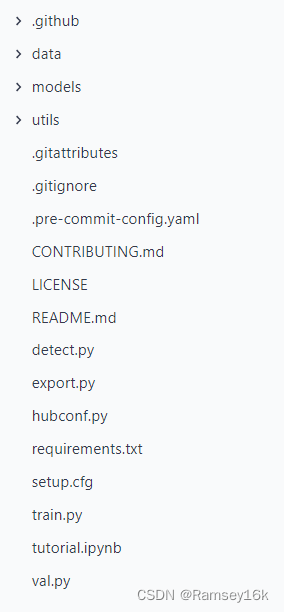
下载好的YOLOv5项目结构如下所示:
; (2)将代码上传到服务器,并创建相应目录
- 将下载好的YOLOv5代码上传到有GPU的服务器
- 在服务器的YOLOv5文件夹中新建一个目录weights,存放yolov5x.pt
- 在服务器的YOLOv5文件夹中新建一个目录datasets,并新建一个当前项目的目录(便于日后针对不同项目管理),存放之前split目录下的images和labels,我这里是datasets/0506HDA 注:上传到服务器的时候需要将images和labels打成压缩包,例如dataset.zip,然后使用 unzip dataset.zip解压缩
- 在models目录下新建一个针对当前任务制定的模型配置文件,我的是yolov5x_hdl.yaml,具体细节参见(3)
- 在datasets/0506HDA目录下新建一个训练所用的yaml文件,我的是hdl.yaml,具体细节参见(3)
(3)回到服务器中的YOLOv5目录,然后输入训练指令:
python train.py --data datasets/0506HDA/hdl.yaml --cfg models/yolov5x_hdl.yaml --weights weights/yolov5x.pt --epoch 400
其中, –cfg 指定训练所用的模型, –data 指定数据文件,默认使用data/coco128.yaml, –weights 指定模型权重, –epoch 指定训练轮数
- yolov5x_hdl.yaml是在yolov5x.yaml的基础上稍作修改的文件,这是由于我的目标检测任务是二分类的,所以将nc从80变成了2,其他部分不变,内容如下:
nc: 2
depth_multiple: 1.33
width_multiple: 1.25
anchors:
  - [10,13, 16,30, 33,23]
  - [30,61, 62,45, 59,119]
  - [116,90, 156,198, 373,326]

backbone:

  [[-1, 1, Conv, [64, 6, 2, 2]],
   [-1, 1, Conv, [128, 3, 2]],
   [-1, 3, C3, [128]],
   [-1, 1, Conv, [256, 3, 2]],
   [-1, 6, C3, [256]],
   [-1, 1, Conv, [512, 3, 2]],
   [-1, 9, C3, [512]],
   [-1, 1, Conv, [1024, 3, 2]],
   [-1, 3, C3, [1024]],
   [-1, 1, SPPF, [1024, 5]],
  ]

head:
  [[-1, 1, Conv, [512, 1, 1]],
   [-1, 1, nn.Upsample, [None, 2, 'nearest']],
   [[-1, 6], 1, Concat, [1]],
   [-1, 3, C3, [512, False]],

   [-1, 1, Conv, [256, 1, 1]],
   [-1, 1, nn.Upsample, [None, 2, 'nearest']],
   [[-1, 4], 1, Concat, [1]],
   [-1, 3, C3, [256, False]],

   [-1, 1, Conv, [256, 3, 2]],
   [[-1, 14], 1, Concat, [1]],
   [-1, 3, C3, [512, False]],

   [-1, 1, Conv, [512, 3, 2]],
   [[-1, 10], 1, Concat, [1]],
   [-1, 3, C3, [1024, False]],

   [[17, 20, 23], 1, Detect, [nc, anchors]],
  ]
- hdl.yaml存放训练集、验证集、测试集的目录,以及类别信息,这是我在data/coco128.yaml的基础上修改的 原始的coco128.yaml指定了训练集、验证集、测试集的路径,以及分类个数和名字,内容如下:
path: ../datasets/coco128
train: images/train2017
val: images/train2017
test:

nc: 80
names: ['person', 'bicycle', 'car', 'motorcycle', 'airplane', 'bus', 'train', 'truck', 'boat', 'traffic light',
        'fire hydrant', 'stop sign', 'parking meter', 'bench', 'bird', 'cat', 'dog', 'horse', 'sheep', 'cow',
        'elephant', 'bear', 'zebra', 'giraffe', 'backpack', 'umbrella', 'handbag', 'tie', 'suitcase', 'frisbee',
        'skis', 'snowboard', 'sports ball', 'kite', 'baseball bat', 'baseball glove', 'skateboard', 'surfboard',
        'tennis racket', 'bottle', 'wine glass', 'cup', 'fork', 'knife', 'spoon', 'bowl', 'banana', 'apple',
        'sandwich', 'orange', 'broccoli', 'carrot', 'hot dog', 'pizza', 'donut', 'cake', 'chair', 'couch',
        'potted plant', 'bed', 'dining table', 'toilet', 'tv', 'laptop', 'mouse', 'remote', 'keyboard', 'cell phone',
        'microwave', 'oven', 'toaster', 'sink', 'refrigerator', 'book', 'clock', 'vase', 'scissors', 'teddy bear',
        'hair drier', 'toothbrush']

download: https://ultralytics.com/assets/coco128.zip
我根据自己的需求修改后内容如下:
train: ../yolov5/datasets/0506HDA/images/train/
val: ../yolov5/datasets/0506HDA/images/val/
test: ../yolov5/datasets/0506HDA/images/test/

nc: 2
names: ['A', 'T']
4.检测
训练完成后,模型的各项信息会保存在yolov5/runs/train/目录下,如果是默认的话,会有 _exp+数字_命名的各种目录,此时进入数字最大的那个(我的是exp3),也就是最后一次训练得到的模型,即可看到训练结果。
训练效果最好的模型参数保存在exp3/weights/best.pt中
检测命令如下:
python detect.py --source /mnt/seqdata2/Public_shared/tmp_cyf/CYCLONE-291/images/20211210171717_LAB256V2_5K_PC28_34_Z3_h49_5C20_J4_AD3_2020SEP_LiuJiaDun --weights ./runs/train/exp3/weights/best.pt --line-thickness 1 --save-txt --save-conf
其中, –source 指定待检测的数据集目录, –weights 指定权重,这里我们使用训练过的最佳模型
检测结果会存放在yolov5/runs/detect/目录下
Original: https://blog.csdn.net/qq_40960093/article/details/124665961
Author: Ramsey16k
Title: YOLOv5目标检测全流程:从标注数据到检测模型
原创文章受到原创版权保护。转载请注明出处:https://www.johngo689.com/519538/
转载文章受原作者版权保护。转载请注明原作者出处!