

语音搜索
前言
在上一篇文章中,给天气APP添加了语音播报的功能,但是主页面要是想去切换城市除了已有常用城市以外,切换城市和搜索城市需要的操作都太多了,因此通过语音来搜索城市,然后查询天气无疑可以简化操作步骤。
正文
之前在加入语音播报时就已经配置好了讯飞的SDK,因此,在这里直接写功能就可以了,下面开始写功能吧。
一、权限配置
语音搜索,则首先需要手机能听到我们说话。因此你需要在app模块下的AndroidManifest.xml中添加一个录音权限。
android:name="android.permission.RECORD_AUDIO"/>
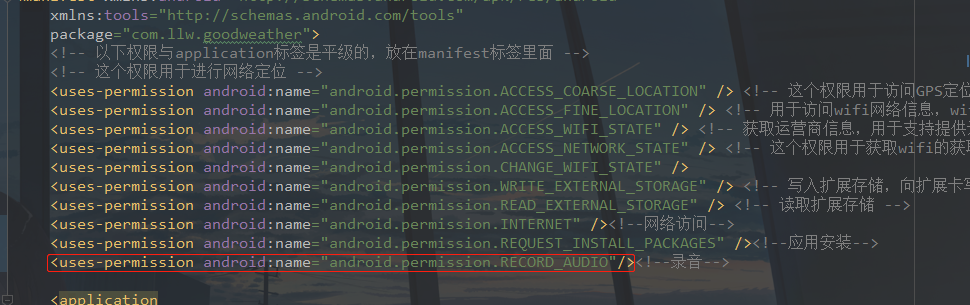

同时,此权限很危险,因此需要动态应用。记住我们在欢迎页面上请求位置权限的地方,所以只需添加此权限即可。
[En]
At the same time, this permission is dangerous, so it needs to be applied dynamically. Remember where we asked for location permission, on the welcome page, so just add this permission.

如果获得许可,您可以执行以下操作。现在您需要考虑在哪里以及如何进行语音搜索,您可以通过主页上的按钮触发语音监控。
[En]
With permission, you can do the following things. Now you need to think about where and how to conduct voice search, and you can trigger voice monitoring through buttons on the main page.
二、用户体验优化
首先,语音搜索功能显然不是必须的,这是锦上添花,但并不是每个用户都会这样认为,这一点应该明确,所谓的普口很难调整,为了避免软件功能成为众矢之的,所以在添加新功能时,我们应该更全面地考虑,减少用户的负面情绪。因此,该语音搜索功能也可以关闭。说到关闭,你有没有想到之前的每日弹出窗口?是的,我们可以将两个交换机放在同一个设置页面中,所以让我们先完成这一步。
[En]
First of all, it is clear that voice search function is not necessary, this is the icing on the cake, but not every user will think so, this point should be clear, the so-called general mouth is difficult to adjust, in order to avoid software functions from becoming the target of public criticism, so when adding new features, we should consider more comprehensively and reduce the negative emotions of users. Therefore, this voice search function can also be turned off. Speaking of closing, did you think of the previous daily pop-up window? Yes, we can put two switches in the same settings page, so let’s finish this step first.
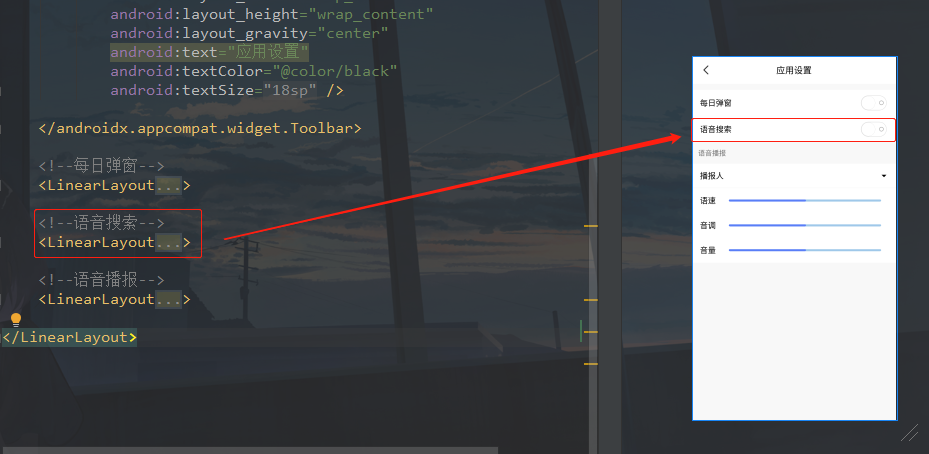
打开activity_setting.xml,在每日弹窗的后面增加如下布局代码:
    android:layout_width="match_parent"
        android:layout_height="wrap_content"
        android:layout_marginTop="@dimen/dp_1"
        android:background="@color/white"
        android:gravity="center_vertical"
        android:orientation="horizontal"
        android:paddingLeft="@dimen/dp_16"
        android:paddingTop="@dimen/dp_8"
        android:paddingRight="@dimen/dp_16"
        android:paddingBottom="@dimen/dp_8">

        android:layout_width="0dp"
            android:layout_height="wrap_content"
            android:layout_weight="1"
            android:text="语音搜索"
            android:textColor="@color/black"
            android:textSize="@dimen/sp_16" />

        android:id="@+id/wb_voice_search"
            android:layout_width="wrap_content"
            android:layout_height="wrap_content" />
如下图所示
布局改好了之后,进入SettingActivity,绑定id。
    @BindView(R.id.wb_voice_search)
    SwitchButton wbVoiceSearch;
所以现在有两个开关按钮,为了不写重复的代码,你可以写一个方法来控制,在这之前,我们先来看看原始的日常弹出代码是如何编写的。
[En]
So now there are two switch buttons, in order not to write repetitive code, you can write a method to control, before that, let’s take a look at how the original daily pop-up code is written.
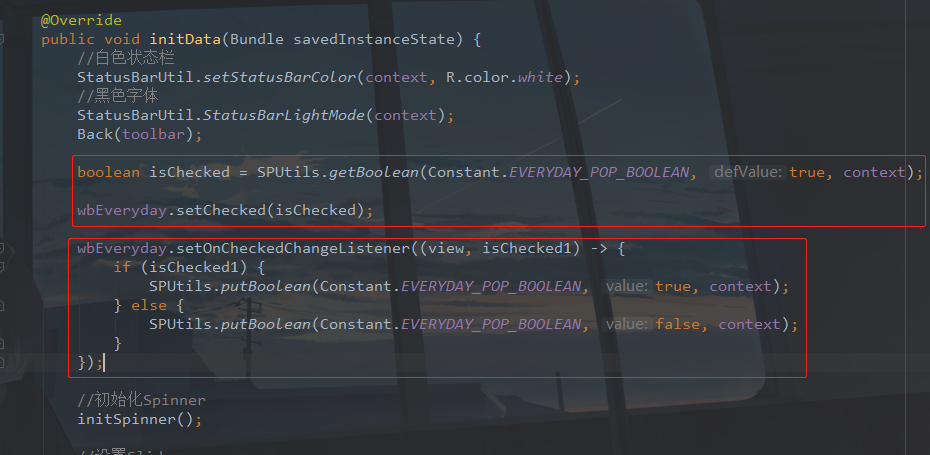
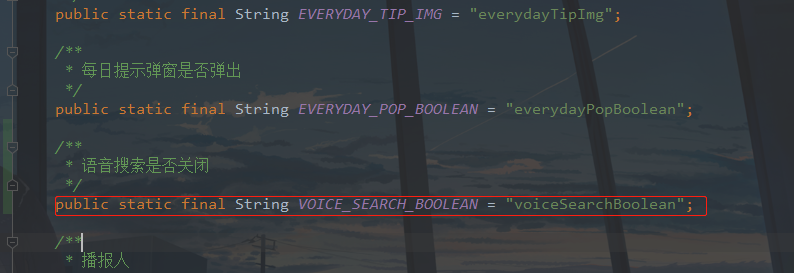
可以看到,这里的代码分为两部分,上部分取缓存中的值,设置是否打开每日弹窗开关,下部分用来监听开关按钮是否打开,然后重新设置缓存。之前是通过一个全局变量来控制每日开关,那么同样也要通过一个变量来控制语音搜索开关。打开Constant,增加如下变量代码:
public static final String VOICE_SEARCH_BOOLEAN = "voiceSearchBoolean";
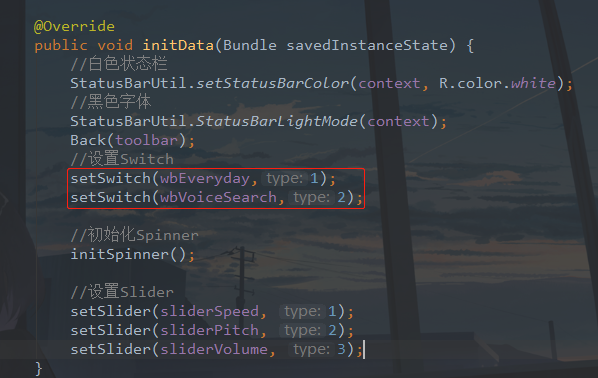
变量有了,在SettingActivity中新增setSwitch方法,代码如下:
    private void setSwitch(SwitchButton switchButton, final int type) {

        wbEveryday.setChecked(SPUtils.getBoolean(Constant.EVERYDAY_POP_BOOLEAN, true, context));
        wbVoiceSearch.setChecked(SPUtils.getBoolean(Constant.VOICE_SEARCH_BOOLEAN, true, context));

        switchButton.setOnCheckedChangeListener((view, isChecked) -> {
            switch (type) {
                case 1:
                    if (isChecked) {
                        SPUtils.putBoolean(Constant.EVERYDAY_POP_BOOLEAN, true, context);
                    } else {
                        SPUtils.putBoolean(Constant.EVERYDAY_POP_BOOLEAN, false, context);
                    }
                    break;
                case 2:
                    if (isChecked) {
                        SPUtils.putBoolean(Constant.VOICE_SEARCH_BOOLEAN, true, context);
                    } else {
                        SPUtils.putBoolean(Constant.VOICE_SEARCH_BOOLEAN, false, context);
                    }
                    break;
                default:
                    break;
            }
        });
    }
然后在initData中调用
设置页面的代码就写好了,下面写主页面的代码,打开activity_main.xml。
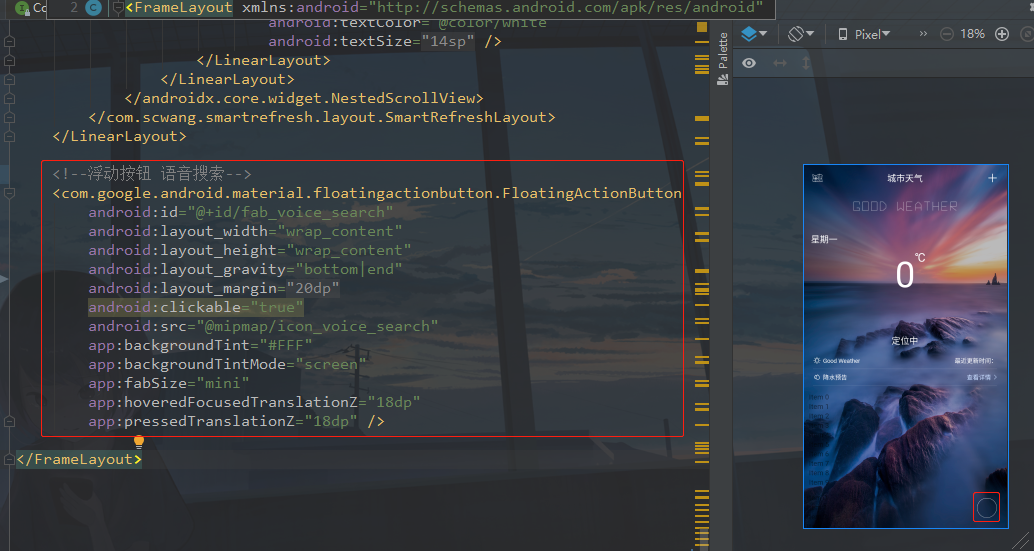
增加浮动按钮代码。
    android:id="@+id/fab_voice_search"
        android:layout_width="wrap_content"
        android:layout_height="wrap_content"
        android:layout_gravity="bottom|end"
        android:layout_margin="@dimen/dp_20"
        android:clickable="true"
        android:src="@mipmap/icon_voice_search"
        app:backgroundTint="@color/white"
        app:backgroundTintMode="screen"
        app:fabSize="mini"
        app:hoveredFocusedTranslationZ="@dimen/dp_18"
        app:pressedTranslationZ="@dimen/dp_18" />

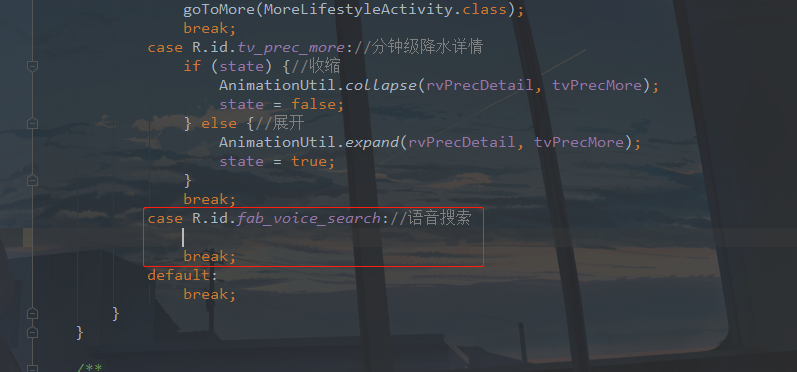
这是按钮的图标,添加代码的位置如下:
[En]
This is the icon for the button, and the location where the code is added is as follows:
进入主页面MainActivity,绑定ID。
    @BindView(R.id.fab_voice_search)
    FloatingActionButton fabVoiceSearch;
然后在onResume方法回调中。
        if (SPUtils.getBoolean(Constant.VOICE_SEARCH_BOOLEAN, true, context)) {
            fabVoiceSearch.show();
        } else {
            fabVoiceSearch.hide();
        }
在这里,您可以通过缓存变量的值来控制是否显示按钮。默认情况下会显示该按钮,但当您关闭设置中的开关时,该按钮将不再显示。
[En]
Here, you control whether the button is displayed by caching the value of the variable. The button is displayed by default, but when you turn off the switch in the setting, the button is no longer displayed.
三、配置语音识别听写
前面说到了有这个按钮,那么点击这个按钮自然要做一些事情,下面来看看做什么事情。还记得在上篇文章中我新增了一个语音工具类SpeechUtil。下面的配置,同样要写在这个工具类中,理由同样是,让主页面的代码逻辑更清晰和简洁,同时方便其他页面调用。当然如果你只是想在一个页面中使用的话,可以看看这一篇文章Android 科大讯飞语音识别,下面进入到SpeechUtil。
先创建成员变量
    private static SpeechRecognizer mIat;
    private static RecognizerDialog mIatDialog;

    private static HashMap<String, String> mIatResults = new LinkedHashMap<String, String>();

    private static SharedPreferences mSharedPreferences;

    private static String language = "zh_cn";

    private static String resultType = "json";

    private static String dictationResults;
然后新增mInitListener变量完成对语音SDK初始化的监听,这里其实和语音合成用的是一样的InitListener ,只是用了不同的变量名来接收,可以更精简一些,如果你是自己写的话,就直接用一个变量就好了。
    private static InitListener mInitListener = code -> {
        Log.d(TAG, "SpeechRecognizer init() code = " + code);
        if (code != ErrorCode.SUCCESS) {
            showTip("初始化失败,错误码:" + code + ",请点击网址https://www.xfyun.cn/document/error-code查询解决方案");
        }
    };
然后创建语音识别回调变量
[En]
Then create a speech recognition callback variable
    private static RecognizerDialogListener mRecognizerDialogListener = new RecognizerDialogListener() {

        @Override
        public void onResult(RecognizerResult results, boolean isLast) {

            parsingResult(results);
        }

        @Override
        public void onError(SpeechError error) {
            showTip(error.getPlainDescription(true));
        }

    };
下面在写parsingResult方法之前,先做好一些准备工作。首先在你的app模块下的utils包下新建一个JsonParser类,里面的代码如下:
package com.llw.goodweather.utils;

import org.json.JSONArray;
import org.json.JSONObject;
import org.json.JSONTokener;

public class JsonParser {

    public static String parseIatResult(String json) {
        StringBuffer ret = new StringBuffer();
        try {
            JSONTokener tokener = new JSONTokener(json);
            JSONObject joResult = new JSONObject(tokener);

            JSONArray words = joResult.getJSONArray("ws");
            for (int i = 0; i < words.length(); i++) {

                JSONArray items = words.getJSONObject(i).getJSONArray("cw");
                JSONObject obj = items.getJSONObject(0);
                ret.append(obj.getString("w"));

            }
        } catch (Exception e) {
            e.printStackTrace();
        }
        return ret.toString();
    }

    public static String parseGrammarResult(String json) {
        StringBuffer ret = new StringBuffer();
        try {
            JSONTokener tokener = new JSONTokener(json);
            JSONObject joResult = new JSONObject(tokener);

            JSONArray words = joResult.getJSONArray("ws");
            for (int i = 0; i < words.length(); i++) {
                JSONArray items = words.getJSONObject(i).getJSONArray("cw");
                for(int j = 0; j < items.length(); j++)
                {
                    JSONObject obj = items.getJSONObject(j);
                    if(obj.getString("w").contains("nomatch"))
                    {
                        ret.append("没有匹配结果.");
                        return ret.toString();
                    }
                    ret.append("【结果】" + obj.getString("w"));
                    ret.append("【置信度】" + obj.getInt("sc"));
                    ret.append("\n");
                }
            }
        } catch (Exception e) {
            e.printStackTrace();
            ret.append("没有匹配结果.");
        }
        return ret.toString();
    }

    public static String parseLocalGrammarResult(String json) {
        StringBuffer ret = new StringBuffer();
        try {
            JSONTokener tokener = new JSONTokener(json);
            JSONObject joResult = new JSONObject(tokener);

            JSONArray words = joResult.getJSONArray("ws");
            for (int i = 0; i < words.length(); i++) {
                JSONArray items = words.getJSONObject(i).getJSONArray("cw");
                for(int j = 0; j < items.length(); j++)
                {
                    JSONObject obj = items.getJSONObject(j);
                    if(obj.getString("w").contains("nomatch"))
                    {
                        ret.append("没有匹配结果.");
                        return ret.toString();
                    }
                    ret.append("【结果】" + obj.getString("w"));
                    ret.append("\n");
                }
            }
            ret.append("【置信度】" + joResult.optInt("sc"));

        } catch (Exception e) {
            e.printStackTrace();
            ret.append("没有匹配结果.");
        }
        return ret.toString();
    }

    public static String parseTransResult(String json, String key) {
        StringBuffer ret = new StringBuffer();
        try {
            JSONTokener tokener = new JSONTokener(json);
            JSONObject joResult = new JSONObject(tokener);
            String errorCode = joResult.optString("ret");
            if(!errorCode.equals("0")) {
                return joResult.optString("errmsg");
            }
            JSONObject transResult = joResult.optJSONObject("trans_result");
            ret.append(transResult.optString(key));

        } catch (Exception e) {
            e.printStackTrace();
        }
        return ret.toString();
    }
}
这个类用于对听写结果进行解析处理,然后在SpeechUtil中新增如下接口。
    private static SpeechCallback mSpeechCallback;

    public interface SpeechCallback {

        void dictationResults(String cityName);
    }
并创建一个变量,下面就可以编写parsingResult方法了,代码如下:
    private static void parsingResult(RecognizerResult results) {

        String text = JsonParser.parseIatResult(results.getResultString());

        String sn = null;

        try {
            JSONObject resultJson = new JSONObject(results.getResultString());
            sn = resultJson.optString("sn");
        } catch (JSONException e) {
            e.printStackTrace();
        }

        mIatResults.put(sn, text);

        StringBuffer resultBuffer = new StringBuffer();
        for (String key : mIatResults.keySet()) {
            resultBuffer.append(mIatResults.get(key));
        }

        dictationResults = resultBuffer.toString();

        mSpeechCallback.dictationResults(dictationResults);

        Log.d(TAG,dictationResults);
    }
然后是配置语音识别的参数,新增setDictationParam方法。
    public static void setDictationParam() {

        mIat.setParameter(SpeechConstant.PARAMS, null);

        mIat.setParameter(SpeechConstant.ENGINE_TYPE, mEngineType);

        mIat.setParameter(SpeechConstant.RESULT_TYPE, resultType);

        if (language.equals("zh_cn")) {
            String lag = mSharedPreferences.getString("iat_language_preference",
                    "mandarin");
            Log.e(TAG, "language:" + language);
            mIat.setParameter(SpeechConstant.LANGUAGE, "zh_cn");

            mIat.setParameter(SpeechConstant.ACCENT, lag);
        } else {

            mIat.setParameter(SpeechConstant.LANGUAGE, language);
        }
        Log.e(TAG, "last language:" + mIat.getParameter(SpeechConstant.LANGUAGE));

        mIat.setParameter(SpeechConstant.VAD_BOS, mSharedPreferences.getString("iat_vadbos_preference", "4000"));

        mIat.setParameter(SpeechConstant.VAD_EOS, mSharedPreferences.getString("iat_vadeos_preference", "1000"));

        mIat.setParameter(SpeechConstant.ASR_PTT, mSharedPreferences.getString("iat_punc_preference", "1"));

        mIat.setParameter(SpeechConstant.AUDIO_FORMAT, "wav");
        mIat.setParameter(SpeechConstant.ASR_AUDIO_PATH, Environment.getExternalStorageDirectory() + "/msc/iat.wav");
    }
然后编写语音识别的startDictation方法,代码如下:
    public static void startDictation(SpeechCallback speechCallback){
        mSpeechCallback = speechCallback;
        if( null == mIat ){

            showTip( "创建对象失败,请确认 libmsc.so 放置正确,且有调用 createUtility 进行初始化" );
            return;
        }

        mIatResults.clear();
        setDictationParam();
        mIatDialog.setListener(mRecognizerDialogListener);

        mIatDialog.show();
    }
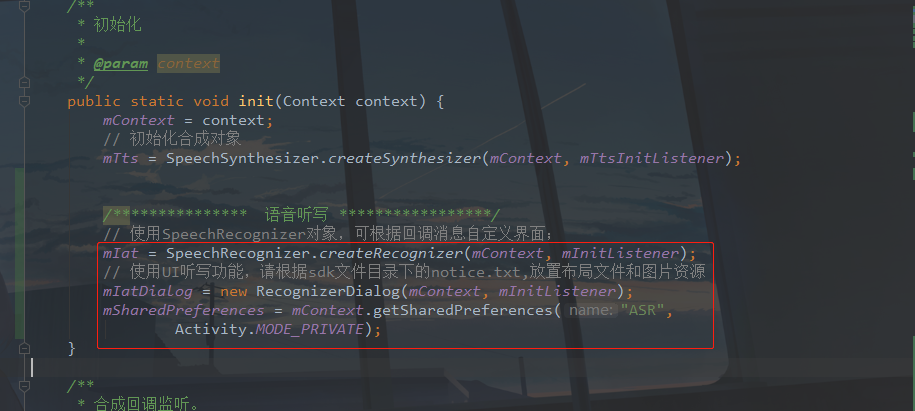
还有最后一步,那就是初始化,还记得init方法吗?
        mIat = SpeechRecognizer.createRecognizer(mContext, mInitListener);

        mIatDialog = new RecognizerDialog(mContext, mInitListener);
        mSharedPreferences = mContext.getSharedPreferences("ASR",
                Activity.MODE_PRIVATE);
添加位置如下图所示:
最后就只要在MainActivity中调用就可以了。
四、语音搜索
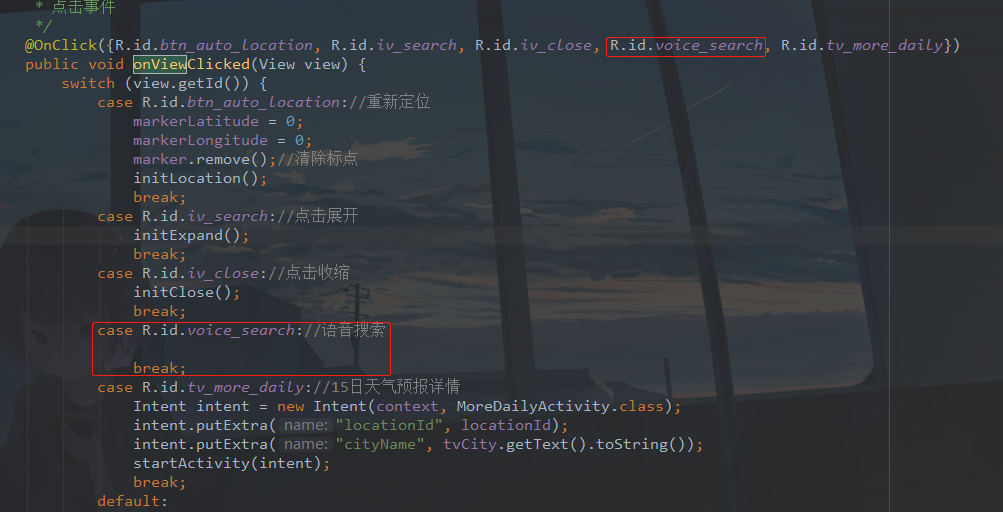
进入到MainActivity,首先给浮动按钮添加点击事件。
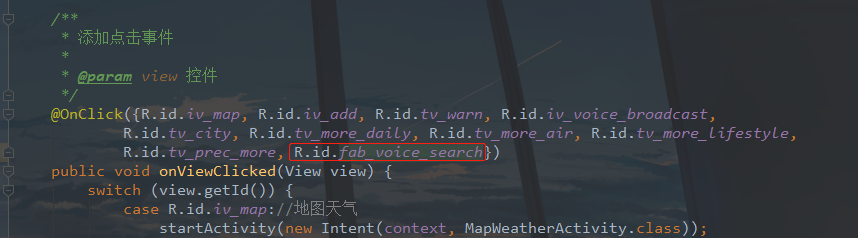
然后通过startDictation方法。
                SpeechUtil.startDictation(new SpeechUtil.SpeechCallback() {
                    @Override
                    public void dictationResults(String cityName) {
                        if(cityName.isEmpty()){
                            return;
                        }
                        ToastUtils.showShortToast(context,cityName);
                    }
                });
这里可以通过lambda表达式进行一下简化,就是这样:
                SpeechUtil.startDictation(cityName -> {
                    if(cityName.isEmpty()){
                        return;
                    }
                    ToastUtils.showShortToast(context,cityName);
                });
让我们来运行测试,请通过真实的机器运行,然后通过录音音频权限。进入主页,点击右下角的浮动按钮,就会弹出一个窗口,然后说出一个城市的名称。我说的是长沙。演示效果如下:
[En]
Let’s run the test, please run it through the real machine, and then pass the recording audio permission. Go to the main page, click the floating button in the lower right corner, and a pop-up window will appear, and then say the name of a city. I’m talking about Changsha. The demo effect is as follows:

这样就拿到了城市,下面就可以通过这个城市的值去搜索城市,然后获取城市的id,之后就可以查询天气数据了,是不是很简单呢?不过刚才出现的语音弹窗有一个小问题,那就是它的底部有一行小字体链接,如果你点击则会进入讯飞的官网,这么一看就像是在打广告了,所以要去掉这一行字,那么怎么去呢?这是一个问题。打开assets中iflytek文件夹下的recognize.xml文件夹,你会看到一些乱码,就像下面的图这样。
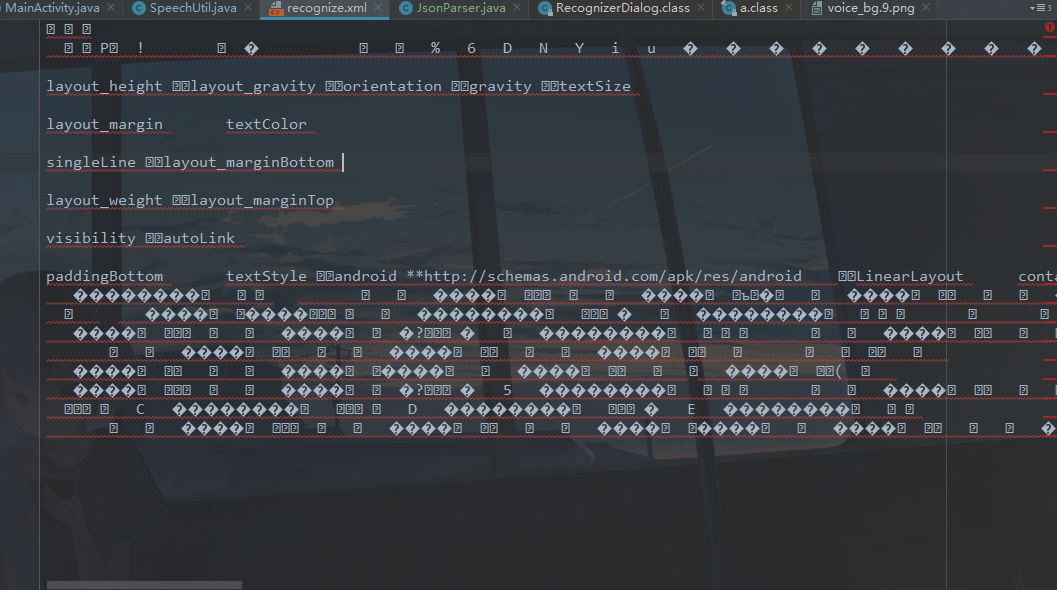
Don’t worry,从之前的弹窗我们得知这是一个超链接文本,那么你就可以从这些乱码中去寻找有关于超链接的字眼?链接的英文是什么?Link啊!
然后你Ctrl + F ,搜索Link。

这个autoLink好像不对,点一下回车。

这个textLink,好像差不多,那么就试一下这个。通过这个命名我有理由相信这是一个控件的id,那么它是textLink,文本链接,那么很有可能就是TextView控件,然后添加了点击事件和下划线形成的,那么下面来验证我的这个判断。还记得我们是在什么地方显示这个弹窗的吗?
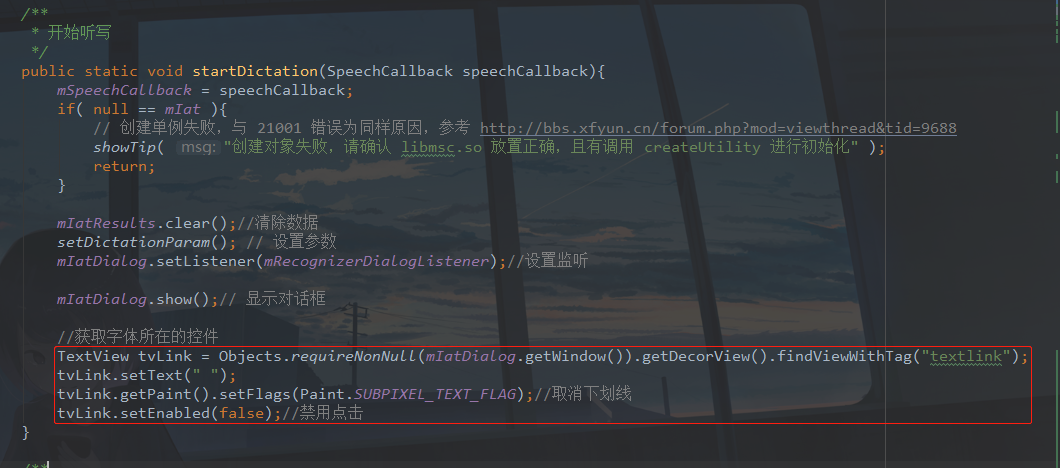
没错就是在SpeechUtil的startDictation方法中,我们可以在弹窗显示之后。添加如下代码。
        TextView tvLink = Objects.requireNonNull(mIatDialog.getWindow()).getDecorView().findViewWithTag("textlink");
        tvLink.setText(" ");
        tvLink.getPaint().setFlags(Paint.SUBPIXEL_TEXT_FLAG);
        tvLink.setEnabled(false);
添加位置如下所示:
下面运行看看。

是不是没有这个底部的广告了呢?嗯,歪打正着,很Nice!程序员的快乐有时候就是这么简单。
OK,下面要做的就很简单了,就是处理这个搜索城市的结果,然后发起请求就可以了。
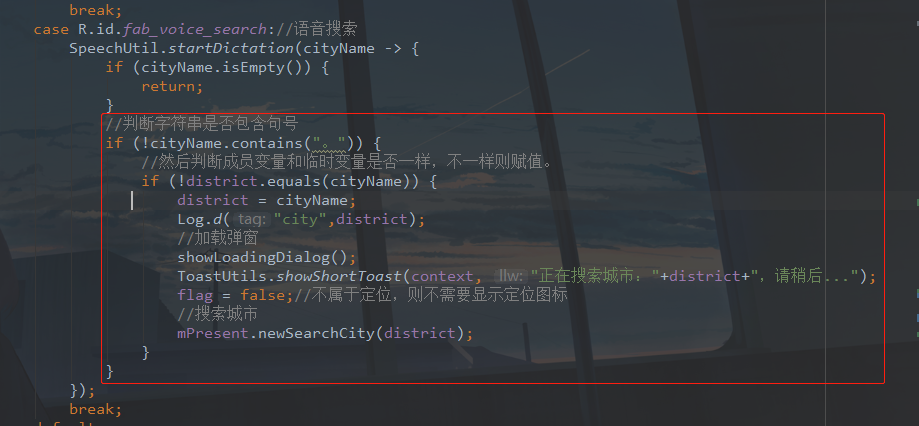
然后修改浮动按钮中的代码如下:
[En]
Then modify the code in the floating button as follows:
                    if (!cityName.contains("。")) {

                        if (!district.equals(cityName)) {
                            district = cityName;
                            Log.d("city",district);

                            showLoadingDialog();
                            ToastUtils.showShortToast(context, "正在搜索城市:"+district+",请稍后...");
                            flag = false;

                            mPresent.newSearchCity(district);
                        }
                    }
改动如下图所示:
这里还有一个需要注意的问题,那就是当你语音搜索一个城市失败的时候,比如你说不,页面还是会搜索,但是你会发现页面有一个无法关闭的弹出窗口,所以你需要在搜索城市的返回上增加一个处理,也就是在搜索找不到城市的时候关闭加载框。(这是读者发现的问题,这里有解释。)
[En]
There is also a problem to pay attention to here, that is, when your voice search for a city fails, for example, if you say “no”, the page will still search, but you will find that the page has a pop-up window that cannot be closed, so you need to add a processing to the return of the search city, that is, close the load box when the search cannot find the city. (this is a problem found by the reader, which is explained here.)


这样做了,主页就有了语音搜索的功能,几个页面也可以添加这个功能。
[En]
This is done, the main page has the function of voice search, and several pages can also add this function.
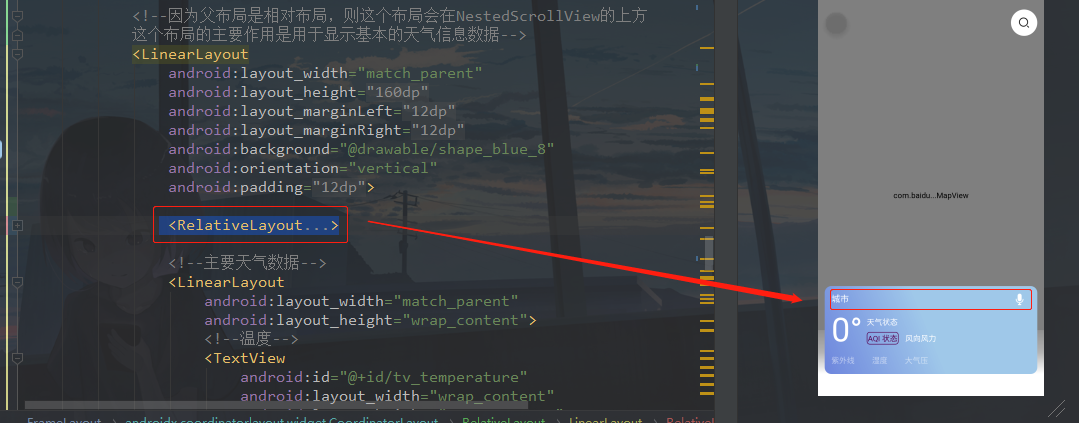
五、地图天气添加语音搜索功能
打开activity_map_weather.xml,这个页面要是添加语音搜索功能也比较简单,直接在这个拖动区域中添加一个按钮图标即可,如下图所示

图标用一个白色的麦克风图标,你可以去我的源代码拿到它。
[En]
Icon using a white microphone icon, you can go to my source code to get it.
修改段的布局代码如下:
[En]
The layout code for the modification section is as follows:
                android:layout_width="match_parent"
                    android:layout_height="wrap_content">

                    android:id="@+id/tv_city"
                        android:layout_width="wrap_content"
                        android:layout_height="wrap_content"
                        android:text="城市"
                        android:textColor="@color/white"
                        android:textSize="@dimen/sp_16" />

                    android:id="@+id/voice_search"
                        android:layout_width="@dimen/dp_40"
                        android:layout_height="wrap_content"
                        android:layout_alignParentRight="true"
                        android:src="@mipmap/icon_voice_search_white" />
添加位置如下图所示:
下面进入到MapWeatherActivity,先绑定控件
    @BindView(R.id.voice_search)
    ImageView voiceSearch;
然后添加点击事件
然后在initData方法中完成初始化。
然后将以下代码添加到Click事件中:
[En]
Then add the following code to the click event:
                SpeechUtil.startDictation(cityName -> {
                    if (cityName.isEmpty()) {
                        return;
                    }

                    if (!cityName.contains("。")) {
                        geoCoder.geocode(new GeoCodeOption().city(cityName).address(cityName));
                    }
                });
在这里得到地址后,首先需要更改地图上的点,然后搜索城市,然后搜索天气。结果如下:
[En]
After you get the address here, you first need to change the points on the map, then search for the city, and then search for the weather. The results are as follows:

这样就增加了地图页面的这一功能。
[En]
In this way, this function of the map page is added.
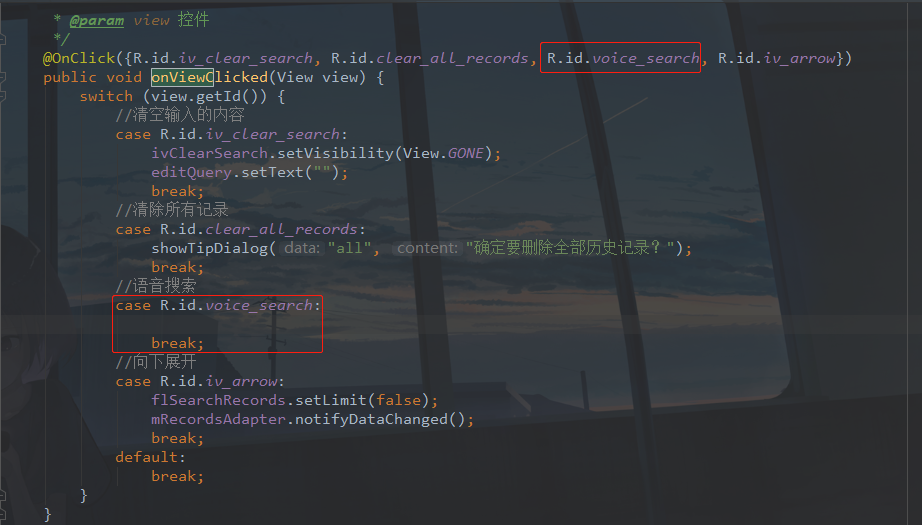
六、城市搜索添加语音搜索功能
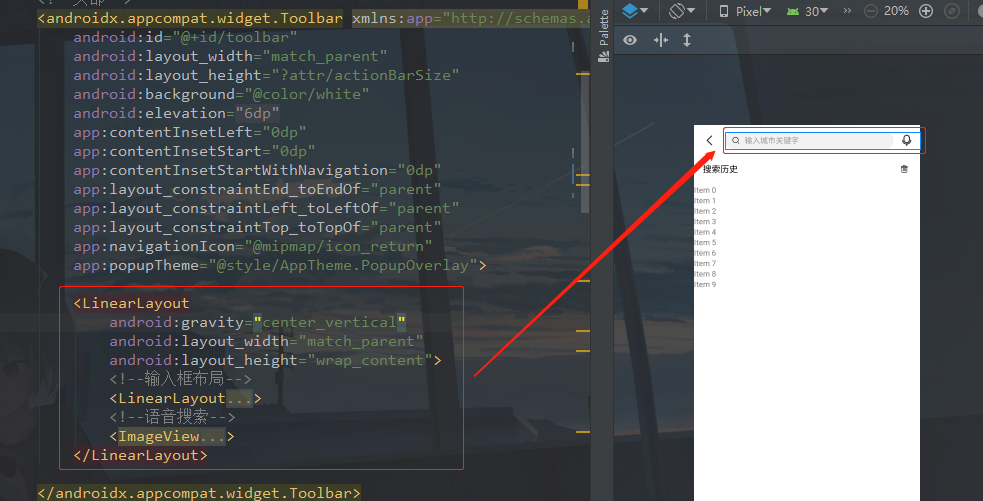
首先也是先修改布局,打开activity_search_city.xml,修改的代码如下:
        android:gravity="center_vertical"
            android:layout_width="match_parent"
            android:layout_height="wrap_content">

            android:layout_width="0dp"
                android:layout_height="@dimen/dp_30"
                android:layout_marginRight="@dimen/dp_12"
                android:layout_weight="1"
                android:background="@drawable/shape_gray_bg_14"
                android:focusable="true"
                android:focusableInTouchMode="true"
                android:gravity="center_vertical"
                android:paddingLeft="@dimen/dp_12"
                android:paddingRight="@dimen/dp_12">

                android:layout_width="@dimen/dp_16"
                    android:layout_height="@dimen/dp_16"
                    android:src="@mipmap/icon_search" />

                android:id="@+id/edit_query"
                    android:layout_width="match_parent"
                    android:layout_height="wrap_content"
                    android:layout_weight="1"
                    android:background="@null"
                    android:completionThreshold="1"
                    android:dropDownHorizontalOffset="5dp"
                    android:hint="输入城市关键字"
                    android:imeOptions="actionSearch"
                    android:paddingLeft="@dimen/dp_8"
                    android:paddingRight="@dimen/dp_4"
                    android:singleLine="true"
                    android:textColor="@color/black"
                    android:textCursorDrawable="@drawable/cursor_style"
                    android:textSize="@dimen/sp_14" />

                android:id="@+id/iv_clear_search"
                    android:layout_width="@dimen/dp_16"
                    android:layout_height="@dimen/dp_16"
                    android:src="@mipmap/icon_delete"
                    android:visibility="gone" />

            android:id="@+id/voice_search"
                android:layout_width="wrap_content"
                android:layout_height="wrap_content"
                android:layout_marginRight="@dimen/dp_12"
                android:src="@mipmap/icon_voice_search" />
修改位置如下图所示:
然后同样是进入到SearchCityActivity页面,绑定id。
    @BindView(R.id.voice_search)
    ImageView voiceSearch;
然后添加一个点击事件,如下图所示:
[En]
Then add a click event, as shown in the following figure:
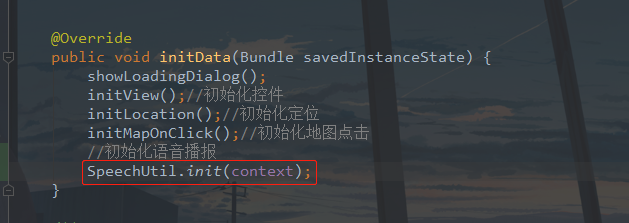
然后就是在initData里面添加
SpeechUtil.init(this);
之后,将以下代码添加到Click事件中:
[En]
After that, add the following code to the click event:
                SpeechUtil.startDictation(cityName -> {

                    if (!cityName.contains("。")) {

                        editQuery.setText(cityName);

                        showLoadingDialog();

                        mRecordsDao.addRecords(cityName);

                        mPresent.newSearchCity(cityName);

                        saveHistory("history", editQuery);
                    }

                });
那很好。在下面运行它:
[En]
That’s fine. Run it below:

OK,这样语音功能就添加进去了,每个页面的业务不同,因此页面的操作也会有相应的改变,要因地制宜,不要想着一份代码在所有地方都适用,这种情况很少。
总结
到这里本篇文章就结束了,说起来这篇文章是从2020年写到了2021年,过年回家那几天光走亲戚去了,回到家里根本不想写代码了,因此回到深圳之后花了一些时间写出来。这个天气APP的系列博客文章我居然都写到了第三十四篇了,这在之前是我不敢相信的,最开始的版本是九篇文章,其实就是一篇文章,但是由于字数太多,不让发布,所以我拆分了成了前九篇文章,然后去年一整年的时间,陆陆续续又写了21篇文章。还是挺感慨的,后续我可能还会再写下去,也可能不会写了,因为确实能跟着博客看完并且手动操作的人比较少,可能一看到这个文章有34篇,就慌了,不敢学了,望文兴叹。学习是一个循序渐进的过程,你不学,其他人就在学,到时候你怎么和别人竞争呢?天道酬勤,我是初学者-Study,山高水长,后会有期~
源码地址:GoodWeather
欢迎 Star 和 Fork
联系邮箱 lonelyholiday@qq.com
Original: https://blog.csdn.net/qq_38436214/article/details/113699279
Author: 初学者-Study
Title: Android 天气APP(三十四)语音搜索
原创文章受到原创版权保护。转载请注明出处:https://www.johngo689.com/515007/
转载文章受原作者版权保护。转载请注明原作者出处!