

1.摘要
许多真实世界的应用,包括计算摄影(闪光反射)和增强现实(虚拟化身),都依赖于对眼睛中虹膜的准确跟踪。在移动设备上解决这一问题是一项具有挑战性的任务,因为有限的计算资源、可变的照明条件以及面具的存在(如头发或人类眯着眼睛)。虹膜跟踪也可以用来确定相机到用户的公制距离。这可以改进各种用例,从虚拟试戴合适大小的眼镜和帽子,到根据观看者的距离设置字体大小的辅助功能。通常,使用复杂的专用硬件来计算公制距离,从而限制了可应用该解决方案的设备范围。
[En]
A wide range of real-world applications, including computational photography (flash reflection) and augmented reality (virtual avatars), rely on accurate tracking of the iris in the eye. It is a challenging task to solve this problem on mobile devices due to limited computing resources, variable lighting conditions and the existence of masks (such as hair or human squinting). Iris tracking can also be used to determine the metric distance from the camera to the user. This can improve a variety of use cases, from virtual trying on glasses and hats of the right size to assistive functions of font size based on the distance of the viewer. Typically, complex dedicated hardware is used to calculate metric distances, thus limiting the range of devices to which the solution can be applied.
MediaPipe 虹膜是一种用于精确虹膜估计的 ML 解决方案,能够使用单个 RGB 摄像头实时跟踪涉及虹膜、瞳孔和眼睛轮廓的地标,无需专门的硬件。通过使用虹膜地标,该解决方案还能够以小于 10% 的相对误差确定对象与相机之间的公制距离。请注意,虹膜跟踪不会推断人们正在查看的位置,也不会提供任何形式的身份识别。借助 MediaPipe 框架的跨平台功能,MediaPipe 虹膜可以在大多数现代手机、台式机/笔记本电脑甚至网络上运行。
2.ML管道
管道的第一步利用 MediaPipe面部网格,它生成近似面部几何体的网格。从这个网格中,我们获取原始图像中的眼睛区域,以用于随后的虹膜跟踪步骤。
管道被实现为一个 MediaPipe 图,它使用来自面部地标模块的面部地标子图以及来自虹膜地标模块的虹膜地标子图,并使用专用的虹膜和深度渲染器子图进行渲染。人脸地标子图内部使用人脸检测模块中的人脸检测子图。
管道的输出是一组 478 个 3D 地标,包括来自 MediaPipe 面部网格 的 468 个面部地标,眼睛周围的标志进一步细化,最后附加了 10 个额外的虹膜地标(每只眼睛 5 个)。
3.模型
- 人脸检测模型:人脸检测器与 MediaPipe 人脸检测中使用的 BlazeFace 模型相同。
- 人脸地标模型:人脸地标模型与 MediaPipe 面部网格中的相同。
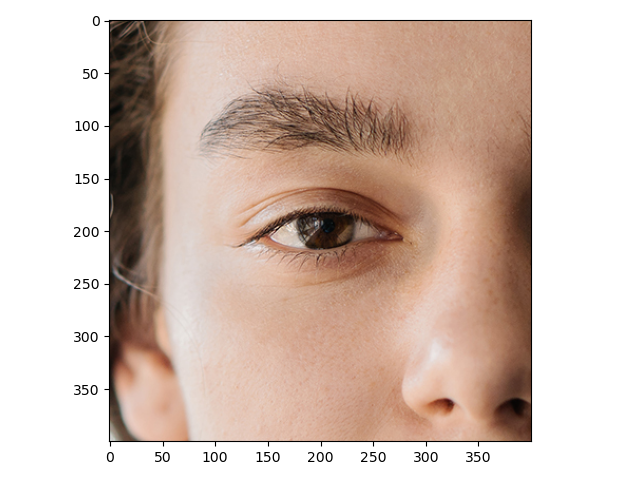
- 虹膜地标模型:虹膜模型捕捉眼睛区域的图像块,并估计眼睛地标(沿眼皮)和虹膜地标(沿虹膜轮廓)。
[En]
Iris landmark model: the iris model captures the image blocks of the eye region and estimates the eye landmarks (along the eyelids) and iris landmarks (along the iris contours).*


眼 睛 地 标 ( 红 色 ) 和 虹 膜 地 标 ( 绿 色 ) 。 眼睛地标(红色)和虹膜地标(绿色)。眼睛地标(红色)和虹膜地标(绿色)。
; 4.根据虹膜测量深度
MediaPipe 虹膜能够以小于 10% 的误差确定拍摄对象到相机的公制距离,而无需任何专门的硬件。这是通过依赖这样一个事实来完成的:人眼的水平虹膜直径在广泛的人群中保持大致恒定在 11.7±0.5 毫米,以及一些简单的几何参数。有关更多详细信息,请参阅Google AI 博客文章。
5.解决方案
官方没有虹膜检测的Python代码,我在Github上找到了TensorFlow以及PyTorch的代码:
链接:https://pan.baidu.com/s/13-Kh_2pGUZGn7Fz-Bifw6Q
提取码:123a
5.1目录结构

; 5.1TensorFlow上实现
import numpy as np
import tensorflow as tf
import cv2
import matplotlib.pyplot as plt

def centerCropSquare(img, center, side=None, scaleWRTHeight=None):
    a = side is None
    b = scaleWRTHeight is None
    assert (not a and b) or (a and not b)
    half = 0
    if side is None:
        half = int(img.shape[0] * scaleWRTHeight / 2)
    else:
        half = int(side / 2)

    return img[(center[0] - half):(center[0] + half), (center[1] - half):(center[1] + half), :]

interpreter = tf.lite.Interpreter(model_path="iris_landmark.tflite")
interpreter.allocate_tensors()

input_details = interpreter.get_input_details()
output_details = interpreter.get_output_details()

img = cv2.imread("test.jpg")
centerRight = [485, 332]
centerLeft = [479, 638]
img = centerCropSquare(img, centerRight,
                       side=400)

img = cv2.cvtColor(img, cv2.COLOR_BGR2RGB)
img = cv2.resize(img, (64, 64))
input_data = np.expand_dims(img.astype(np.float32) / 127.5 - 1.0, axis=0)

input_shape = input_details[0]['shape']
interpreter.set_tensor(input_details[0]['index'], input_data)

interpreter.invoke()

output_data_0 = interpreter.get_tensor(output_details[0]['index'])

eyes = output_data_0
print(eyes.shape)
iris = interpreter.get_tensor(output_details[1]["index"])
print(iris.shape)

plt.imshow(img, zorder=1)
x, y = eyes[0, ::3], eyes[0, 1::3]
plt.scatter(x, y, zorder=2, s=1.0, c="b")

x, y = iris[0, ::3], iris[0, 1::3]
plt.scatter(x, y, zorder=2, s=1.0, c="r")
plt.show()
5.2PyTorch上实现
import torch
from irislandmarks import IrisLandmarks
import matplotlib.pyplot as plt
import cv2

def centerCropSquare(img, center, side=None, scaleWRTHeight=None):
    a = side is None
    b = scaleWRTHeight is None
    assert (not a and b) or (a and not b)
    half = 0
    if side is None:
        half = int(img.shape[0] * scaleWRTHeight / 2)
    else:
        half = int(side / 2)

    return img[(center[0] - half):(center[0] + half), (center[1] - half):(center[1] + half), :]

print("PyTorch version:", torch.__version__)
print("CUDA version:", torch.version.cuda)
print("cuDNN version:", torch.backends.cudnn.version())

gpu = torch.device("cuda:0" if torch.cuda.is_available() else "cpu")

net = IrisLandmarks().to(gpu)
net.load_weights("irislandmarks.pth")

img = cv2.imread("test.jpg")
centerRight = [485, 332]
centerLeft = [479, 638]
img = centerCropSquare(img, centerRight,
                       side=400)
img = img[..., ::-1]
plt.imshow(img)
plt.show()

img = cv2.resize(img, (64, 64))

eye_gpu, iris_gpu = net.predict_on_image(img)
eye = eye_gpu.cpu().numpy()
iris = iris_gpu.cpu().numpy()

print(eye.shape)
print(iris.shape)

plt.imshow(img, zorder=1)
x, y = eye[0, :, 0], eye[0, :, 1]
plt.scatter(x, y, zorder=2, s=1.0, c='b')
x, y = iris[0, :, 0], iris[0, :, 1]
plt.scatter(x, y, zorder=2, s=1.0, c='r')
plt.show()
参考目录
https://github.com/cedriclmenard/irislandmarks.pytorch
https://google.github.io/mediapipe/solutions/iris
Original: https://blog.csdn.net/weixin_43229348/article/details/120529083
Author: 求则得之,舍则失之
Title: MediaPipe基础(3)虹膜(Iris)
原创文章受到原创版权保护。转载请注明出处:https://www.johngo689.com/514520/
转载文章受原作者版权保护。转载请注明原作者出处!