

sagemaker 是aws的托管机器学习的服务,具体的请看

在本地使用tf2.0以上的版本编写一个CNN模型,我测试的是编写是猫狗识别模型。
最后fit完成后,保存模型。其中1 是版本号,主要用于多模型部署,export这个名字可以随便改,但是/Servo 好像是sagemaker规定好的,反正我没这个路径就部署不成功。你们可以试试。
model.save('export/Servo/1/')
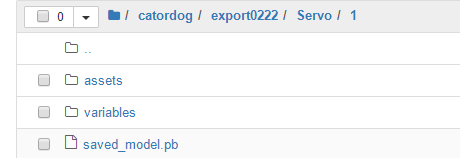
保存模型后,目录结构如下所示。
[En]
After saving the model, the directory structure looks like this.

然后将该目录压缩成.tar.gz格式,这个格式是sagemaker规定格式。
import tarfile
model_archive = 'model.tar.gz'
with tarfile.open(model_archive, mode='w:gz') as archive:
    archive.add('export', recursive=True)
本地会有一个

然后将该压缩文件上传到s3上。
from sagemaker import get_execution_role
from sagemaker import Session
role = get_execution_role()
sess = Session()
model_data = sess.upload_data(path=model_archive, key_prefix='model_dc_new')
下面开始部署:
在sagemaker-笔记本实例中创建一个新的笔记本实例,创建完成后,打开jupyter
这里要强调下role-用户权限,你在创建笔记本实例时,选择IAM角色时,一定要确定该用户具备sagemaker的读写部署等权限。


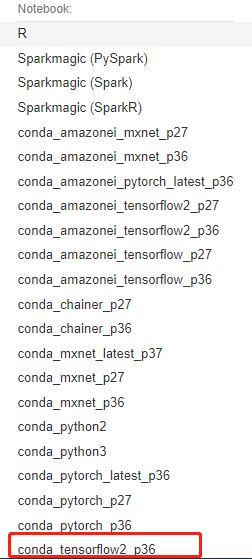
然后创建一个笔记本实例,我这边选择是conda-tensorflow2_p36
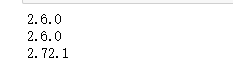
创建一个新的jupyter,导入必要的包,这样打印下tf,keras和sagemaker的版本,因为我的模型是用tf和kears编写,保证这两个包的版本一致,我用的2.6,sagemaker一定要2.0以上。
from sagemaker import get_execution_role
from sagemaker import Session
import tensorflow as tf
import keras,sagemaker
from sagemaker.tensorflow.model import TensorFlowModel ###2.0以上版本
role = get_execution_role()
sess = Session()
tf_framework_version = tf.__version__
print(tf.__version__)
print(keras.__version__)
print(sagemaker.__version__)
建立模型:这里需要注意的是framework_version,必须是整数,如果是2.3.4之类的部署的时候回报错,那个错误我忘记截图了,我这用的2.6,model_data是模型位置。
sm_model = TensorFlowModel(model_data='s3://sagemaker-ap-northeast-1-499396867125/local_model2/model.tar.gz',
framework_version='2.6.0',role=role)
部署模型:instance_type 是EC2的型号,按需设置。initial_instance_count 个数。
正常的大约在10-15分钟内就会完事。endpoint_name 可以指定节点名称,不写就会给你随机一个。
%%time
instance_type = 'ml.c5.xlarge'
uncompiled_predictor = sm_model.deploy(initial_instance_count=1,instance_type=instance_type)
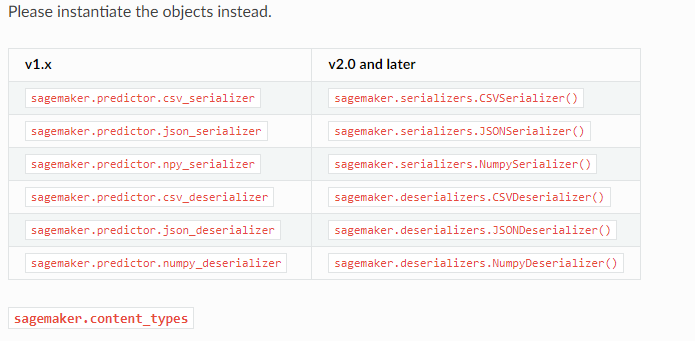
TIP:deploy 中有序列化和反序列的配置serializer和deserializer可以按需配置。详细可以在api里查看
Use Version 2.x of the SageMaker Python SDK — sagemaker 2.77.0 documentation
完成后 打印
uncompiled_predictor.endpoint_name 可以查看节点名称。
调用:
第一个是数据处理,如何在编写模型时处理模型,以及如何处理调用。例如,我在这里做的是:
[En]
The first is data processing, how to handle the model when it is written and how to handle the call. For example, here is what I do here:
test_path ="test.jpg"
image = cv2.imread(test_path)
image = cv2.resize(image,(image_size,image_size),0,0,cv2.INTER_LINEAR)
image = image.astype(np.float32)
image_array = np.multiply(image,1./255.)
x_batch = image_array.reshape(1,image_size,image_size,3)
x_batch.shape
(1, 64, 64, 3)
首先部署完成后,uncompiled_predictor可以直接传参narray,返回结果。
res=uncompiled_predictor.predict(x_batch)
print(res)

##结果:{'predictions': [[0.94271487, 0.0572850853]]}
然后打开终端节点:
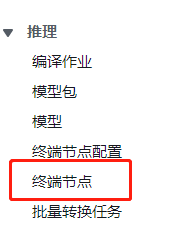
您可以看到刚刚部署的终端节点
[En]
You can see the terminal node just deployed

我们可以直接调用终端节点,这调用终端节点传参就比较奇怪了因为不能直接传入narray
传入会报错:”{“error”: “Unsupported Media Type: application/x-npy”}”,我目前也不知道咋解决,可能是序列化的问题,有知道的望告知,多谢。
所以我这只能已json的形式传入,也可以。
至于返回结果的json格式,可以修改成自定义的,你也可以改成不是json的。
结果不一样是因为我换了张图片,换成猫的了。
runtime = boto3.Session().client(service_name="runtime.sagemaker")
image = Image.open(test_path)
image = image.resize([image_size, image_size])
image = np.multiply(image,1./255.)
x_train = image.reshape(1,image_size,image_size,3)
input1 = {'instances': x_train.tolist()}
response = runtime.invoke_endpoint(EndpointName=uncompiled_predictor.endpoint_name,
                               ContentType='application/json', Body=json.dumps(input1))
result = response["Body"].read()
result = json.loads(result)
print(result)
###结果{'predictions': [[0.0799172819, 0.920082748]]}
至此sagemaker部署节点并调用基本是完事了 ,但是里面有很多问题,比如:
1.invoke_endpoint函数调用传参问题,虽然结果没错但是很别扭
2.序列化问题
3.好像是图片大小不能超过5M,这是我在一个国外博客看到的,不知道是不是真的。
4.还有 inference.py:
5.还有各种坑。
等以后在研究把。
给大家推荐一个网址,上面讲了一部分内容,挺好的,还有#799 Serving a Tensorflow model fails with ConnectionClosedError · Issue #831 · aws/sagemaker-python-sdk · GitHub
Original: https://blog.csdn.net/weixin_41907245/article/details/123092118
Author: yuxj记录学习
Title: sagemaker在终端节点部署Tensorflow模型并调用
原创文章受到原创版权保护。转载请注明出处:https://www.johngo689.com/514324/
转载文章受原作者版权保护。转载请注明原作者出处!