

官方文档介绍如下, 此时博主电脑环境配置为:tensorflow-gpu 2.4.0、python3.6、cuda11.0、cudnn8.0,详细信息可见博主这篇 博客
应用 Applications – Keras 中文文档 https://keras.io/zh/applications/;

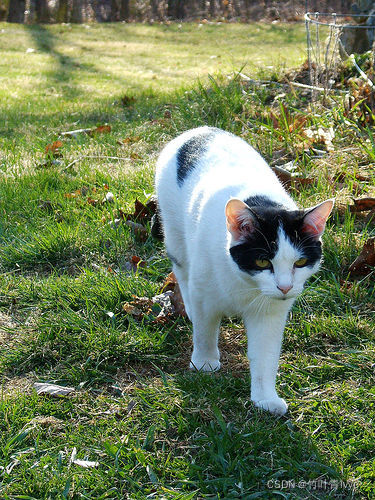
- 直接用预训练模型对一张猫咪图片(也可从前面几篇博客找到原图)进行预测,第一次执行,会自动下载模型,模型保存的路径见/home/sxhlvye/.keras/models(具体路径视自己环境而定)
import tensorflow as tf
import numpy as np
from tensorflow.keras.preprocessing import image
from tensorflow.keras.applications import resnet50

from tensorflow.keras.applications.resnet50 import preprocess_input, decode_predictions
from PIL import Image
import time

physical_devices = tf.config.list_physical_devices('GPU')
tf.config.experimental.set_memory_growth(physical_devices[0], True)

#加载预训练模型
model1 = resnet50.ResNet50(weights='imagenet')

model1.save("weights.h5")

model = tf.keras.models.load_model("weights.h5")

file = tf.keras.utils.get_file(
    "grace_hopper.jpg",
    "https://storage.googleapis.com/download.tensorflow.org/example_images/grace_hopper.jpg")
img = tf.keras.preprocessing.image.load_img(file, target_size=[224, 224])

#加载图片,为NHWC格式
img = image.load_img('2008_002682.jpg', target_size=(224, 224))
img = image.img_to_array(img)
img = preprocess_input(img)
print("img: ",img.shape)

img = np.expand_dims(img, axis=0)
print(img.shape)

#img = img.transpose(0,3,1,2) 通道转换

t_model = time.perf_counter()
pred_class = model.predict(img)
print((pred_class.shape))
print(f'do inference cost:{time.perf_counter() - t_model:.8f}s')

print('Predicted:', decode_predictions(pred_class, top=5)[0])
输出结果:
img:  (224, 224, 3)
(1, 224, 224, 3)
2022-04-13 14:48:03.673228: I tensorflow/compiler/mlir/mlir_graph_optimization_pass.cc:185] None of the MLIR Optimization Passes are enabled (registered 2)
2022-04-13 14:48:04.697999: I tensorflow/stream_executor/cuda/cuda_dnn.cc:369] Loaded cuDNN version 8101
2022-04-13 14:48:05.812750: W tensorflow/core/common_runtime/bfc_allocator.cc:338] Garbage collection: deallocate free memory regions (i.e., allocations) so that we can re-allocate a larger region to avoid OOM due to memory fragmentation. If you see this message frequently, you are running near the threshold of the available device memory and re-allocation may incur great performance overhead. You may try smaller batch sizes to observe the performance impact. Set TF_ENABLE_GPU_GARBAGE_COLLECTION=false if you'd like to disable this feature.

(1, 1000)
do inference cost:2.52066355s
Predicted: [('n02123597', 'Siamese_cat', 0.1655076), ('n02108915', 'French_bulldog', 0.14137916), ('n04409515', 'tennis_ball', 0.08570885), ('n02095314', 'wire-haired_fox_terrier', 0.05204656), ('n02123045', 'tabby', 0.050695747)]
这里要说明的是,预测数据得是NHWC格式的,和前面几篇博客中pytorch用的数据格式不同。
Tensorflow和Pytorch通道维度总结_feng_xun123的博客-CSDN博客
keras的相关介绍可见我前面的博客
- 接下来,将上面保存的weight.h5文件转化为tensorflow pb模型
import tensorflow as tf
import tensorflow.python.keras.backend
from tensorflow.keras.models import load_model
from tensorflow.python.framework.convert_to_constants import convert_variables_to_constants_v2

physical_devices = tf.config.list_physical_devices('GPU')
tf.config.experimental.set_memory_growth(physical_devices[0], True)

def h5_to_pb(model, pb_model_name):
    model.summary()
    full_model = tf.function(lambda Input: model(Input))
    full_model = full_model.get_concrete_function(tf.TensorSpec(model.inputs[0].shape, model.inputs[0].dtype))

    # Get frozen ConcreteFunction
    frozen_func = convert_variables_to_constants_v2(full_model)
    frozen_func.graph.as_graph_def()

    layers = [op.name for op in frozen_func.graph.get_operations()]
    print("-" * 50)
    print("Frozen model layers: ")
    for layer in layers:
        print(layer)

    print("-" * 50)
    print("Frozen model inputs: ")
    print(frozen_func.inputs)
    print("Frozen model outputs: ")
    print(frozen_func.outputs)

    # Save frozen graph from frozen ConcreteFunction to hard drive
    tf.io.write_graph(graph_or_graph_def=frozen_func.graph,
                      logdir="./",
                      name=pb_model_name,
                      as_text=False)

h5_model_path = "./weights.h5"
pb_model_name = "weights.pb"

net_model = load_model(h5_model_path)
h5_to_pb(net_model, pb_model_name)
运行后结果如下:

完毕,pb模型就这样获得了。
补充实验:
下面是用tensorflow来加载此pb模型,预测同一张图片的代码
import numpy as np
import cv2
from PIL import Image
from tensorflow.keras.preprocessing import image
from tensorflow.keras.applications import resnet50
from tensorflow.keras.applications.resnet50 import preprocess_input, decode_predictions
import tensorflow as tf
import time

physical_devices = tf.config.list_physical_devices('GPU')
tf.config.experimental.set_memory_growth(physical_devices[0], True)

#(train_images, train_labels), (test_images, test_labels) = tf.keras.datasets.mnist.load_data() 自带数据集,读到的是numpy数组

#load a image for be classified
img = image.load_img('2008_002682.jpg', target_size=(224, 224))
img = image.img_to_array(img)
img = preprocess_input(img)
print(img.shape)

PATH_TO_CKPT = "weights.pb"

detection_graph = tf.Graph()
with detection_graph.as_default():
    od_graph_def = tf.compat.v1.GraphDef()
    with tf.compat.v1.gfile.GFile(PATH_TO_CKPT, 'rb') as fid:
        serialized_graph = fid.read()
        od_graph_def.ParseFromString(serialized_graph)
        tf.import_graph_def(od_graph_def, name='')

with detection_graph.as_default() as graph:
    with tf.compat.v1.Session(graph=detection_graph) as sess:
        img = np.expand_dims(img, axis=0)
        print(img.shape)
        # #获取graphic中的张量名称
        # for op in graph.get_operations():
        #     print(op.name)

        inp = detection_graph.get_tensor_by_name('Input:0')
        predictions = detection_graph.get_tensor_by_name('resnet50/predictions/Softmax:0')

        t_model = time.perf_counter()
        x = predictions.eval(feed_dict={inp: img})
        print(f'do inference cost:{time.perf_counter() - t_model:.8f}s')
        print(x.shape)
        print('Predicted:', decode_predictions(x, top=5)[0])
运行结果如下:

预测结果同上,可以看到从keras模型转化到tensorflow2.x模型,模型精度无丢失。
如下博客可用于参考:
快速将Keras模型转换成Tensorflow模型_代丹的博客-CSDN博客_keras转tensorflow
Original: https://blog.csdn.net/jiugeshao/article/details/123597664
Author: 竹叶青lvye
Title: keras模型转换为tensorflow的pb模型结构
原创文章受到原创版权保护。转载请注明出处:https://www.johngo689.com/513964/
转载文章受原作者版权保护。转载请注明原作者出处!