

一、需求分析
我们知道,网上有很多的翻译平台,比如:Google翻译、百度翻译、有道翻译、微软翻译等等。本次我们来使用selenium模块实现对Google翻译的爬取的实现。
我们需要上传一个文件给Google翻译,然后再将Google翻译的结果保存在一个文件之中。
当然,我们有完全自动化的处理程序。换句话说,我们使用该程序自动执行这些翻译操作。
[En]
Of course, we have fully automated processing. In other words, we use the program to carry out these translation operations automatically.
二、Google 翻译介绍
显然,如果你想要访问Google翻译是需要一些魔法知识的,这个不方便在这里叙述,所以如果有需要的话可以私信我,我可以私下教你如何处理了啦。
Google翻译有两种功能,第一种是直接翻译文本,第二种是翻译一个文件里面的内容:
这是用于直接翻译文本的界面。
[En]
This is the interface for translating text directly.
这是用于翻译文件内容的接口。
[En]
This is the interface for translating the contents of a file.
我们这次使用的是第二种方法,即上传文件进行翻译。当然,正如我们前面所说的,我们使用程序来自动化操作。
[En]
We use the second method this time, that is, to upload a file for translation. Of course, as we said earlier, we use programs to automate operations.
; 三、网页界面的分析(网页检查)
我们打开网页检查的分析界面:
[En]
We open the analysis interface for web page inspection:
然后,我们知道需要首先单击文档上的按钮,然后单击按钮选择文件:
[En]
Then, we know that we need to click the button on the document first, and then click the button to select the file:
1、点击文档按钮进行跳转:
我们首先找到文本导航按钮的位置:
[En]
We first find the location of the text navigation button:
我们使用元素选择工具进行选择:
[En]
We use the element selection tool to make the selection:
; 2、点击选择文档的按钮:
方法同上:
[En]
The method is the same as the one above:
然后,当我们完成添加文件时,将出现一个用于翻译的按钮:
[En]
Then, when we have finished adding the file, a button for translation appears:
我们还需要点击翻译按钮来获得翻译的结果。
[En]
We also need to click the translation button to get the result of the translation.
四、使用Python进行实现功能(selenium模块)
我们就给出密码吧。其中有更详细的评论:
[En]
Let’s just give the code. There are more detailed comments in it:
python学习交流Q群:906715085###
from selenium import webdriver

导入 python 的 selenium 模块

def transfer(path):
"""
此函数用于访问Google翻译,首先获取文件的路径,然后将其发送到浏览器。<details><summary>*<font color='gray'>[En]</font>*</summary>*<font color='gray'>This function is used to access Google translation, first getting the path to the file, and then sending it to the browser.</font>*</details>
:param path: 你想要翻译的文件的绝对路径。
:return: 空
"""
browser = webdriver.Chrome()    # 创建浏览器对象
browser.get('https://translate.google.cn/'
'?hl=zh-CN&tab=TT&sl=zh-CN&tl=en&op=translate')
访问谷歌翻译的网址
里面的参数设置了语言的翻译,我们可以进行修改,这里是将汉语翻译成为英语    h1 = browser.current_window_handle
记录当前的页面
此操作是在点击后找不到我们想要的页面。<details><summary>*<font color='gray'>[En]</font>*</summary>*<font color='gray'>This operation is that we can't find the page we want after clicking.</font>*</details>
ele = browser.find_elements_by_tag_name("button")
获取得到 button 标签并且点击 button
这里采用了通过标签名来获取 button 的方法来进行获取标签,方便后面的点击操作    ele[1].click()
点击 button    all_h = browser.window_handles
获取得到所有的页面    browser.switch_to.window(all_h[0])
选择当前的页面    h2 = browser.current_window_handle    upload = browser.find_element_by_id('i34')
获取得到 "添加文件" 的那个按钮的标签
这个标签的 id 是我们通过网页检查获取得到的啦    upload.send_keys(path)
上传文件
path 是文件的绝对路径,有我们自己选择指定    print(upload.get_attribute('value'))
打印显示文件的路径    browser.find_elements_by_tag_name("button")[39].click()
这是点击文件成功上载的翻译按钮。<details><summary>*<font color='gray'>[En]</font>*</summary>*<font color='gray'>This is the translation button that clicks on the successful upload of the file.</font>*</details>
res = browser.page_source    # 这个是获取得到页面的内容
with open("result.txt", "w+") as f:        # 这里是将翻译的结果写入一个文件
打开文件并将内容写入该文件<details><summary>*<font color='gray'>[En]</font>*</summary>*<font color='gray'>Open a file and write the contents to the file</font>*</details>
print(res[30: len(res) - 20])        # 显示翻译的结果
f.write(res[30: len(res) - 20])        # 将翻译的结果写入文件之中
f.close()        # 操作完成文件以后还是需要进行关闭的操作的啦
browser.close()    # 所有的操作完成以后需要关闭浏览器了啦
if __name__ == '__main__':    # main函数    # 这个是测试
transfer(path=r"C:\Users\1\Desktop\Google翻译\google_transfer0\test.txt")    #
 将文件的位置传递到形参 path 里面
删除评论后的代码如下:
[En]
The code after removing the comments is as follows:
from selenium import webdriver
def transfer(path):
browser = webdriver.Chrome()
browser.get('https://translate.google.cn/' '?hl=zh-CN&tab=TT&sl=zh-CN&tl=en&op=translate')
h1 = browser.current_window_handle
ele = browser.find_elements_by_tag_name("button")
ele[1].click()
all_h = browser.window_handles
browser.switch_to.window(all_h[0])
h2 = browser.current_window_handle
upload = browser.find_element_by_id('i34')
upload.send_keys(path)
print(upload.get_attribute('value'))
browser.find_elements_by_tag_name("button")[39].click()
res = browser.page_source
with open("result.txt", "w+") as f:
print(res[30: len(res) - 20])
f.write(res[30: len(res) - 20])
f.close()
browser.close()if __name__ == '__main__':
ransfer(path=r"C:\Users\1\Desktop\Google翻译\google_transfer0\test.txt")
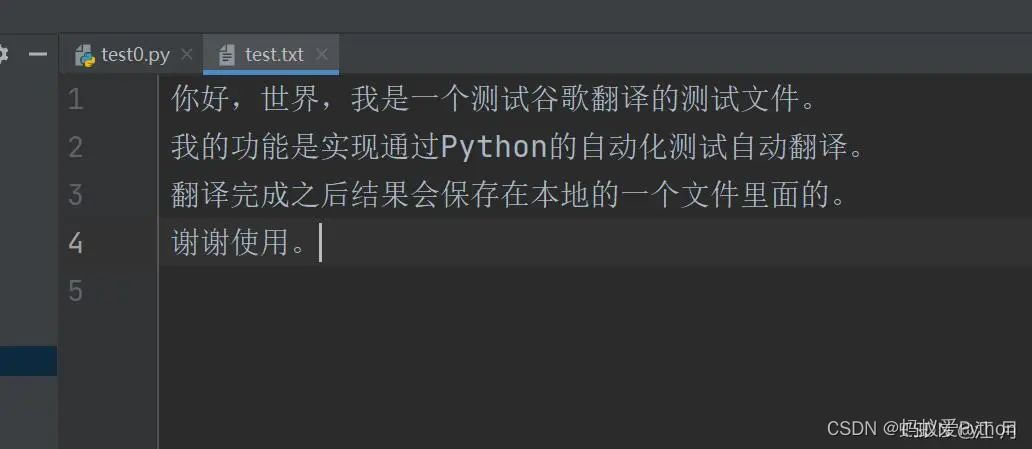
五、测试功能
我们进行测试:
test.txt文件:

翻译完成后生成的文件:
[En]
The files generated after the translation is completed:
交互端的打印:
以上是我们的测试,这表明我们已经实现了我们想要的功能。今天的代码似乎不是很多,所以它非常适合动手实践。这里。
[En]
The above is our test, which shows that we have achieved the function we want. Today’s code doesn’t seem to be very much, so it’s very suitable for hands-on practice. Here.
分享结束了。下一章见。
[En]
The sharing is over. See you in the next chapter.
Original: https://www.cnblogs.com/1234567FENG/p/16381861.html
Author: 蚂蚁爱Python
Title: Python+selenium实现谷歌翻译
原创文章受到原创版权保护。转载请注明出处:https://www.johngo689.com/499361/
转载文章受原作者版权保护。转载请注明原作者出处!