

本文环境:
- 操作系统:Windows 10 21H1
- 虚拟机:Virtual Box 6.1.30 r148432
- Linux 发行版:Ubuntu Focal 20.04 (LTS)
- Linux 内核:5.4.0-90-generic
- Docker:20.10.11, build dea9396
搭建 Linux 环境可参考:
Tensorflow 资料:
官方文档:https://tensorflow.google.cn/install/docker?hl=zh-cn
docker 镜像地址:https://hub.docker.com/r/tensorflow/tensorflow/
注:虚拟机不能使用物理显卡,所以不支持 GPU 版的 TensorFlow,这里使用 CPU 版。如果在物理机直接使用 Docker 安装,并且有独立显卡,推荐安装 GPU 版。
拉取镜像:
docker pull tensorflow/tensorflow:2.7.0-jupyter
-jupyter,包含 Jupyter 及 TensorFlow 教程笔记。- 此镜像基于 Ubuntu 20.04.3 LTS,大小 1.15 G。
- 镜像中环境:Python 3.8.10,TensorFlow 2.7.0
在主机上创建工作目录,绑定容器工作目录:
[En]
Create a working directory on the host to bind the container working directory:
mkdir notebooks
注意:将容器中创建的文件暴露给宿主时,可能会出现权限问题。通常,最好修改主机系统上的文件。
[En]
Note: permission issues may occur when exposing files created in the container to the host. In general, it is best to modify the files on the host system.
测试运行:
docker run -it --rm tensorflow/tensorflow:2.7.0-jupyter \
python -c "import tensorflow as tf; print(tf.reduce_sum(tf.random.normal([1000, 1000])))"
--rm:退出后会移除容器。
后台运行:
docker run -it -d -v ${PWD}/notebooks:/tf/notebooks \
-p 8888:8888 -u $(id -u):$(id -g) tensorflow/tensorflow:2.7.0-jupyter
-d:后台运行。-v:绑定刚才创建的 notebooks 目录到容器内的 /tf/notebooks。-u:容器内使用当前用户权限。
查看启动日志:
$ docker ps | grep tensorflow

$ docker logs 2430
其中, http://127.0.0.1:8888/?token=... 是访问 Jupyter 的链接。
如果是虚拟机, 127.0.0.1 要更换为虚拟机 IP 地址。
成功启动后,就可以从浏览器访问 Jupyter。
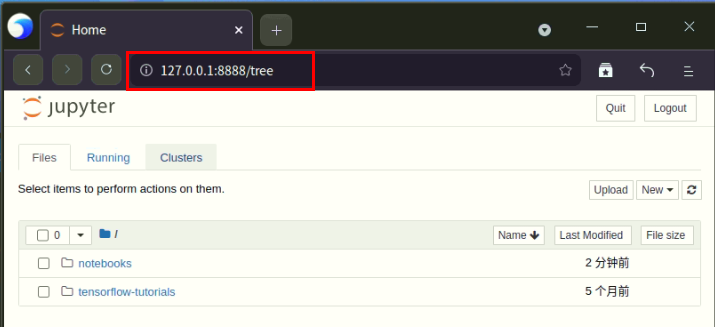

测试代码:
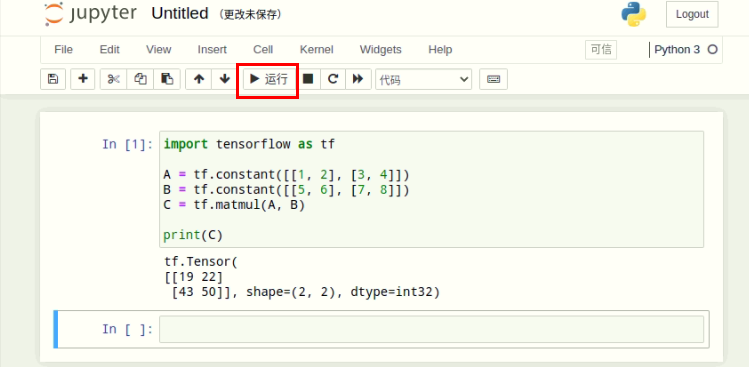
在 Jupyter 中,进入 notebooks 目录,点击 “New” 新建一个 Python3 文件,输入如下代码,点击 “运行” 即可看到计算结果:
import tensorflow as tf

A = tf.constant([[1, 2], [3, 4]])
B = tf.constant([[5, 6], [7, 8]])
C = tf.matmul(A, B)

print(C)
容器编排
创建 .env
UID=1000
GID=1000
设置 UID:GID 是为了限制容器内的执行权限,如果需要在容器内使用 root 权限,如安装应用,可删除此设置,使用默认的 root 权限使用容器。
创建容器使用的工作目录:
[En]
Create the working directory used by the container:
notebooks:存放 notebook 文件。.jupyter:保存 jupyter 配置信息。
创建 docker-compose.yml
version: "3.1"
services:
 tensorflow:
    image: tensorflow/tensorflow:2.7.0-jupyter
    container_name: tensorflow270
    restart: always
    user: "${UID}:${GID}"
    volumes:
      - "${PWD}/notebooks:/tf/notebooks"
      - "${PWD}/.jupyter:/.jupyter"
      - "/etc/timezone:/etc/timezone:ro"
      - "/etc/localtime:/etc/localtime:ro"
    ports:
      - "8888:8888"
注意:您可以将其他需要的目录添加到容器中,例如数据集所在的文件夹。
[En]
Note: you can add other required directories to the container, such as the folder where the dataset is located.
检查模板文件:
docker compose config
启动容器:
docker compose up -d
-d:后台启动。
查看状态:
docker compose ps
关闭并删除容器:
docker compose down
–End–
Original: https://blog.csdn.net/hunter1000/article/details/122872468
Author: cidens
Title: Docker安装tensorflow
原创文章受到原创版权保护。转载请注明出处:https://www.johngo689.com/497183/
转载文章受原作者版权保护。转载请注明原作者出处!