

免责声明:本文非常简单,适合初学者。
[En]
Disclaimer: this article is very simple and suitable for beginners.
概要
本文是利用tensorflow中的keras构建一个简单的全连接神经网络做多分类任务。数据集使用的是fashion mnist数据集,不用额外下载,可以直接用keras加载: (train_images, train_labels), (test_images, test_labels) = keras.datasets.fashion_mnist.load_data()。模型分为三层,分别为一层输入层,一层隐藏层和一层输出层。
模型构建
import tensorflow as tf
from tensorflow import keras

import numpy as np
import matplotlib.pyplot as plt

print(tf.__version__)

fashion_mnist = keras.datasets.fashion_mnist

(train_images, train_labels), (test_images, test_labels) = fashion_mnist.load_data()
数据分为训练集(60000个样本)和测试集(10000个样本),数据集有10个类别:0:T恤/上衣;1:裤子;2:套头衫;3:连衣裙;4:外套;5:凉鞋;6:衬衫;7:运动鞋;8:包;9:短靴。通过代码可以查看数据集情况:
train_images.shape
len(train_labels)
set(train_labels)
测试数据集与训练集相似,但样本数量不同。
[En]
The test data set is similar to the training set, but the number of samples is different.
图片数据是一个[28*28]的二维矩阵数据,矩阵中的每个元素都是一个像素值(取值在0~255),可以通过python的画图接口查看图像数据:
plt.figure()
plt.imshow(train_images[0])
plt.colorbar()
plt.grid(False)
plt.show()


为了更好的训练模型,我们将数据值映射到[0,1]之间。
train_images = train_images / 255.0
test_images = test_images / 255.0

class_names = ['T-shirt/top', 'Trouser', 'Pullover', 'Dress', 'Coat',
               'Sandal', 'Shirt', 'Sneaker', 'Bag', 'Ankle boot']
plt.figure(figsize=(10,10))
for i in range(25):
    plt.subplot(5, 5+i)
    plt.xticks([])
    plt.yticks([])
    plt.grid(False)
    plt.imshow(train_images[i], cmap=plt.cm.binary)
    plt.xlabel(class_names[train_labels[i]])
plt.show()

我们的模型主要是三层结构,所以模型的构建代码如下:
[En]
Our model mainly has a three-tier structure, so the construction code of the model is as follows:
model = keras.Sequential([
        keras.layers.Flatten(input_shape=(28,28)),
        keras.layers.Dense(128, activation='relu'),
        keras.layers.Dense(10)])
第一层是一个平铺层,将28 × \times × 28的二维数据平铺成1 × \times × 784的一维数据,该层没有需要学习的参数。
第二层是一个全连接层,设置了128个节点,relu激活函数。
第三层是一个输出层,10个节点,每个节点代表一个类别的得分,最终得出图像属于哪一个类别。
在模型训练之前,需要对模型进行一些设置,如优化器、损失函数、评价标准等。
[En]
Before model training, some settings need to be made to the model, such as optimizer, loss function, evaluation criteria, etc.
model.compile(optimize="adam",
              loss=tf.keras.losses.SparseCategoricalCrossentropy(from_logits=True),
              metrics=["accuracy"])
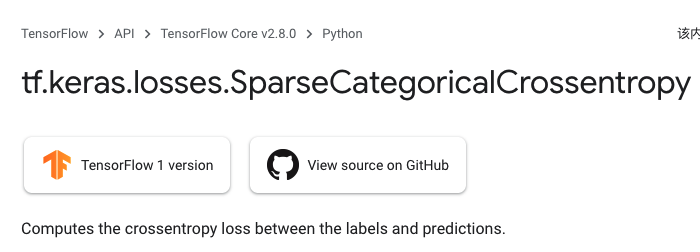
这里我们使用的优化器是Adam;损失函数使用的是稀疏类别交叉熵损失,计算的是标签和预测值之间的交叉熵(如下图TensorFlow中keras的API接口说明);评估标准用的是准确率【accuracy】。
设置完成后,开始培训模型:
[En]
Once set up, start training the model:
model.fit(train_images, train_labels, epochs=10)
训练结果:

其中损失降到了0.2381,精确度提升到了0.9113。
然后,对模型进行测试
test_loss, test_acc = model.evaluate(test_images, test_labels)
print('\nTest loss:', test_loss)
print('\nTest accuracy:', test_acc)
可以看出,测试集上的损失函数的值大于训练集的损失函数值,但精度却小于训练集的损失函数值。一般来说,这种现象是会发生的,只要差别不大,这种训练过度适应的现象是可以接受的。
[En]
It can be seen that the value of the loss function on the test set is larger than that of the training set, but the accuracy is smaller than that of the training set. Generally, this phenomenon will occur, as long as it is not very different, this kind of training over-fitting phenomenon is acceptable.
在构建模型的时候,我们说过最后一层是一个节点为10的输出,每个节点代表一个类别得分。因此,在预测时,我们可以给模型加一个softmax层,转换成一个概率输出。
probability_model = tf.keras.Sequential([model,tf.keras.layers.Softmax()])
predictions = probability_model.predict(test_images)
print(np.argmax(predictions[0]))
print(test_labels[0])
以上便完整的构建了一个简单地三层网络结构的全连接模型。其中,构建模型最主要的模块在于keras.Sequential和keras.layers。这两个api中包含很多常用的模型包括卷积网络,循环网络等。
Original: https://blog.csdn.net/superY_26/article/details/123815534
Author: superY25
Title: TensorFlow构建模型一
原创文章受到原创版权保护。转载请注明出处:https://www.johngo689.com/497005/
转载文章受原作者版权保护。转载请注明原作者出处!