


随着短视频vlog时代的到来,自动驾驶技术、人脸识别门禁系统、智慧视频监控、AI机器人等贴近人们日常生活的视频信息量的暴增,视频目标检测的研究具有无比的现实研究意义与未来行业潜力。视频是由一系列具有时间连续性和内容相关性的图像组成,所以关于视频目标检测的研究自兴起以来就是在经典的图像目标检测算法的基础上进行改进与创新的。软硬件设备的迭代更新,使得视频的流畅度也越来越高,几秒钟的视频画面便可包含高达两三百甚至上千张图像,而视频比单纯的图像包含更多的时间和空间信息,若直接用图像目标检测的方法对视频文件的内容逐帧检测,不仅忽视了视频的时空信息还会拖慢检测速度,难以达到实时的需求。如何利用视频提供的时空上下文信息提升检测的准确率、速度等性能,成为了各国研究人员的工作重点。目标检测 (Object Detection) 是计算机视觉和图像处理的一项分支技术,其主要任务是在一幅数字图像中正确识别出目标物体的位置并判断类别。目标检测算法需要框选出图片中的物体,并判断出框选出的物体是什么以及它是否可信。
得益于近年来 GPU 加速技术和深度学习技术的发展,使得如今基于深度学习的人脸检测能够达到高精度和较好的实时性,有效的改善传统方法的效率低下问题,能够使该项技术广泛应用于医学军事领域等。
YOLOv5是一种单阶段目标检测算法,该算法在YOLOv4的基础上添加了一些新的改进思路,使其速度与精度都得到了较大的性能提升。YOLO 是一种卷积神经网络,相较于传统神经网络,卷积神经网络能够更好的提取特征,同时还能减少模型参数。
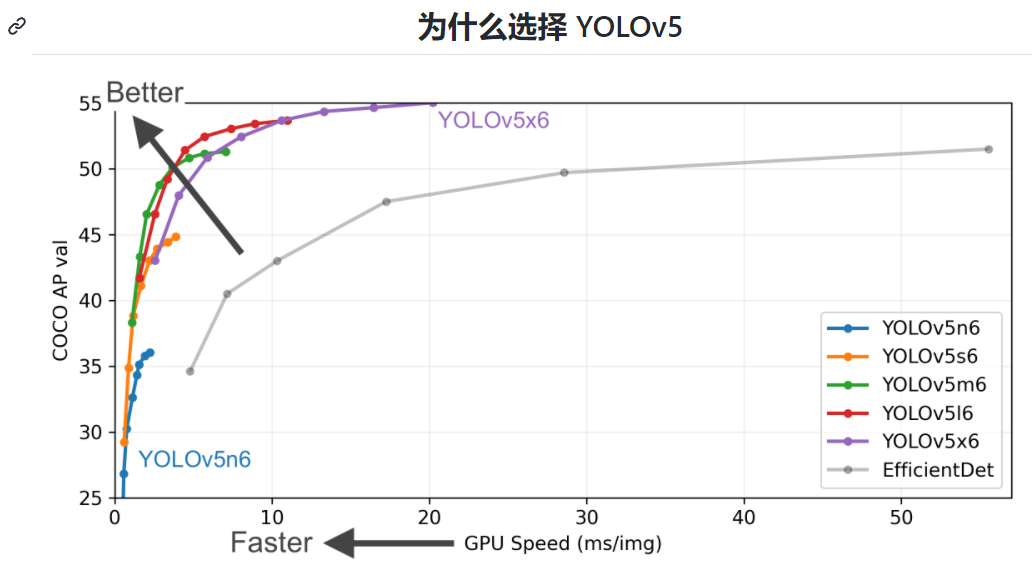
YOLOv5并不是一个单独的模型,而是一个模型家族,包括了YOLOv5s、YOLOv5m、YOLOv5l、YOLOv5x、YOLOv5x+TTA,这点有点儿像EfficientDet。由于没有找到V5的论文,只能从代码去学习它。总体上它和YOLOV4差不多,可以认为是YOLOV4的加强版。
对于yolov4而言yolov5的主要的改进思路如下所示:
输入端:在模型训练阶段,提出了一些改进思路,主要包括Mosaic(马赛克)数据增强、自适应锚框计算、自适应图片缩放;
基准网络:融合其它检测算法中的一些新思路,主要包括:Focus结构与CSP结构;
Neck网络:目标检测网络在BackBone与最后的Head输出层之间往往会插入一些层,Yolov5中添加了FPN+PAN结构;
Head输出层:输出层的锚框机制与YOLOv4相同,主要改进的是训练时的损失函数GIOU_Loss,以及预测框筛选的DIOU_nms。
下面的文章主要描述了我自己手动标记数据集并对其进行训练的过程。
[En]
The following space mainly describes my own process of manually tagging data sets and training them.
一. 环境搭建(不能含有中文路径)
开始之前
克隆存储库和安装要求.txt 在 Python>=3.7.0 环境中,包括 PyTorch>=1.7。模型和数据集从最新的 YOLOv5 版本自动下载。
git clone https://github.com/ultralytics/yolov5  # clone
cd yolov5
pip install -r requirements.txt  # install
创建用于检测对象的自定义模型是一个迭代过程,包括收集和组织图像、标记感兴趣的对象、训练模型、将其部署到现场进行预测,然后使用部署的模型收集边缘条件的示例以进行重复和改进
[En]
Creating a custom model to detect objects is an iterative process, including collecting and organizing images, tagging objects of interest, training models, deploying them to the field for prediction, and then using the deployed model to collect examples of edge conditions for repetition and improvement
YOLOv5 模型必须在标记数据上进行训练,以便学习该数据中对象的类别。在开始训练之前,有两个选项可用于创建数据集:
使用Roboflow以YOLO格式自动标记,准备和托管您的自定义数据
或手动准备数据集
本次例程用到的环境:
安装yolov5配置环境,我用的是anaconda和pycharm进行yolov5的环境搭建
pytorch: 1.8.0 python: 3.8.12
tips:如若使用GPU,cuda version >=10.1
首先要下载并安装yolov5:
yolov5官方要求 Python>=3.6 and PyTorch>=1.7
yolov5源码下载:https://github.com/ultralytics/yolov5
下载后,进入pytorch环境进入yolov5文件夹,使用换源的方法安装依赖。
如果在上次安装过程中没有更改源代码,强烈建议您使用更改源代码的方法重新安装。
[En]
If there is no source change during the previous installation, it is strongly recommended that you use the source change method to install again.
如果缺少模块,将不安装已安装的模块,影响后续项目和模型培训的运行。
[En]
Installed modules will not be installed in case there is a lack of modules, affecting the operation of subsequent programs and model training.
使用清华镜像源:
pip install -r requirements.txt -i https://pypi.tuna.tsinghua.edu.cn/simple
本文数据集部分内容参考一位大佬的文章:(62条消息) Yolov5训练自己的数据集(详细完整版)_缔宇的博客-CSDN博客_yolov5训练自己的数据集![]() https://blog.csdn.net/qq_45945548/article/details/121701492 ;
https://blog.csdn.net/qq_45945548/article/details/121701492 ;
二、环境配置所需资源
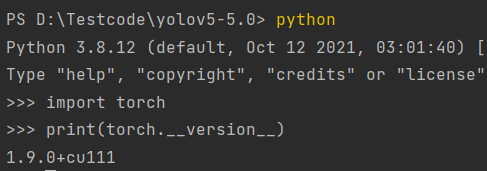
我选用的是pycharm+anaconda搭建的环境,使用Pip命令安装所需功能包,第一次配置时,我的环境如下:python3.8.12+cuda10.2+cudnn-10.2-windows11-x64-v22000.556Windows 功能体验包 1000.22000.556.0+pytorch1.8.0+cpu,后面因为cpu跑模型训练太慢了,所以我换成了torch 1.9.0+cu111 CUDA:0 (GeForce GTX 1650, 4096.0MB)也就是GPU独立显卡来跑yolov5。
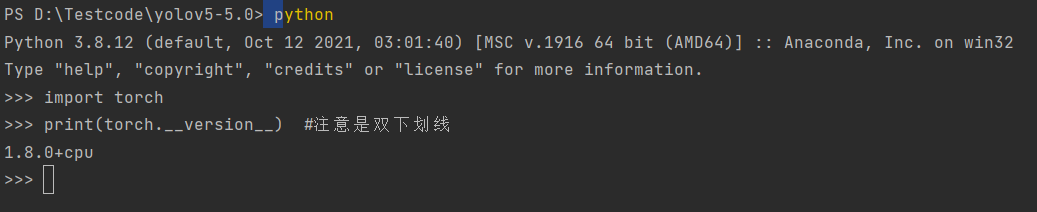
最开始的训练环境CPU,发现太慢了,于是乎我换了GPU
安装环境:
git clone https://github.com/ultralytics/yolov5 # 下载 yolov5 项目
python3 -c “from yolov5.utils.google_utils import gdrive_download; gdrive_download(‘1n_oKgR81BJtqk75b00eAjdv03qVCQn2f’,’coco128.zip’)” # 下载官方数据集
cd yolov5 #进入yolov5 项目文件
pip install -U -r requirements.txt #安装需求
如遇pip install -U -r requirements.txt 这一步报错,则依次手动执行pip install
pip install numpy==1.17
pip install python==3.8
下面所有的需要全部装一遍,可以参照 yolov5下的 requirements.txt 文件
Python>=3.7 PyTorch>=1.5 Cython numpy==1.17 opencv-python torch>=1.5 matplotlib
Pillow tensorboard PyYAML>=5.3 torchvision scipy tqdm
git+https://github.com/cocodataset/cocoapi.git#subdirectory=PythonAPI
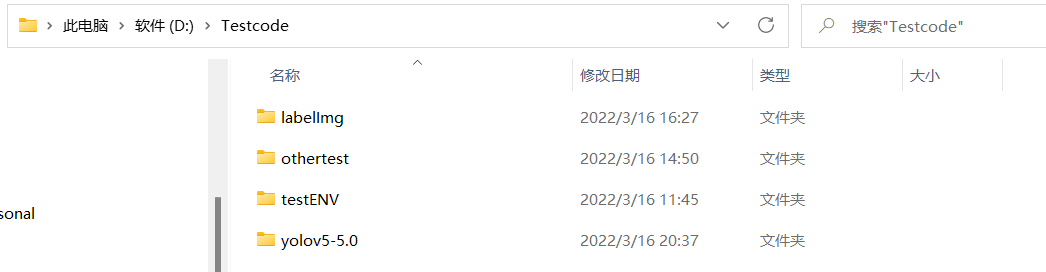
开始进行训练模型的准备
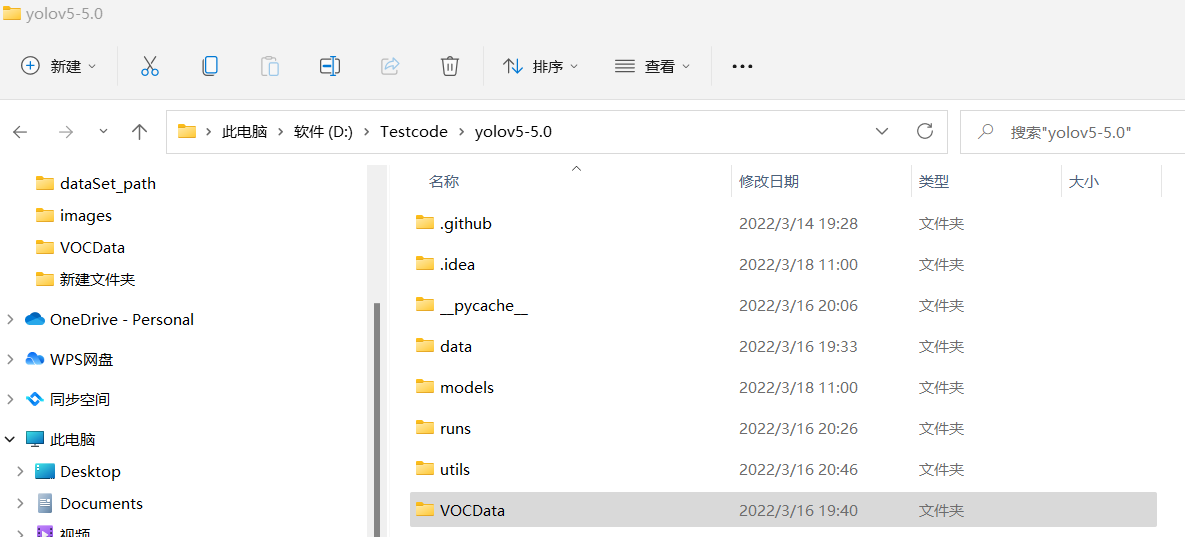
2.在VOCData下新建两个文件夹 Annotations 以及 images
其作用为:
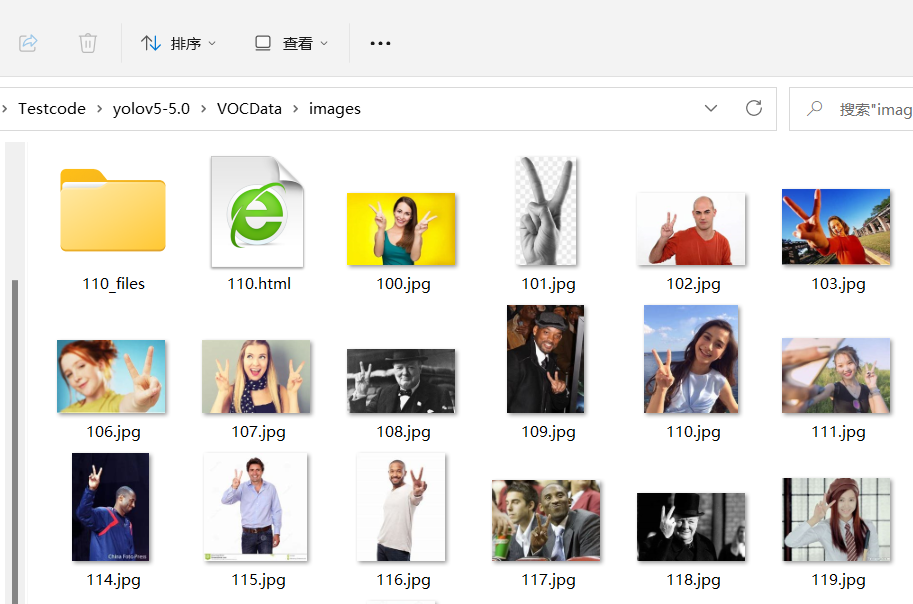
images:用于存放要标注的图片(jpg格式)
Annotations :用于存放标注图片后产生的内容(这里采用XML格式)
三. 使用labelImg标注图片
1.安装labellmg
下载labelImg:https://github.com/tzutalin/labelImg
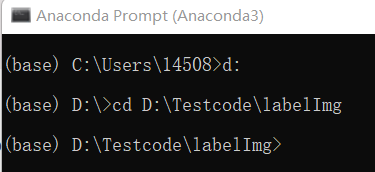
cd d:

cd D:\Testcode\labelImg 
执行命令前,建议更新一下conda
conda update -n base -c defaults conda
然后执行以下命令
conda install pyqt=5<br> conda install -c anaconda lxml<br> pyrcc5 -o libs/resources.py resources.qrc
2. 使用labellmg
开始使用labellmg进行图像的标注
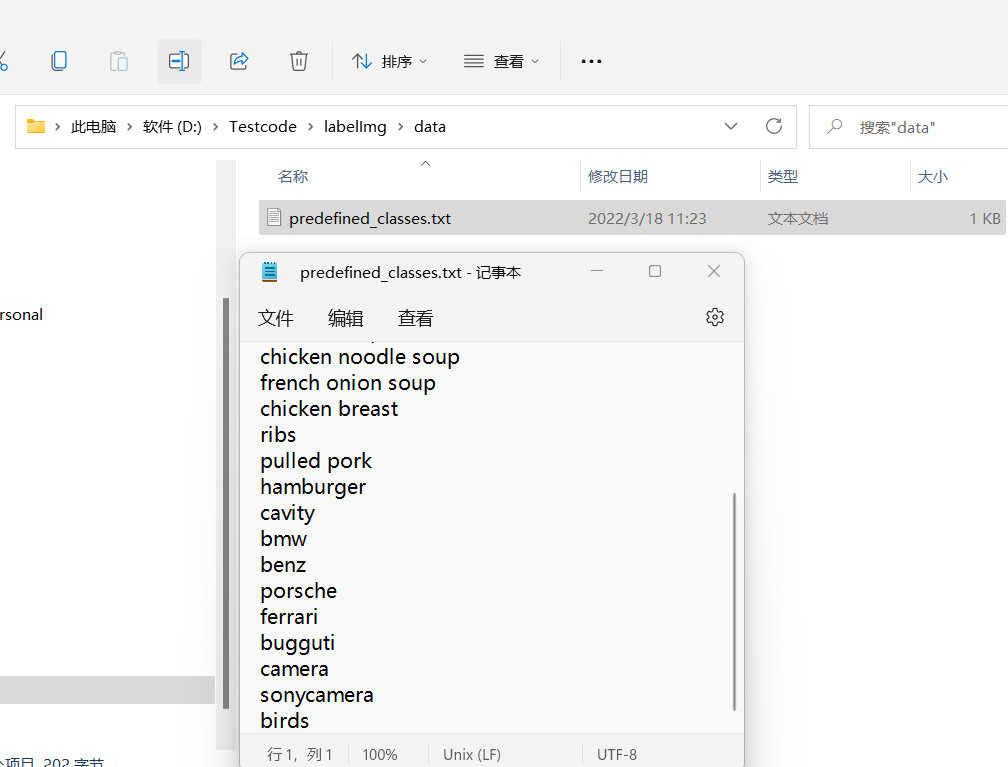
您可以在运行软件之前更改要标记的类别。
[En]
You can change the categories to be labeled before running the software.
建议先更改类别,因为如果进入软件后再添加,每次进入软件时都要添加,这样会比较复杂。
[En]
It is recommended to change the category first, because if you add it after entering the software, you have to add it every time you enter the software, which will be more complicated.
打开labellmg(要进入labellmg文件夹运行,这里使用pycharm打开labellmg文件夹转到目录下再运行)

python labelImg.py #运行软件
打开labelimg的自动保存模式(auto save mode)
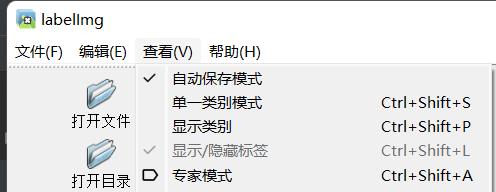
保存位置为D:\Testcode\yolov5-5.0\VOCData\Annotations
要标注的图片文件夹D:\Testcode\yolov5-5.0\VOCData\images

格式默认为XML格式即可,可以更改成yolo,这里就使用默认的XML格式
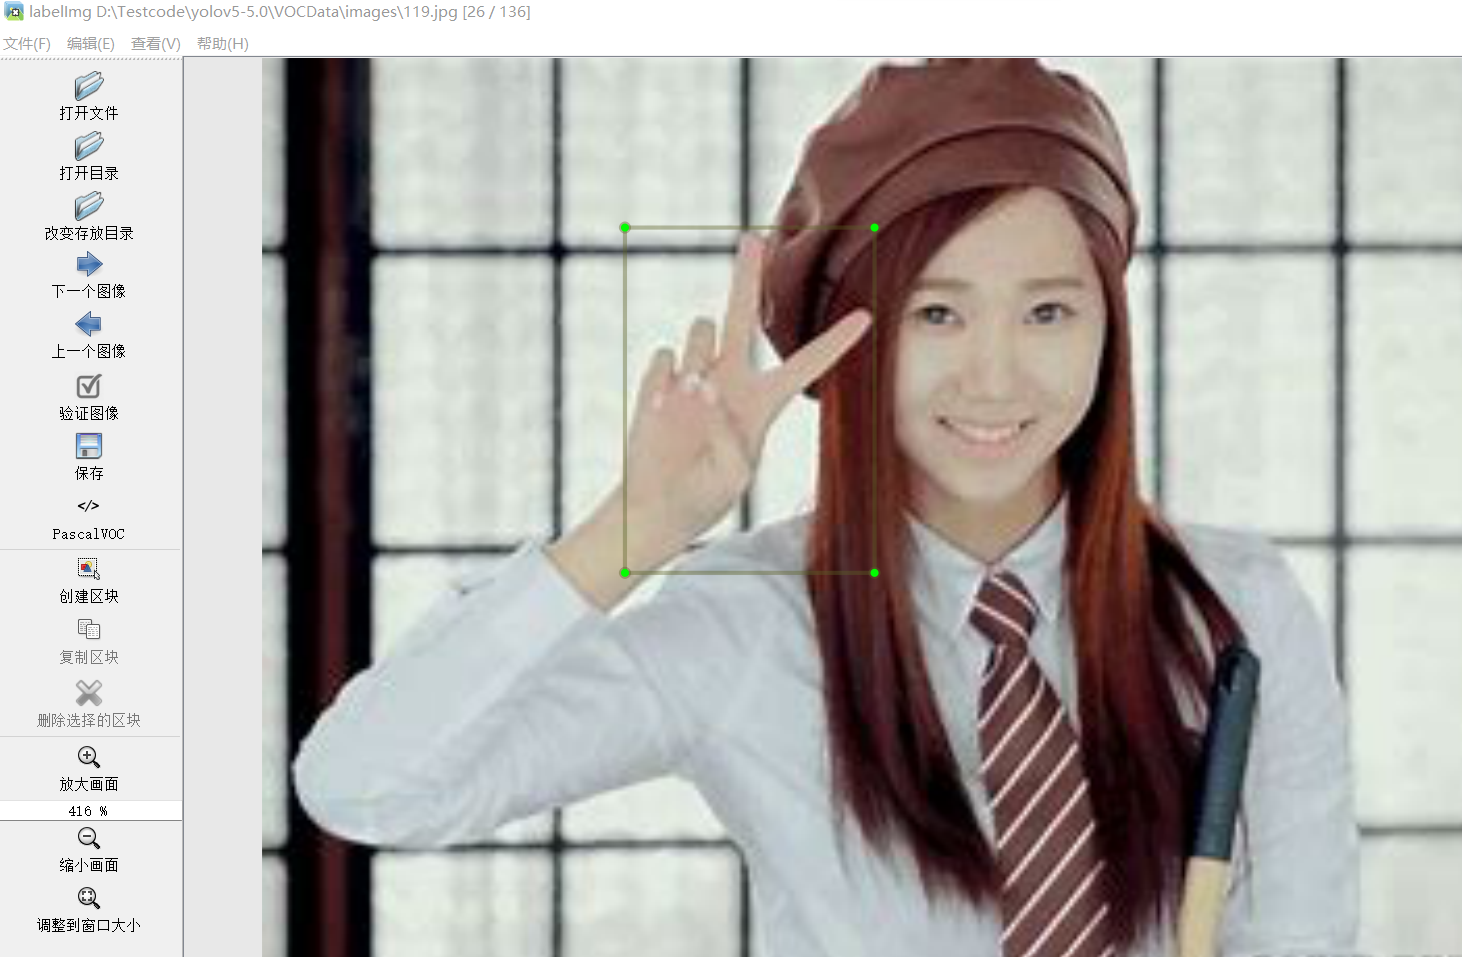
点击左方边栏或者屏幕右键选择 Create RectBox 即可进行标注。
尽可能完全适合标注尺寸的对象。建议放大尺寸。
[En]
Fully fit the dimensioned object as much as possible. It is recommended to enlarge the dimensioning.
其它看个人标准。
四. 划分数据集以及配置文件修改
运行代码方式
第一种:使用pycharm、vscode、python自带的IDLE。如果出现缺少模块的情况(no module named),你可以安装模块,也可以使用后一种方法。
第二种:进入pytorch环境,进入代码所在目录,使用命令行形式运行(python + 程序名)
- 划分训练集、验证集、测试集
在VOCData目录下创建程序 split_train_val.py 并运行,程序如下:
coding:utf-8

import os
import random
import argparse

parser = argparse.ArgumentParser()
#xml文件的地址,根据自己的数据进行修改 xml一般存放在Annotations下
parser.add_argument('--xml_path', default='Annotations', type=str, help='input xml label path')
#数据集的划分,地址选择自己数据下的ImageSets/Main
parser.add_argument('--txt_path', default='ImageSets/Main', type=str, help='output txt label path')
opt = parser.parse_args()

trainval_percent = 1.0  # 训练集和验证集所占比例。 这里没有划分测试集
train_percent = 0.9     # 训练集所占比例,可自己进行调整
xmlfilepath = opt.xml_path
txtsavepath = opt.txt_path
total_xml = os.listdir(xmlfilepath)
if not os.path.exists(txtsavepath):
    os.makedirs(txtsavepath)

num = len(total_xml)
list_index = range(num)
tv = int(num * trainval_percent)
tr = int(tv * train_percent)
trainval = random.sample(list_index, tv)
train = random.sample(trainval, tr)

file_trainval = open(txtsavepath + '/trainval.txt', 'w')
file_test = open(txtsavepath + '/test.txt', 'w')
file_train = open(txtsavepath + '/train.txt', 'w')
file_val = open(txtsavepath + '/val.txt', 'w')

for i in list_index:
    name = total_xml[i][:-4] + '\n'
    if i in trainval:
        file_trainval.write(name)
        if i in train:
            file_train.write(name)
        else:
            file_val.write(name)
    else:
        file_test.write(name)

file_trainval.close()
file_train.close()
file_val.close()
file_test.close()
运行完毕后 会生成 ImagesSets\Main 文件夹,且在其下生成 测试集、训练集、验证集,存放图片的名字(无后缀.jpg)
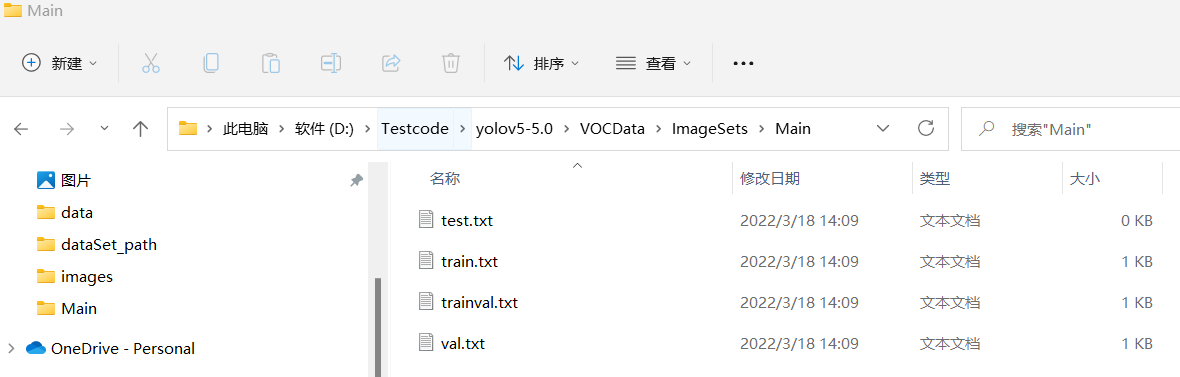
因为没有分配测试集,所以测试集是空的。
[En]
Because no test set is assigned, the test set is empty.
若要分配,更改第 14、15 行代码,更改所在比例即可。
- XML格式转yolo_txt格式
在VOCData目录下创建程序 text_to_yolo.py 并运行
程序如下:
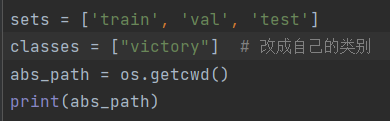
注:需要将第 7 行改成要所标注的类别 以及 代码中各文件绝对路径
路径需为:d:\images 或者 d:/images,双右斜线或者单左斜线
-*- coding: utf-8 -*-
import xml.etree.ElementTree as ET
import os
from os import getcwd

sets = ['train', 'val', 'test']
classes = ["victory"]   # 改成自己的类别
abs_path = os.getcwd()
print(abs_path)

def convert(size, box):
    dw = 1. / (size[0])
    dh = 1. / (size[1])
    x = (box[0] + box[1]) / 2.0 - 1
    y = (box[2] + box[3]) / 2.0 - 1
    w = box[1] - box[0]
    h = box[3] - box[2]
    x = x * dw
    w = w * dw
    y = y * dh
    h = h * dh
    return x, y, w, h

def convert_annotation(image_id):
    in_file = open('D:/Yolov5/yolov5/VOCData/Annotations/%s.xml' % (image_id), encoding='UTF-8')
    out_file = open('D:/Yolov5/yolov5/VOCData/labels/%s.txt' % (image_id), 'w')
    tree = ET.parse(in_file)
    root = tree.getroot()
    size = root.find('size')
    w = int(size.find('width').text)
    h = int(size.find('height').text)
    for obj in root.iter('object'):
        difficult = obj.find('difficult').text
        #difficult = obj.find('Difficult').text
        cls = obj.find('name').text
        if cls not in classes or int(difficult) == 1:
            continue
        cls_id = classes.index(cls)
        xmlbox = obj.find('bndbox')
        b = (float(xmlbox.find('xmin').text), float(xmlbox.find('xmax').text), float(xmlbox.find('ymin').text),
             float(xmlbox.find('ymax').text))
        b1, b2, b3, b4 = b
        # 标注越界修正
        if b2 > w:
            b2 = w
        if b4 > h:
            b4 = h
        b = (b1, b2, b3, b4)
        bb = convert((w, h), b)
        out_file.write(str(cls_id) + " " + " ".join([str(a) for a in bb]) + '\n')

wd = getcwd()
for image_set in sets:
    if not os.path.exists('D:/Yolov5/yolov5/VOCData/labels/'):
        os.makedirs('D:/Yolov5/yolov5/VOCData/labels/')
    image_ids = open('D:/Yolov5/yolov5/VOCData/ImageSets/Main/%s.txt' % (image_set)).read().strip().split()

    if not os.path.exists('D:/Yolov5/yolov5/VOCData/dataSet_path/'):
        os.makedirs('D:/Yolov5/yolov5/VOCData/dataSet_path/')

    list_file = open('dataSet_path/%s.txt' % (image_set), 'w')
    for image_id in image_ids:
        list_file.write('D:/Yolov5/yolov5/VOCData/images/%s.jpg\n' % (image_id))
        convert_annotation(image_id)
    list_file.close()
运行后会生成如下 labels 文件夹和 dataSet_path 文件夹。
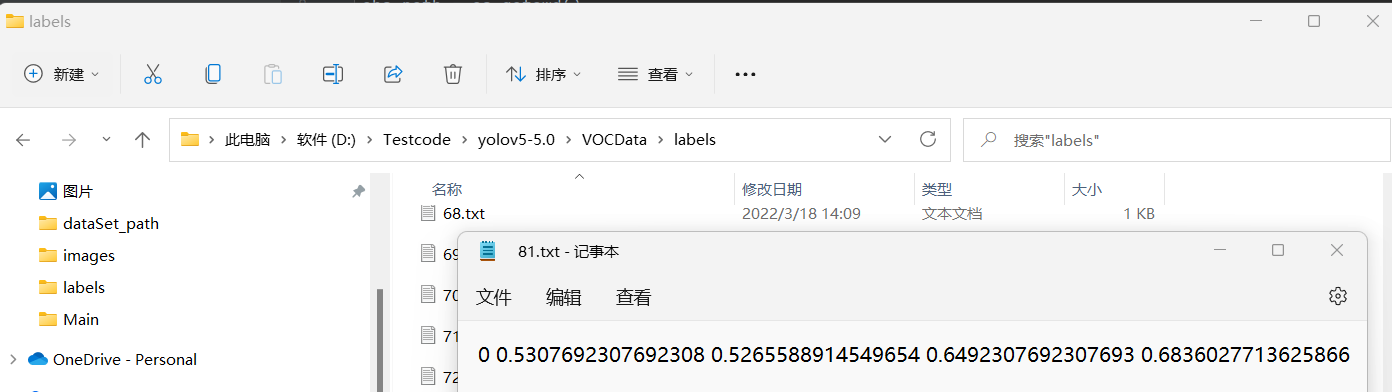
其中 labels 中为不同图像的标注文件。每个图像对应一个txt文件,文件每一行为一个目标的信息,包括class, x_center, y_center, width, height格式,这种即为 yolo_txt格式
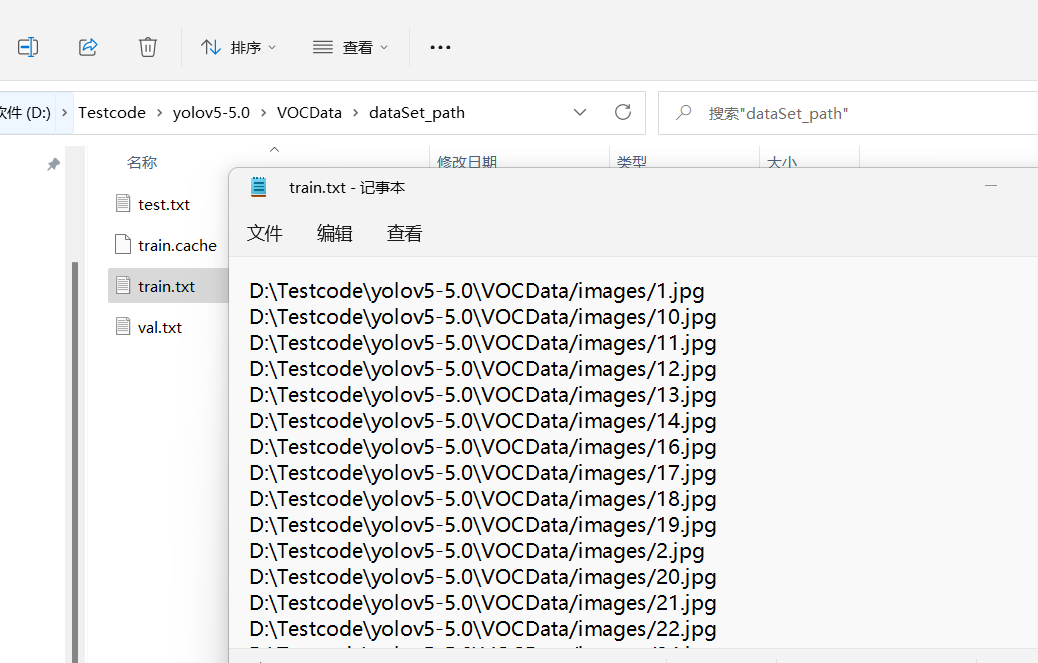
dataSet_path文件夹包含三个数据集的txt文件,train.txt等txt文件为划分后图像所在位置的绝对路径,如train.txt就含有所有训练集图像的绝对路径。
3. 配置文件
在 yolov5 目录下的 data 文件夹下 新建一个 myvoc.yaml文件(可以自定义命名),用记事本打开。
内容是:训练集以及验证集(train.txt和val.txt)绝对路径(通过 text_to_yolo.py 生成),然后是目标的类别数目和类别名称。
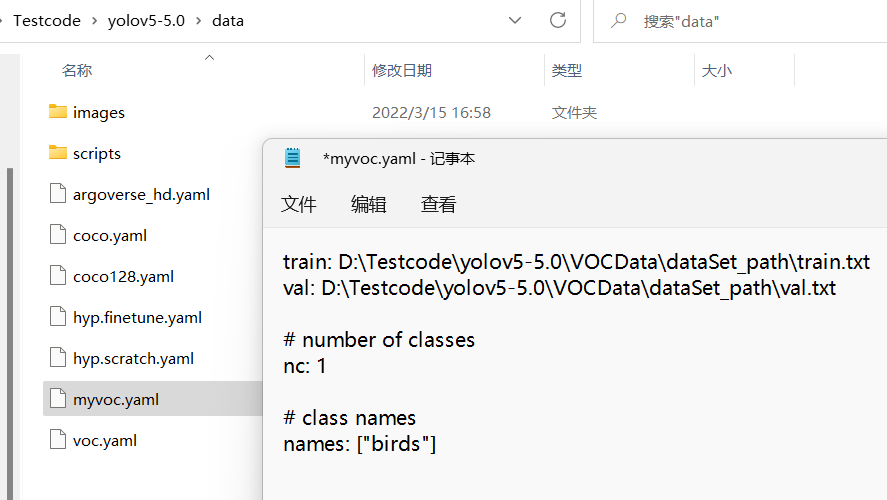
我的是这样设置的
train: D:\Testcode\yolov5-5.0\VOCData\dataSet_path\train.txt
val: D:\Testcode\yolov5-5.0\VOCData\dataSet_path\val.txt

number of classes
nc: 1

class names
names: ["victory"]
tips:冒号后面需要加空格
3. 聚类获得先验框
3.1 生成anchors文件
在VOCData目录下创建程序两个程序 kmeans.py 以及 clauculate_anchors.py
不需要运行 kmeans.py,运行 clauculate_anchors.py 即可。
kmeans.py 程序如下:这不需要运行,也不需要更改,报错则查看第十三行内容。
import numpy as np

def iou(box, clusters):
"""
    Calculates the Intersection over Union (IoU) between a box and k clusters.
    :param box: tuple or array, shifted to the origin (i. e. width and height)
    :param clusters: numpy array of shape (k, 2) where k is the number of clusters
    :return: numpy array of shape (k, 0) where k is the number of clusters
"""
    x = np.minimum(clusters[:, 0], box[0])
    y = np.minimum(clusters[:, 1], box[1])
    if np.count_nonzero(x == 0) > 0 or np.count_nonzero(y == 0) > 0:
        raise ValueError("Box has no area")    # 如果报这个错,可以把这行改成pass即可

    intersection = x * y
    box_area = box[0] * box[1]
    cluster_area = clusters[:, 0] * clusters[:, 1]

    iou_ = intersection / (box_area + cluster_area - intersection)

    return iou_

def avg_iou(boxes, clusters):
"""
    Calculates the average Intersection over Union (IoU) between a numpy array of boxes and k clusters.
    :param boxes: numpy array of shape (r, 2), where r is the number of rows
    :param clusters: numpy array of shape (k, 2) where k is the number of clusters
    :return: average IoU as a single float
"""
    return np.mean([np.max(iou(boxes[i], clusters)) for i in range(boxes.shape[0])])

def translate_boxes(boxes):
"""
    Translates all the boxes to the origin.
    :param boxes: numpy array of shape (r, 4)
    :return: numpy array of shape (r, 2)
"""
    new_boxes = boxes.copy()
    for row in range(new_boxes.shape[0]):
        new_boxes[row][2] = np.abs(new_boxes[row][2] - new_boxes[row][0])
        new_boxes[row][3] = np.abs(new_boxes[row][3] - new_boxes[row][1])
    return np.delete(new_boxes, [0, 1], axis=1)

def kmeans(boxes, k, dist=np.median):
"""
    Calculates k-means clustering with the Intersection over Union (IoU) metric.
    :param boxes: numpy array of shape (r, 2), where r is the number of rows
    :param k: number of clusters
    :param dist: distance function
    :return: numpy array of shape (k, 2)
"""
    rows = boxes.shape[0]

    distances = np.empty((rows, k))
    last_clusters = np.zeros((rows,))

    np.random.seed()

    # the Forgy method will fail if the whole array contains the same rows
    clusters = boxes[np.random.choice(rows, k, replace=False)]

    while True:
        for row in range(rows):
            distances[row] = 1 - iou(boxes[row], clusters)

        nearest_clusters = np.argmin(distances, axis=1)

        if (last_clusters == nearest_clusters).all():
            break

        for cluster in range(k):
            clusters[cluster] = dist(boxes[nearest_clusters == cluster], axis=0)

        last_clusters = nearest_clusters

    return clusters

if __name__ == '__main__':
    a = np.array([[1, 2, 3, 4], [5, 7, 6, 8]])
    print(translate_boxes(a))
运行:clauculate_anchors.py
会调用 kmeans.py 聚类生成新anchors的文件
程序如下:
需要更改第 9 、13行文件路径 以及 第 16 行标注类别名称
FILE_ROOT = "D:\Testcode\yolov5-5.0\VOCData/"     # 根路径
ANNOTATION_ROOT = "Annotations"   # 数据集标签文件夹路径
ANNOTATION_PATH = FILE_ROOT + ANNOTATION_ROOT

ANCHORS_TXT_PATH = "D:\Testcode\yolov5-5.0\VOCData/anchors.txt"   #anchors文件保存位置

CLUSTERS = 9
CLASS_NAMES = ['victory']   #类别名称
-*- coding: utf-8 -*-
根据标签文件求先验框

import os
import numpy as np
import xml.etree.cElementTree as et
from kmeans import kmeans, avg_iou

FILE_ROOT = "D:/yolov5-5/VOCData/"     # 根路径
ANNOTATION_ROOT = "Annotations"   # 数据集标签文件夹路径
ANNOTATION_PATH = FILE_ROOT + ANNOTATION_ROOT

ANCHORS_TXT_PATH = "D:/yolov5-5/VOCData/anchors.txt"   #anchors文件保存位置
CLUSTERS = 9
CLASS_NAMES = ['victory']   #类别名称

def load_data(anno_dir, class_names):
    xml_names = os.listdir(anno_dir)
    boxes = []
    for xml_name in xml_names:
        xml_pth = os.path.join(anno_dir, xml_name)
        tree = et.parse(xml_pth)

        width = float(tree.findtext("./size/width"))
        height = float(tree.findtext("./size/height"))

        for obj in tree.findall("./object"):
            cls_name = obj.findtext("name")
            if cls_name in class_names:
                xmin = float(obj.findtext("bndbox/xmin")) / width
                ymin = float(obj.findtext("bndbox/ymin")) / height
                xmax = float(obj.findtext("bndbox/xmax")) / width
                ymax = float(obj.findtext("bndbox/ymax")) / height

                box = [xmax - xmin, ymax - ymin]
                boxes.append(box)
            else:
                continue
    return np.array(boxes)

if __name__ == '__main__':

    anchors_txt = open(ANCHORS_TXT_PATH, "w")

    train_boxes = load_data(ANNOTATION_PATH, CLASS_NAMES)
    count = 1
    best_accuracy = 0
    best_anchors = []
    best_ratios = []

    for i in range(10):      ##### 可以修改,不要太大,否则时间很长
        anchors_tmp = []
        clusters = kmeans(train_boxes, k=CLUSTERS)
        idx = clusters[:, 0].argsort()
        clusters = clusters[idx]
        # print(clusters)

        for j in range(CLUSTERS):
            anchor = [round(clusters[j][0] * 640, 2), round(clusters[j][1] * 640, 2)]
            anchors_tmp.append(anchor)
            print(f"Anchors:{anchor}")

        temp_accuracy = avg_iou(train_boxes, clusters) * 100
        print("Train_Accuracy:{:.2f}%".format(temp_accuracy))

        ratios = np.around(clusters[:, 0] / clusters[:, 1], decimals=2).tolist()
        ratios.sort()
        print("Ratios:{}".format(ratios))
        print(20 * "*" + " {} ".format(count) + 20 * "*")

        count += 1

        if temp_accuracy > best_accuracy:
            best_accuracy = temp_accuracy
            best_anchors = anchors_tmp
            best_ratios = ratios

    anchors_txt.write("Best Accuracy = " + str(round(best_accuracy, 2)) + '%' + "\r\n")
    anchors_txt.write("Best Anchors = " + str(best_anchors) + "\r\n")
    anchors_txt.write("Best Ratios = " + str(best_ratios))
    anchors_txt.close()
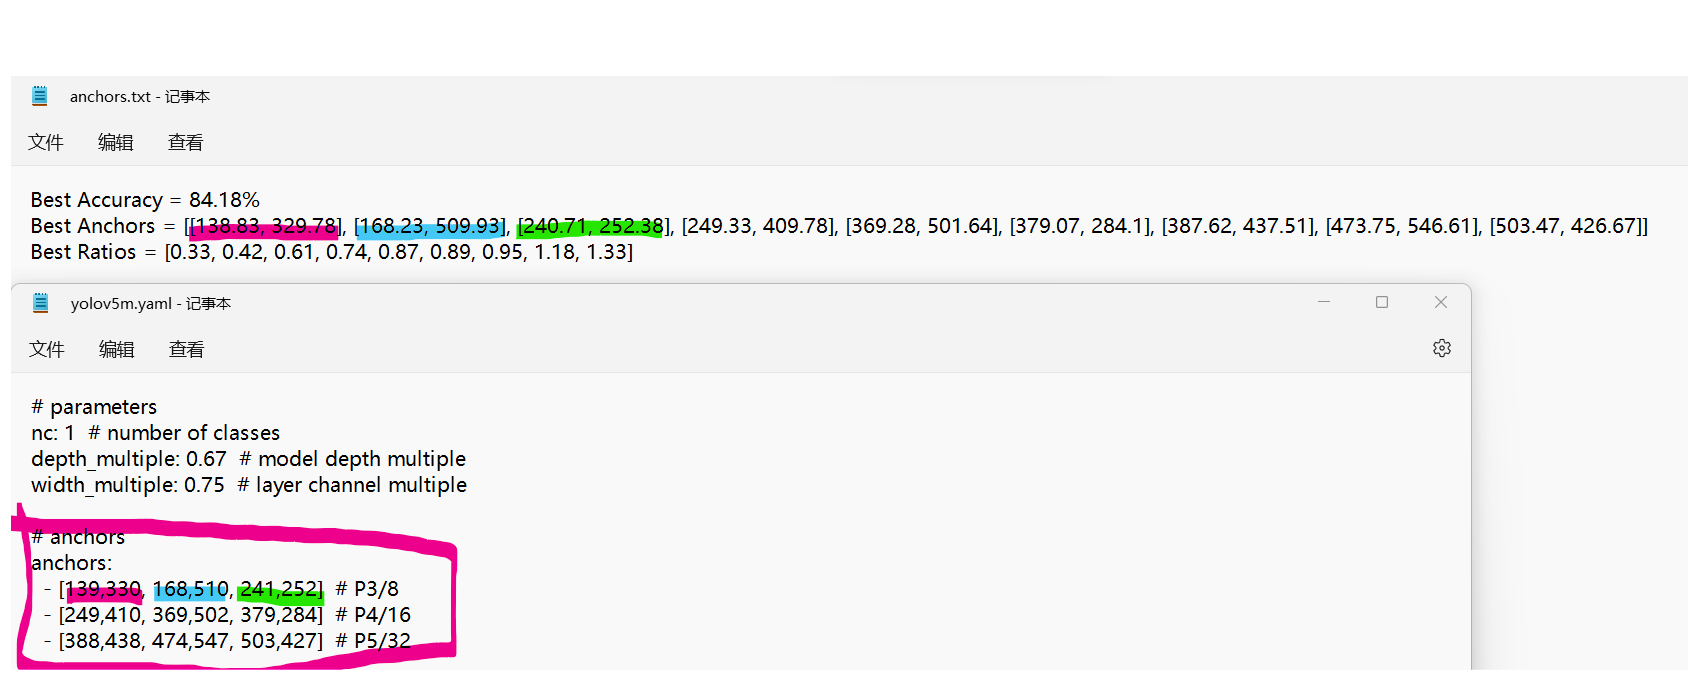
会生成anchors文件。如果生成文件为空,重新运行即可。
第二行 Best Anchors 后面需要用到。
3.2 修改模型配置文件
选择一个模型,在yolov5目录下的model文件夹下是模型的配置文件,有n、s、m、l、x版本,逐渐增大(随着架构的增大,训练时间也是逐渐增大)。
这里放一些官方数据:GitHub – ultralytics/yolov5
这里选用 yolov5m.yaml
使用记事本打开 yolov5m.yaml。
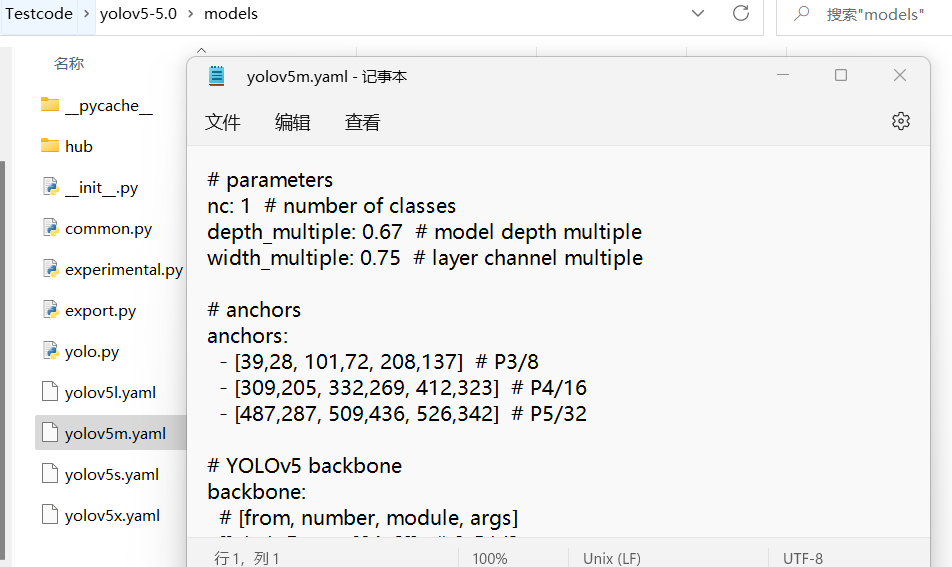
这里,我们需要修改两个参数。
[En]
Here we need to modify two parameters.
把 nc:后面改成自己的标注类别数
修改anchors,根据 anchors.txt 中的 Best Anchors 修改,需要取整(四舍五入、向上、向下都可以)。
保持yaml中的anchors格式不变,按顺序一对一即可,比如我这里的anchors.txt紫色部分对应
着yolov5m.yaml的紫色部分,anchors.txt蓝色部分对应着yolov5m.yaml的蓝色部分。
五. 模型训练 1. 开始训练
打开yolov5 目录下的 train.py 程序,一般有七个参数可以留意:weights:权重文件路径 cfg:存储模型结构的配置文件 data:存储训练、测试数据的文件 epochs:指的就是训练过程中整个数据集将被迭代多少次 batch-size:一次看完多少张图片才进行权重更新,梯度下降的mini-batch img-size:输入图片宽高 device:cuda device, i.e. 0 or 0,1,2,3 or cpu选择使用GPU还是CPU(这里我选择使用device0即为GPU),
其它参数解释:rect:进行矩形训练、 resume:恢复最近保存的模型开始训练、 nosave:仅保存最终checkpoint、 notest:仅测试最后的epoch、evolve:进化超参数、 cache-images:缓存图像以加快训练速度、 adam:使用adam优化、 multi-scale:多尺度训练、 single-cls:单类别的训练集。
步骤11——训练命令如下:首先进入pytorch环境,进入yolov5文件夹,运行指令:python train.py –weights weights/yolov5s.pt –cfg models/yolov5s.yaml –data data/myvoc.yaml –epoch 233 –batch-size 8 –img 640 –device 0 ,其中device 0:意为使用GPU进行训练 epoch 200 :意为训练200次,batch-size 8:意为训练8张图片后进行权重更新 device cpu:意为使用CPU训练。
python train.py --weights weights/yolov5s.pt --cfg models/yolov5s.yaml --data data/myvoc.yaml --epoch 233 --batch-size 8 --img 640 --device 0
2. 训练过程
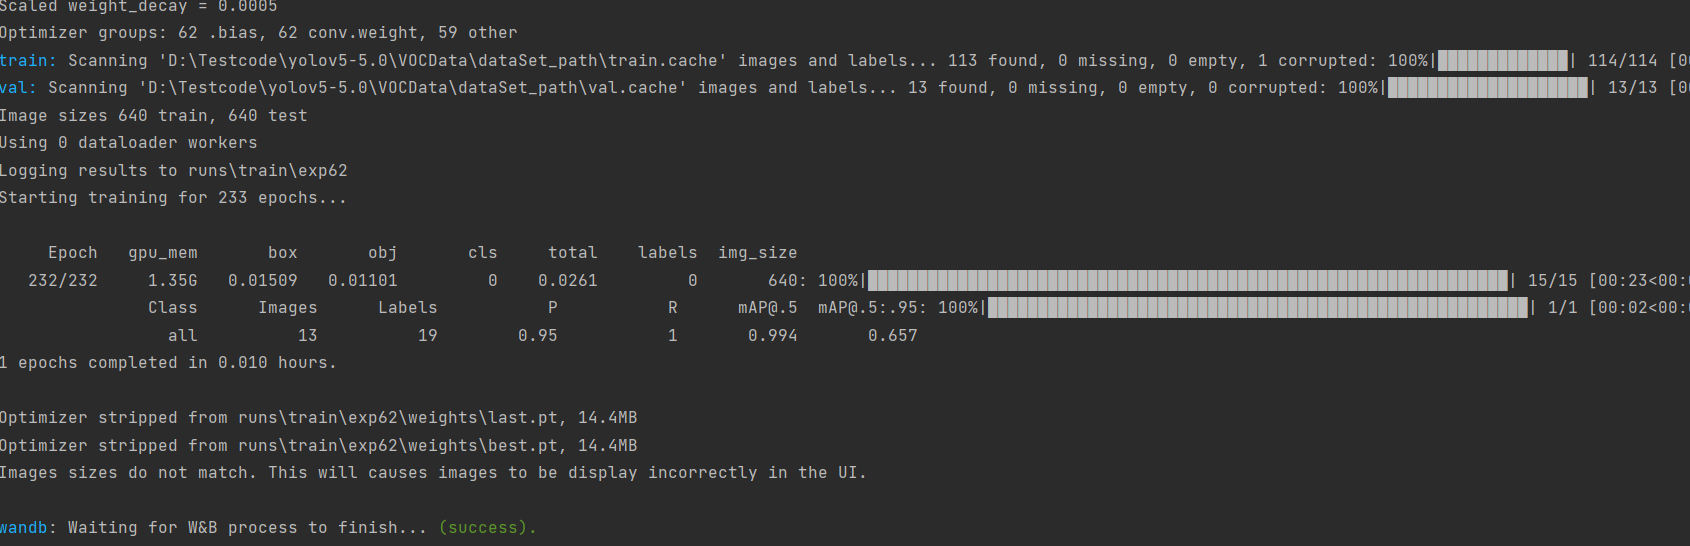
训练好的模型会被保存在 yolov5 目录下的 runs/train/weights/expxx下。
3. 训练时间
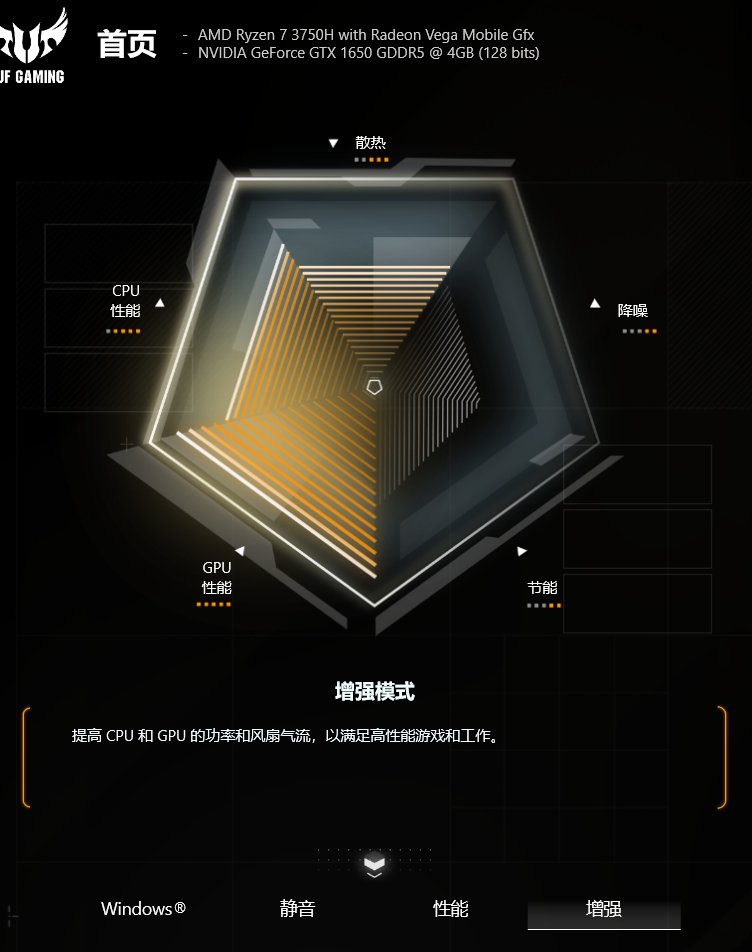
本次训练对象为标注的118张手势图片,分别使用GPU训练了233次,耗时约为1.7小时。
我的电脑在这里打开了增强模式,风扇正在高速运转。
[En]
The enhanced mode of my computer is turned on here, and the fan is running at a high speed.
4. 相关问题
报错1:页面太小,无法完成操作——解决方案:由于虚拟内存不足,我设置了一下电脑的虚拟内存然后就可以了,或者降低线程 –workers (默认是8) ,调小 –batch-size,降低 –epoch。
报错2:训练过程中出现 cuda out of memory error ——解决方案:由于内存满了,减小batch-size ,同时降低 –epochs。然后降低线程 –workers (默认是8)同上一步。
报错3:运行detect.py时报错AttributeError: ‘NoneType’ object has no attribute ‘find’ ——解决方案;由于图片的指定路径出现错误或者路径是正确的,但是路径设置中的”\”无法被识别,需要”/”,如\data\images无法被正确识别,而data/images则可以被正确识别。
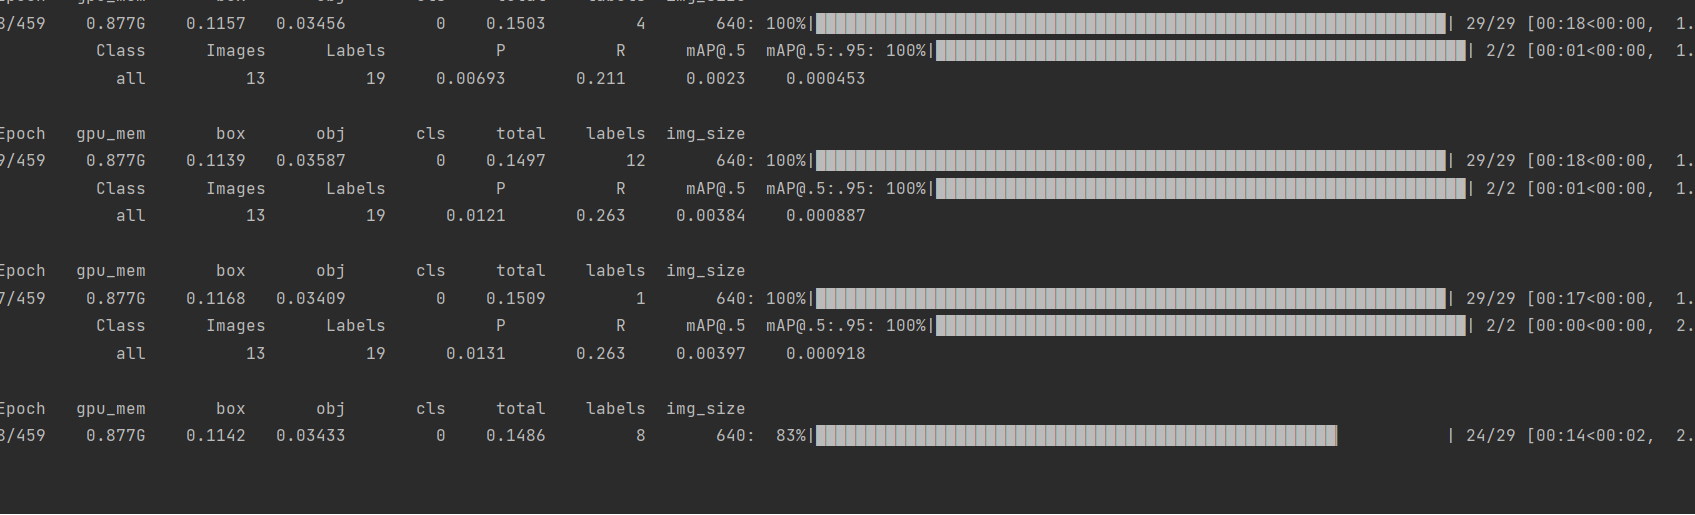
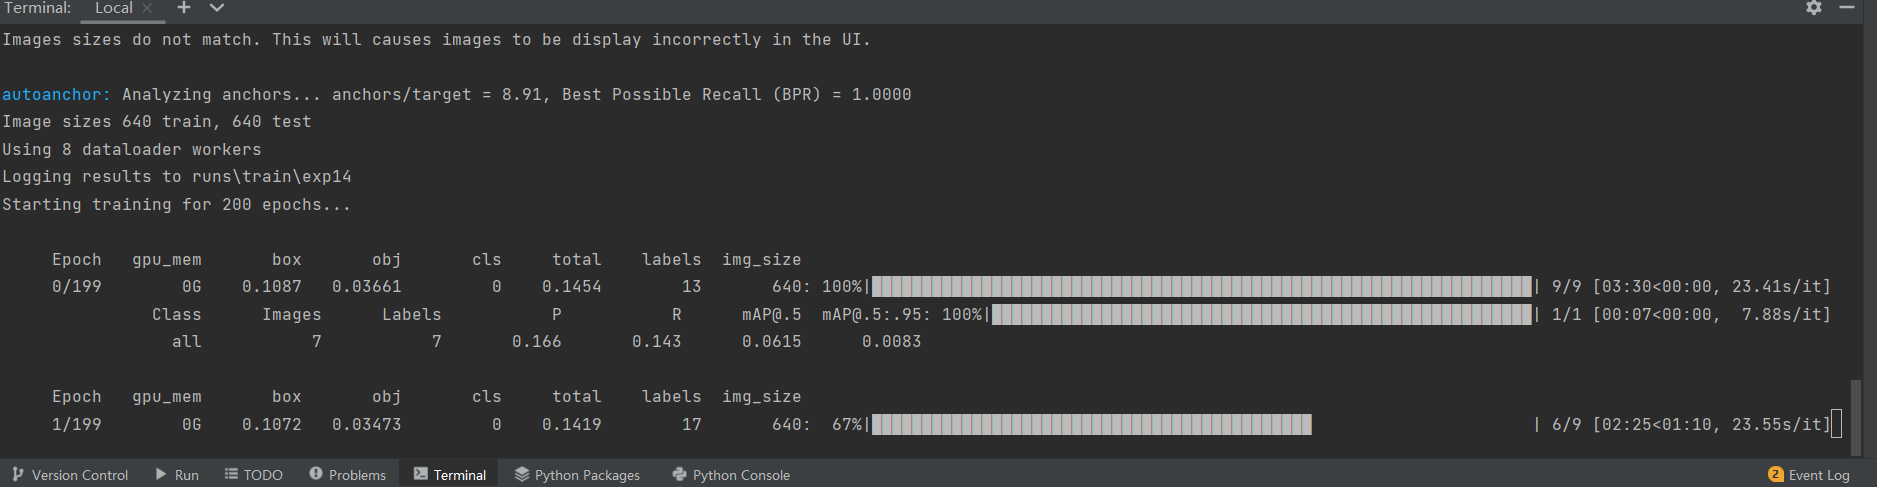
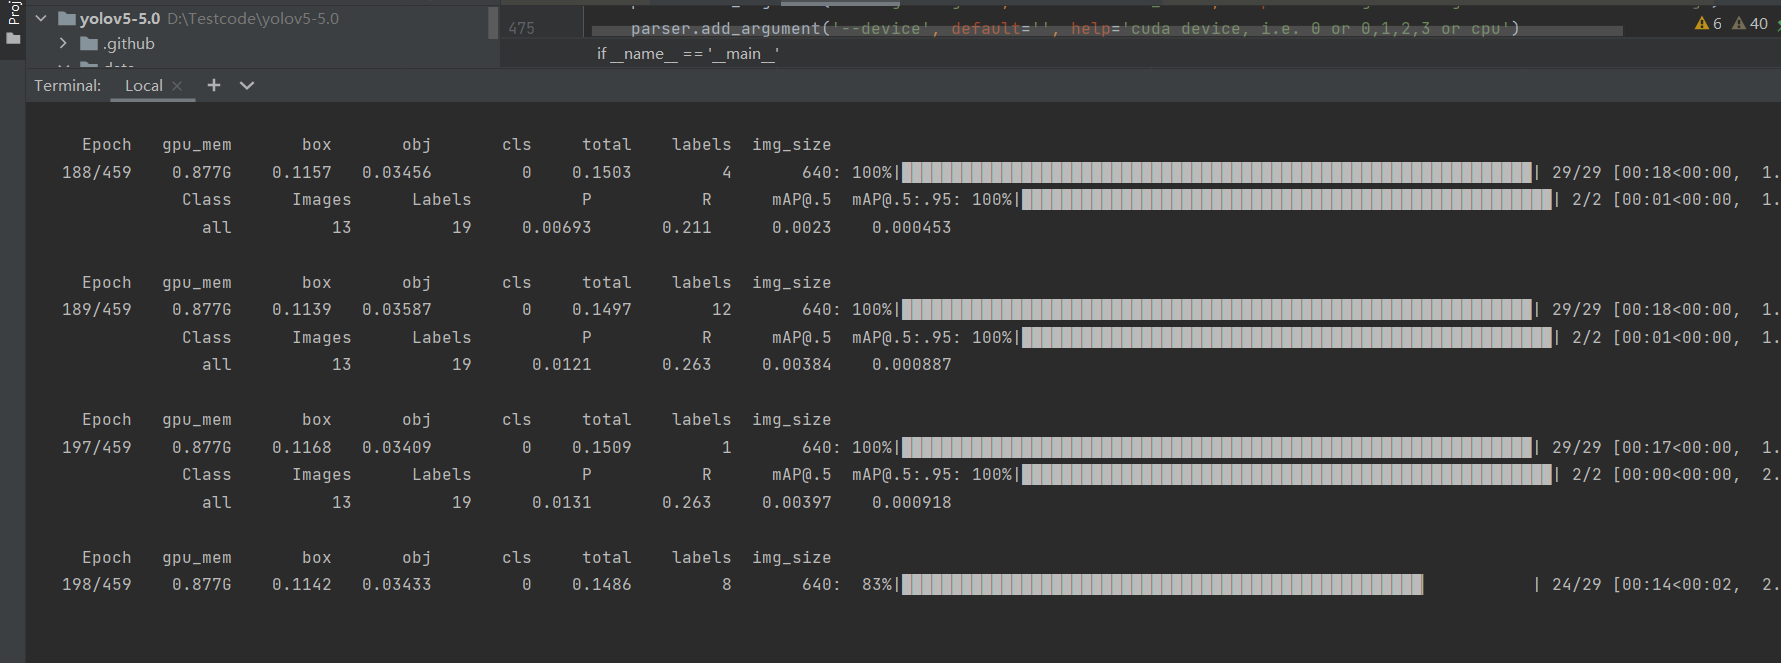
五. 训练可视化
由于我使用的是pycharm,在训练的时候终端可以可视化训练过程
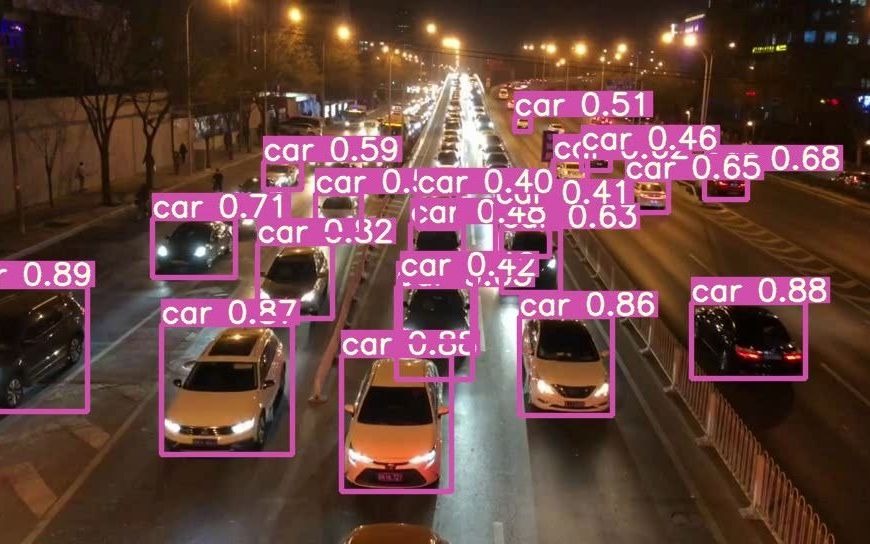
六. 测试效果
这里刚刚训练出的最好的模型 best.pt 来测试,在yolov5目录下的runs/train/exp44/weights/best.pt(训练的人脸模型)和runs/train/exp62/weights/best.pt(训练的手势模型)如要进行图片或者视频数据流的识别在terminal输入python detect.py –weights runs/train/exp44/weights/best.pt –source ../data/images(或videos)/123.jpg(123.mp4)即可,如要进行实时摄像头的人脸或者手势识别,则需要修改detect.py第154行的代码为default=’0′

识别结果如下:在测试过程中我留意到由于自己标注的数据集数量比较少以及显卡性能有限的原因batchsize(单次输入神经网络图片的数量即训练x张图片后进行权重更新)不能设置为8以上的大数值,这会导致报错ERROR:cuda out of memory(显卡内存不足)
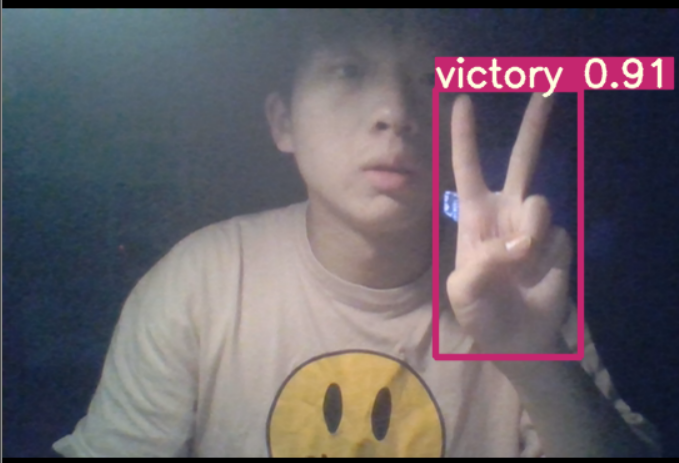
实时检测识别效果窗口
结果分析:本次识别中,进行图片和数据流的人脸识别和手势识别效果还行,但在进行实时识别的时候我发现,因为数据集样本数量不够多,少于推荐训练的1500张图片epochs(训练)次数不是特别多次,以及由于显卡内存不足导致batchsize的阈值设置的受限,在识别手势的过程中,比V形手势的时候置信度较高(高于0.85),其余手势也会被识别到,但是其置信度比较低。故下一步我将对yolov5的边框的准确度、标签平滑等方向——做出进一步的优化,以实现高准确率边框,高置信度的人脸识别和手势检测。
七、感谢以下文章提供的参考
Original: https://blog.csdn.net/blink182007/article/details/123569332
Author: wccllllllllll
Title: 初学入门YOLOv5手势识别之制作并训练自己的数据集
原创文章受到原创版权保护。转载请注明出处:https://www.johngo689.com/496464/
转载文章受原作者版权保护。转载请注明原作者出处!