
目录
- 前言
- 一)查看GPU是否支持CUDN
- 二)下载CUDA
- 三)下载cuDNN
- 四)设置环境变量
- 五)下载并安装Anaconda
- 六)设置TensorFlow工作环境
- 七)确认TensorFlow安装完成
*
–
前言
TensorFlow是一个基于数据流编程的符号数学系统,被广泛应用于各类机器学习(machine learning)算法的编程实现,其前身是谷歌的神经网络算法库DistBelief,本文介绍在电脑上安装TensorFlow的全过程。
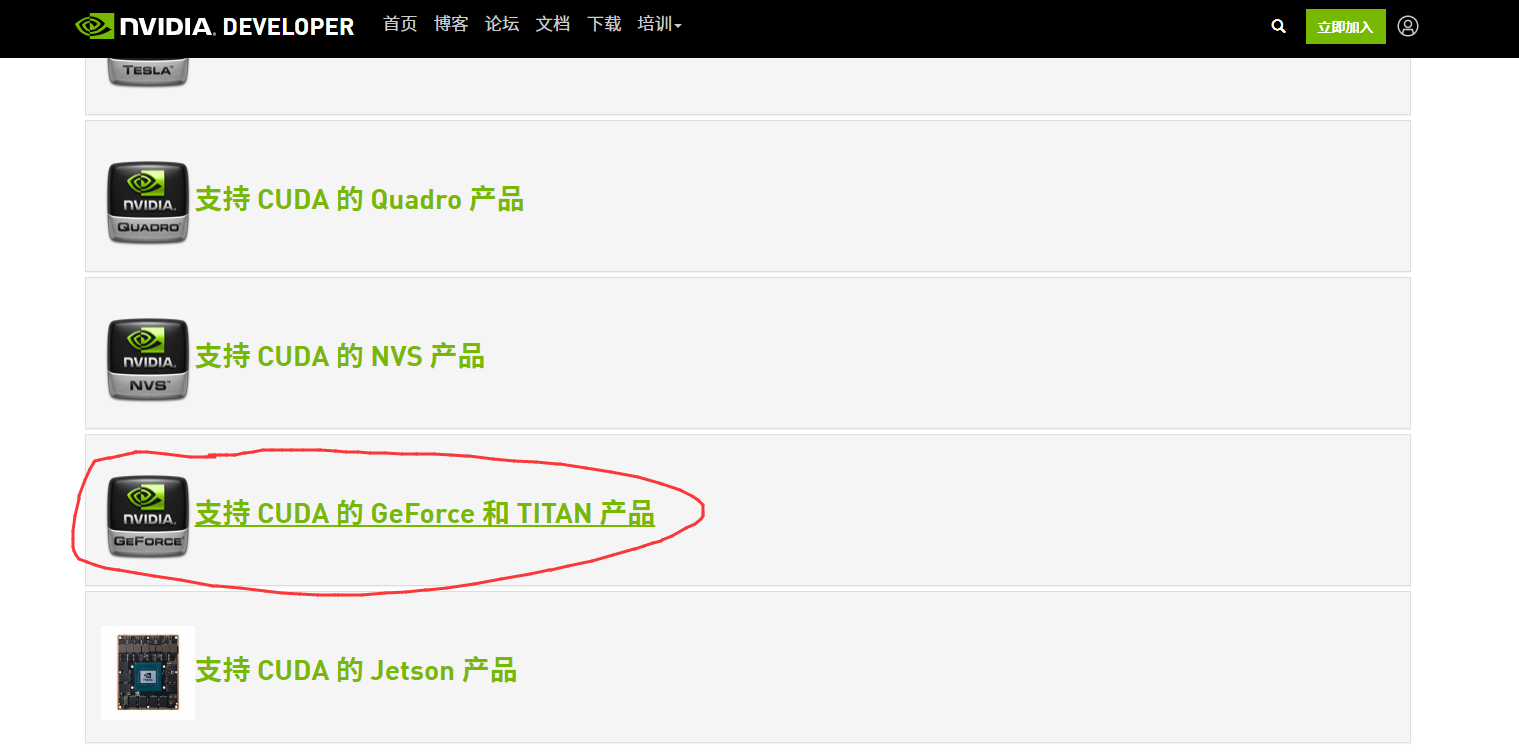
一)查看GPU是否支持CUDN
打开下面的网站,在CUDA-Enabled GeForce Products中查看你电脑的显卡型号是否在里面
https://developer.nvidia.com/cuda-gpus

; 二)下载CUDA
打开下面的网址,点击Windows
https://developer.nvidia.com/cuda-downloads
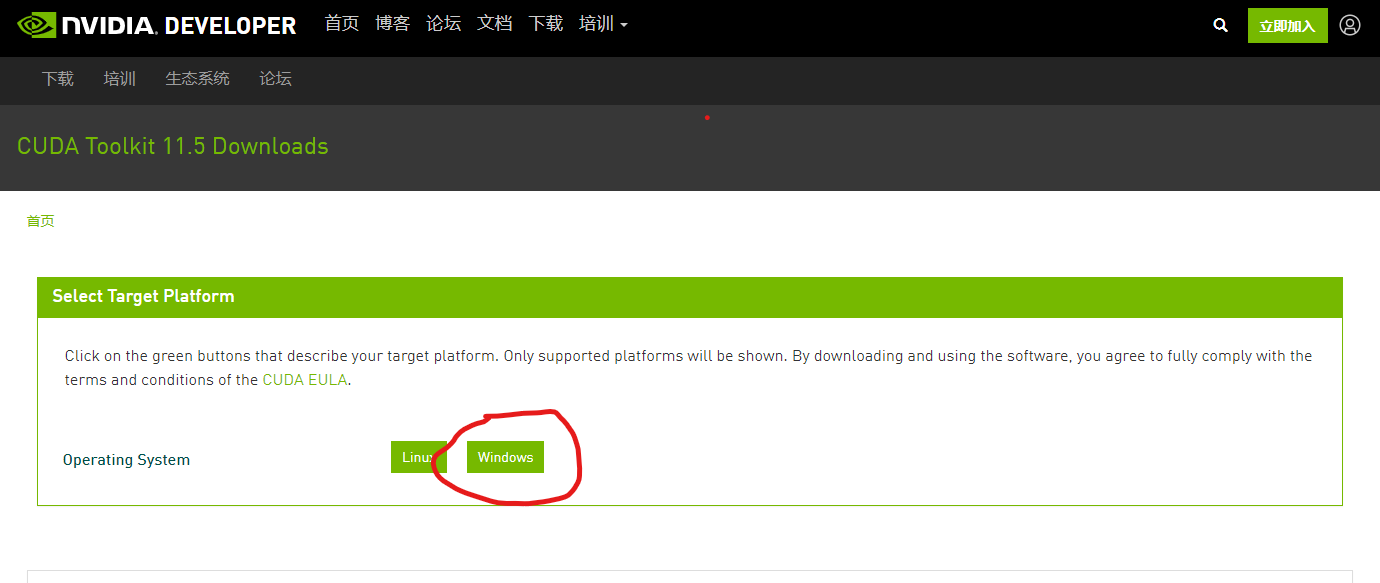
选择你的电脑的系统版本(这里我的是win10)

选择第一个下载
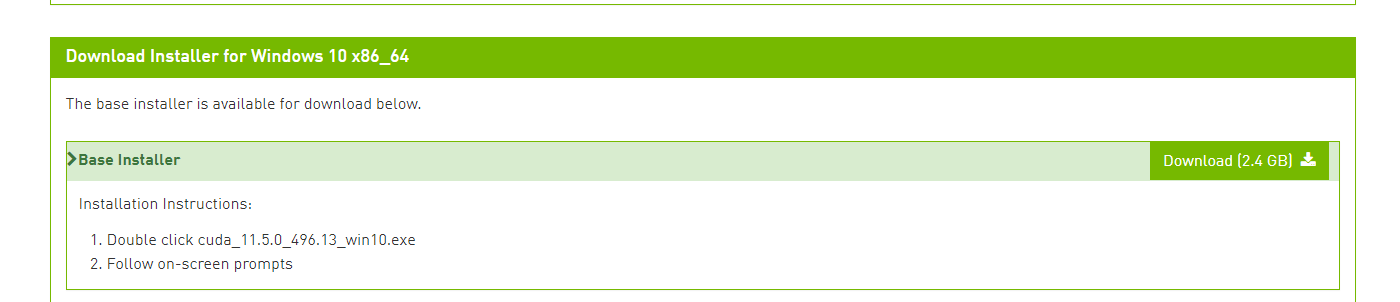
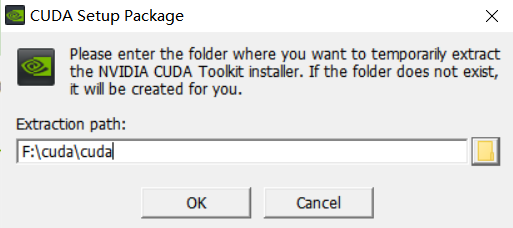
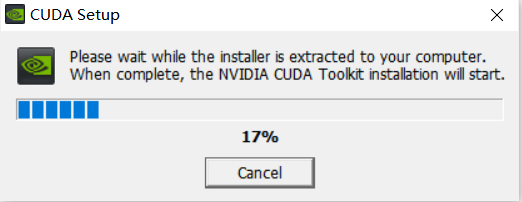
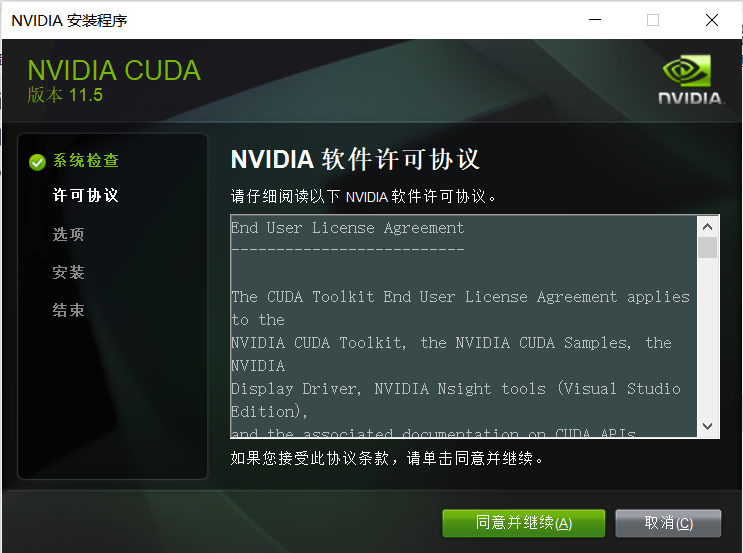
下载后,打开安装并选择安装路径(空文件夹)
[En]
After downloading, open the installation and select the installation path (empty folder)
等待安装
之后一路确认到底
安装完后进入下一步
三)下载cuDNN
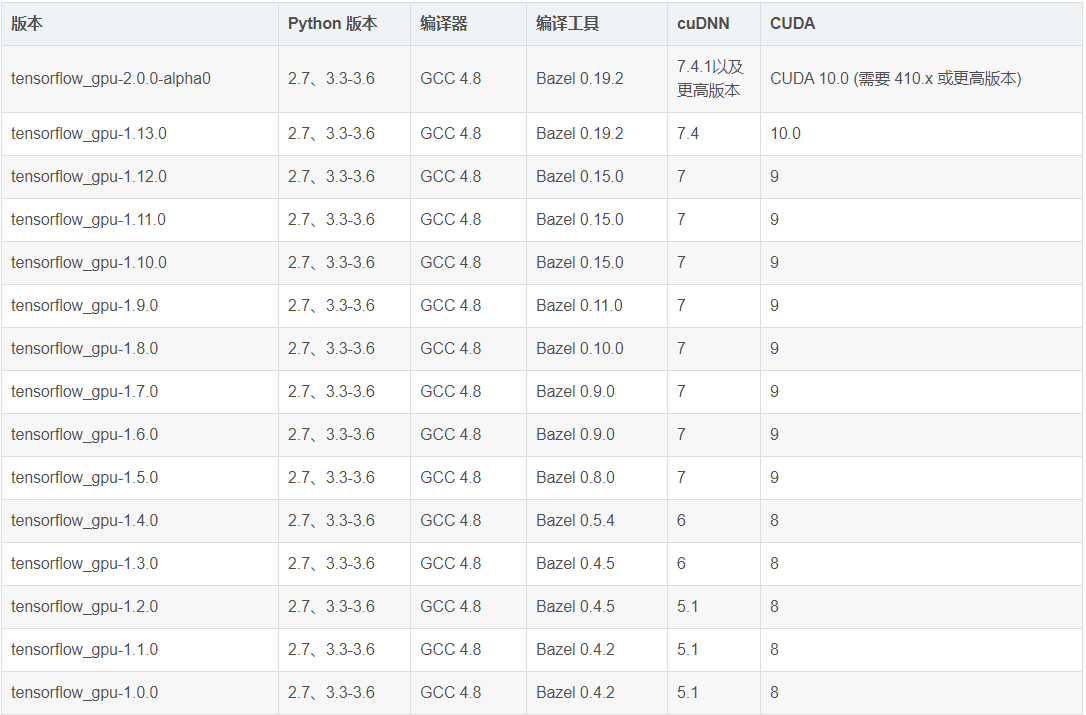
(cudnn版本要和cuda对应)附版本对照表(版本不对应后面会有很多问题)
打开以下下载URL(您需要注册,过程可能有些繁琐,但没有办法,只有注册才能下载):
[En]
Open the following download URL (you need to register, the process may be a little tedious, but there is no way, you can only download it if you register):
https://developer.nvidia.com/rdp/cudnn-download
完成注册后查找下载内容。在这里,我们选择下载并安装第一个。
[En]
Find the download after completing the registration. Here we choose the first one to download and install.
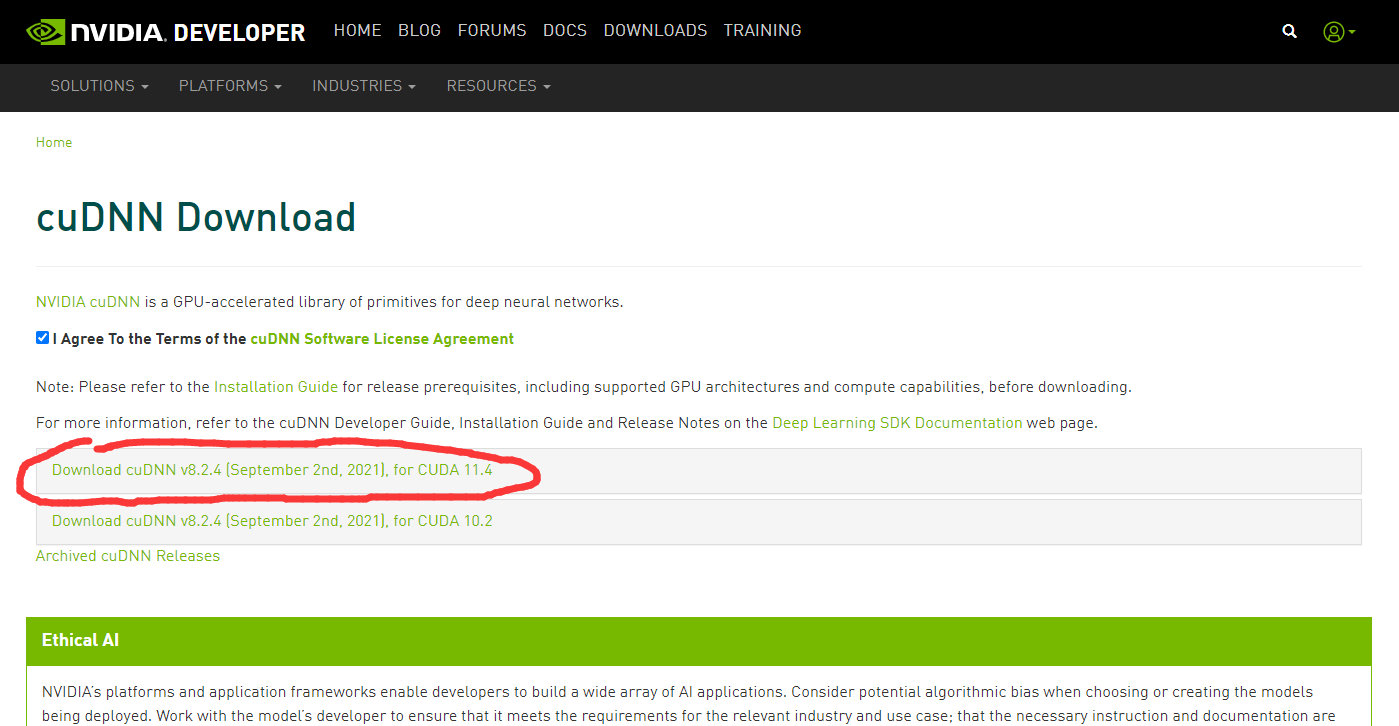
选择对应的版本,这里我的是windowsx64
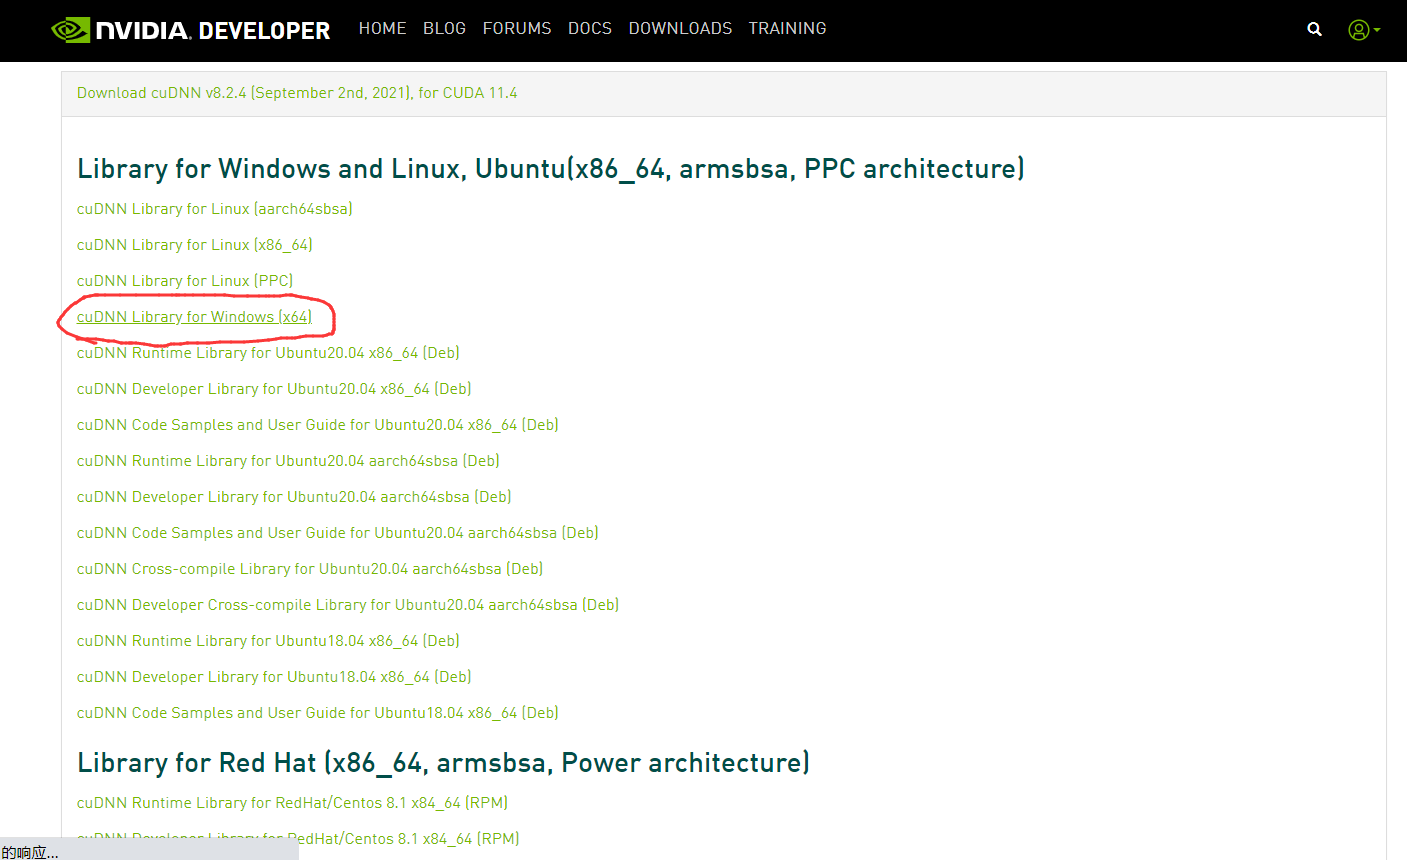
下载后将其解压缩

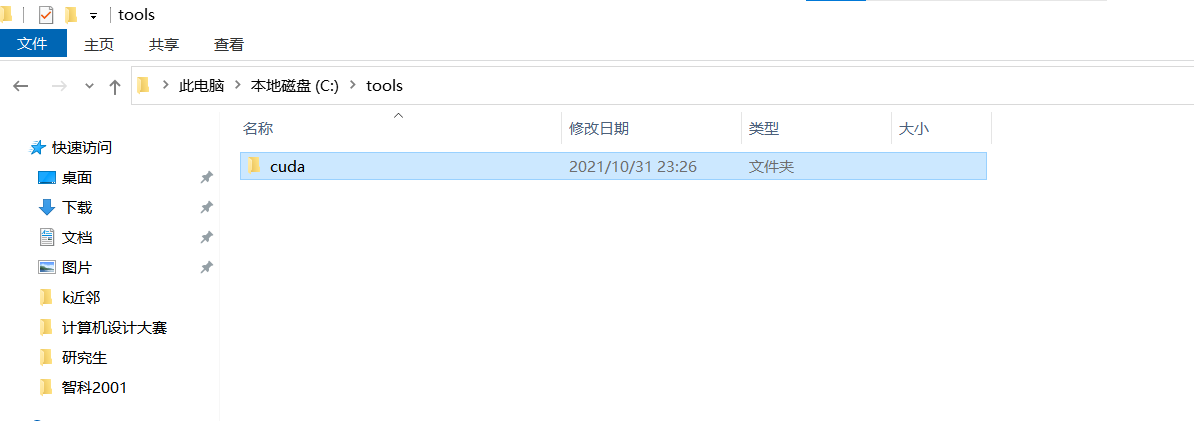
在C盘根目录下新建个tools文件夹,将解压后的”cuda”文件夹放入其中
; 四)设置环境变量
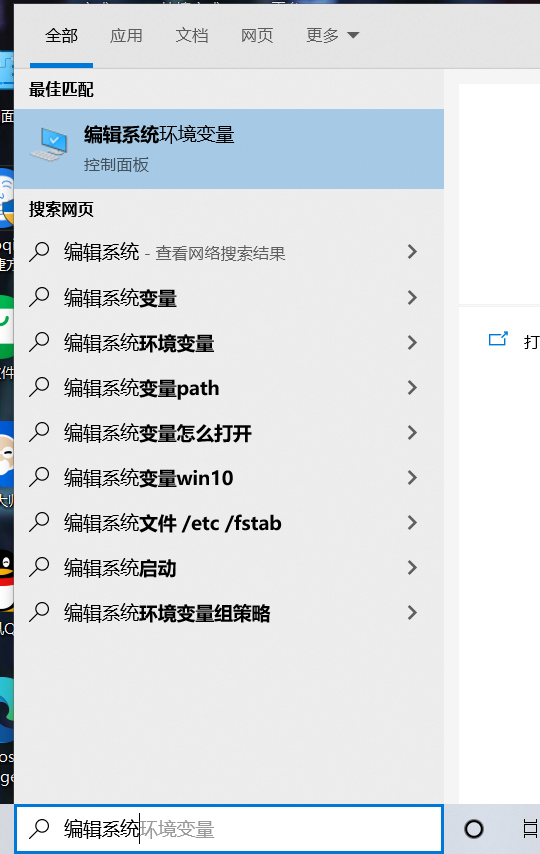
win键搜索”编辑系统环境变量”打开
进入环境变量
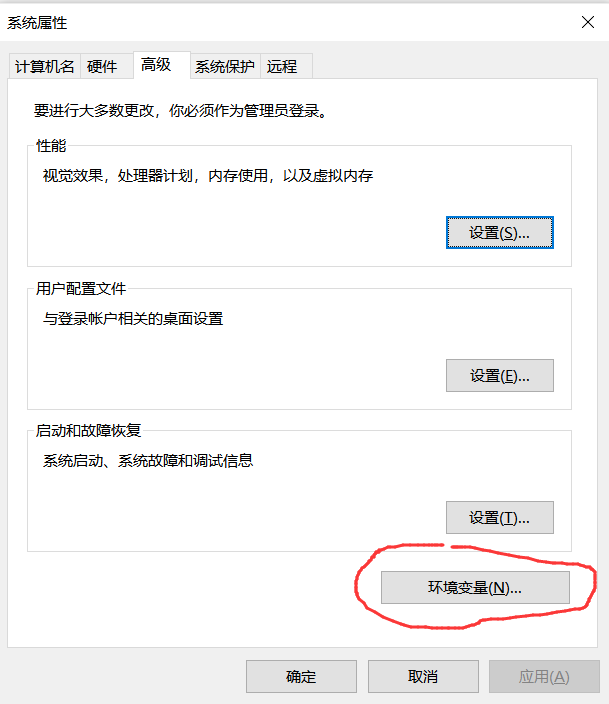
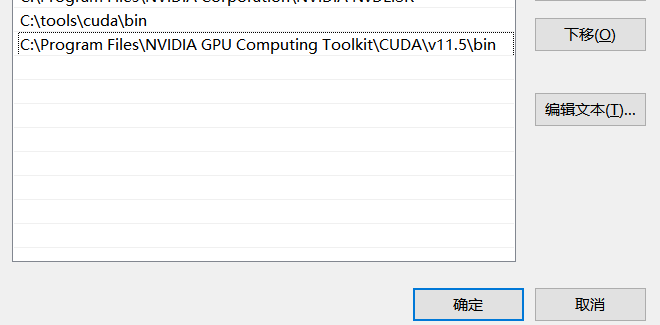
在系统变量中进入”Path”
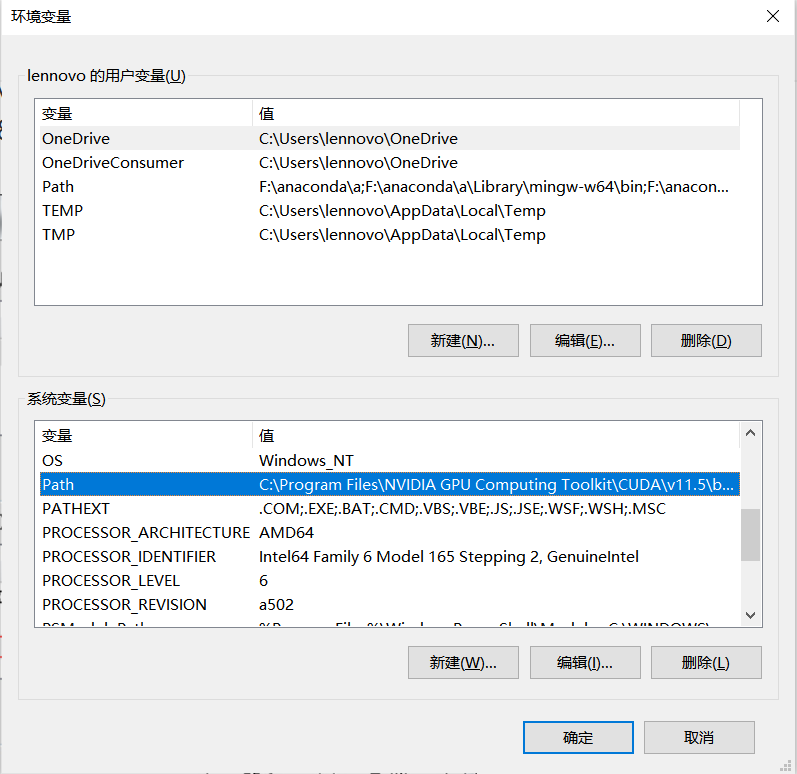
添加”c:\tools\cuda\bin”与”C:\Program Files\NVIDIA GPU Computing Toolkit\CUDA\v8.0\bin”后点击确认
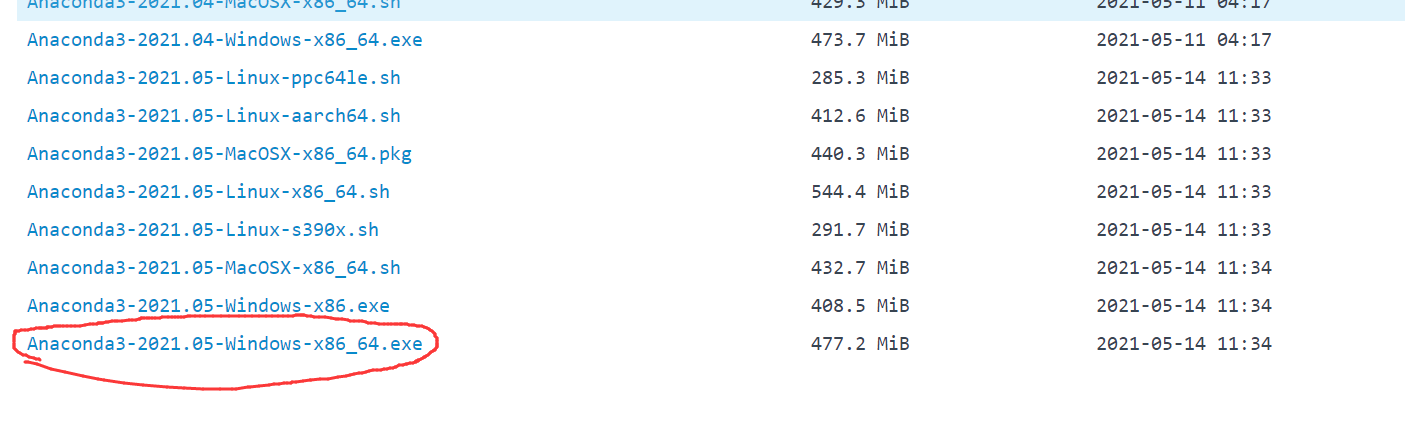
五)下载并安装Anaconda
我用的是清华大学的镜像网。只需找到您需要的下载即可。
[En]
I use this is the mirror network of Tsinghua University. Just find the download you need.
https://mirrors.tuna.tsinghua.edu.cn/anaconda/archive/
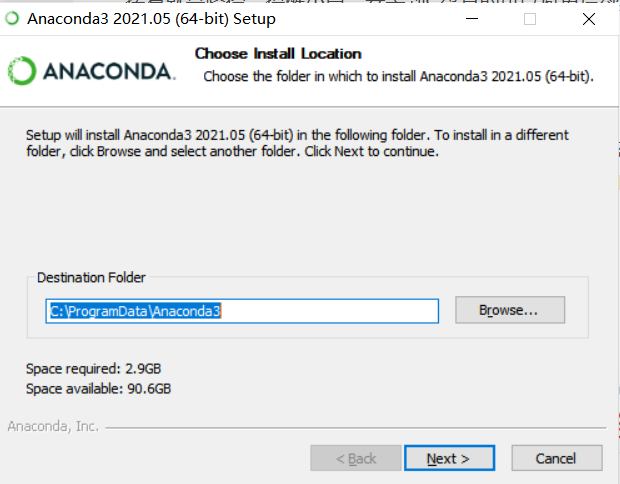
安装(错误重灾区)
在这里提醒,这个”All Users”选上

接着就是路径,提醒小白,安装到C盘真的可以避免后续的很多小问题
也可以选择其它盘
注意简单的路径,没有空格!没有汉字!
[En]
Pay attention to the simple path, no spaces! No Chinese characters!
最容易错的部分来了,
第一项Add Anaconda… 这个是说将安装路径填入到系统环境变量中,我曾经选上,发现后期总是出现什么”无法定位到动态链接库”问题!!!(这里是自动添加系统环境变量,不选!!自己手动添加就好)
第二项 是说要默认使用python的版本,选上!!
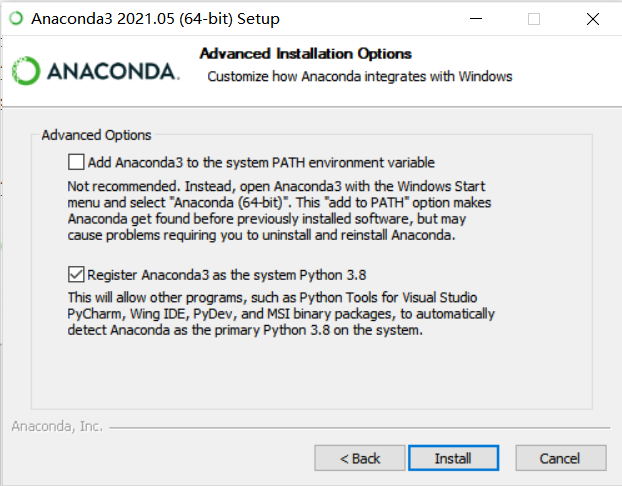
点击install
; 六)设置TensorFlow工作环境
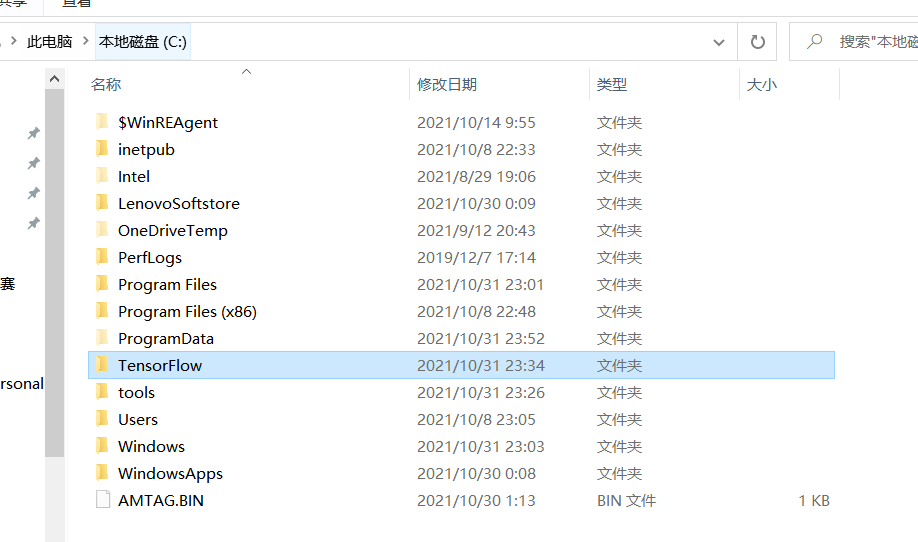
在你喜欢的地方新建个tensorflow目录。这里我就在c盘更目录建立了。
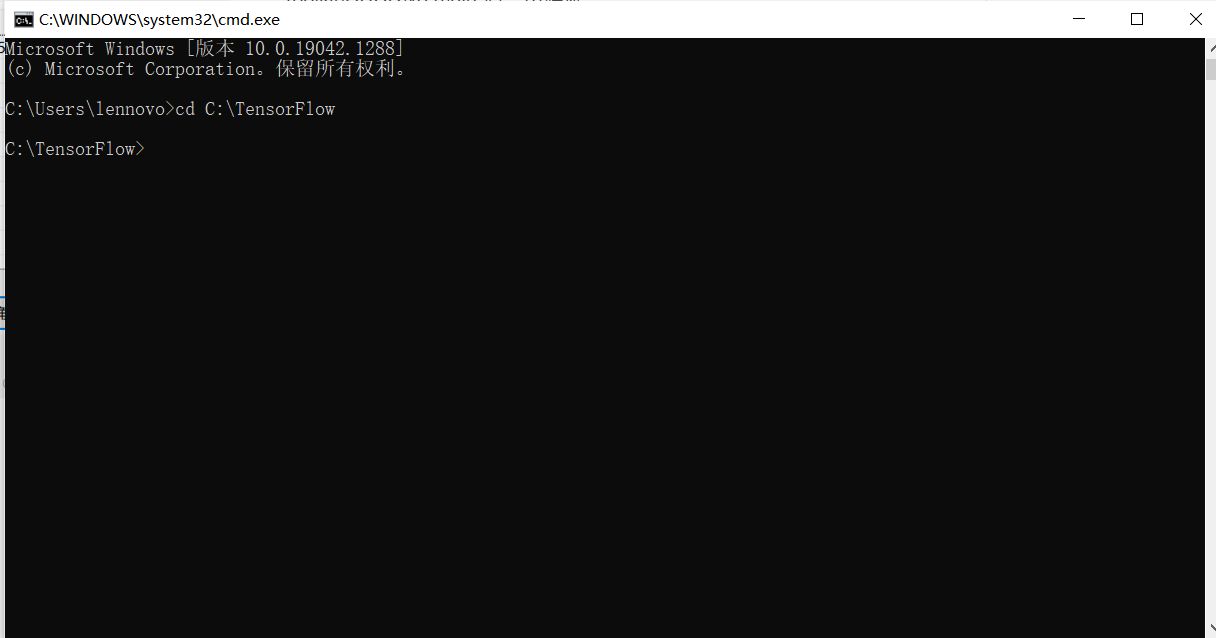
按win+r打开”运行”输入cmd,打开命令提示符
输入cd +tensorflow所在目录,回车
接下来依次输入一下几个命令,注意结尾不能有空格,如果途中让你选择是Yes/no,全部输入y
conda create -name tensorflow-gpu python=3.8 anaconda
pip install tensorflow-gpu
pip install keras
七)确认TensorFlow安装完成
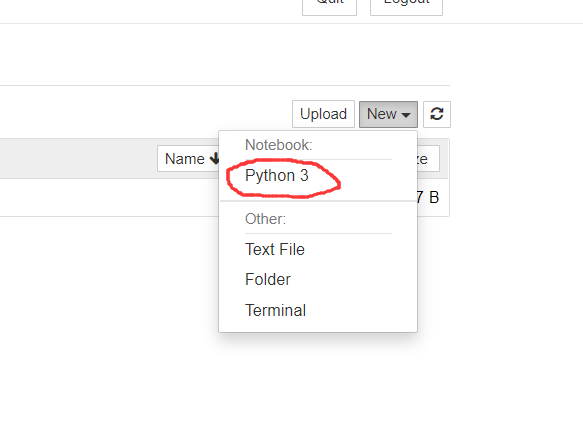
在命令提示符中输入”jupyter notebook”,在浏览器中召唤jupyter notebook
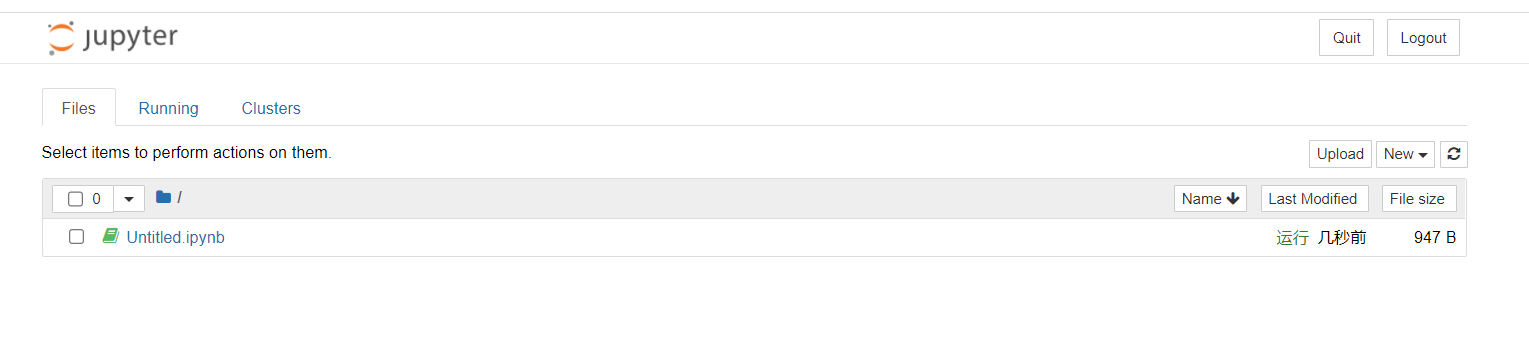
新建个python3档案
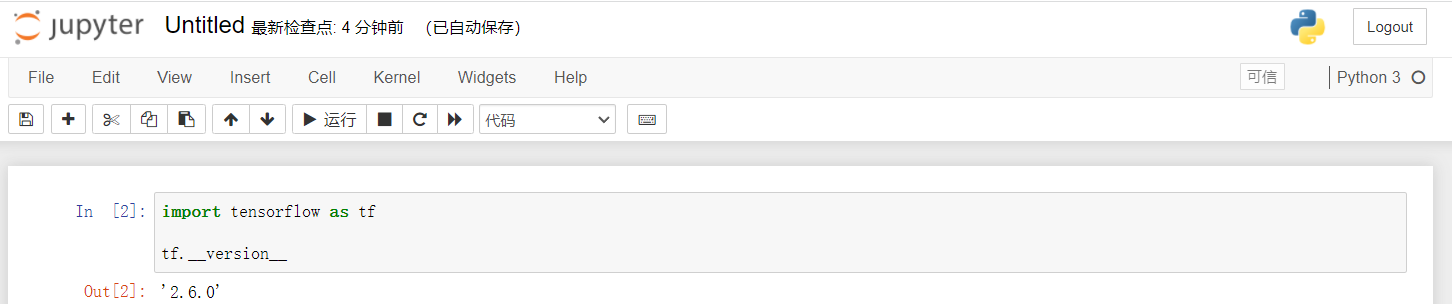
在里面输入以下指令
import tensorflow as tf
tf.__version__
按下shift+enter运行后假如看到2.6.0,说明你成功了,接下来你就可以自由用tensorflow了
如果对你有帮助的话,感谢点赞支持


Original: https://blog.csdn.net/qq_52118067/article/details/121067576
Author: .别拖至春天.
Title: TensorFlow安装教程
原创文章受到原创版权保护。转载请注明出处:https://www.johngo689.com/496012/
转载文章受原作者版权保护。转载请注明原作者出处!